Table of Contents
Advertisement
Quick Links
Advertisement
Table of Contents

Related Manuals for AEG 79902G-M


Summary of Contents for AEG 79902G-M
- Page 1 79902G Electronic gas hob Operating instructions...
-
Page 2: The Innovative Features Of Your Gas Hob
The innovative features of your gas hob Your new gas hob offers several innovative Children safety device to prevent the functions that distinguish it from conventional controls from being accidentally operated. gas hobs. General shutdown to turn off all the Electronic control of all functions. -
Page 3: Table Of Contents
Contents For the User The innovative features of your gas hob ................2 For your safety ........................... 4 Description of the hob ........................6 Operating instructions ........................7 Touch controls ..........................7 How to light a burner .......................8 How to turn off a burner ......................9 In case of ignition failure ...................... -
Page 4: For Your Safety
For your safety This new appliance is easy to use. Nevertheless, it is important to carefully read this booklet before installing or using the appliance for the first time. This will allow you to obtain best performance, avoid improper actions, use the appliance in complete safety and also respect the environment. - Page 5 Keep the appliance clean. Food residuals The symbol on the product or on its increase the risk of fire. packaging indicates that this product may not This appliance cannot be cleaned with steam be treated as household waste. Instead it shall or with a steam cleaning machine.
-
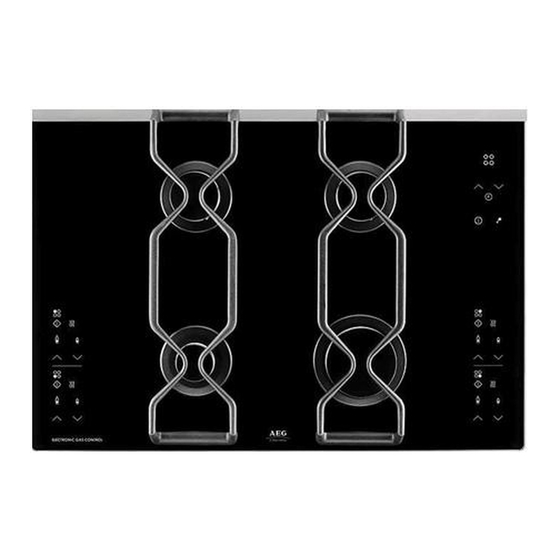
Page 6: Description Of The Hob
Description of the hob Timer control zone Semirapid Semirapid burner burner Child Safety Control Main ON/OFF Auxiliary Rapid switch burner burner Rear left Rear right burner burner control control zone zone Front left Front right burner burner control zone control zone... -
Page 7: Operating Instructions
Operating instructions Before using the appliance, remove all packaging, including the advertising labels and any protective film. Touch Controls The hob is supplied with special Touch Controls. To operate your hob, simply touch the required control with a fingertip. Ensure to only touch one control at a time during use. -
Page 8: How To Light A Burner
How to light a burner 1. Touch the main ON/OFF Control about 3 seconds to switch on the hob. The red indicator above the touch control lights up, an acoustic signal sounds and the hob is ready to use. 2. Touch the Burner Ignition Touch Control of the required burner. -
Page 9: How To Turn Off A Burner
- If touch control is selected, the burner automatically lights at medium flame level (three flame level indicators illuminate). 4. To adjust the burner flame level, use the Increasing or Decreasing Touch Control. The residual heat indicator lights up immediately after the burner is lit. This means that the cooking zone is getting hot: the indicator remains on until the pan support and the burner have cooled down. -
Page 10: In Case Of Accidental Extinguishing (Automatic Reignition)
After 60 seconds, you can remove the safety device on the burner by touching both the Increasing Controls and the Decreasing Control at the same time. Then, follow the instructions given in the paragraph “How to light a burner”. Caution! Check that the burner cap and crown are correctly positioned (see diagram). -
Page 11: How To Turn Off All The Burners At Once
How to turn off all the burners at once In case of unexpected safety hazard (spilling of liquids, children hazard, etc.), you can immediately turn off all the hob burners at once by touching the main ON/OFF Control Burner Safety Cut-off Function If you leave one or more burners lit and unattended for a long time (that is, you don’t... -
Page 12: Protection Against Overheating
Protection against overheating If the hob is used intensively, e.g. several burners at maximum level for a long time, a temperature sensor detects possible overheating and automatically adjusts all the lit burners to minimum. If the hob temperature keeps rising although the flame level has been reduced, all the lit burners are automatically turned off and a safety device is set on all the four burners. -
Page 13: The Electronic Timer
2. To unlock the hob controls, touch the “Lock” Control for about 3 seconds. The red indicator next to the “Lock” symbol goes off and an acoustic signal sounds. It is highly recommended to activate the child safety function every time the hob is not operated. -
Page 14: How To Programme A Burner To Switch Off
How to programme a burner to switch off To programme a burner to switch off, proceed as follows: 1. If necessary, activate the hob by touching the main ON/OFF Control for about 3 seconds. 2. Light the burner and adjust the flame level using the Increasing or Decreasing controls (see par. - Page 15 5. The timerstarts the countdown a few seconds after the cooking time has been set. 6. During the last ten seconds, the timer starts beeping to advise that the cooking time is about to end. 7. An acoustic signal sounds at the end of the cooking time.
-
Page 16: How To Set The Minute Minder Function
How to set the Minute Minder Function You can use the timer as a simple minute minder when none of the burners are operating. The hob must be activated in order to use the timer as a minute minder. Proceed as follows: 1. -
Page 17: Safety And Energy-Saving Advice
Safety and energy-saving advice For a correct use of the hob To ensure maximum burner efficiency and lower consumption, you should only use pots and pans with a flat bottom fitting the size of the burner used (see table). If you use a saucepan which is smaller Burner diameter diameter... -
Page 18: Cooking Table
Cooking Table Recommended cooking time (Where no DISHES BURNER POWER recommendation is given, times should be set according to your personal requirements) Soups Broths 15-20 minutes Fish Court- bouillon Hollandaise Sauces Bechamel 10 minutes Endives Peas in sauce 25-30 minutes Vegetables Provence tomatoes 15-20 minutes... -
Page 19: Cleaning And Maintenance
Cleaning and maintenance Before any maintenance or cleaning can be carried out, you must DISCONNECT the hob from the electricity supply and wait until it has cooled down. This appliance cannot be cleaned with steam or with a steam cleaning machine. The Hob Top Regularly wipe over the hob top using a soft cloth well wrung out in warm water to which a little... - Page 20 Pan Supports The pan supports are dishwasher proof. If washing them by hand, take care when drying them as the enamelling process occasionally leaves rough edges. If necessary, remove stubborn stains using a paste cleaner. The pan supports can be removed from the hob to enable better cleaning.
-
Page 21: Something Not Working
Something not working? If the hob is not working correctly, please carry out the following checks before contacting your local Service ForceCentre. IMPORTANT: If you call out an engineer to a fault listed below, or to repair a fault caused by incorrect use or installation, a charge will be made even if the appliance is under guarantee. PROBLEM CAUSE SOLUTION... - Page 22 If after all these checks, your hob still does not operate correctly, contact your local Service Force Centre. Please note that it will be necessary to provide proof of purchase for any in-guarantee service calls. In-guarantee customers should ensure that the above checks have been made as the engineer will make a charge if the fault is not a mechanical or electrical breakdown.
-
Page 23: Service And Spare Parts
Date of purchase Customer Care For general enquiries concerning your AEG-Electrolux appliance and for further information on AEG-Electrolux products, contact our Customer Care Department by letter or telephone at the address below or visit our website at www.aeg.co.uk Customer Care Department... -
Page 24: Guarantee Conditions
Guarantee Conditions Standard guarantee conditions We, AEG-Electrolux, undertake that if within 12 months of the date of the purchase this AEG-Electrolux appliance or any part thereof is proved to be defective by reason only of faulty workmanship or materials, we will, at our discretion repair or replace the same FREE OF CHARGE for labour, materials or carriage on condition that: ·... -
Page 25: Instructions For The Installer
Instructions for the Installer Engineers Technical Data Gas burner power Rapid burner (large) 2.9 kW (Natural gas 20 mbar) 2.7 (LPG 28-30/37 mbar) Semirapid burner (medium) 1.9 kW Auxiliary burner (small) 1.0 kW Supply connections Gas: R 1/2 inch (1/2 inch male) Rear right hand corner Electric: 230 V 50 Hz supply, 3 core flexible cable with non rewireable plug fitted with a 3 amp cartridge fuse. -
Page 26: Important Safety Requirements
Important safety requirements This hob must be installed in accordance with the Gas Safety (Installation and Use) Regulations (Current Edition) and the IEE Wiring Regulations (Current Edition). For appliances installed in the Republic of Ireland please refer to NSAI- Domestic Gas Installation I.S. - Page 27 Location FITTING THE GAS HOB WITHOUT A COOKER HOOD ABOVE The hob may be located in a kitchen, a kitchen/ diner or bed sitting room, but not in a bathroom or shower room. Before making the cut out in the worktop ensure that the edges of the hob that are to be near either a side or rear wall have a minimum distance of 55 mm.
- Page 28 Connection IMPORTANT: This hob must be installed by a competent person to the relevant Gas Standards. Any gas installation must be carried out by a competent person. The manufacturer will not accept liability, should the above instructions or any of other safety instructions...
-
Page 29: Electrical Connections
Electrical connections Any electrical work required to install this hob should be carried out by a qualified electrician or competent person, in accordance with the current regulations. THIS HOB MUST BE EARTHED. The manufacturer declines any liability should these safety measures not be observed. This hob is designed to be connected to a 230 V 50 Hz AC electrical supply. - Page 30 Upon completion there must be no cut, or stray strands of wire present and the cable clamp must be secure over the outer sheath. A cut off plug inserted into a 13 amp socket is a serious safety (shock) hazard. Ensure that the cut off plug is disposed of safely.
-
Page 31: Wiring Diagram
Wiring Diagram... -
Page 32: Conversion To Lpg
Conversion to LPG Replacing the injectors 1. Remove the pan supports. 2. Remove the burner caps and crowns. unscrew and 3. Using a 7 mm socket spanner remove the injectors, then replace them with the ones required for the new type (see the table “Burner characteristics”). - Page 33 Setting the hob for the new gas type 1. If necessary, activate the hob by touching the main ON/OFF Control for about 3 seconds. 2. Touch the Timer Control repeatedly to select the auxiliary burner (front left burner) on the burner selection display . 3.
- Page 34 4. Touch the Decreasing Control to select the required type of gas. 5. After selecting the type of gas, switch off the hob touching the main ON/OFF Control 6. Touch the main ON/OFF Control again to reactivate the hob. The appliance is automatically set to the normal “User Mode”.
- Page 35 4. While the flame is on, touch the Increasing or Decreasing Controls to carry out a fine adjustment, until a small and regular flame is obtained on the whole burner crown. 5. Switch off the hob touching the main ON/ OFF Control...
-
Page 36: Building In
Building In A = Auxiliary burner Dimensions are given in millimetres SR = Semirapid burner R = Rapid burner Fig. 1 The hob is designed to be inserted in modular kitchen units with depth of 550 - 600 mm and having proper characteristics. - Page 37 Fitting the hob to the worktop Before fitting the hob into the cut out, an adhesive seal must be fitted to the underside outside edge of the hob. It is essential that no gaps are left in this seal in order to prevent spillage near the hob seeping into the cabinet below.
-
Page 38: Installation Possibilities
Installation possibilities Building over a kitchen unit with door Proper arrangements must be taken in designing Fig. 5 the furniture unit, in order to avoid any contact with the bottom of the hob which can be heated when it is operated. The recommended solution is shown in Fig. - Page 39 Hanging furniture units or hoods must be placed at 650 mm. minimum from the hob (Fig. 6). The electronic gas hob can only be installed over a built-in oven equipped with cooling fan. If the hob is installed over a built-in oven equipped with pyrolytic cleaning function, the hob must not be in use while...
- Page 40 Postfach 1036 D-90327 Nürnberg http://www.aeg.hausgeraete.de © Copyright by AEG From the Electrolux Group. The world’s No.1 choice. The Electrolux Group is the world’s largest producer of powered appliances for kitchen, cleaning and outdoor use. More than 55 million Electrolux Group products (such as refrigerators, cookers, washing machines, vacuum cleaners, chain saws and lawn mowers) are sold each year to a value of approx.
- Page 41 This file has been downloaded from: www.UsersManualGuide.com User Manual and User Guide for many equipments like mobile phones, photo cameras, monther board, monitors, software, tv, dvd, and othes.. Manual users, user manuals, user guide manual, owners manual, instruction manual, manual owner, manual owner's, manual guide, manual operation, operating manual, user's manual, operating instructions, manual operators, manual operator, manual product, documentation manual, user maintenance, brochure, user reference, pdf manual...
Need help?
Do you have a question about the 79902G-M and is the answer not in the manual?
Questions and answers