Table of Contents
Advertisement
Available languages
Available languages
SEC.
적용모델
WORK
90
RC9066A3F
150
8
7
6
5
4
3
신모델 모델명 추가
EAGI700539
2
북미 중재강제조항 적용 관련 문구 추가
EAGI100901
1
지적재산권 보호 문구 삽입
EAGH300991
REV. NO.
REVISION DESCRIPTION
REF. NO.
기호
변경 사항
시방 번호
재
질
인쇄방법
모조지 80g OFFSET 인쇄
OFFSET 인쇄
2018.07.23
윤혜진
정영석
2018.01.30
최장안
정영석
2017.03.24
윤혜진
정영석
DATE
PREPARED
APPROVED
년/월/일
시방자
승인자
인 쇄 도 수
PAGE
표 지
내 지
68, A5
1도
1도
<< 주기 >>
1. 재질, 인쇄방법, 인쇄도수, 외곽치수등은 작업표에 준한다.
2. 인쇄내용, 문자크기 및 형상, 선의 굵기 등은 설계에서 제시된 FILM에 준함.
3. 외곽치수는 절단후 치수임.
4. 양산전에 설계 한도를 득할 것.
5. 본 부품에 금지물질이 포함되지 않도록 하고, 상세내용은 LG(63)-A-5501-34
를 만족할 것.
<< NOTES >>
1. Material, printing and exterier size are refer to work tables.
2. Printing, text size and line are based on LG design film.
3. Exterier size on the drawing is cutting line.
4. Before product controlled by criteria sample.
5. The part should not contain prohibited substances(Pb,Cd,Hg,Cr+6,PBB,
PBDE) and details should comply with LG standard of LG(63)-A-5501-34
TRIG.
UNIT
mm
MODELING
DESIGNED
REVIEWED
CHECKED APPROVED
윤 혜 진
윤 혜 진
16.07.21
16.07.21
LG 전자
(주)
LG Electronics Inc.
REMARK
ECI향
Enlish
French
PDF
ILLUSTRATOR
SCALE 1
1
MANUAL,OWNER'S
T
I
T
한 일 탁
L
PRIME PLUS(D) ECI향
E
16.07.21
MFL67731090
RELATED DWG.
DWG.
No.
RELEASING THIS DRAWING
WITHOUT PERMISSION LG
Electronics SHOULD BE
ACCUSED ACCORDING TO THE
LAWS AND COMPANY RULES.
이 도면은 LG전자의 자산으로 불법
유출시 관계법과 회사규정에 의해 처벌됨.
DR COMPLETED
도면 DR 완료
완료일 :
1/1
Advertisement
Chapters
Table of Contents

Related Manuals for LG DLEC888R


Summary of Contents for LG DLEC888R
- Page 1 << NOTES >> 1. Material, printing and exterier size are refer to work tables. 2. Printing, text size and line are based on LG design film. 3. Exterier size on the drawing is cutting line. 4. Before product controlled by criteria sample.
- Page 2 OWNER’S MANUAL DRYER Read this owner’s manual thoroughly before operating the appliance and keep it handy for reference at all times. DLEC888W DLEC888R DLEC885W www.lg.com MFL67731090 Copyright © 2016 - 2018 LG Electronics Inc. All Rights Reserved. Rev.03_072318...
-
Page 3: Table Of Contents
Ultra Big Capacity Drum The LG Dryer has a large capacity. Reduced drying time Drying time is reduced by the use of an efficient air flow system and an optimized heater. Innovative Noise Reduction The optimized design of the air flow system and the vibration reduction technology helps to reduce noise. -
Page 4: Safety Instructions
afety Instructions READ ALL INSTRUCTIONS BEFORE USE WARNING For your safety, the information in this manual must be followed to minimize the risk of fire or explosion, electric shock, or to prevent property damage, personal injury, or loss of life. Your Safety and the safety of others is very important. - Page 5 afety Instructions BASIC SAFETY PRECAUTIONS WARNING To reduce the risk of fire, electric shock, or injury to persons when using this appliance, follow basic precautions, including the following: • Read all instructions before using the dryer. • The interior of the dryer and exhaust vent should be cleaned periodically by qualified •...
- Page 6 afety Instructions SAFETY INSTRUCTIONS FOR INSTALLATION WARNING To reduce the risk of fire, electric shock, or injury to persons when using this appliance, follow basic precautions, including the following: • Properly ground dryer to conform with all • Remove all packing items and dispose of all governing codes and ordinances.
- Page 7 afety Instructions WARNING To reduce the risk of fire, electric shock, or injury to persons when using this appliance, follow basic precautions, including the following: SAFETY INSTRUCTIONS FOR INSTALLATION • Do not, under any circumstances, cut or • The dryer should always be plugged into its remove the ground prong from the power cord.
-
Page 8: Installation Instructions
nstallation Instructions The following instructions will help guide you through the initial steps of setting up your dryer for use. Please note that every section of this manual provides important information regarding the preparation and use of your dryer, and it is important that you review this entire manual before proceeding with any installation or use. More detailed instructions concerning electrical connections, gas connections, and exhaust requirements are provided in other parts of this manual. - Page 9 nstallation Instructions Electrical Connections Preparation of the Dryer Prior to the first use of this appliance, use all-purpose Following are several warnings and instructions cleaning products or a solution of detergent and water, concerning making the electrical connection for electric dryers. More detailed information with a damp cloth to remove from the inside of the concerning the electrical connection is provided at dryer drum/drying compartment any dust or dirt that...
- Page 10 Instructions Stacking Kit WARNING In order to stack this dryer an LG stacking kit is required. • Incorrect installation can cause serious accidents. • The weight of the dryer and the height of installation makes the stacking procedure Dryer too risky for one person.
- Page 11 nstallation Instructions Level the dryer 1. Level the dryer is to prevent undesirable noise and vibration. Locate your dryer on a solid, level floor. Make sure it is not subjected to splashing water or freezing temperatures. Do not store flammable materials near the dryer.
-
Page 12: Electrical Requirement
lectrical Requirement CONNECTING ELECTRIC DRYERS • The power cord (pigtail) connection between wall receptacle and dryer terminal block IS NOT supplied with dryer. Type of pigtail and gauge of wire must WARNING conform to local codes and with instructions on the To help prevent fire, electric shock, serious following pages. - Page 13 lectrical Requirement Review the following options to determine the appropriate electrical connection for your home: 4-wire receptacle : 4-wire connection with (NEMA type14-30R) a Power supply cord. • lf your local codes or ordinances do not allow the Use the instructions in this section if your home has use of a 3 wire connection, or you are installing a 4-wire receptacle (NEMA type 14-30R) and you your dryer in a mobile home, you must use a 4-...
- Page 14 lectrical Requirement : 3-Wire Connection with : Optional 3-wire a Power Supply Cord connection. lf your local codes or ordinances permit the • If your local codes or ordinances do not allow the connection of a frame-grounding conductor to the connection of a frame-grounding conductor to the neutral wire, use these instructions.
-
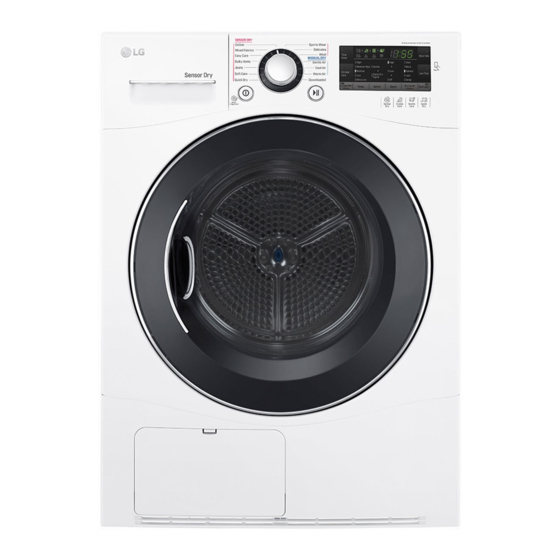
Page 15: Appearance And Design
ppearance And Design Control Panel Water Container Door Condenser Cover Air Ventilation Grill Control Panel LED Display • Time Display Cycle Selector Knob • Indicator Lamps Power Start/Pause Additional Function Buttons • More Time • Time Delay • Less Time •... -
Page 16: Operating Your Dryer
perating Your Dryer Cycle Selection Table Drying SENSOR DRY CYCLES Temp. Level Quilts, small comforters and Very For thick and quilted fabrics blankets Terry towels, tea towels, More For thick and quilted fabrics which do not need to be ironed towels, bed linen Bath towels, tea towels, For fabrics which do not need to be ironed... - Page 17 perating Your Dryer BEFORE YOU USE YOUR DRYER 1. When unpacking your dryer, make sure there is no visible damage to the machine. 2. Follow the installation instructions and use a level to ensure proper installation. 3. Check the water reservoir, condenser, door, gasket and drum for signs of damage. 4.
- Page 18 perating Your Dryer 5. Close the Door. Select the desired Before you close the door, make sure fabrics are cycle. properly loaded and not caught in the door opening. 6. Select the Drying Cycle you want. You can choose a cycle by turning the Cycle Selector Knob until the required program reaches to its indicator.
-
Page 19: Additional Functions
dditional Functions Time Delay Custom PGM The Time Delay feature allows you to have the If you have a special combination of settings dryer run at a time that is more convenient, for that you use frequently, you can save these example when electricity rates are cheaper. - Page 20 dditional Functions More Time / Less Time Temp. The More Time and Less Time buttons can Adjusts the temperature setting from Ultra Low be used to increase or decrease the dry time to High. This allows precise care of your fabrics when MANUAL DRY cycles are selected.
- Page 21 Functions • The Tag On function allows you to conveniently use the LG SmartDiagnosis™ and Cycle Download features to communicate with your appliance right from your own smart phone. •To use the Tag On function: 1. Download the LG Smart Laundry & DW App to your smart phone.
- Page 22 In some cases, NFC-equipped phones may be unable to transmit successfully. • Press in the LG Smart Laundry & DW app for a more detailed guide on how to use the Tag On function.
-
Page 23: Caring For Your Dryer
aring For Your Dryer Clean lint filter Clean lint filter during a cycle To maintain proper air flow and keep your dryer If the Clean Filter( ) light flashes and the alarm operating at peak efficiency, it is important to empty sounds during operation, clean the filter promptly. - Page 24 aring For Your Dryer Condenser The condenser is a very important part of your dryer. This is where the moisture is removed form the air so there is no need for an outside exhaust. If the condenser is not properly maintained, it will greatly increase energy consumption and drying time.
- Page 25 aring For Your Dryer Ventilation Grille and Cool Air Inlet 3. Connect the external drain Grille hose included Use a vacuum cleaner to clean the front with the dryer. ventilation grill and the cool air inlet in the back. Route this hose Failure to remove any lint or dirt buildup will to a permanent reduce air flow and increase energy...
-
Page 26: Additional Tips For Smart Use
dditional Tips For Smart Use Drying Guide Below are fabric care labels. Woolen Article Dry woolens in wool cycle. Be sure to follow fabric Symbols Instructions care label symbols. Wool is not completely dried from the program so don't repeat drying. Pull woolens to their original shape and dry them flat. - Page 27 dditional Tips For Smart Use Accessory parts Spare Parts Spare parts are covered under the terms of Your dryer comes with accessories such as warranty. Components covered by warranty are provided free of charge. If coverage is expired, Condensing drain hose spare parts must be purchased from an authorized service center.
- Page 28 roubleshooting Guide Troubleshooting Tips Save time and money! Review the charts on the following pages first and you may not need to call for service. 1. Problem: My dryer won’t start Question What to Do Confirm that the dryer’s plug is securely and completely pushed into the Is the dryer plugged in? power outlet Check your home’s or laundry room’s fuse box/circuit breaker box and replace the...
-
Page 29: Troubleshooting Guide
roubleshooting Guide 4. Problem: There is lint on my clothes Question What to Do Please refer to the manual section on cleaning the lint filter, and please confirm that Is your lint filter full? the lint filter is clean. It is important that the lint filter is clean before each new load of laundry. - Page 30 roubleshooting Guide 7. Problem: It takes too long for my clothes to dry Question What to Do Separate heavy weight items from light weight items when creating loads. Did you properly sort your loads of laundry? Heavy fabrics take longer to dry because they tend to retain more moisture. Are you drying large loads of heavy To help reduce and maintain more consistent drying times for large and heavy fabrics, fabrics?
- Page 31 roubleshooting Guide Error Mode • LED displays in case of the door open. The door must be closed and start Button must be pressed for re-operation. • If display errors continue to occur, unplug the power cord and then call the Service Center.
- Page 32 Guide Should you experience any problems with your dryer, it has the capability of transmitting data to your smart phone using the LG Smart Laundry Application or via your telephone to the LG call center. Smart Diagnosis™ cannot be activated unless your dryer is turned on by pressing the Power button.
-
Page 33: Technical Data
echnical Data " (850 mm) " (640 mm) " (600 mm) Type : Electric Dryer Rating : Please refer to the rating label regarding detailed information. Size : 23 x 25 x 33 (inch) Capacity : IEC 4.2 cu.ft Weight : 107lb (48.6 kg) ❋... -
Page 35: Warranty
• Costs associated with removal of your Product from your home for repairs. • The removal and reinstallation of the Product if it is installed in an inaccessible location or is not installed in accordance with published installation instructions, including LG’s owner’s and installation manuals. - Page 36 The notice must provide your name, address, and telephone number; identify the product that is the subject of the claim; and describe the nature of the claim and the relief being sought. If you and LG are unable to resolve the dispute within 30 days of LG’s receipt of the Notice of Dispute, the dispute shall be resolved by binding arbitration in accordance with the procedure set out herein.
- Page 38 MODE D’EMPLOI SÉCHEUSE Lisez attentivement le présent guide d'utilisation avant de faire fonctionner l'appareil et conservez-le à portée de main pour le consulter en tout temps. DLEC888W DLEC888R DLEC885W www.lg.com Copyright © 2016 - 2018 LG Electronics Inc. Tous droits réservés.
- Page 39 Tambour Maxi-Space Votre sèche-linge LG a une très grande capacité. Temps de séchage réduit Le temps de séchage est raccourci grâce à un système de circulation de l'air efficace et un chauffage optimisé. Réduction du bruit innovante La conception optimisée du système de circulation de l'air et la technologie de diminution des vibrations permettent de réduire le bruit.
-
Page 40: Consignes De Sécurité
onsignes de sécurité LISEZ TOUTES LES INSTRUCTIONS AVANT UTILISATION AVERTISSEMENT Pour votre sécurité, respectez les consignes présentées dans ce manuel afin de minimiser le risque d'incendie, d'explosion ou de choc électrique, et d'éviter des dommages matériels, des blessures ou la mort. Votre sécurité, tout comme celle d'autrui, est très importante. - Page 41 onsignes de sécurité PRÉCAUTIONS DE SÉCURITÉ ÉLÉMENTAIRES AVERTISSEMENT Pour réduire le risque d'incendie, de choc électrique ou de blessure aux personnes lors de l'utilisation de cet appareil, vous devez respecter les précautions élémentaires de sécurité, dont les suivantes. • Lisez toutes les instructions avant d'utiliser votre •...
- Page 42 onsignes de sécurité CONSIGNES DE SÉCURITÉ POUR L'INSTALLATION AVERTISSEMENT Pour réduire le risque d'incendie, de choc électrique ou de blessure aux personnes lors de l'utilisation de cet appareil, vous devez respecter les précautions élémentaires de sécurité, dont les suivantes. • Mettez le sèche-linge à la terre •...
- Page 43 onsignes de sécurité AVERTISSEMENT Pour réduire le risque d'incendie, de choc électrique ou de blessure aux personnes lors de l'utilisation de cet appareil, vous devez respecter les précautions élémentaires de sécurité, dont les suivantes. CONSIGNES DE SÉCURITÉ POUR L'INSTALLATION • Ne coupez ou ne retirez en aucun cas la •...
-
Page 44: Instructions D'installation
nstructions d'installation Les instructions suivantes vous guideront lors des premières étapes d'installation de votre sèche-linge. Veuillez noter que tous les chapitres de ce manuel vous donnent des informations importantes concernant la préparation et l'utilisation de votre sèche-linge, et qu'il est important de prendre connaissance de l'ensemble de ce manuel avant de procéder à... - Page 45 nstructions d'installation ÉTAPE 2 Branchements électriques ÉTAPE 3 Préparation du sèche-linge Avant d'utiliser cet appareil pour la première fois, Tenez compte des instructions et avertissements suivants concernant le raccordement électrique de servez-vous d'un produit de nettoyage multi-usages votre sèche-linge. Des informations plus détaillées ou d'un mélange de détergent et d'eau pour éliminer concernant les branchements électriques sont la poussière ou la saleté...
- Page 46 Procédure d'installation • Vissez les deux vis retirées précédemment de la 1. Placez la sécheuse LG sur la laveuse LG. sécheuse au set de montage. 2. Retirez les deux vis situées sur chaque côté en bas • Utilisez les quatre vis (16 mm) du sac des à...
- Page 47 nstructions d'installation Mise à niveau du sèche-linge 1. La mise à niveau du sèche-linge permet d’empêcher les bruits et vibrations indésirables. Installez votre sèche-linge sur un sol stable et à niveau. Faites en sorte qu'il ne soit pas exposé aux éclaboussures ou à des températures négatives.
-
Page 48: Conditions Électriques
onditions électriques RACCORDEMENT DES • Le raccord du cordon d'alimentation (pigtail) entre la prise murale et la plaque de bornes du sèche-linge SÈCHE-LINGE ÉLECTRIQUES n'est PAS fourni avec le sèche-linge. Le type de câble pigtail et le calibre de fil doivent être AVERTISSEMENT conformes aux normes locales et aux instructions des pages suivantes. - Page 49 onditions électriques Examinez les options suivantes afin de déterminer le branchement électrique approprié pour votre domicile. Prise à quatre fils Option 1 : Raccordement à l'aide (NEMA type 14-30R) d'un cordon d'alimentation à quatre fils Respectez les instructions suivantes si votre •...
- Page 50 onditions électriques Option 2 : Raccordement à l'aide Option 3 : Raccordement à trois d'un cordon fils facultatif d'alimentation à trois fils • Si vos normes ou réglementations locales n'autorisent pas le raccordement d'un conducteur Si vos normes ou réglementations locales de terre au fil neutre, respectez les instructions autorisent le raccordement d'un conducteur de terre suivantes.
-
Page 51: Présentation
résentation Panneau de Bac de commande récupération d'eau Porte Trappe du condenseur Grille de ventilation Panneau de commande Afficheur LED • Affichage du temps Bouton de sélection de cycle • Affichage d'indications Marche/Arrêt Départ/Pause Touches de fonction supplémentaires • More Time •... -
Page 52: Fonctionnement De Votre Sèche-Linge
onctionnement de votre sèche-linge Tableau de sélection des cycles Degré de Cycles de séchage Par détecteur Temp. séchage Très sec Couettes, petits édredons et Textiles épais ou matelassés couvertures (Very) Serviettes éponges, torchons à Plus sec vaisselle, serviettes de toilette, draps Textiles épais ou matelassés n’ayant pas besoin d’être repassés (More) Serviettes de bain, torchons à... - Page 53 onctionnement de votre sèche-linge AVANT D'UTILISER VOTRE SÈCHE-LINGE 1. Au moment de déballer votre sèche-linge, assurez-vous qu'il ne présente aucun signe visible de détérioration. 2. Suivez les instructions d'installation et utilisez un niveau pour garantir une installation correcte. 3. Vérifiez le bac de récupération d'eau, le condenseur, la porte, le joint et le tambour pour vous assurer qu'ils sont intacts. 4.
- Page 54 onctionnement de votre sèche-linge 5. Fermez la porte. Sélectionn ez le cycle Avant de fermer la porte, assurez-vous que le linge souhaité. est correctement chargé et ne risque pas de se coincer dans l'ouverture de la porte. 6. Sélectionnez le cycle de séchage souhaité.
-
Page 55: Fonctions Supplémentaires
onctions supplémentaires FIN DIFFÉRÉE (Time Delay) PROGRAMME PERSONNALISÉ La fonction de Fin différée vous permet de (Custom PGM) faire fonctionner le sèche-linge à un moment Si vous avez une combinaison de réglages que bien précis, par exemple durant les heures vous utilisez fréquemment, vous pouvez creuses. - Page 56 onctions supplémentaires TEMPS +/TEMPS - Température (Temp.) (More Time / Less Time) Ce bouton permet de régler la température pour ainsi assurer un entretien adéquat de vos tissus Les touches More Time (Temps +) et Less et de vos vêtements. Time (Temps -) servent à...
- Page 57 Pour utiliser la fonction Tag On, procedez comme suit. • Pour utiliser la fonction Tag On : 1. Téléchargez l’application LG Smart Laundry & DW sur un téléphone intelligent. 2. Activez la fonction NFC (CCP – Communication en champ proche) sur le téléphone intelligent.
- Page 58 Dans certains cas, les téléphones dotés de la technologie NFC peuvent être incapables de transmettre les données. • Appuyez sur [ ] dans l’application LG Smart Laundry & DW afin d’obtenir un mode d’emploi plus détaillé de la fonction Tag On.
-
Page 59: Entretien De Votre Sèche-Linge
ntretien de votre sèche-linge Nettoyage du filtre à peluches Nettoyage du filtre à peluches pendant un cycle Pour assurer une bonne circulation de l'air et garantir des performances optimales à votre sèche- Si le voyant Clean Filter (Entretien filtre ) clignote linge, il est important de nettoyer le filtre à... - Page 60 ntretien de votre sèche-linge Condenseur Le condenseur est une pièce très importante de votre sèche-linge. Il permet d'enlever l'humidité de l'air, ce qui supprime la nécessité d'une évacuation vers l'extérieur. Si le condenseur n'est pas correctement entretenu, il augmentera considérablement la consommation d'énergie et les temps de séchage. Le condenseur doit être nettoyé...
- Page 61 ntretien de votre sèche-linge Grille de ventilation et grille 3. Raccordez le tuyau d'entrée d'air froid d'évacuation Utilisez un aspirateur pour nettoyer la grille de externe fourni ventilation à l'avant et l'entrée d'air froid à avec le sèche- l'arrière. Si vous laissez les peluches ou la linge.
-
Page 62: Conseils Supplémentaires Pour Une Utilisation Optimale
onseils supplémentaires pour une utilisation optimale Guide de séchage Signification des étiquettes d'entretien des Lainages vêtements Pour sécher la laine, utilisez le cycle WOOL (Laine). Assurez-vous de suivre les symboles indiqués sur Symboles Instructions les étiquettes d'entretien des vêtements. Si la laine n'est pas complètement sèche à... - Page 63 onseils supplémentaires pour une utilisation optimale Accessoires Pièces de rechange Les pièces de rechange sont couvertes par la Votre sèche-linge est fourni avec les garantie. Les composants couverts par la accessoires suivants : garantie sont fournis gratuitement. Lorsque la période de garantie a expiré, les pièces de Tuyau d'évacuation de l'eau de condensation rechange doivent être achetées auprès d'un centre de service après-vente agréé.
-
Page 64: Guide De Dépannage
uide de dépannage Conseils de dépannage Pour gagner du temps et de l'argent, consultez le tableau suivant avant d'appeler le centre de service après-vente. 1. Problème : Mon sèche-linge ne s'allume pas Cause Solution Vérifiez que la fiche du sèche-linge est bien enfoncée dans la prise murale. Le sèche-linge n'est pas branché? Vérifiez la boîte à... - Page 65 uide de dépannage 4. Problème : Il y a des peluches sur mes vêtements Cause Solution Reportez-vous à la section du manuel relative au nettoyage du filtre à Votre filtre à peluches est obstrué? peluches pour vous assurer qu'il est propre. Il est important que le filtre à peluches soit propre avant chaque utilisation.
- Page 66 uide de dépannage 7. Problème : Mes vêtements mettent trop de temps à sécher Cause Solution Séparez les articles lourds et volumineux des articles légers au moment de Vous n'avez pas bien trié votre charger votre sèche-linge. linge? Vous séchez de grandes quantités Les tissus lourds sont plus longs à...
- Page 67 uide de dépannage Mode d'erreur • L'afficheur LED indique lorsque la porte est ouverte. Pour remettre le sèche-linge en marche, fermez la porte et appuyez sur le bouton Départ. • Si l'afficheur continue d'indiquer des erreurs, débranchez le cordon d'alimentation et appelez le service après-vente. L'éclairage du tambour ne fonctionne pas •...
- Page 68 Si vous éprouvez un problème avec votre sécheuse, celle-ci est en mesure de transmettre des renseignements vers votre téléphone intelligent à l’aide de l’application LG Smart Laundry ou, par l'entremise de votre téléphone, au centre de service de LG.
-
Page 69: Informations Techniques
nformations techniques (850 mm) (640 mm) (600 mm) Type : Sèche-linge électrique Caractéristiques nominales : Reportez-vous à l'étiquette signalétique pour connaître les informations détaillées. Taille : 23 x 25 x 33 (Po) Capacité : IEC 4,2 pi Poids : 107lb (48,6 kg) ❋... -
Page 71: Garantie
• Les coûts associés à l’enlèvement du produit de votre résidence aux fins de réparation. • L’enlèvement et la réinstallation du produit, s’il est installé à un endroit inaccessible ou de façon non conforme aux instructions d’installation publiées, y compris dans le manuel de l’utilisateur de LG et dans les manuels d’installation. - Page 72 à l’amiable. L’avis doit mentionner votre nom, votre adresse, votre numéro de téléphone, le produit faisant l’objet de la réclamation, la nature de la réclamation et la réparation demandée. Si vous et LG ne parvenez pas à régler le différend dans les 30 jours suivant la réception de l’avis de différend par LG, le différend doit être réglé...
- Page 73 emarque...
Need help?
Do you have a question about the DLEC888R and is the answer not in the manual?
Questions and answers