Samsung SM-A520F/DS User Manual
Hide thumbs
Also See for SM-A520F/DS:
- User manual (167 pages) ,
- User manual (161 pages) ,
- User manual (39 pages)

Related Manuals for Samsung SM-A520F/DS


Summary of Contents for Samsung SM-A520F/DS
- Page 1 SM-A320F SM-A320F/DS SM-A320FL SM-A320Y SM-A320Y/DS SM-A520F SM-A520F/DS SM-A720F SM-A720F/DS User Manual English. 05/2018. Rev.1.0 www.samsung.com...
-
Page 2: Table Of Contents
SIM or USIM card (nano-SIM card) Email Memory card (microSD card) Camera Turning the device on and off Gallery Initial setup Always On Display Samsung account Multi window Transferring data from your previous Samsung Pay device Samsung Members Understanding the screen Samsung Notes... - Page 3 130 Wallpapers and themes 131 Advanced features 132 Device maintenance 135 Apps 135 Lock screen 136 Biometrics and security 137 Fingerprint recognition 140 Samsung Pass 142 Secure Folder 146 Cloud and accounts 147 Backup and restore 148 Google 148 Accessibility 149 General management...
-
Page 4: Basics
• D efault apps that come with the device are subject to updates and may no longer be supported without prior notice. If you have questions about an app provided with the device, contact a Samsung Service Centre. For user-installed apps, contact service providers. - Page 5 • B e careful not to forget your unlock codes for the screen lock, accounts, and other security features. If you forget an unlock code, you will not be able to use the device if you do not reset it. Samsung is not responsible for any data loss or inconvenience caused by forgotten unlock codes.
-
Page 6: Device Overheating Situations And Solutions
• I f the lower part of the device overheats, it could be because the connected USB cable is damaged. Replace the damaged USB cable with a new Samsung-approved one. - Page 7 Basics When the device heats up during use When you use features or apps that require more power or use them for extended periods, your device may temporarily heat up due to increased battery consumption. Close any running apps and do not use the device for a while. The following are examples of situations in which the device may overheat.
- Page 8 • D ecrease the screen brightness. • I f the device overheats or feels hot for a prolonged period, do not use it for a while. If the device continues to overheat, contact a Samsung Service Centre. Device limitations when the device overheats When the device heats up, the features and performance may be limited or the device may turn off to cool down.
- Page 9 Basics Precautions for operating environment Your device may heat up due to the environment in the following conditions. Use caution to avoid shortening the battery’s lifespan, damaging the device, or causing a fire. • D o not store your device in very cold or very hot temperatures. •...
-
Page 10: Device Layout And Functions
• A ppearances and specifications are subject to change without prior notice. • Y ou can purchase additional accessories from your local Samsung retailer. Make sure they are compatible with the device before purchase. • U se only Samsung-approved accessories. Using unapproved accessories may cause the performance problems and malfunctions that are not covered by the warranty. - Page 11 Basics Device layout – Type 1 (SM-A320F, SM-A320Y): SIM card / Memory card tray Speaker Front camera Proximity sensor Loud speaker Power key Touchscreen Home key (Fingerprint recognition sensor) Recents key Back key Microphone Headset jack Multipurpose jack (USB Type-C)
- Page 12 Basics Microphone GPS antenna Flash Rear camera Volume key NFC antenna / MST antenna Main antenna...
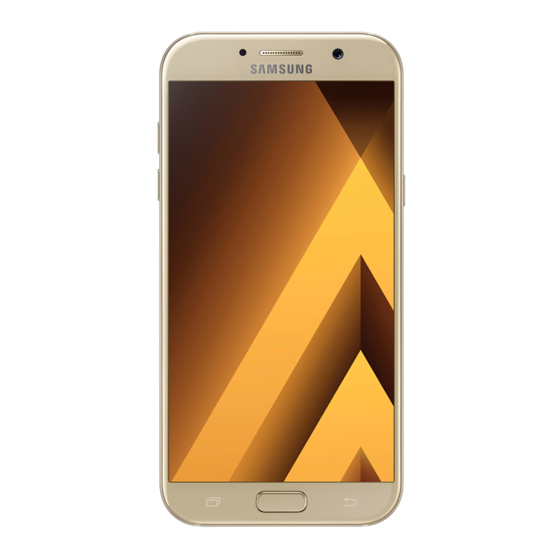
- Page 13 Basics – Type 2 (SM-A520F, SM-A720F): ► Single SIM models: Memory card tray Speaker ► Dual SIM models: SIM card / Memory card tray Front camera Loud speaker Proximity / RGB sensor Power key Touchscreen Home key (Fingerprint recognition sensor) Recents key Back key Microphone...
- Page 14 – If you cover the device’s antenna area with your hands or other objects while using certain features, such as calls or the mobile data connection • U sing a Samsung-approved screen protector is recommended. Unapproved screen protectors may cause the sensors to malfunction.
-
Page 15: Battery
Charge the battery before using it for the first time or when it has been unused for extended periods. Use only Samsung-approved chargers, batteries, and cables. Unapproved chargers or cables can cause the battery to explode or damage the device. - Page 16 Basics Connect the USB cable to the USB power adaptor. Plug the USB cable into the device’s multipurpose jack. – Type 1 (SM-A320F, SM-A320Y): – Type 2 (SM-A520F, SM-A720F): Plug the USB power adaptor into an electric socket. After fully charging, disconnect the charger from the device. Then, unplug the charger from the electric socket.
- Page 17 • I f you charge the device while the multipurpose jack is wet, the device may be damaged. Thoroughly dry the multipurpose jack before charging the device. • I f the device is not charging properly, take the device and the charger to a Samsung Service Centre.
- Page 18 About Fast charging • F ast charging uses battery charging technology that charges the battery faster by increasing the charging power. The device supports Samsung’s Adaptive fast charging feature and Qualcomm Quick Charge 2.0. • T o use Fast charging on your device, connect it to a battery charger that supports Adaptive fast charging or Quick Charge 2.0.
-
Page 19: Sim Or Usim Card (Nano-Sim Card)
SIM cards are inserted in the device than when one SIM card is inserted. Use caution not to lose or let others use the SIM or USIM card. Samsung is not responsible for any damages or inconveniences caused by lost or stolen cards. - Page 20 Basics ► Single SIM models: – Type 1 (SM-A320F, SM-A320Y):...
- Page 21 Basics – Type 2 (SM-A520F, SM-A720F):...
- Page 22 Basics ► Dual SIM models: – Type 1 (SM-A320F, SM-A320Y):...
- Page 23 Basics – Type 2 (SM-A520F, SM-A720F):...
- Page 24 Basics Insert the ejection pin into the hole on the tray to loosen the tray. Ensure that the ejection pin is perpendicular to the hole. Otherwise, the device may be damaged. Pull out the tray gently from the tray slot.
- Page 25 Basics ► Single SIM models: Place the SIM or USIM card on the tray with the gold-coloured contacts facing downwards. ► Dual SIM models: Place the SIM or USIM card on the tray with the gold-coloured contacts facing downwards. ) and the secondary SIM or USIM card Place the primary SIM or USIM card on the tray 1 ( on the tray 2 ( –...
- Page 26 Basics Correct card installation ► Single SIM models: – Type 1 (SM-A320F, SM-A320Y): Nano-SIM card microSD card – Type 2 (SM-A520F, SM-A720F): Nano-SIM card microSD card...
- Page 27 Basics ► Dual SIM models: – Type 1 (SM-A320F, SM-A320Y): Nano-SIM card Nano-SIM card Nano-SIM card microSD card – Type 2 (SM-A520F, SM-A720F): Nano-SIM card Nano-SIM card microSD card • U se only a nano-SIM card. • Y ou cannot insert a nano-SIM card and a microSD card in tray 2 at the same time.
- Page 28 Basics Removing the SIM or USIM card Insert the ejection pin into the hole on the tray to loosen the tray. Pull out the tray gently from the tray slot. Remove the SIM or USIM card. Insert the tray back into the tray slot. Using dual SIM or USIM cards (dual SIM models) If you insert two SIM or USIM cards, you can have two phone numbers or service providers for a single device.
-
Page 29: Memory Card (Microsd Card)
To view your device’s maximum memory card capacity, refer to the Samsung website. • S ome memory cards may not be fully compatible with the device. Using an incompatible card may damage the device or the memory card, or corrupt the data stored in it. - Page 30 Basics – Type 1 (SM-A320F, SM-A320Y):...
- Page 31 Basics – Type 2 (SM-A520F, SM-A720F): Insert the ejection pin into the hole on the tray to loosen the tray. Ensure that the ejection pin is perpendicular to the hole. Otherwise, the device may be damaged. Pull out the tray gently from the tray slot. When you remove the tray from the device, the mobile data connection will be disabled.
- Page 32 Basics Place a memory card on the tray 2 with the gold-coloured contacts facing downwards. – Type 1 (SM-A320F, SM-A320Y): Tray 1 Tray 2 – Type 2 (SM-A520F, SM-A720F): Tray 1 Tray 2 Gently press the memory card into the tray to secure it. If the card is not fixed firmly into the tray, the memory card may leave or fall out of the tray.
- Page 33 Doing so can cause data to be corrupted or lost or cause damage to the external storage or device. Samsung is not responsible for losses, including loss of data, resulting from the misuse of external storage devices.
-
Page 34: Turning The Device On And Off
Basics Turning the device on and off Press and hold the Power key for a few seconds to turn on the device. When you turn on your device for the first time or after performing a data reset, follow the on- screen instructions to set up your device. -
Page 35: Initial Setup
Basics Initial setup When you turn on your device for the first time or after performing a data reset, follow the on-screen instructions to set up your device. The initial setup procedures may vary depending on the device’s software and your region. -
Page 36: Samsung Account
Samsung account Introduction Your Samsung account is an integrated account service that allows you to use a variety of Samsung services provided by mobile devices, TVs, and the Samsung website. Once your Samsung account has been registered, you can keep your data up to date and secure across your Samsung devices with Samsung Cloud, track and control your lost or stolen device, see tips and tricks from Samsung Members, and more. - Page 37 Tap DONE to finish registering your Samsung account. Removing your Samsung account When you remove your registered Samsung account from the device, your data, such as contacts or events, will also be removed. Launch the Settings app and tap Cloud and accounts → Accounts.
-
Page 38: Transferring Data From Your Previous Device
You can transfer content, such as images, contacts, and messages, from your previous device via Smart Switch or from a backup of your data via Samsung Cloud. • T his feature may not be supported on some devices or computers. - Page 39 Smart Switch. On the computer, launch Smart Switch. If your previous device is not a Samsung device, back up data to a computer using a program provided by the device’s manufacturer. Then, skip to the fifth step. Connect your previous device to the computer using the device’s USB cable.
- Page 40 Basics Samsung Cloud Back up data from your previous device to Samsung Cloud and restore the data to your new device. You must register and sign in to your Samsung account to use Samsung Cloud. Refer Samsung account for more information.
-
Page 41: Understanding The Screen
Basics Understanding the screen Controlling the touchscreen • D o not allow the touchscreen to come into contact with other electrical devices. Electrostatic discharges can cause the touchscreen to malfunction. • T o avoid damaging the touchscreen, do not tap it with anything sharp or apply excessive pressure to it with your fingertips. - Page 42 Basics Dragging Tap and hold an item and drag it to the target position. Double-tapping Double-tap the screen. Swiping Swipe upwards, downwards, to the left, or to the right. Spreading and pinching Spread two fingers apart or pinch on the screen.
- Page 43 Basics Home screen and Apps screen The Home screen is the starting point for accessing all of the device’s features. It displays widgets, shortcuts to apps, and more. The Apps screen displays icons for all apps, including newly installed apps. The screen may appear differently depending on the region or service provider.
- Page 44 Basics Switching between Home and Apps screens On the Home screen, swipe upwards or downwards to open the Apps screen. To return to the Home screen, swipe upwards or downwards on the Apps screen. Home screen Apps screen Moving items Tap and hold an item, and then drag it to a new location.
- Page 45 Basics Creating folders Create folders and gather similar applications to quickly access and launch apps. On the Home screen or the Apps screen, tap and hold an app, and then drag it over another app. Drop the app when a folder frame appears around the apps. A new folder containing the selected apps will be created.
- Page 46 Basics Editing the Home screen On the Home screen, tap and hold an empty area, or pinch your fingers together to access the editing options. You can set the wallpaper, add widgets, and more. You can also add, delete, or rearrange Home screen panels. •...
- Page 47 Basics Displaying all apps on the Home screen Without using a separate Apps screen, you can set the device to display all apps on the Home screen. On the Home screen, tap and hold an empty area, and then tap Home screen settings →...
- Page 48 Basics Icon Meaning Flight mode activated Error occurred or caution required Battery charging Battery power level Lock screen Pressing the Power key turns off the screen and locks it. Also, the screen turns off and automatically locks if the device is not used for a specified period. The screen is locked with Swipe, the default screen lock method.
- Page 49 Basics • N one: Do not set a screen lock method. • F ingerprints: Register your fingerprints to unlock the screen. Refer to Fingerprint recognition for more information. You can set your device to perform a factory data reset if you enter the unlock code incorrectly several times in a row and reach the attempt limit.
-
Page 50: Notification Panel
Basics Notification panel When you receive new notifications, such as messages or missed calls, indicator icons appear on the status bar. To see more information about the icons, open the notification panel and view the details. To open the notification panel, drag the status bar downwards. To close the notification panel, swipe upwards on the screen. - Page 51 Basics Using quick setting buttons Tap quick setting buttons to activate certain features. Swipe downwards on the notification panel to view more buttons. To change feature settings, tap the text under each button. To view more detailed settings, tap and hold a button. To rearrange buttons, tap →...
-
Page 52: Entering Text
Basics Entering text Keyboard layout A keyboard appears automatically when you enter text to send messages, create notes, and more. Text entry is not supported in some languages. To enter text, you must change the input language to one of the supported languages. Additional keyboard functions View more keyboard functions. - Page 53 Basics Additional keyboard functions • : Predict words based on your input and show word suggestions. To return to the keyboard functions list, tap This feature may not be available depending on the region or service provider. • : Enter emoticons. •...
- Page 54 Basics Dictionary Look up definitions for words while using certain features, such as when browsing webpages. Tap and hold over a word that you want to look up. If the word you want to look up is not selected, drag to select the desired text.
-
Page 55: Apps And Features
Launch the Galaxy Apps app. • T his app may not be available depending on the region or service provider. • T his app may appear in the Samsung folder depending on the region or service provider. Installing apps Browse apps by category or tap the search field to search for a keyword. - Page 56 Apps and features Managing apps Uninstalling or disabling apps Tap and hold an app and select an option. • D isable: Disable selected default apps that cannot be uninstalled from the device. • U ninstall: Uninstall downloaded apps. Enabling apps Launch the Settings app, tap Apps →...
-
Page 57: Phone
Apps and features Phone Introduction Make or answer voice and video calls. Making calls Launch the Phone app and enter a phone number. If the keypad does not appear on the screen, tap to open the keypad. to make a voice call, or tap to make a video call. - Page 58 Apps and features Making calls from call logs or contacts list Tap RECENTS or CONTACTS, and then swipe to the right on a contact or a phone number to make a call. If this feature is deactivated, launch the Settings app, tap Advanced features, and then tap the Swipe to call or send messages switch to activate it.
- Page 59 Apps and features Receiving calls Answering a call When a call comes in, drag outside the large circle. Rejecting a call When a call comes in, drag outside the large circle. To send a message when rejecting an incoming call, drag the rejection message bar upwards. To create various rejection messages, launch the Phone app, tap →...
- Page 60 Apps and features Options during calls During a voice call The following actions are available: • : Access additional options. • A dd call: Dial a second call. The first call will be put on hold. When you end the second call, the first call will be resumed.
- Page 61 Apps and features Adding a phone number to Contact Adding a phone number to Contacts from the keypad Launch the Phone app. Enter the number. If the keypad does not appear on the screen, tap to open the keypad. Tap CREATE CONTACT to create a new contact, or tap UPDATE EXISTING to add the number to an existing contact.
-
Page 62: Contacts
Apps and features Contacts Introduction Create new contacts or manage contacts on the device. Adding contacts Creating a new contact Launch the Contacts app, tap , and then select a storage location. Enter contact information. Select a storage location. Add an image. Enter contact information. - Page 63 Launch the Settings app, tap Cloud and accounts → Accounts, and select the account to sync with. Tap Sync account and tap the Sync Contacts switch to activate it. For the Samsung account, tap → Sync settings and tap the Contacts switch to activate Searching for contacts Launch the Contacts app.
- Page 64 Apps and features Tap the contact’s image, or tap the contact’s name → Details. Then take one of the following actions: • : Add to favourite contacts. • / : Make a voice or video call. • : Compose a message. •...
-
Page 65: Messages
Apps and features Merging duplicate contacts When you import contacts from other storages, or sync contacts with other accounts, your contacts list may include duplicate contacts. Merge duplicate contacts into one to streamline your contacts list. Launch the Contacts app and tap → Manage contacts → Merge contacts. Tick contacts and tap MERGE. - Page 66 Apps and features Enter a message. Access additional options. Edit recipients. Add recipients from the contacts list. Attach files. Send the message. Enter a message. Enter emoticons. to send the message. For dual SIM models, tap to send the message. Viewing messages Messages are grouped into message threads by contact.
- Page 67 Apps and features Blocking unwanted messages Block messages from specific numbers added to your block list. Launch the Messages app and tap → Settings → Block messages → Block numbers. Tap INBOX or CONTACTS, select a contact, and then tap To manually enter a number, tap Enter number, and then enter a phone number.
-
Page 68: Internet
Browse the Internet to search for information and bookmark your favourite webpages to access them conveniently. Browsing webpages Open the Samsung folder and launch the Internet app. Tap the address field. Enter the web address or a keyword, and then tap Go. - Page 69 Apps and features Using secret mode In secret mode, you can separately manage open tabs, bookmarks, and saved pages. You can lock secret mode using a password and your fingerprint. Activating secret mode In the toolbar at the bottom of the screen, tap Tabs → TURN ON SECRET MODE. If you are using this feature for the first time, set whether to use a password for secret mode.
-
Page 70: Email
Setting up email accounts Set up an email account when opening Email for the first time. Open the Samsung folder and launch the Email app. Enter the email address and password, and then tap SIGN IN. To manually register an email account, tap MANUAL SETUP. -
Page 71: Camera
Apps and features Camera Introduction Take photos and record videos using various modes and settings. Camera etiquette • D o not take photos or record videos of other people without their permission. • D o not take photos or record videos where legally prohibited. •... - Page 72 Apps and features Using swipe gestures Quickly control the preview screen by swiping in different directions. You can change the shooting mode, switch between cameras, or apply filters or other effects. Switching cameras On the preview screen, swipe upwards or downwards to switch between cameras. Rear camera preview Front camera preview Changing shooting modes...
- Page 73 Apps and features Applying filters and other effects On the preview screen, swipe to the left to open the list of filters and other effects. You can apply a unique effect to your photos or videos. After selecting a filter or effect, tap the preview screen and take a photo or record a video. To remove the applied filter or effect, open the filters and effects list and tap Remove effect.
- Page 74 Apps and features Basic shooting Taking photos or recording videos Tap the image on the preview screen where the camera should focus. to take a photo or tap to record a video. Current mode Stickers list Camera settings Preview thumbnail Change the flash setting.
- Page 75 Apps and features Locking the focus (AF) and exposure (AE) You can lock the focus or exposure on a selected area to prevent the camera from automatically adjusting based on changes to the subjects or light sources. Tap and hold the area to focus, the AF/AE frame will appear on the area and the focus and exposure setting will be locked.
- Page 76 Apps and features • H DR (Rich tone): Take multiple shots in various exposures and combine them to create soft and rich colours. • S elfie: Take selfie shots and apply various effects, such as an airbrushed effect. •...
- Page 77 Apps and features Panorama Using panorama mode, take a series of photos and then stitch them together to create a wide scene. To get the best shots using panorama mode, follow these tips: • M ove the camera slowly in one direction. •...
- Page 78 Apps and features Selfie Take self-portraits with the front camera. You can preview various beauty effects on the screen. On the preview screen, swipe upwards or downwards, or tap to switch to the front camera for self-portraits. On the shooting modes list, tap Selfie. Face the front camera lens.
- Page 79 Apps and features Wide selfie Take a wide self-portrait and include as many people in the photo as possible to avoid leaving people out. On the preview screen, swipe upwards or downwards, or tap to switch to the front camera for self-portraits. On the shooting modes list, tap Wide selfie.
- Page 80 Apps and features HDR (Rich tone) Take photos with rich colours and reproduce details even in bright and dark areas. On the shooting modes list, tap HDR (Rich tone). Without effect With effect Night Take a photo in low-light conditions, without using the flash. On the shooting modes list, tap Night.
- Page 81 Apps and features Food Take photos of food with more vibrant colours. On the shooting modes list, tap Food. Tap the screen and drag the circular frame over the area to highlight. The area outside the circular frame will be blurred. To resize the circular frame, drag a corner of the frame.
- Page 82 Apps and features • : Select a frame rate. • : Focus on a subject inside the circular frame and blur the image outside the frame. Camera settings On the preview screen, tap . Some options may not be available depending on the shooting mode.
-
Page 83: Gallery
• V olume key function: Set the device to use the Volume key to control the shutter or zoom in or out. • R eset settings: Reset the camera settings. • C ontact us: Ask questions or view frequently asked questions. Refer to Samsung Members for more information. Gallery Introduction View images and videos stored in your device. - Page 84 Apps and features Viewing images and videos Viewing images Launch the Gallery app and tap PICTURES. Select an image. Access additional options. Add the image to favourites. Share the image with others. Modify the image. Delete the image. You can create a GIF animation or collage from multiple images. Tap → Animate or Collage, and then select images.
- Page 85 Apps and features Viewing videos Launch the Gallery app and tap PICTURES. Select a video to play. Video files show the icon on the preview thumbnail. Access additional Skip to the options. previous video. Tap and hold to rewind. Skip to the next video.
- Page 86 Apps and features Viewing stories When you capture or save images and videos, the device will read their date and location tags, sort the images and videos, and then create stories. To create stories automatically, you must capture or save multiple images and videos. Creating stories Create stories with various themes.
-
Page 87: Always On Display
Apps and features Syncing images and videos with Samsung Cloud You can sync images and videos saved in Gallery with Samsung Cloud and access them from other devices. You must register and sign in to your Samsung account to use Samsung Cloud. - Page 88 Apps and features Opening notifications when the screen is off When you receive message, missed call, or app notifications, notification icons will appear on the screen even when it is turned off. Double-tap a notification icon with your finger to view its notification.
-
Page 89: Multi Window
Apps and features Multi window Introduction Multi window lets you run two apps at the same time in the split screen view. You can also run multiple apps at the same time in the pop-up view. Some apps may not support this feature. Split screen view to open the list of recently used apps. - Page 90 Apps and features Using additional options Tap the bar between the app windows to access additional options. Adjusting the window size Drag the bar between the app windows up or down to adjust the size of the windows. When you drag the bar between the app windows to the top or bottom edge of the screen, the window will be maximised.
- Page 91 Apps and features Minimising the split screen view Press the Home key to minimise the split screen view. The icon will appear on the status bar. The app in the lower window will close and the app in the upper window will remain active in the minimised split screen view.
- Page 92 Apps and features Pop-up view This feature may not be available depending on the region or service provider. to open the list of recently used apps. Swipe upwards or downwards, tap and hold an app window, and then drag it to Drop here for pop-up view.
-
Page 93: Samsung Pay
You can view more information, such as cards that support this feature at www.samsung.com/samsungpay. Alternatively, launch the Samsung Pay app and tap → How to use. • T o use this feature, you must sign in to your Samsung account and register your biometric data. For more information, refer to Samsung... - Page 94 Read and agree to the terms and conditions. Register your fingerprint to use when making payments. Create a PIN to use when making payments. This PIN will be used to verify various actions in Samsung Pay, such as making payments and unlocking the app. Registering cards You can easily register cards by capturing their images with the camera.
- Page 95 On the cards list, swipe to the left or right and select a card to use. Scan your fingerprint. Alternatively, enter the payment PIN you set when setting up the Samsung Pay. Touch the back of your device to the card reader.
-
Page 96: Samsung Members
Changing the Samsung Pay settings On the Samsung Pay screen, tap → Settings. Select the screen where the card image will appear to activate Samsung Pay on the Home screen or locked screen, or when the screen is turned off. -
Page 97: Samsung Notes
Paint with brushes. When you are finished composing the note, tap SAVE. Deleting notes Launch the Samsung Notes app, tap ALL, or tap COLLECTIONS, and then select a category. Tap and hold a note to delete. To delete multiple notes, tick more notes to delete. -
Page 98: Calendar
Apps and features Calendar Introduction Manage your schedule by entering upcoming events or tasks in your planner. Creating events Launch the Calendar app and tap or double-tap a date. If the date already has saved events or tasks in it, tap the date and tap Enter event details. -
Page 99: Samsung Health
Tap Sync account and tap the Sync Calendar switch to activate it. For the Samsung account, tap → Sync settings and tap the Calendar switch to activate To add accounts to sync with, launch the Calendar app and tap → Manage calendars →... - Page 100 Samsung Health. To add items to the Samsung Health screen, tap → Manage items, and then select items. • G OALS: Set your daily fitness goals and view your progress. • P ROGRAMS: Use customisable exercise programmes.
- Page 101 Together allows you to set up step count goals and compete with your friends. You can invite friends to walk together, set target step counts, compete in challenges, and view your ranking on the Steps leaderboard. On the Samsung Health screen, tap TOGETHER. Steps The device counts the number of steps you take and measures the distance travelled.
- Page 102 (But if you sign in to your Samsung account from Samsung Health, your data may be saved on the server for data backup purposes.) Personal information may be stored until the completion of such purposes.
- Page 103 Setting a wake-up command You can launch S Voice using your own wake-up command. To change the wake-up command, open the Samsung folder and launch the S Voice app. → Voice wake-up → Change wake-up command → Custom → START, and Then, tap then follow the on-screen instructions.
- Page 104 Setting the language → Language, and then select a Open the Samsung folder and launch the S Voice app, tap language. The selected language is applied to S Voice only, not to the language displayed on...
-
Page 105: Voice Recorder
Use different recording modes for various situations. The device can convert your voice to text. Making voice recordings Open the Samsung folder and launch the Voice Recorder app. to start recording. Speak into the microphone. to pause recording. While making a voice recording, tap BOOKMARK to insert a bookmark. -
Page 106: My Files
Apps and features Changing the recording mode Open the Samsung folder and launch the Voice Recorder app. Select a mode from the top of the voice recorder screen. • S TANDARD: This is the normal recording mode. • S PEECH-TO-TEXT: The device records your voice and simultaneously converts it to onscreen text. -
Page 107: Clock
Apps and features Clock Introduction Set alarms, check the current time in many cities around the world, time an event, or set a specific duration. ALARM Launch the Clock app and tap ALARM. Setting alarms in the alarms list, set an alarm time, select the days on which the alarm will repeat, set other various alarm options, and then tap SAVE. -
Page 108: Calculator
Apps and features STOPWATCH Launch the Clock app and tap STOPWATCH. Tap START to time an event. To record lap times while timing an event, tap LAP. Tap STOP to stop timing. To restart the timing, tap RESUME. To clear lap times, tap RESET. TIMER Launch the Clock app and tap TIMER. -
Page 109: Radio
Apps and features Radio Listening to the FM radio Launch the Radio app. Before you use this app, you must connect a headset, which serves as the radio antenna. The FM radio scans and saves available stations automatically when running for the first time. -
Page 110: Game Launcher
Apps and features Scanning radio stations Launch the Radio app. Tap STATIONS → SCAN, and then select a scan option. The FM radio scans and saves available stations automatically. Select the radio station you want from the stations list. Game Launcher Introduction Game Launcher gathers your games downloaded from Play Store and Galaxy Apps into one place for easy access. - Page 111 Apps and features Using Game Launcher Launch the Settings app, tap Advanced features → Games, and then tap the Game Launcher switch to activate it. Game Launcher will be added to the Home screen or the Apps screen. When you deactivate the feature, Game Launcher will be removed from the Home screen and the Apps screen.
- Page 112 Apps and features Using Game Tools You can set the Game Tools icon to be displayed as a floating icon on game screens. Launch the Settings app, tap Advanced features → Games → Game Tools and tap the switch to activate it. While playing a game, tap to display the game tools.
-
Page 113: Sharing Content
Using additional features • L ink Sharing: Share large files. Upload files to the Samsung storage server and share them with others via a Web link or a code. To use this feature, your phone number must be verified. -
Page 114: Google Apps
Google apps Google provides entertainment, social network, and business apps. You may require a Google account to access some apps. Refer to Samsung account for more information. To view more app information, access each app’s help menu. Some apps may not be available or may be labelled differently depending on the region or service provider. - Page 115 Apps and features YouTube Watch or create videos and share them with others. Photos Search for, manage, and edit all your photos and videos from various sources in one place. Hangouts Send messages, images, and emoticons to your friends and have video calls with them. Google Search quickly for items on the Internet or your device.
-
Page 116: Introduction
Settings Introduction Customise settings for functions and apps. You can make your device more personalised by configuring various setting options. Launch the Settings app. To search for settings by entering keywords, tap Connections Options Change settings for various connections, such as the Wi-Fi feature and Bluetooth. On the Settings screen, tap Connections. -
Page 117: Wi-Fi
Settings • N FC and payment: Set the device to allow you to read near field communication (NFC) tags that contain information about products. You can also use this feature to make payments and buy tickets for transportation or events after downloading the required apps. - Page 118 Settings Wi-Fi Direct Wi-Fi Direct connects devices directly via a Wi-Fi network without requiring an access point. On the Settings screen, tap Connections → Wi-Fi, and then tap the switch to activate it. Tap Wi-Fi Direct. The detected devices are listed. If the device you want to connect to is not in the list, request that the device turns on its Wi-Fi Direct feature.
-
Page 119: Bluetooth
• D o not use the Bluetooth feature for illegal purposes (for example, pirating copies of files or illegally tapping communications for commercial purposes). Samsung is not responsible for the repercussion of illegal use of the Bluetooth feature. Pairing with other Bluetooth devices On the Settings screen, tap Connections →... -
Page 120: Nfc And Payment
Settings Sending and receiving data Many apps support data transfer via Bluetooth. You can share data, such as contacts or media files, with other Bluetooth devices. The following actions are an example of sending an image to another device. Launch the Gallery app and select an image. →... - Page 121 Settings Using the NFC feature Use the NFC feature to send images or contacts to other devices, and read product information from NFC tags. On the Settings screen, tap Connections and tap the NFC and payment switch to activate it. Place the NFC antenna area on the back of your device near an NFC tag.
- Page 122 Settings Sending data Allow data exchange when your device’s NFC antenna touches the other device’s NFC antenna. On the Settings screen, tap Connections → NFC and payment and tap the switch to activate it. Tap the Android Beam switch to activate it. Select an item and touch the other device’s NFC antenna to your device’s NFC antenna.
-
Page 123: Mobile Hotspot And Tethering
Settings Mobile Hotspot and Tethering Use the device as a mobile hotspot to share the device’s mobile data connection with other devices when the network connection is not available. Connections can be made via Wi-Fi, USB, or Bluetooth. On the Settings screen, tap Connections → Mobile Hotspot and Tethering. You may incur additional charges when using this feature. -
Page 124: Sim Card Manager (Dual Sim Models)
Settings SIM card manager (dual SIM models) Activate your SIM or USIM cards and customise the SIM card settings. Refer to Using dual SIM or USIM cards (dual SIM models) for more information. On the Settings screen, tap Connections → SIM card manager. •... - Page 125 Settings Printing Configure settings for printer plug-ins installed on the device. You can connect the device to a printer via Wi-Fi or Wi-Fi Direct, and print images or documents. Some printers may not be compatible with the device. Adding printer plug-ins Add printer plug-ins for printers you want to connect the device to.
- Page 126 Settings MirrorLink You can display your device’s screen on the vehicle’s head unit monitor. Connect your device to a vehicle to control your device’s MirrorLink apps on the vehicle’s head unit monitor. On the Settings screen, tap Connections → More connection settings → MirrorLink. Your device is compatible with vehicles that support MirrorLink version 1.1 or higher.
-
Page 127: Sounds And Vibration
Settings Download booster Set the device to download files larger than 30 MB, faster via Wi-Fi and mobile networks simultaneously. A stronger Wi-Fi signal will provide a faster download speed. On the Settings screen, tap Connections → More connection settings → Download booster. -
Page 128: Notifications
Settings • N otification sounds: Change the notification sound settings for each app. • D o not disturb: Set the device to mute incoming calls, notification sounds, and media, except for allowed exceptions. • T ouch sounds: Set the device to sound when you select an app or option on the touchscreen. -
Page 129: Display
Settings Display Options Change the display and the Home screen settings. On the Settings screen, tap Display. • B rightness: Adjust the brightness of the display. • A uto brightness: Set the device to keep track of your brightness adjustments and apply them automatically in similar lighting conditions. -
Page 130: Blue Light Filter
Settings Blue light filter Reduce eye strain by limiting the amount of blue light emitted by the screen. While you are watching HDR videos from HDR-exclusive video services, the blue light filter will not be applied. On the Settings screen, tap Display → Blue light filter, and then tap the Turn on now switch to activate it. -
Page 131: Advanced Features
Settings Advanced features Activate advanced features and change the settings that control them. On the Settings screen, tap Advanced features. Excessive shaking or impact to the device may cause unintended input for some features. • S mart stay: Set the device to prevent the display from turning off while you are looking at it. -
Page 132: Device Maintenance
Settings • E asy mute: Set the device to mute incoming calls or alarms by using palm motions or facing the device’s screen downwards. • S wipe to call or send messages: Set the device to make a call or send a message when you swipe to the right or left on a contact or a phone number. - Page 133 Settings Using the quick optimisation feature On the Settings screen, tap Device maintenance → OPTIMISE NOW or FIX NOW. The quick optimisation feature improves device performance through the following actions. • C learing some memory. • D eleting unnecessary files and closing apps running in the background. •...
- Page 134 The available capacity may change when you update the device. • Y ou can view the available capacity of the internal memory in the Specification section for your device on the Samsung website. Managing the memory To delete residual files, such as cache, tap CLEAN NOW. To delete files or uninstall apps that you do not use any more, select a category under USER DATA.
-
Page 135: Apps
Settings Apps Manage the device’s apps and change their settings. You can view the apps’ usage information, change their notification or permission settings, or uninstall or disable unnecessary apps. On the Settings screen, tap Apps. Lock screen Change settings for the locked screen. On the Settings screen, tap Lock screen. -
Page 136: Biometrics And Security
• F ind My Mobile: Activate or deactivate the Find My Mobile feature. Access the Find My Mobile website (findmymobile.samsung.com) to track and control your lost or stolen device. • S ecurity update: View the version of your device’s security system and check for updates. -
Page 137: Fingerprint Recognition
If your pattern, PIN, or password is forgotten, you will not be able to use the device if you do not reset it. Samsung is not responsible for any data loss or inconvenience caused by forgotten unlock codes. - Page 138 Settings For better fingerprint recognition When you scan your fingerprints on the device, be aware of the following conditions that may affect the feature’s performance: • T he Home key contains a fingerprint recognition sensor. Ensure that the Home key sensor is not scratched or damaged by metal objects, such as coins, keys, and necklaces.
- Page 139 Tap EDIT. Tick fingerprints to delete and tap REMOVE. Using Samsung Pass When you register your fingerprints to Samsung Pass, you can use them to easily verify your identity or sign in to websites. Refer to Samsung Pass for more information.
-
Page 140: Samsung Pass
ID or password. • T o use this feature, your device must be connected to a mobile network. • T o use this feature, you must sign in to your Samsung account. For more information, refer to Samsung account. - Page 141 Using Samsung Pass to sign in to websites You can use Samsung Pass to easily sign in to websites that support ID and password saving. Open a website that you want to sign in to. Enter your user name and password, and then tap the website’s sign in button.
-
Page 142: Secure Folder
Deleting your Samsung Pass data You can delete your biometric data, web sign-in information, and app data registered to Samsung Pass with Delete data. Your agreement to the terms and conditions and your Samsung account will remain active. On the Settings screen, tap Biometrics and security → Samsung Pass. - Page 143 • W hen you launch the Secure Folder app, you must unlock the app using your preset lock method. • I f you forget your Secure Folder unlock code, you can reset it using your Samsung account. Tap the reset button that appears when an incorrect unlock code is entered, and enter your Samsung account password.
- Page 144 Settings Moving content to Secure Folder Move content, such as photos and contacts, to Secure Folder. The following actions are an example of moving an image from the default storage to Secure Folder. Launch the Secure Folder app and tap Add files. Tap Images, tick images to move, and then tap DONE.
- Page 145 Settings Adding accounts Add your Samsung and Google accounts, or other accounts, to sync with the apps in Secure Folder. Launch the Secure Folder app and tap → Settings → Accounts → Add account. Select an account service. Follow the on-screen instructions to complete the account setup.
-
Page 146: Cloud And Accounts
• S amsung Cloud: Manage the content that you want to store securely in Samsung Cloud. Check the usage status of your Samsung Cloud storage, and sync, back up, and restore your data. -
Page 147: Backup And Restore
On the Settings screen, tap Cloud and accounts → Backup and restore → Back up data for the Samsung account, tap the switches next to the items you want to back up to activate them, and then tap BACK UP. -
Page 148: Google
Power key and the Volume Up key simultaneously or press the Home key three times quickly. • A ccessibility shortcut: Set the device to activate Voice Assistant or Samsung universal switch when you press and hold the Volume Up key and the Volume Down key simultaneously. -
Page 149: General Management
• R eport diagnostic information: Set the device to automatically send the device’s diagnostic and usage information to Samsung. • M arketing information: Set whether to receive Samsung marketing information, such as special offers, membership benefits, and newsletters. -
Page 150: Software Update
Settings Adding device languages You can add languages to use on your device. On the Settings screen, tap General management → Language and input → Language → Add language. To view all the languages that can be added, tap → All languages. Select a language to add. -
Page 151: User Manual
Settings Security updates information Security updates are provided to strengthen the security of your device and protect your personal information. For security updates for your model, visit security.samsungmobile.com. The website supports only some languages. User manual View help information to learn how to use the device and apps or configure important settings. - Page 152 Appendix Troubleshooting Before contacting a Samsung Service Centre, please attempt the following solutions. Some situations may not apply to your device. When you turn on your device or while you are using the device, it prompts you to enter one of the following codes: •...
- Page 153 • R estart your device to clear any temporary software bugs. • E nsure that your device software is updated to the latest version. • I f the touchscreen is scratched or damaged, visit a Samsung Service Centre. Your device freezes or encounters a fatal error Try the following solutions.
- Page 154 Appendix Calls are not connected • E nsure that you have accessed the right cellular network. • E nsure that you have not set call barring for the phone number you are dialling. • E nsure that you have not set call barring for the incoming phone number. Others cannot hear you speaking on a call •...
- Page 155 • E nsure that the charger is connected properly. • V isit a Samsung Service Centre and have the battery replaced. The battery depletes faster than when first purchased • W hen you expose the device or the battery to very cold or very hot temperatures, the useful charge may be reduced.
- Page 156 • E nsure that your device and the other Bluetooth device are within the maximum Bluetooth range (10 m). If the tips above do not solve the problem, contact a Samsung Service Centre. A connection is not established when you connect the device to a computer •...
- Page 157 Data stored in the device has been lost Always make backup copies of all important data stored in the device. Otherwise, you cannot restore data if it is corrupted or lost. Samsung is not responsible for the loss of data stored in the device.
- Page 158 Samsung Cloud does not work • E nsure that you are connected to a network properly. • D uring a Samsung Cloud’s service check, you cannot use Samsung Cloud. Try again later. Removing the battery • T o remove the battery, contact an authorised service centre. To obtain battery removal instructions, please visit www.samsung.com/global/ecodesign_energy.
- Page 159 Samsung Electronics. Trademarks • S AMSUNG and the SAMSUNG logo are registered trademarks of Samsung Electronics. ® • B luetooth is a registered trademark of Bluetooth SIG, Inc. worldwide.
Need help?
Do you have a question about the SM-A520F/DS and is the answer not in the manual?
Questions and answers