Table of Contents
Advertisement
Advertisement
Table of Contents

Related Manuals for Envision H1981


Summary of Contents for Envision H1981
- Page 1 H1981...
-
Page 2: Operation Instructions
FCC RADIO FREQUENCY INTERFERENCE STATEMENT WARNING: (FOR FCC CERTIFIED MODELS) This monitor has been tested and found compliant with the limits for a Class B digital device, pursuant to part 15 of the FCC Rules. These limits are designed to provide proper protection against harmful interference to a residential installation. -
Page 3: Table Of Contents
Content Safety Precautions...1 First Setup ...2 Quick Installation...2-3 Front View of the Product ... 4 Rear View of the Product ... 4 Using On Screen Display (OSD) Functions ...5-7 Supporting Timing Modes ... 8 Technical Information... 9 Care and Maintenance...10 Troubleshooting ...10... -
Page 4: Safety Precautions
WARNINGS: This monitor should be operated only at the correct power sources indicated on the label on the rear end of the monitor. If you’re unsure of the power supply in your residence, consult your local dealer or power company. -
Page 5: First Setup
First Setup Congratulation for purchasing this monitor of high performance! This monitor comes with the following accessories: Power Cable D-Sub Cable (15 pin) User’s Guide Quick Start Guide Warranty Documents Quick Installation Installing & Removing the Base Install Remove... -
Page 6: Connecting The Monitor
Connecting the Monitor 1. Connect Power Cable Connect the power cable to the back of the monitor. Plug the power cable to a nearby power outlet. 2. Connect Analog video cable (D-Sub cable) Make sure both monitor and computer are powered OFF. Connect the video cable ( D-Sub cable) to the computer, then to the monitor. -
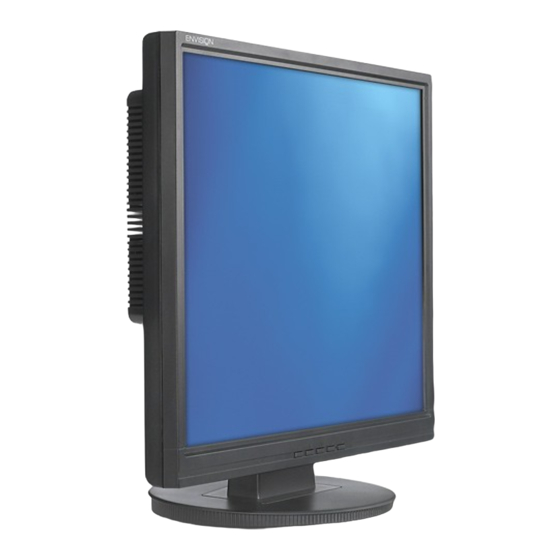
Page 7: Front View Of The Product
Front View of the Product ➊ OSD TURN ON/OFF ➋ SCROLL DOWN/DECREASE ➌ SCROLL UP/INCREASE Rear View of the Product ➐ ➐ POWER INPUT ➑ VGA CABLE (D-SUB 15 PIN) ➊ ➋ ➌ ➍ ➎ ➏ ➍ CONFIRM SELECTION ➎ POWER ON/OFF ➏... -
Page 8: Using On Screen Display (Osd) Functions
Using On Screen Display (OSD) Functions Display main menu. Exit from OSD menu. Auto adjust the image when not in main menu. Confirm the selection. Select the desired item when in OSD menu. When not in OSD menu, it is to immediately activate Contrast/ Brightness. - Page 9 Short Cuts Function from the button(s) Auto Adjust : To auto adjust Horizontal Position, Vertical Position, Phase (Fine Tune) and Clock (H. Size) of the screen. Contrast : To adjust the foreground white level of screen image. : increase contrast, Brightness : To adjust the luminance of the video.
- Page 10 Sharpness : To adjust the clarity of a non-SXGA (1280x1024) signal with button. Setup Menu : To set up Language Select, Resolution Notice, OSD Position, and OSD Time Out. Language Select : To allow users to choose from available languages. Resolution Notice : Resolution Notice is to remind you set the best quality for the image.
-
Page 11: Supporting Timing Modes
VESA VESA Warning : Do not set the graphic card in your computer to exceed these maximum refresh rates. Doing so may result in permanent damage to your monitor. 720 x 400 @ 70Hz 640 x 480 @ 60Hz 640 x 480 @ 67Hz... -
Page 12: Technical Information
Technical Information Technical Specification LCD Panel 19.0” TFT Power Management Energy Star compliant VESA DPMS compatible < 1 W Displayable Resolution SXGA 1280 x 1024 max. Vertical Frequency 75Hz max. Pixel Dimension 0.294 x 0.294 mm LCD Display Color 16.2M (6 bits + FRC/ color) Tilt 0°~20°... -
Page 13: Care And Maintenance
Never remove the rear cover of your monitor cabinet. The display unit inside contains high-voltage parts and may cause electric shock to human bodies. Never try to repair your monitor yourself. Always call your service center or a qualified technician to fix it. - Page 14 Wrong or abnormal colors If any colors (red, green, blue) are missing, check the video cable to make sure it is securely connected. Loose or broken pins in the cable connector could cause an improper connection. Connect the monitor to another computer.
Need help?
Do you have a question about the H1981 and is the answer not in the manual?
Questions and answers