Advertisement
Quick Links
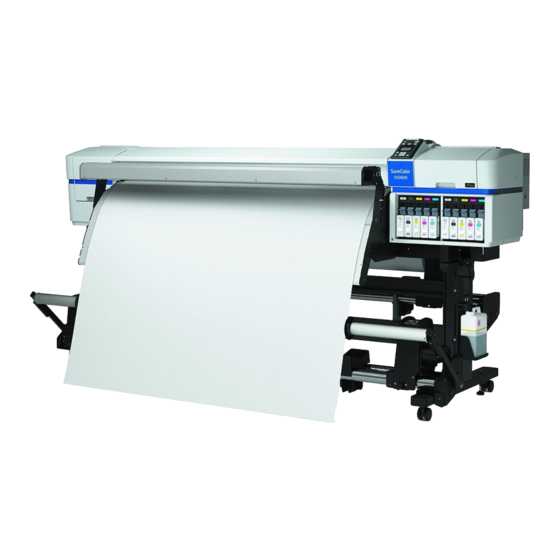
大判インクジェットプリンター
JA
セットアップガイド
EN
Setup Guide
TC
安裝說明
組み立て
JA
Assembly
EN
組裝
TC
平行調整
JA
Parallel Adjustment
EN
平行調整
TC
初回インク充填
JA
Initial Ink Charging
EN
初始化導墨
TC
メディアのセット
JA
Loading Media
EN
裝入材料
TC
接続とインストール
JA
Installing the Software
EN
安裝軟體
TC
メンテナンスのお願い
JA
About Maintenance
EN
關於維護
TC
9
20
27
30
35
38
Advertisement

Subscribe to Our Youtube Channel
Related Manuals for Epson SC-S70600 Series


Summary of Contents for Epson SC-S70600 Series
- Page 1 組み立て Assembly 組裝 平行調整 Parallel Adjustment 大判インクジェットプリンター 平行調整 セットアップガイド 初回インク充填 Initial Ink Charging 初始化導墨 メディアのセット Loading Media Setup Guide 裝入材料 接続とインストール Installing the Software 安裝軟體 安裝說明 メンテナンスのお願い About Maintenance 關於維護...
- Page 2 ご使用の前に 安全上のご注意 本書は、本製品の搬入後、梱包箱から取り出して使用するまでの作業について説明しています。 本製品を使用するうえで、作業する人や他の人への危害、財産への損害を未然に防ぐため、必 本書に掲載するイラストは、特に指定がない限り SC-S70650 を使用しています。 ず守っていただきたいことを説明しています。本製品を安全にお使いいただくために、お使い になる前には必ず付属のマニュアルをお読みください。また、付属のマニュアルは、製品の不 マークの意味 明点をいつでも解決できるように手元に置いてお使いください。 本書で使用しているマークの意味は以下の通りです。 設置上のご注意 この表示を無視して誤った取り扱いをすると、人が死亡または重傷を負う可能性が想定 される内容を示しています。 本製品の通風口を塞がないでください。 この表示を無視して誤った取り扱いをすると、人が傷害を負う可能性および財産の損害 通風口を塞ぐと内部に熱がこもり、火災になるおそれがあります。布などで覆ったり、風通 の可能性が想定される内容を示しています。 しの悪い場所に設置しないでください。また、マニュアルで指示された設置スペースを確保 してください。 U 本書 6 ページ「設置に適した場所」 必ず行っていただきたい事項(指示、 電源プラグをコンセントから抜くこと 十分に換気ができる場所で使用してください。 行為)を示しています。 を示しています。 インク、廃インク、インククリーナー、クリーニング液の臭いや蒸気によって、気分が悪く なるおそれがあります。気分が悪くなった場合は、以下の処置をしてください。 アース接続して使用することを示して 製品が水に濡れることの禁止を示して • 空気が新鮮な場所に移動してください。 います。 います。 • 保護マスクを着用してください。 •...
- Page 3 安全上のご注意 スタンドのキャスター(車輪)と固定具を固定したまま移動させないでください。 本製品の上に乗ったり、重いものを置かないでください。 転倒などによる事故のおそれがあります。 特に、子どものいる家庭ではご注意ください。倒れたり壊れたりして、けがをするおそれが あります。 プリンターをスタンドに装着した状態で移動する場合、段差や凹凸のある場所は避けてください。 転倒などによる事故のおそれがあります。 本製品を保管・輸送するときは、傾けたり、立てたり、逆さまにしないでください。 インクが漏れるおそれがあります。 取り扱い上のご注意 前面カバーを開閉するときは、手や指を挟まないよう注意してください。 けがをするおそれがあります。 自動巻取りユニット動作中は、 手や髪の毛などが稼動部に巻き込まれないように注意してください。 けがをするおそれがあります。 アルコール、 シンナーなどの揮発性物質のある場所や火気のある場所では使用しないでください。 各種ケーブルやオプションを取り付ける際は、取り付ける向きや手順を間違えないでください。 感電・火災のおそれがあります。 火災やけがのおそれがあります。マニュアルの指示に従って、正しく取り付けてください。 煙が出たり、変なにおいや音がするなど異常状態のまま使用しないでください。 本製品を移動する際は、電源を切り、電源プラグをコンセントから抜き、全ての配線を外し 感電・火災のおそれがあります。異常が発生したときは、すぐに電源を切り、電源プラグを たことを確認してから行ってください。 コンセントから抜いてから、販売店またはエプソンの修理窓口にご相談ください。 コードが傷つくなどにより、感電・火災のおそれがあります。 お客様による修理は、危険ですから絶対にしないでください。 メディア、自動巻取りユニットの紙管は、マニュアルをご覧になり、正しく固定してください。 メディアや巻き取った印刷物が落下すると、けがをするおそれがあります。 可燃ガスおよび爆発性ガス等が大気中に存在するおそれのある場所では使用しないでくださ い。また、本製品の内部や周囲で可燃性ガスのスプレーを使用しないでください。 メディア、 巻き取った印刷物の取り外しはマニュアルをご覧になり、 正しく作業してください。 引火による火災のおそれがあります。 メディアや巻き取った印刷物が落下するとけがをするおそれがあります。 各種ケーブルは、マニュアルで指示されている以外の配線をしないでください。 メディア搬送ユニット、自動巻取りユニット動作中は、手や髪の毛などが稼動部に巻き込ま 発火による火災のおそれがあります。また、接続した他の機器にも損傷を与えるおそれがあ れないように注意してください。...
- Page 4 安全上のご注意 消耗品(インク、メディアなど) 、廃インクに関するご注意 インクカートリッジ、クリーニングカートリッジ、インククリーナーは消耗品(別売)です。 濡れた手で電源プラグを抜き差ししないでください。 インクカートリッジ、クリーニングカートリッジ、インククリーナー、キャリッジ副軸用グリ 感電のおそれがあります。 ス、 廃インクを取り扱う前には、 製品安全データシートをお読みください。製品安全データシー 漏電事故防止のため、接地接続(アース)を行ってください。 トは、エプソンのホームページ(http://www.epson.jp)からダウンロードできます。 アース線 (接地線) を取り付けない状態で使用すると、 感電 ・ 火災のおそれがあります。 電源コー ドのアースを以下のいずれかに取り付けてください。 • 電源コンセントのアース端子 • 銅片などを 65cm 以上地中に埋めた物 • 接地工事(D 種)を行っている接地端子 火気のある場所では使用 ・ 保管しないでください。 アース線の取り付け / 取り外しは、 電源プラグをコンセントから抜いた状態で行ってください。 インクカートリッジ、廃インク、インククリーナー、クリーニングカートリッジは、引火に ご使用になる電源コンセントのアースを確認してください。アースが取れないときは、販売 よる火災のおそれがあります。 店にご相談ください。...
-
Page 5: Important Safety Instructions
The Epson 安全資料表可以從當地的 網站下載。 Safety Data Sheet is available for download at your local Epson Web site. Warning 警告 Use only the power cord that comes with the printer. Use of another cord may result in fire or ❏... -
Page 6: Choosing A Place For The Printer
The number of power cables and total amperage are as follows: ❏ SC-S70600 series: 2 power cables, total amperage 20 A at 100 V or 10 A at 240 V SC-S50600 series: 3 power cables, total amperage 21 A at 100 V or 10.5 A at 240 V If the total amperage can not be supplied from one outlet, connect the power cables to outlets on different circuits. - Page 7 Unpacking 梱包内容の確認 清點配件...
- Page 8 梱包内容の確認 Unpacking 清點配件 SC-S50650 には外付け乾燥ファンユニットが付属します。 梱包内容や取り付け方は、外付け乾燥ファンユニットに付属のマニュアルをご覧ください。 SC-S50600 series printers come with an additional print drying system. See the additional print drying system manual for information on installation and package contents. SC-S50670 印表機有一個附加乾燥系統。關於安裝和包裝內容的說明,請查看附加乾燥系統的使用手冊。 ❏ ~ E は、 セットアップでは使用しません。 使い方や詳細は、 『 ユーザーズガイド』 ( PDF) ❏...
- Page 9 組み立て Assembly 組裝 スタンド スタンドの組み立て作業は 3 人で行うことをお勧めします。 It is recommended to assemble the stand by a group of Stand three. 腳架 建議三人一起組裝腳架。 [ [ [ [ 2 [ [ 3 [ [ 4 [ [ 5 [...
- Page 10 組み立て Assembly 組裝 プリンターの取り付け Printer Installation 安裝印表機 [ [ [ 必ず固定した状態で本機をお使いください。本機を移動するときは、固定具を逆方向に回して確実に上げ、キャスターのロックを外 してください。 Before using the printer, be sure the stand is fixed in place. When moving the printer, rotate the adjusters in the opposite direction to raise them and then unlock the casters. 使用印表機之前,請確認腳架已固定到位。當要搬動印表機時,請以反方向旋轉固定旋鈕,將其升高,然後解開腳輪的鎖定。...
- Page 11 組み立て Assembly 組裝 [ 4 [ 本製品は重いので、1 人で運ばないでください。 開梱や移動の際は 6 人以上で運んでください。 Caution: When carrying the printer, use at least six persons. 注意: 搬運印表機至少需要 人。 [ 5 [ [ 6 [ 前面カバーを開閉するときは、手や指を挟まない よう注意してください。 Be careful not to trap your hands or fingers Caution: when opening or closing the front cover.
- Page 12 組み立て Assembly 組裝 [ 7 [ [ 8 [ 図のようにメディア押さえ板のツマミを両側から押さ えながら、プラテンの中央に退避させます。 Pressing the tabs on the sides of the media holding plates as shown, position the plates temporarily in the center of the platen. 如圖所示,壓下材料固定板兩側的卡榫,將固定板暫時 放在壓盤的中央。 [ 9 [ [ [0 [ [ [[ [ 廃インクボトルの蓋は、廃インクを廃棄するときに必要です。捨てずに保管しておいてください。...
- Page 13 組み立て Assembly 組裝 [ [2 [ [ [3 [ あらかじめ貼られている英語ラベルの上に、付属の日本語 ラベルを貼り付けてください。 Place the caution label for your language over the English label. 請將繁體中文的警告標籤貼在英文標籤上方。 オプションの重量メディアユニットを取り付けるときは、重量メディアユニットに付属のマニュアルをご覧ください。 取り付け終了後は、本紙をご覧になり「平行調整」以降の作業を行ってください。 When installing the optional Heavy Roll Media System, see the manual supplied with the Heavy Roll Media System. After installation, proceed to “Parallel Adjustment” in this manual. 當安裝選購高磅捲筒進紙系統時,請查看高磅捲筒進紙系統內附的手冊。安裝後,請進入本手冊中的〝平行調整〞...
- Page 14 組み立て Assembly 組裝 メディア搬送ユニット Media Feeding Unit 材料進紙單元 メディア搬送ユニット ( 約 19.5kg) は、2 人で 2 本のバーを右図のように持って運んでください。 Carry the Media Feeding Unit (approx. 19.5 kg) using two persons, each holding the two bars as shown in the figure on the right. 19.5 kg 搬運材料進紙單元(約...
- Page 15 組み立て Assembly 組裝 [ 2 [ [ 3 [ [ 4 [ 右図の 4 本のネジは、平行調整が終了するまでは仮止めの状態にしてください。 Keep the four screws in the figure on the right provisionally tightened until parallel adjustment is completed. 將右圖中的 個螺絲暫時旋轉直至完成平行調整。 [ 5 [ [ 6 [...
- Page 16 組み立て Assembly 組裝 [ 7 [ [ 8 [ [ 9 [ 手前側のバーに貼られている目盛りラベルに、左端を合わせて付属のラベルを重ねて貼ります。 もう 1 枚のラベルは、予備です。他の付属品と一緒に保管してください。 Affix the supplied label over the guide label on the front bar, aligning the left ends of the supplied label and the guide label. The remaining label is a spare. Keep it with the other accessories. 將內附的標籤貼在長桿的導引標籤上,並將內附標籤的左側對齊導引標籤的左側。剩餘的標籤是備用...
- Page 17 組み立て Assembly 組裝 自動巻取りユニット Auto Take-up Reel Unit 自動收紙單元 自動巻取りユニット(約 21.5kg)は、2 人で 2 本のバーを右図のように持って運んでください。 Carry the Auto Take-up Reel Unit (approx. 21.5 kg) using two persons, each holding the two bars as shown in the figure on the right. 21.5 kg 搬運自動收紙單元(約...
- Page 18 組み立て Assembly 組裝 [ 3 [ [ 2 [ [ 4 [ 左図の 2 本のネジは、平行調整が終了するまでは仮止めの状態にしてください。 Keep the two screws in the figure on the left provisionally tightened until parallel adjustment is completed. 將左圖中的 個螺絲暫時旋緊直至完成平行調整。 [ 5 [...
- Page 19 組み立て Assembly 組裝 [ 6 [ [ 7 [ [ 8 [ • AC100V 以外の電源は使用しないでください。 • 漏電事故防止のため、接地接続(アース)を行ってください。 Caution: Use only the type of power source indicated on the printer’s label. 注意: 只使用此印表機標籤上所標示的電源類型。 SC-S50650/SC-S50600 Series/SC-S50670 外付け乾燥ファンユニットを付属のマニュアルを参照して 必ず取り付けてください。 Be sure to install the additional print drying system as described in the supplied manual.
-
Page 20: Parallel Adjustment
平行調整 Parallel Adjustment 平行調整 組み立てが終了したら、付属の紙管と調整用フィルム a・b を使って、メディア搬送ユニットと自動巻取りユニットの平行調整 を行います。 平行調整を行わないと、メディアがまっすぐ搬送されずに印刷や巻き取りの不具合が生じることがあります。 本作業はプリンターの前面と背面で確認・調整を同時に行うので、2 人で作業してください。 After completing the assembly, use the included roll core and adjustment films (“a” and “b”) to perform parallel adjustment of the Media Feeding Unit and Auto Take-up Reel Unit. If parallel adjustment is not performed, the media may not be fed straight, resulting in printing or take-up failures. - Page 21 平行調整 Parallel Adjustment 平行調整 [ 5 [ [ 6 [ [ 7 [ [ 8 [ ハンドルの軸が押し込まれているときは、ハンドルが 回らなくなるまで手前に回します。 If the roll holder handle shaft is pressed in, rotate the handle forward until it no longer turns. 若滾筒支撐架的把手軸被壓入,請將把手向前旋轉 直至無法再轉動為止。 [ 9 [ [ [0 [ 上図の...
- Page 22 平行調整 Parallel Adjustment 平行調整 [ [[ [ 1.❏ ❏本機の前後で、フィルム a を L 側のフィルム b にぴったり沿わせます。 2.❏ ❏フィルム a にカウンターウェイトを取りつけます。 Place Film “a” so that it lines up with the edge of Film “b” (side L) at front side and back side of the printer, leaving no gaps between the edges of the films.
- Page 23 平行調整 Parallel Adjustment 平行調整 [ [4 [ 本機前面でフィルム a の目盛りを確認しながら、本機背面で調整を行います。 調整ネジを反時計回りに回すと目盛りが奥に、時計回りに回すと目盛りが手前に動きます。 ネジ 1❏回転で、約 1mm❏動かすことができます。目盛りの値が L 側と一致したら調整は終了です。 Make adjustments at the rear of the printer while checking the scale printed on Film “a” at the front of the printer. Rotate the adjustment screw counterclockwise to move back or clockwise to move ahead about one millimeter with each turn of the screw.
- Page 24 平行調整 Parallel Adjustment 平行調整 [ [ [ 自動巻取りユニット Auto Take-up Reel Unit 自動收紙單元 [ 2 [ [ 3 [ 上図の A の部分が隠れるまで紙管ホルダーを押し込みます。オプションの重量メ ディアユニットは、③の後にハンドルを回して押し込んでください。 Press in the roll core holder until part A in the figure above is hidden. If you are installing the optional heavy roll media system, rotate the handle until part A is hidden after completing Step (3).
- Page 25 平行調整 Parallel Adjustment 平行調整 [ 5 [ 1.❏ ❏フィルム a の振れが収まったら、プラテン上の白線の手前側が通る目盛りの数値を記録します。 2.❏ ❏本機背面でフィルム a からカウンターウェイトを取り外します。 3.❏ フィルム a を本機から引き抜き、R 側のフィルム b まで移動して、再び本機に通します。 Once Film “a” stops swinging, note the value for location where it is crossed by the front of white line on the platen. Remove the counterweight from Film “a”...
- Page 26 平行調整 Parallel Adjustment 平行調整 [ 8 [ [ 9 [ 仮止めにしていた 2 本のネジを締めてしっかり固定します。 Fully tighten the two screws that you provisionally tightened. 完全鎖緊您之前暫時旋緊的 個螺絲。 [ [0 [ [ [[ [ [ [2 [ [ [3 [ [ [4 [ 取り外したフィルム a・b は、カウンターウェイトと一緒に折 り目がつかないように保管してください。再び使用するとき...
- Page 27 開啟印表機電源並執行語言選擇和時鐘設定等基本設定後,請選擇一種色彩模式。關於色彩模式的詳細說明,請參考進階使用說明 。 SC-S70650 [8 色(固定) ] * 、 [8 色(切替可能) ] 、 [9 色] 、 [10 色]のいずれか SC-S70600 series/SC-S70670 8 Color (Fixed)*/8 Color (Unfixed)/9 Color/[0 Color SC-S50650 * [4 色モード]または[5 色モード(4 色+ WH) ] 4C Mode/5C Mode (With WH) SC-S50600 series*/SC-S50670* *選択後にカラーモードを切り替えることはできません。* Can not be changed once selected.
- Page 28 初回インク充填 Initial Ink Charging 初始化導墨 ヘッド洗浄中およびインク充填中は、次の注意事項を守ってください。注意事項を守らないと、作業が中断してやり直しが発生するため、通常よりもインクを多く消費することがあります。 電源コードをコンセントから抜いたり、電源を切ったりしないでください。 ❏ 画面の指示以外の操作は行わないでください。 ❏ Observe the following precautions when washing the head and charging the ink. If these precautions are not observed, the work may be interrupted and require redoing, resulting in more ink being consumed than normal.
- Page 29 *1. Insert a cleaning cartridge in this slot when 9 Color or 8 Color (Unfixed) is selected. *2. Insert a supplied replacement cartridge in this slot when 8 Color (Fixed) (SC-S70600 Series) or 4C Mode (SC-S50600 Series) is selected. “9 Color”...
-
Page 30: Loading Media
メディアのセット Loading Media 裝入材料 メディアは重いので、1人で運ばないでください。 Caution: Because the media is heavy, it should not be carried by one person. メディアのセット手順 注意: 由於材料很重,請不要獨自一人搬動。 Loading Media 裝入材料 メディア幅ごとの推奨セット位置は『ユーザーズガイド』 (PDF)で確認してください。 For information on positioning media of different widths, see the User’s Guide. 關於放置不同寬度材料的說明,請查看進階使用說明。 [ [ [ [ 2 [ [ 3 [... - Page 31 メディアのセット Loading Media 裝入材料 [ 5 [ 図は、メディア幅 64 インチの左右端合わせの例です。メディア幅によって左右端の合わせ位置が異なります。 詳細は、 『ユーザーズガイド』 (PDF)をご覧ください。 The illustration shows how to align the edges of 64-inch-wide media. The positions of the edges vary with media width; for more information, see the User’s Guide (PDF). (PDF) 此圖示說明如何對齊...
- Page 32 メディアのセット Loading Media 裝入材料 [ 9 [ [ [0 [ [ [[ [ メディアの中央を持ち、メディアの先端がアフターヒーターの上側のラベルを超えるまで、まっすぐ引き出します。 メディアを指定の位置よりも引き出し過ぎたときは、操作パネルのボタンで指定の位置まで巻き戻してください。 (印刷面外巻き: 【u】ボタン、印刷面内巻き: 【d】ボタン) Pull the media straight forward until the edge has past the label on the top side of the after heater. If the media is drawn too far, rewind it to the specified position using the control panel buttons. (Printable Side Out: Press the u button.
- Page 33 メディアのセット Loading Media 裝入材料 [ [3 [ 厚さ 0.4mm 以下のメディア / メディア押さえ板のツマミを両側から押さえながら、 Media with thicknesses of 0.4 mm or less / [[3[ メディアの両端に寄せます。 0.4 mm 材料厚度 或以下 Pressing the tabs on the sides of the media holding plates, slide the plates to the edges of the media. その他...
-
Page 34: Performing A Test Print
メディアのセット Loading Media 裝入材料 [ [ [ テストパターン印刷 Performing a Test Print 列印測試 [ 2 [ [ 3 [ 【OK】ボタンを押すとノズルチェックパターンが印刷されます。 正常に印刷できないときは、 『ユーザーズガイド』 (PDF) 「困ったときは」を参照して対処してください。 Press the OK button to print a nozzle check pattern. If you cannot print properly, see “Problem Solver” in the User’s Guide to solve the problem. 按下『... -
Page 35: Installing The Software
接続とインストール Installing the Software 安裝軟體 [ [ [ Network [ 2 [ [ 3 [ [ 4 [ この後は画面の指示に従ってインストールを完了させてください。 Follow the on-screen instructions to complete the installation. 請依照螢幕上的操作說明,完成安裝步驟。... - Page 36 接続とインストール Installing the Software 安裝軟體 Network [ネットワークユーティリティ]のチェックを外さないで Do not remove the check mark from Epson Network Utilities. Epson 請勿去除 [ 網絡工具程式 ] 的勾選標記。 ください。 Windows 上の画面が表示されたら、発行元が「SEIKO EPSON」で If this dialog box appears, make sure the publisher is SEIKO SEIKO 若 出 現 如 上 圖 所 示 的 對 話 框 時, 請 確 認 發 行 者 為“...
- Page 37 接続とインストール Installing the Software 安裝軟體 [ [ [ Web ブラウザを起動して、アドレスバーに本機の IP アドレ パスワードの設定(ネットワークのみ) スを入力します。 Setting a Password (Networks Only) Open your Web browser, and enter the IP address of the printer in the address bar. 設定密碼(只限於網路) 開啟網頁瀏覽器,然後在網址列中輸入印表機的 位址。 [ 2 [ [ オプション...
-
Page 38: About Maintenance
メンテナンスのお願い About Maintenance 關於維護 メンテナンスについて 電子マニュアルについて 良好な印刷品質を保つためには、適切な時期に正しいメンテ 付属のソフトウェアディスクには以下の PDF が収録されてい ナンス作業を行うことが必要です。 ます。 メインメニューで、 [ 表示 ] ボタンをクリックして、 ドラッ グ & ドロップでデスクトップなどにコピーしてご覧ください。 詳細は付属のソフトウェアディスクに収録されている『ユー ザーズガイド』 (PDF)のメンテナンスの章をご覧ください。 ユーザーズガイド 章の最後には、メンテナンスチェックシートが付いています。 ネットワークガイド 印刷して本機の近くに貼って、メンテナンスの抜け・忘れ防 止にご活用ください。 Maintenance Supplied Online Guides Regular maintenance is required to maintain print quality. The following online guides are included on the supplied software CD. - Page 39 その他諸注意 (Information for Users in Japan Only) 商標 ご注意 「EPSON」 、 「EPSON❏EXCEED❏YOUR❏VISION」 、 「EXCEED❏YOUR❏VISION」はセイコー ❏ 本書の内容の一部または全部を無断転載することを禁止します。 ❏ エプソン株式会社の登録商標または商標です。 ❏ 本書の内容は将来予告なしに変更することがあります。 ❏ Mac❏OS は米国およびその他の国で登録された Apple❏Inc. の商標です。 ❏ 本書の内容にご不明な点や誤り、記載漏れなど、お気付きの点がありましたら弊社までご ❏ Windows は、米国 Microsoft❏Corporation の米国およびその他の国における登録商標です。 連絡ください。 その他の製品名は各社の商標または登録商標です。 ❏ 運用した結果の影響については前項に関わらず責任を負いかねますのでご了承ください。 ❏ ❏ 製品が、本書の記載に従わずに取り扱われたり、不適当に使用されたり、弊社および弊社 ❏...
- Page 40 © 2014 Seiko Epson Corporation. All rights reserved. EPSON, EPSON EXCEED YOUR VISION, EXCEED YOUR VISION and their logos are registered trademarks or trademarks of Seiko Epson Corporation. 2014 年 8 月発行 Printed in XXXXXX...
Need help?
Do you have a question about the SC-S70600 Series and is the answer not in the manual?
Questions and answers