Table of Contents
Advertisement
Quick Links
Advertisement
Table of Contents

Related Manuals for Acer LX.AQB0X.612


Summary of Contents for Acer LX.AQB0X.612
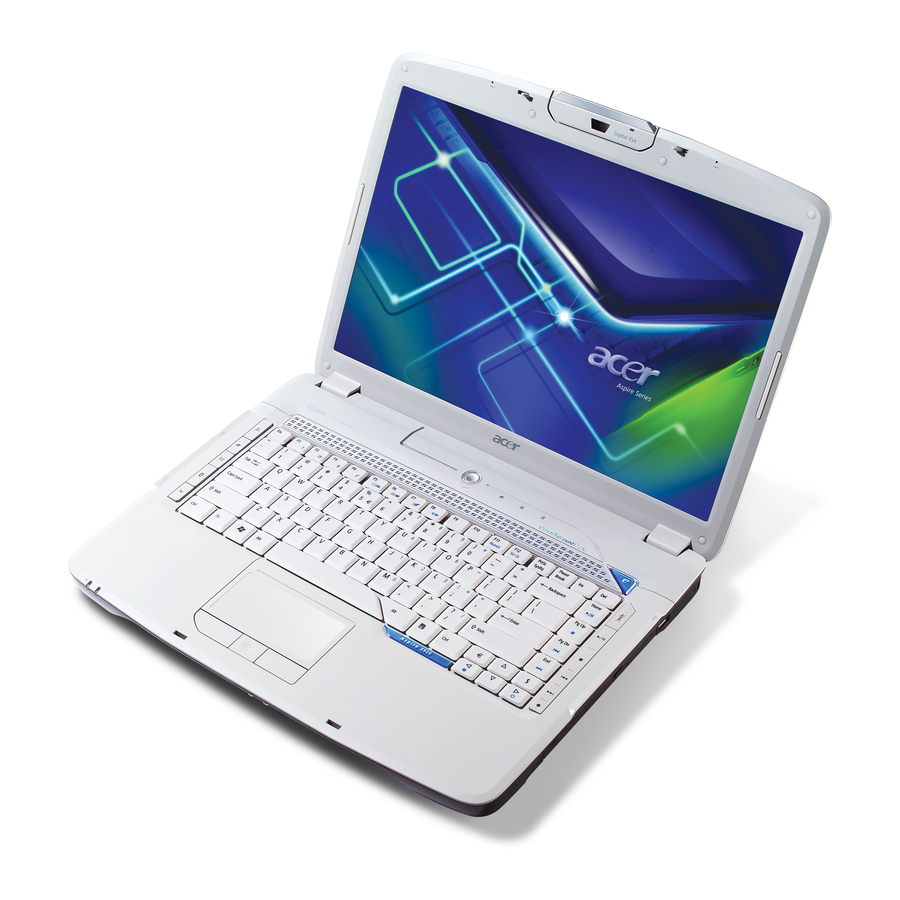
- Page 1 Aspire 5920G/5920 Series User's Guide...
- Page 2 Serial number: ___________________________________ Date of purchase: ________________________________ Place of purchase: ________________________________ Acer and the Acer logo are registered trademarks of Acer Incorporated. Other companies' product names or trademarks are used herein for identification purposes only and belong to their respective companies.
-
Page 3: Safety Instructions
Information for your safety and comfort Safety instructions Read these instructions carefully. Keep this document for future reference. Follow all warnings and instructions marked on the product. Turning the product off before cleaning Unplug this product from the wall outlet before cleaning. Do not use liquid cleaners or aerosol cleaners. -
Page 4: Using Electrical Power
Warnings Do not use this product near water. • Do not place this product on an unstable cart, stand or table. If the product • falls, it could be seriously damaged. Slots and openings are provided for ventilation to ensure reliable •... - Page 5 Note: The grounding pin also provides good protection from unexpected noise produced by other nearby electrical devices that may interfere with the performance of this product. Use the product only with the supplied power supply cord set. If you need •...
-
Page 6: Replacing The Battery Pack
When the operation time becomes noticeably shorter than normal, buy a new battery. Use only Acer approved batteries, and recharge your battery only with Acer approved chargers designated for this device. -
Page 7: Additional Safety Information
Telephone line safety Disconnect all telephone lines from the equipment when not in use and/or • before servicing. To avoid the remote risk of electric shock from lightning, do not connect • the telephone line to this equipment during lightning or thunderstorms. Warning! For safety reasons, do not use non-compliant parts when adding or changing components. -
Page 8: Vehicles
viii Pacemakers. Pacemaker manufacturers recommend that a minimum separation of 15.3 centimeters (6 inches) be maintained between wireless devices and a pacemaker to avoid potential interference with the pacemaker. These recommendations are consistent with the independent research by and recommendations of Wireless Technology Research. Persons with pacemakers should do the following: Always keep the device more than 15.3 centimeters (6 inches) from the •... -
Page 9: Emergency Calls
To minimize pollution and ensure utmost protection of the global environment, please recycle. For more information on the Waste from Electrical and Electronics Equipment (WEEE) regulations, visit http://global.acer.com/about/sustainability.htm Mercury advisory For projectors or electronic products containing an LCD/CRT monitor or display: Lamp(s) inside this product contain mercury and must be recycled or disposed of according to local, state or federal laws. -
Page 10: Tips And Information For Comfortable Use
ENERGY STAR sticker located in the bottom right-hand corner of the palm rest. As an ENERGY STAR partner, Acer Inc. has determined that this product meets the ENERGY STAR guidelines for energy efficiency. This product has been shipped enabled for power management: Activate display’... -
Page 11: Finding Your Comfort Zone
coldness or weakness • If you have these symptoms, or any other recurring or persistent discomfort and/or pain related to computer use, consult a physician immediately and inform your company's health and safety department. The following section provides tips for more comfortable computer use. Finding your comfort zone Find your comfort zone by adjusting the viewing angle of the monitor, using a footrest, or raising your sitting height to achieve maximum comfort. - Page 12 using a glare-reduction filter • using a display visor, such as a piece of cardboard extended from the • display's top front edge Avoid adjusting your display to an awkward viewing angle. • Avoid looking at bright light sources, such as open windows, for extended •...
-
Page 13: First Things First
First things first We would like to thank you for making an Acer notebook your choice for meeting your mobile computing needs. Your guides To help you use your Acer notebook, we have designed a set of guides: First off, the Just for Starters... poster helps you get started with setting up your computer. -
Page 14: Taking Care Of Your Computer
To turn the power off, do any of the following: Use the Windows shutdown command Click on Start • Shut Down. Use the power button • You can also put the computer in sleep mode by pressing the sleep hotkey <Fn>... -
Page 15: Taking Care Of Your Battery Pack
Taking care of your battery pack Here are some ways to take care of your battery pack: Use only batteries of the same kind as replacements. Turn the power off • before removing or replacing batteries. Do not tamper with batteries. Keep them away from children. •... -
Page 16: Table Of Contents
Acer eAudio Management Acer ePresentation Management Acer eDataSecurity Management (for selected models) Acer eLock Management Acer eRecovery Management Acer eSettings Management Windows Mobility Center Your Acer notebook tour Front view Closed front view Left view Right view Rear view Base view Specifications... - Page 17 Maximizing the battery's life Installing and removing the battery pack Charging the battery Checking the battery level Optimising battery life Battery-low warning Acer Arcade (for selected models) Finding and playing content Settings Arcade controls Navigation controls Player controls Virtual keyboard...
- Page 18 TV settings Using TeleText functions Acer Arcade Deluxe (for selected models) Remote control (for selected models) Remote functions Starting Acer Arcade Deluxe VideoMagician TV Joy (selected models only) SportsCap (selected models only) DV Wizard DVDivine Taking your notebook PC with you...
- Page 19 Connecting your TV (for selected models) BIOS utility Boot sequence Enable disk-to-disk recovery Password Using software Playing DVD movies Power management Acer eRecovery Management Create backup Burn backup disc Restore and recovery Troubleshooting Troubleshooting tips Error messages Regulations and safety notices...
-
Page 21: Acer Empowering Technology
Actual product specifications may vary. The Empowering Technology toolbar makes it easy for you to access frequently used functions and manage your new Acer system. Displayed by default in the upper half of your screen, it provides access to the following utilities: Acer eNet Management hooks up to location-based networks intelligently. -
Page 22: Acer Enet Management
Acer eNet Management Acer eNet Management helps you quickly connect to both wired and wireless networks in a variety of locations. To access this utility, select "Acer eNet Management" from the Empowering Technology toolbar or run the program from the Acer Empowering Technology program group in Start menu. You can... - Page 23 Acer eNet Management can save network settings for a location to a profile, and automatically switch to the appropriate profile when you move from one location to another. Settings stored include network connection settings (IP and DNS settings, wireless AP details, etc.), as well as default printer settings.
-
Page 24: Acer Epower Management
To access this utility, select "Acer ePower Management" from the Empowering Technology toolbar, run the program from the Acer Empowering Technology program group in Start menu, or right-click the Windows power icon in the system tray and select "Acer ePower Management". Using power plans Acer ePower Management comes with three predefined power plans: Balanced, High performance and Power saver. -
Page 25: Battery Status
Click "Apply" to save your new settings. To delete a power plan: You cannot delete the power plan you are currently using. If you want to delete the active power plan, switch to another one first. Select the power plan you wish to delete from the drop-down list. Click the Delete Power Plan icon. -
Page 26: Acer Eaudio Management
Acer eAudio Management Acer eAudio Management allows you to easily control the enhanced sound effects of Dolby® Home Theater™ on your system. Select "Movie" or "Game" mode to experience the awesome realism of 5.1-channel surround sound from just 2 speakers, via Dolby Virtual Speaker technology. "Music" mode lets you... -
Page 27: Acer Epresentation Management
Acer ePresentation Management Acer ePresentation Management lets you project your computer's display to an external display device or projector using the hotkey: <Fn> + <F5>. If auto- detection hardware is implemented in the system and the external display supports it, your system display will be automatically switched out when an external display is connected to the system. -
Page 28: Acer Edatasecurity Management (For Selected Models)
Acer eDataSecurity Management (for selected models) Acer eDataSecurity Management is an encryption utility that protects your files from being accessed by unauthorized persons. It is conveniently integrated with Windows Explorer as a shell extension for quick data encryption/decryption and also supports on-the-fly file encryption for Lotus Notes and Microsoft Outlook. -
Page 29: Acer Elock Management
Acer eLock Management Acer eLock Management is simple yet effective utility that allows you to lock removable storage, optical and floppy drive devices to ensure that data can't be stolen while your system is unattended. • Removable Storage Devices — includes USB disk drives, USB pen drives, USB... -
Page 31: Acer Erecovery Management
Acer eRecovery Management Acer eRecovery Management is a versatile backup utility. It allows you to create full or incremental backups, burn the factory default image to optical disc, and restore from previously created backups or reinstall applications and drivers. By default, user-created backups are stored to the D:\ drive. - Page 32 For more information, please refer to "Acer eRecovery Management" on page 84 in the AcerSystem User's Guide. Note: If your computer did not come with a Recovery CD or System CD, please use Acer eRecovery Management's "System backup to optical disc" feature to burn a backup image to CD or DVD.
-
Page 33: Acer Esettings Management
Acer eSettings Management Acer eSettings Management allows you to inspect hardware specifications, set BIOS passwords and modify boot options. Acer eSettings Management also: Provides a simple graphical user interface for navigation. • Prints and saves hardware specifications. • Lets you set an asset tag for your system. -
Page 34: Windows Mobility Center
Windows Mobility Center The Windows Mobility Center collects key mobile-related system settings in one easy-to-find place, so you can quickly configure your Acer system to fit the situation as you change locations, networks or activities. Settings include display brightness, power plan, volume, wireless networking on/off, external display settings, display orientation and synchronization status. -
Page 35: Your Acer Notebook Tour
Your Acer notebook tour After setting up your computer as illustrated in the Just for Starters... poster, let us show you around your new Acer notebook. Front view ICON Item Acer PureZone Acer Crystal Eye Display screen Description Internal microphones for sound recording. - Page 36 Light-Emitting Diodes (LEDs) that light up to show the status of the computer's functions and components. See "Indicators" on page 26 for more details. For use with Acer Arcade and other media playing programs. Lanuch Acer Empowering Technology Light-Emitting Diodes (LEDs) that light up to show the status of the computer's functions and components.
-
Page 37: Closed Front View
Closed front view Icon Item CIR receiver 5-in-1 card reader Line-in jack Microphone-in jack Headphones/speaker/ line-out jack with S/PDIF support Unlimited volume control wheel Latch Description Receives signals from a remote control. Accepts Secure Digital (SD), MultiMediaCard (MMC), Memory Stick (MS), Memory Stick PRO (MS PRO), xD- Picture Card (xD). -
Page 38: Left View
Left view Icon Item External display (VGA) port Ethernet (RJ-45) port Modem (RJ-11) port 3 USB 2.0 ports HDMI S-video/TV-out (NTSC/PAL) port 4-pin IEEE 1394 port ExpressCard/54 slot Description Connects to a display device (e.g., external monitor, LCD projector). Connects to an Ethernet 10/100/1000-based network (for selected models). -
Page 39: Right View
Right view Item Optical drive Optical disk access indicator Optical drive eject button Emergency eject hole USB 2.0 port RF-in port Kensington lock slot Rear view Icon Item DC-in jack Ventilation slots Description Internal optical drive; accepts CDs or DVDs (slot-load or tray-load depending on model). -
Page 40: Base View
Base view Icon Item Battery bay Battery release latch Battery lock Memory compartment Sub woofer Hard disk bay Ventilation slots and cooling fan Description Houses the computer's battery pack. Releases the battery for removal. Locks the battery in position. Houses the computer's main memory. Emits low frequency sound output. -
Page 41: Specifications
Digital TV-tuner supporting DVB-T (Digital Video Broadcasting Terrestrial) standard (6 MHz to 8 MHz) TV-tuner I/O: • TV-tuner cables: • Acer DVB-T antenna (UHF/VHF reception) supporting Acer ™ SignalUp Display 15.4" WXGA high-brightness (220-nits) Acer CrystalBrite LCD, 1280 x 800 pixel resolution, supporting simultaneous multi-... - Page 42 • S/PDIF (Sony/Philips Digital Interface) support for digital speakers • MS-Sound compatible • Acer PureZone technology with two built-in stereo microphones featuring beam forming, echo cancellation, and noise suppression technologies ® GM965 Express Chipset with integrated 3D ® Graphic Media Accelerator (GMA) ®...
- Page 43 Standby and Hibernation power-saving modes • 71 W 4800 mAh Li-ion battery pack (8-cell) • 44 W 4000 mAh Li-ion battery pack (6-cell) • 3-pin 90 W AC adapter supporting Acer QuicCharge technology (for selected models): • • • •...
- Page 44 • Modem (RJ-11) port • DC-in jack for AC adapter Options and • Acer Xpress VoIP phone featuring Acer Video Conference accessories Manager • Acer Media Center remote control • 512 MB, 1 or 2GB DDR2 667 MHz soDIMM modules •...
- Page 45 Software • Acer Empowering Technology (Acer eNet, ePower, ePresentation, eDataSecurity (for selected models), eLock, eRecovery, eSettings, eAudio Management) • Acer Arcade HomeMedia • Acer Arcade Deluxe VideoMagician, DVDivine, Acer HomeMedia • Acer Crystal Eye • Acer GameZone • Acer GridVista •...
-
Page 46: Indicators
Indicators The computer has serveral easy-to-read status indicators. The front panel indicators are visible even when the computer cover is closed Icon Function Description Power Indicates the computer's power status. Battery Indicates the computer's batttery status. Indicates when the hard disk drive is active. Num Lock Lights up when Num Lock is activated. -
Page 47: Easy-Launch Buttons
Empowering Technology" on page 1. The mail and Web browser buttons are pre-set to email and Internet programs, but can be reset by users. To set the Web browser, mail and programmable buttons, run the Acer Launch Manager. See "Launch Manager" on page 41. -
Page 48: Touchpad
Touchpad The built-in seamless touchpad is a pointing device that senses movement on its surface. This means the cursor responds as you move your finger across the surface of the touchpad. The central location on the palmrest provides optimum comfort and support. Touchpad basics The following items show you how to use the touchpad: Move your finger across the touchpad (2) to move the cursor. - Page 49 Press the left (1) and right (4) buttons located beneath the touchpad to • perform selection and execution functions. These two buttons are similar to the left and right buttons on a mouse. Tapping on the touchpad is the same as clicking the left button. Use the 4-way scroll (3) button to scroll up or down and move left or right •...
-
Page 50: Using The Keyboard
Using the keyboard The keyboard has full-sized keys and an embedded numeric keypad, separate cursor, lock, Windows, function and special keys. Lock keys and embedded numeric keypad The keyboard has three lock keys which you can toggle on and off. Lock key Description Caps Lock... -
Page 51: Windows Keys
Windows keys The keyboard has two keys that perform Windows-specific functions. Description Windows key Pressed alone, this key has the same effect as clicking on the Windows Start button; it launches the Start menu. It can also be used with other keys to provide a variety of functions: <... -
Page 52: Hotkeys
Brightness up <Fn> + < ← > Brightness down Description Displays help on hotkeys. Launches Acer eSettings in Acer Empowering Technology. See "Acer Empowering Technology" on page 1. Launches Acer ePower Management in Acer Empowering Technology. See "Acer Empowering Technology" on page 1. -
Page 53: Special Keys
Special keys You can locate the Euro symbol and the US dollar sign at the upper-center and/or bottom-right of your keyboard. The Euro symbol Open a text editor or word processor. Either press < > at the bottom-right of the keyboard, or hold <Alt Gr> and then press the <5>... -
Page 55: Ejecting The Optical (Cd Or Dvd) Drive Tray
Ejecting the optical (CD or DVD) drive tray Press the drive eject button to eject the optical drive tray when the computer is Insert a paper clip to the emergency eject hole to eject the optical drive tray when the computer is off. -
Page 56: Using A Computer Security Lock
Using a computer security lock The notebook comes with a Kensington-compatible security slot for a security lock. Wrap the computer security lock cable around an immovable object such as a table or handle of a locked drawer. Insert the lock into the notch and turn the key to secure the lock. -
Page 57: Audio
Audio ® The computer comes with 32-bit Intel High-Definition audio, and Dolby certified surround sound system with two built-in stereo speakers and one subwoofer supporting low-frequency effects enhancement. Adjusting the volume Adjusting the volume on the computer is as easy as scrolling unlimited volume control wheel on the front panel. -
Page 58: Using Dolby Home Theater For Surround/Multi-Channel Sound
Using Dolby Home Theater for surround/multi-channel sound Your Acer notebook comes with the Dolby ® featuring Dolby PRO LOGIC II, Dolby Virtual Speaker technologies to give you high-quality digital surround sound for enjoying movies, games and music in a realistic, multi-channel audio environment. - Page 59 The Playback Devices dialog box will pop up. There are three tabs: Playback, Recording and Sounds. Click the Playback tab, and then select Realtek Digital Output and click Set Default to set the digital output. For enjoying movies, games and music in a realistic, multi-channel audio environment, please see Acer eAudio Management.
-
Page 60: Using The System Utilities
Acer GridVista is a handy utility that offers four pre-defined display settings so you can view multiple windows on the same screen. To access this function, please go to Start, All Programs and click on Acer GridVista. You may choose any one of the four display settings indicated below:... -
Page 61: Launch Manager
Acer Gridvista is dual-display compatible, allowing two displays to be partitioned independently. Acer GridVista is simple to set up: Run Acer GridVista and select your preferred screen configuration for each display from the taskbar. Drag and drop each window into the appropriate grid. -
Page 62: Frequently Asked Questions
Frequently asked questions The following is a list of possible situations that may arise during the use of your computer. Easy solutions are provided for each one. I turned on the power, but the computer does not start or boot up. Look at the power indicator: If it is not lit, no power is being supplied to the computer. - Page 63 on page 17 or "Hotkeys" on page 32 for more detail. If headphones, earphones or external speakers are connected to the line- • out port on the computer, the internal speakers automatically turn off. I want to eject the optical drive tray without turning on the power.
-
Page 64: Recovery Cds
Note: To activate the BIOS utility, press <F2> during POST. To start the recovery process: Restart the system. While the Acer logo is showing, press <Alt> + <F10> at the same time to enter the recovery process. Refer to the onscreen instructions to perform system recovery. -
Page 65: Requesting Service
Place your proof-of-purchase in the flap located inside the front cover of the ITW passport. If the country you are traveling in does not have an Acer-authorized ITW service site, you can still get in contact with our offices worldwide. Please consult http://global.acer.com. -
Page 66: Battery Pack
Battery pack The computer uses a battery pack that gives you long use between charges. Battery pack characteristics The battery pack has the following characteristics: • Employs current battery technology standards. • Delivers a battery-low warning. The battery is recharged whenever you connect the computer to the AC adapter. -
Page 67: Installing And Removing The Battery Pack
Follow these steps again until the battery has been charged and discharged three times. Use this conditioning process for all new batteries, or if a battery hasn't been used for a long time. If the computer is to be stored for more than two weeks, you are advised to remove the battery pack from the unit. -
Page 68: Charging The Battery
To remove a battery pack: Slide the battery release latch to release the battery. Pull the battery from the battery bay. Charging the battery To charge the battery, first make sure that it is correctly installed in the battery bay. Plug the AC adapter into the computer, and connect to a mains power outlet. -
Page 69: Battery-Low Warning
Battery-low warning When using battery power pay attention to the Windows power meter. Warning: Connect the AC adapter as soon as possible after the battery-low warning appears. Data will be lost if the battery to become fully depleted and the computer shuts down. When the battery-low warning appears, the recommended course of action depends on your situation: Situation... -
Page 70: Acer Arcade (For Selected Models)
Acer Arcade (for selected models) Acer Arcade is an integrated player for music, photos, TV, DVD movies and videos. It can be operated using your pointing device or remote control. To watch or listen, click or select a content button (e.g., Music, Video, etc.) on the Arcade home page. -
Page 71: Finding And Playing Content
Arcade, please refer to the Arcade Help menu. This can be accessed from the Arcade home page by selecting Help Settings There are settings in Acer Arcade that allow you to fine-tune its performance to suit your machine and your personal preferences. To access Settings, click on this icon located on the upper-right hand corner of the main page. -
Page 72: Arcade Controls
Virtual Surround Sound, in order to avoid damaging your speakers. Click Run Setup Wizard to change your original startup settings. Click About Acer Arcade to open a page with version and copyright information. Click Restore Default Settings to return the Acer Arcade settings to their default values. -
Page 73: Virtual Keyboard
Background mode With Acer Arcade you can continue listening to music or watching Live TV while you perform certain other functions. TV, video and music will continue playing in a small window located in the bottom left-hand corner of the screen. -
Page 74: Cinema
Cinema If your computer came with a DVD drive, you can play movies from DVDs and video CDs (VCDs) with the Cinema function of Acer Arcade. This player has the features and controls of a typical DVD player. When you insert a disk into the DVD drive, the movie begins playing automatically. -
Page 75: Album
Album Acer Arcade lets you view digital photos individually or as a slide show, from any available drive on your computer. Click the Album button on the Arcade Home page to show the Album main page. The content area on the right shows both individual pictures and folders. -
Page 76: Video
To return to the Video page, click Stop. Capturing video (TV models only) Acer Arcade allows you to capture and record video clips from other external devices, such as a DVD player or camcorder. Click Capture Device on the video page and then select the source you are using for your video input. -
Page 77: Music
Music For convenient access to your music collection, click Music on the Arcade homepage to open the Music homepage. Select the folder, CD or category that contains the music you want to listen to. Click Play to listen to the entire content from the beginning, or select the song that you want to hear from the list in the content area. -
Page 78: Tv (For Selected Models)
TV (for selected models) Arcade allows you to watch TV from your computer. Click the TV button on the home page to show the TV main page. The Live TV option plays TV on screen. Press Escape at any time to return to Arcade. -
Page 79: Recorded Tv
Note: Since the TV content you watch always lags slightly behind the live TV broadcast, going to the end of the instant replay recording is as close to watching live TV as Arcade permits. Recorded TV The "Recorded TV" page shows recorded TV files. A thumbnail image shows the first frame of each file. -
Page 80: Using Teletext Functions
Signal settings Click on Capture Device to select between an analog or digital input for your TV signal. Select TV Source to choose the source of the signal. The Region option allows you to select the country or region where your cable provider is located. - Page 81 Note: The snapshot function is available when TeleText is running.
-
Page 82: Acer Arcade Deluxe (For Selected Models)
Media Center. Acer Arcade Deluxe extends the capabilities of your Windows Media Center- equipped system with a set of Acer utilities designed to make it easy to manage your multimedia files, create your own customized content, and more. Arcade Deluxe includes the following utilities: VideoMagician •... -
Page 83: Remote Control (For Selected Models)
Remote control (for selected models) If your computer is bundled with a remote control for use wiht the Arcade Deluxe software, the table below explains the functions. -
Page 84: Remote Functions
Remote functions Item Description Play Play selection Record Record TV Rewind Reverse playback or go to previous picture Skip Backward Skip a section backward Pause Pause playback Recorded TV Display Recorded TV page Guide Display the Guide Navigation/ Navigate and confirm selections OK buttons Mute Toggle audio on/off... -
Page 85: Starting Acer Arcade Deluxe
Starting Acer Arcade Deluxe You can run the Acer Arcade Deluxe utilities directly from Windows Media Center. To do this, scroll up/down from the Main page to view the Acer Arcade Deluxe utilities list and left/right to select a utility. -
Page 86: Dv Wizard
DV Wizard DV Wizard provides real-time preview and capture from DV camcorders and webcams to your computer's hard drive or directly burned to DVD. DV Wizard also supports the capture of High Definition video to your computer's hard disk in the DVD format. Attach your DV camcorder or web cam to your computer and then start DV Wizard to begin. -
Page 87: Taking Your Notebook Pc With You
Taking your notebook PC with you This section gives you tips and hints to consider when moving around or traveling with your computer. Disconnecting from the desktop Follow these steps to disconnect your computer from external accessories: Save any open files. Remove any media, floppy disks or compact disks from the drive(s). -
Page 88: What To Bring To Meetings
Note: If the Sleep indicator is off, the computer has entered Hibernation mode and is turned off. If the power indicator is off but the Sleep indicator is on, the computer has entered Sleep mode. In both cases, press and release the power button to turn the computer back on. -
Page 89: Special Considerations
Special considerations Follow these guidelines to protect your computer while traveling to and from work: Minimize the effects of temperature changes by keeping the computer • with you. If you need to stop for an extended period of time and cannot carry the •... -
Page 90: Special Considerations
Special considerations In addition to the guidelines for taking the computer home, follow these guidelines to protect your computer while traveling: Always take the computer as carry-on luggage. • If possible, have the computer inspected by hand. Airport security X-ray •... -
Page 91: Securing Your Computer
Securing your computer Your computer is a valuable investment that you need to take care of. Learn how to protect and take care of your computer. Security features include hardware and software locks — a security notch and passwords. Using a computer security lock The notebook comes with a Kensington-compatible security slot for a security lock. -
Page 92: Entering Passwords
Entering passwords When a password is set, a password prompt appears in the center of the display screen. When the Supervisor Password is set, a prompt appears when you press • <F2> to enter the BIOS utility at boot-up. Type the Supervisor Password and press <Enter> to access the BIOS utility. •... -
Page 93: Expanding Through Options
Expanding through options Your notebook PC offers you a complete mobile computing experience. Connectivity options Ports allow you to connect peripheral devices to your computer as you would with a desktop PC. For instructions on how to connect different external devices to the computer, read the following section. -
Page 94: Built-In Network Feature
Built-in network feature The built-in network feature allows you to connect your computer to an Ethernet-based network. To use the network feature, connect an Ethernet cable from the Ethernet (RJ-45) port on the chassis of the computer to a network jack or hub on your network. -
Page 95: Ieee 1394 Port
IEEE 1394 port The computer's IEEE 1394 port allows you to connect to an IEEE 1394- compatible device like a video camera or digital camera. See your video or digital camera's documentation for details. -
Page 96: Expresscard
ExpressCard The ExpressCard is the newest version of the PC Card. It is a smaller and faster interface that further enhances the usability and expandability of your computer. ExpressCards support a vast number of expansion options, including flash memory card adapters, TV-tuners, Bluetooth connectivity and IEEE 1394B adapters. -
Page 97: Installing Memory
Replace the memory cover and secure it with the screw. Reinstall the battery pack, and reconnect the AC adapter. Turn on the computer. The computer automatically detects and reconfigures the total memory size. Please consult a qualified technician or contact your local Acer dealer. -
Page 98: Connecting Your Tv (For Selected Models)
Connecting your TV (for selected models) Follow the instructions below to set up the TV function of your Acer notebook. PAL/SECAM and NTSC systems Plug the PAL/SECAM cable’s RF plug into your notebook’s RF-in jack. Connect the other end to your TV antenna cable, using the NTSC converter if necessary. - Page 99 To set up the antenna: Push gently at the top until the bottom section pops out. Pull the bottom up until it is positioned at 90 degrees to the antenna body. To ensure good reception, the antenna can be positioned on top of your notebook display using the special clip, as shown below.
-
Page 100: Bios Utility
BIOS utility The BIOS utility is a hardware configuration program built into your computer's BIOS. Your computer is already properly configured and optimized, and you do not need to run this utility. However, if you encounter configuration problems, you may need to run it. To activate the BIOS utility, press <F2>... -
Page 101: Using Software
Using software Playing DVD movies When the DVD drive module is installed in the optical drive bay, you can play DVD movies on your computer. Eject the DVD disk. Important! When you launch the DVD player for the first time, the program asks you to enter the region code. -
Page 102: Power Management
Power management This computer has a built-in power management unit that monitors system activity. System activity refers to any activity involving one or more of the following devices: keyboard, mouse, hard disk, peripherals connected to the computer, and video memory. If no activity is detected for a period of time (called an inactivity timeout), the computer stops some or all of these devices in order to conserve energy. -
Page 103: Acer Erecovery Management
Acer eRecovery Management Acer eRecovery Management is a tool to quickly backup and restore the system. You can create and save a backup of the current system configuration to hard disk, CD or DVD. You can also backup/restore the factory default image, and reinstall applications and drivers. -
Page 104: Burn Backup Disc
Burn backup disc Using the Burn Disc page of Acer eRecovery Management, you can burn the factory default image, a user backup image, the current system configuration, or an application backup image to CD or DVD. Press <Alt> + <F10> or select Acer eRecovery Management from the Empowering Technology toolbar to start Acer eRecovery Management. -
Page 105: Troubleshooting
Troubleshooting This chapter shows you how to deal with common system problems. Read it before calling a technician if a problem occurs. Solutions to more serious problems require opening up the computer. Do not attempt to open the computer yourself; contact your dealer or authorized service center for assistance. - Page 106 If you still encounter problems after going through the corrective measures, please contact your dealer or an authorized service center for assistance. Some problems may be solved using the BIOS utility.
-
Page 107: Regulations And Safety Notices
Regulations and safety notices FCC notice This device has been tested and found to comply with the limits for a Class B digital device pursuant to Part 15 of the FCC rules. These limits are designed to provide reasonable protection against harmful interference in a residential installation. -
Page 108: Modem Notices
Cet appareil numérique de la classe B est conforme a la norme NMB-003 du Canada. Declaration of Conformity for EU countries Hereby, Acer, declares that this notebook PC series is in compliance with the essential requirements and other relevant provisions of Directive 1999/5/EC. (Please visit http://global.acer.com/products/notebook/reg-nb/index.htm for complete documents.) -
Page 109: Notice For Australia
Your telephone company may make changes in its facilities, equipment, operations, or procedures that could affect the proper functioning of your equipment. If they do, you will be notified in advance to give you an opportunity to maintain uninterrupted telephone service. If this equipment should fail to operate properly, disconnect the equipment from the phone line to determine if it is causing the problem. -
Page 110: Notice For New Zealand
Notice for New Zealand The grant of a Telepermit for any item of terminal equipment indicates only that Telecom has accepted that the item complies with minimum conditions for connection to its network. It indicates no endorsement of the product by Telecom, nor does it provide any sort of warranty. Above all, it provides no assurance that any item will work correctly in all respects with another item of Telepermitted equipment of a different make or model, nor does it imply that any product is compatible with all of... -
Page 111: Laser Compliance Statement
Laser compliance statement The CD or DVD drive used with this computer is a laser product. The CD or DVD drive's classification label (shown below) is located on the drive. CLASS 1 LASER PRODUCT CAUTION: INVISIBLE LASER RADIATION WHEN OPEN. AVOID EXPOSURE TO BEAM. -
Page 112: Radio Device Regulatory Notice
Radio device regulatory notice Note: Below regulatory information is for models with wireless LAN and/or Bluetooth only. General This product complies with the radio frequency and safety standards of any country or region in which it has been approved for wireless use. Depending on configurations, this product may or may not contain wireless radio devices (such as wireless LAN and/or Bluetooth modules). - Page 113 wireless mouse/keyboard) EN301 511 V9.0.2:2003 (Applied to models with 3G function) • EN301 908-1 V2.2.1:2003 (Applied to models with 3G • function). EN301 908-2 V2.2.1:2003 (Applied to models with 3G • function).
-
Page 114: The Fcc Rf Safety Requirement
LAN Mini PCI Card built in to the screen section and all persons. Note: The Acer wireless Mini PCI adapter implements a transmission diversity function. The function does not emit radio frequencies simultaneously from both antennas. One of the antennas is selected automatically or manually (by users) to ensure good quality radiocommunication. -
Page 115: Canada - Low-Power License-Exempt Radio Communication Devices (Rss-210)
This device is restricted to indoor use due to its operation in the 5.15 to 5.25 GHz frequency range. FCC requires this product to be used indoors for the frequency range 5.15 to 5.25 GHz to reduce the potential for harmful interference to co-channel Mobile Satellite systems. -
Page 116: Federal Communications Comission Declaration Of Conformity
Address of responsible party: Contact person: Tel: Fax: Notebook PC Aspire 5920G/5920 Aspire 5920G/5920-xxxxx ("x" = 0 - 9, a - z, or A - Z) Acer America Corporation 333 West San Carlos St. San Jose, CA 95110 Acer Representitive 1-254-298-4000 1-254-298-4147... - Page 117 Acer Computer (Shanghai) Limited 3F, No. 168 Xizang medium road, Huangpu District, Shanghai, China Contact Person: Mr. Easy Lai Tel: 886-2-8691-3089 Fax: 886-2-8691-3000 E-mail: easy_lai@acer.com.tw Hereby declare that: Product: Personal Computer Trade Name: Acer Model Number: ZD1 Machine Type: Aspire 5920G/5920 SKU Number: Aspire 5920G/5920-xxxxx ("x"...
-
Page 118: Lcd Panel Ergonomic Specifications
Class IV 85.0° Illuminance level: • α [250 + (250cos )] lx where Color: Source D65 • Ordinary LCD: Class I • Protective or Acer CrystalBrite • Class III Both • • • Class II α = 85° ™ LCD:... -
Page 119: Index
Index AC adapter caring for audio adjusting the volume troubleshooting battery pack battery-low warning caring for characteristics charging checking charge level installing low conditions maximizing life optimizing removing using the first time BIOS utility brightness hotkeys caps lock on indicator care AC adapter battery pack... - Page 120 memory installing messages error modem network Notebook Manager hotkey num lock on indicator numeric keypad embedded password types ports printer troubleshooting problems CD-ROM display keyboard printer startup troubleshooting questions setting location for modem use safety CD or DVD modem notices scroll lock security keylock...
Need help?
Do you have a question about the LX.AQB0X.612 and is the answer not in the manual?
Questions and answers