Sign In
Upload
Download
Table of Contents
Contents
Add to my manuals
Delete from my manuals
Share
URL of this page:
HTML Link:
Bookmark this page
Add
Manual will be automatically added to "My Manuals"
Print this page
×
Bookmark added
×
Added to my manuals
Manuals
Brands
Pioneer Manuals
Speakers
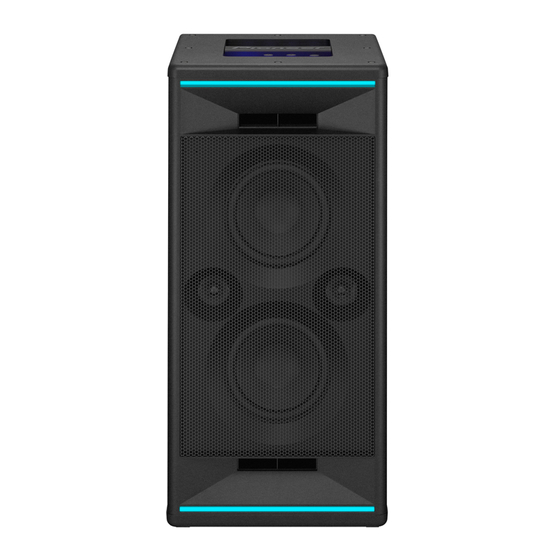
XW-SX70
Instruction manual
Pioneer XW-SX70 Instruction Manual
Wireless speaker system
Hide thumbs
Also See for XW-SX70
:
Instruction manual
(39 pages)
1
Table Of Contents
2
3
4
5
6
7
8
9
10
11
12
13
14
15
16
17
18
19
20
21
22
23
24
25
26
27
28
29
30
31
32
33
34
35
36
37
38
39
page
of
39
Go
/
39
Contents
Table of Contents
Troubleshooting
Bookmarks
Table of Contents
Table of Contents
What's in the Box
Part Names
Top Panel
Front Panel
Rear Panel
Preparations
Installation and Connection
Playback
BLUETOOTH Playback
Basic Operations
USB Memory Device
Basic Operations
Device and Supported Format
Connecting Other Audio Devices
Connecting with a Stereo Mini Plug
Connecting with an Analog Audio Cable
Analog Chain
Basic Operations
Stereo Pair
Basic Operations
Convenience Functions
Illumination LED
Locking this Unit
Canceling Volume Limit
Emphasizing the Low Range
Adjusting the Bass and Treble
Pioneer Club Sound App
Voice Functions
Voice Assistant
Basic Operations
Hands Free Calling
Basic Operations
Setup
Various Settings
Firmware Update
The Updating Function on this Unit
Updating Via USB
When the Unit Is Operating Erratically
Try Restarting the Unit
Resetting the Unit (this Resets the Unit Settings to the Default)
Troubleshooting
X84; Power
X84; Audio
X84; BLUETOOTH Function
X84; USB Memory Device
X84; Others
General Specifications
Advertisement
Quick Links
1
Installation and Connection
2
Bluetooth Playback
Download this manual
Instruction
Manual
XW-SX70
XW-SX50
WIRELESS SPEAKER SYSTEM
En
Table of contents
Preparations
Playback
Voice Functions
Setup
Troubleshooting
Appendix
Supplementary Information
Top Panel≫ Front Panel≫ Rear Panel≫
≫
≫
≫
≫
≫
≫
≫
≫
Table of
Contents
Previous
Page
Next
Page
1
2
3
4
5
Advertisement
Table of Contents
Need help?
Do you have a question about the XW-SX70 and is the answer not in the manual?
Ask a question
Questions and answers
Subscribe to Our Youtube Channel
Related Manuals for Pioneer XW-SX70
Speakers Pioneer XW-SX50 Instruction Manual
(39 pages)
Speakers Pioneer A3 Addendum Manual
(2 pages)
Speakers Pioneer XW-HTD630 Manual
Digital wireless rear speaker system (76 pages)
Speakers Pioneer XW-HTD640 Service Manual
Digital wireless speaker system (74 pages)
Speakers Pioneer XW-SMA4-K Features & Specifications
Wi-fi speaker featuring airplay, dlna, htc connect, wireless direct and built-in subwoofer (2 pages)
Speakers Pioneer XW-BTS1 Operating Instructions Manual
(60 pages)
Speakers Pioneer XW-LF3-T Operating Instructions Manual
(92 pages)
Speakers Pioneer XW-btsp70 Instruction Manual
(32 pages)
Speakers Pioneer XW-BTS3 Operating Instructions Manual
(72 pages)
Speakers Pioneer XW-BTSP1-W/-K/-N Operating Instructions Manual
(65 pages)
Speakers Pioneer XW-SX50-B Instruction Manual
Wireless speaker system (39 pages)
Speakers Pioneer XW-BTSP1-W Operating Instructions Manual
(65 pages)
Speakers Pioneer XW-BTS7-T Operating Instructions Manual
Wireless speaker system (148 pages)
Speakers Pioneer XW-NAW1-K Operating Instructions Manual
Slim speaker system for ipod (116 pages)
Speakers Pioneer XY-152 User Manual
Xy series 15 inch two way loudspeaker (13 pages)
Speakers Pioneer XY Series Installation Manual
(43 pages)
This manual is also suitable for:
Xw-sx50
Xw-sx50-b
Xw-sx70-b
Table of Contents
Print
Rename the bookmark
Delete bookmark?
Delete from my manuals?
Login
Sign In
OR
Sign in with Facebook
Sign in with Google
Upload manual
Upload from disk
Upload from URL


Need help?
Do you have a question about the XW-SX70 and is the answer not in the manual?
Questions and answers