Table of Contents
Advertisement
INSTRUCTION MANUAL
INSTRUCTION MANUAL
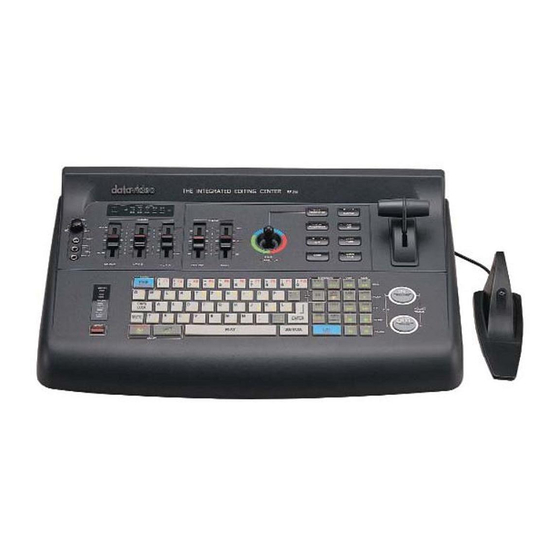
THE INTEGRATED EDITING CENTER
LEFT
RIGHT
MIC
AUDIO
MUSIC
VCR B
EDITOR
PAGE
1
SEG
TITLER
~
O
Q
W
CAPS
"
I
LOCK
IN
OUT
CAPS
A
LOCK
'
SENSOR
^
Z
DELETE
V
`
ALT
SHIFT
SE-200 Pro
dB
VIDEO
VCR A
COLOR
GAIN
2
3
4
5
6
7
E
R
T
Y
U
S
D
F
G
H
J
X
C
V
B
N
PLAY
R.G.B
CORRECTOR
COLOR
PROCESSOR
B
A
B/W
R.G.B.
MODE
CORRECTOR
STYLE
COLOR
8
9
0
SIZE
CHAR
I
O
P
COLOR
WAIT
SPEED
K
L
M
;
ENTER
DEMO
AUTO/
MANUAL
EDIT
SUB MODE
R R
B
A
SOURCE
M I X
VIDEO
FADE
AUDIO
FADE
IN IN
I
BORDER
EHN
+
RECORD
RECORD
FLASH
CAPTION
ADJUST
CUT
SCROLL
ZOOM
TIMING
OUT
OUT
PAUSE
PAUSE
-
O
Advertisement
Table of Contents

Related Manuals for Datavideo SE-200 Pro

Summary of Contents for Datavideo SE-200 Pro
- Page 1 LEFT RIGHT AUDIO MUSIC VCR B VCR A EDITOR PAGE TITLER CAPS " LOCK CAPS LOCK SENSOR DELETE SHIFT SE-200 Pro VIDEO R.G.B. CORRECTOR COLOR GAIN ENTER SUB MODE PLAY R.G.B SOURCE CORRECTOR COLOR M I X PROCESSOR VIDEO FADE...
-
Page 2: Table Of Contents
1.0 FUNCTIONS AND CONTROLS 1.1 SPECIFICATIONS 2.0 GENERAL COMMENTS 2.0.1 Typical Installation of SE-200 with Two Non-Synchronous Video Sources 3.0 SYNCHRONOUS VIDEO 3.0.1 Hook-up the SE-200 with a Time Base Corrector 3.0.2 Typical Installation of SE-200 with TBC-2000 Time Base Corrector and Two Non-Synchronous Video Sources 4.0 TITLER MODE( to Create Title “Pages”... - Page 3 5.1.2.b Programming with Synchronous Video Sources 5.2 ANIMATION SET UP SUB-MODE 5.2.1 Go from Program Sub-Mode to Animation 5.2.2 How User-Programmed Animation 5.3 ACTIVE SUB-MODE 5.3.1 Go from Program Sub-Mode to Active Sub-Mode 5.3.2 Preview All Effects Programmed into the Function Keys 5.3.3 Play back Effects 6.0 EDITOR MODE 6.1 SET UP SUB MODE...
- Page 4 6.5.4 Manual Record TIME BASE CORRECTOR TBC-2000 ------------------ ------------------...
-
Page 5: Before You Get Started
1.0 BEFORE YOU GET STARTED Included with the unit : Included with the unit : 1. EDIT CONTROL CABLES. You will use only one of these two cables, depending on what camcorder you have. a) "Control-L" cable. Use this cable if you have a Sony, Ricoh, Nikon, or similar 8mm or Hi-8 camcorder. -
Page 6: Functions And Controls
1.1 FUNCTIONS AND CONTROLS Including Color Processing and Audio Mixing 26 25 24 23 22 21 20 19 18 17 16 LEFT RIGHT AUDIO MUSIC VCR B EDITOR PAGE TITLER CAPS " LOCK CAPS LOCK SENSOR DELETE SHIFT Please note: Reading through this manual will require concentration. Before you start reading, take time to set up all your equipment carefully, checking all connections. - Page 7 3. Keypad for the SE-200's Titler functions. 4. Keypad for the SE-200's Editor functions. 5. MODE key: Selects the function mode (Titler, S.E.G., or Editor). AUDIO FADE Key: Activates T-Bar for manual audio fades. When LED is lit, audio fade is active. VIDEO FADE Key: Activates T-Bar for manual video fades.
-
Page 8: Specifications
22. Earphone Volume Control: complete stereo audio output. 23. MIC Volume Control: Microphone provided). 24. Earphone Output Jack: monitoring complete stereo audio output. 25. Mic Input Jack (Left or Mono): Narration Microphone provided. Note: mono input here will be outputed through both the Left and Right channels. -
Page 9: General Comments
The SE-200 handles both synchronous and non-synchronous video, though it does not synchronize videos by itself. Synchronous video is a professional application, requiring a Time Base Corrector (TBC) such as the Datavideo TBC-3000. To learn more about synchronous video, read section 3.0. -
Page 10: Hook-Up The Se-200 With A Time Base Corrector
This is not possible with non-synchronous video sources. A Time Base Corrector (TBC)is used to synchronize two non-synchronous video sources, and it is usually a very expensive piece of equipment. Datavideo, however, provides a low cost TBC with high performance (model TBC-3000), which is easy to hook up with the SE-200 for professional video effects like A/B Roll, A/B Dissolve and A/B Animation. -
Page 11: Select The Source Type
The SE-200 handles both synchronous and non-synchronous videos. Since your videos are probably "non-synchronous", the SE-200 is pre-set for "non-synchronous videos". (If you are using the Datavideo TBC-3000 to generate synchronized video, see "Synchronous Video" on page 5). Using the up and down Arrow Keys, move the cursor to "Synchronous Video"... -
Page 12: Select Text Colors
4.0.5 Select text colors. Cursor shows what color the character will be. Press the "CHAR COLOR" key to see the eight colors available and select one of them. Note: If you are using the SE-200 with an external source, and you are creating titles on a solid color background, there is a ninth character color to choose from: "clear."... -
Page 13: Select Text Border
* To make a character with the accent mark that appears in the upper right corner of an Accent key: press all three "ALT", "SHIFT", and Accent keys, then the character key. * To make capital letters with accent marks, turn "CAPS LOCK" on, and repeat the above steps. -
Page 14: Create Titling Effects
h. You can also make cursor-size blocks of color that are different than the solid background color: simultaneously press "ALT" + SHIFT + the " same key as " i " ). Once you have created a block of color, you can change that color by pressing the "... -
Page 15: Select "Wai T" Period
c). To make title appear like TICKERTAPE: Press the "IN" key until "IN" is flashing, then press the right-to-left ARROW key (just to the right of "EDIT" key). The words "LINE SHIFT", "SPEED 1" and "SIZE 1" will appear on the screen. Press the "SPEED"... -
Page 16: Play Back Titles Manually
4.3.3 Play back titles manually. Unlike automatic mode, manual mode plays back one page at a time. This feature is good for reviewing the accuracy of titles, page by page, before an automatic playback. Press the "AUTO/MANUAL" key to exit Auto Mode and go into the Manual Mode. -
Page 17: View Your Custom Icon Library
4.4..3 View your custom icon library. After generating a few custom icons or characters, press the "NEXT" key to view your new icon library. The first page of the library will appear on screen: This screen shows the first 12 icons (01-12) that you customized. You can create up to 36 individual custom icons or characters. -
Page 18: Before Entering Program Sub-Mode
5.0.2 Before entering Program Sub-Mode. The Program Sub-Mode will allow you to program Fades, Wipes (24 patterns), Animation effects (24 patterns), and User-Programmable effects (up to five). These effects are coded with numbers as described below. Refer to these number codes as you read through the Program Sub-Mode section. a) To select a Fade, press the "ANIMATION"... -
Page 19: Project Sub-Mode
5.1 PROJECT SUB-MODE 5.1.1 Press the number "1" key and then the "ENTER" key to enter the Project Sub-Mode. The following information should appear on screen: FUNCTION KEYS 5.1.2 For instant, one-touch playback of virtually any effect, program the keyboard's Function keys(F01-F30). - Page 20 iii. Move the cursor to the row of the function key you wish to program, then press the Background "COLOR" key to select a color for the effect. Color selection is available for Fade, Wipe and Animation effects, but not for Title effects (because the colors for Title effects have already been selected in "Titler Mode").
-
Page 21: Animation Set Up Sub-Mode
PROJECT SUB MODE [PROJECT] KEY EFFTS SRC COL. SP. DIS. F01. A12 F02. A00 F03. T08 F04. A00 F05. A05 F06. A00 A>B F07. A12 B>A F08. T01 A>B F09. T01 B>A F10. A37 Note: With these special "A/B DISSOLVE" effects, you have the capability of superimposing one source video on top of the other in the form of any character or icon you make in "Titler Mode". -
Page 22: How User-Programmed Animation
5.2.2 How User-Programmed Animation effects work. a) Understanding basic terms: "effect" and "icon". On the Animation Set Up Sub-Mode screen (shown above), a number code (in upper right corner of screen ) identifies each User-Programmed effect. There are five User-Programmed effects available, number coded A95 through A99. -
Page 23: Active Sub-Mode
ANIMATION SET UP I/D NO.:A95 1 2 3 4 5 6 7 8 9 1 2 3 4 5 6 7 8 9 SIMULATION EFFECT: A38 NEXT ICON = "NEXT" KEY NEXT EFFECT= "IN" KEY To select an existing Animation effect to combine with your User-Programmed effect, enter the number code (A25-A52) by pressing the "ANIMATION"... -
Page 24: Editor Mode
programmed into the F15 key, you would press "ALT" + "F5" . c) To play back any of the effects programmed into Function keys F21-F30, press "SHIFT" + a Function key. EXAMPLE: to play back the effect programmed into the F29 key, you would press "SHIFT" + "F9". d) Once you play back an effect using a Function key, you can play back the next Function key's effect by pressing the "NEXT"... - Page 25 VIDEO SOURCE - A VIDEO SOURCE - B RECORD TIME DELAY OF RECORDING VCR PAUSE TIME DELAY OF RECORDING VCR INFRARED CONTROL SYSTEM OF RECORDING 6.1.2 Select the type of edit control used by video source A. Move the cursor (using the Arrow keys) to "SOURCE A", then press the "IN" key to cycle through your three choices: "PANASONIC", "SONY"...
-
Page 26: Adjust The Record And Pause Time
The GPI (General Purpose Interface) trigger is an advanced feature that allows the Editor to "cue" GPI-compatible external devices (such as the Datavideo SE-300 Digital Video Illustrator) to "play" effects automatically at specified points during an edit sequence. A detailed description of how to do this will follow shortly. - Page 27 What is the difference between a "single" and "double" GPI trigger? Any device that has a "single" GPI trigger (eg. the Datavideo SE-300 Digital Video Illustrator), utilizes just one electrical pulse to control the duration of an effect (the single pulse signals both the "in" and "out" points of the effect).
-
Page 28: Select The Infrared Control System
6.1.7 Select frame calibration--"yes" or "no". To edit a tape, you have to mark the "in" (start) and "out" (end) points of every scene you want to keep. Sometimes, your "mark" can be a few frames off from where the scene actually starts or ends. - Page 29 iv. Next, press the "IN" and/or "OUT" keys to search the list of VCRs one at a time. When the name of your VCR appears on screen, press each and every one of the Editor's VCR function keys (PLAY, FF, REW, etc.) to see if they control your recording VCR.
- Page 30 to flash. iv. Point the recording VCR's remote control close to the Editor's SENSOR (the red window at the lower left corner of the unit) about 10 to 15 cm distance, and press the button on the VCR's remote control (PAUSE, RECORD, or PLAY-as you just determined above) that RELEASES PAUSE.
-
Page 31: Cut Sub-Mode
6.2 CUT SUB-MODE 6.2.1 From the "Editor Mode" menu, press the "2" key to enter Cut Sub Mode. This screen will appear: 6.2.2 Before editing a new tape, it is usually desirable to delete all edit information previously stored in the Editor's memory. Press the "DELETE"... - Page 32 After the source tape is wound to the point where you wish to start editing, this screen will appear: 6.2.4 Mark the "IN" (start) and "OUT" (end) points of every scene on the source tape. a) After the source tape is wound to the point where you wish to start editing, press the Editor's CAM "play"...
- Page 33 6.2.5 Save the EDL (Edit Decision List) in the Editor's memory. a) After marking every scene you want to keep for your final edited video, you may want to save this EDL data in the Editor's memory. First, stop the source player (camcorder).
-
Page 34: Edl Sub-Mode
6.3 EDL SUB-MODE 6.3.1 Press the "3" key to enter EDL Sub Mode. This screen will appear. 6.3.2 Move the cursor to the first line (SN 01) and press the "PREVIEW" key. The scene will play back automatically for you to preview it. Note: make sure you are playing back the tape number "1"... -
Page 35: Delete An Edl
Move cursor with the left and right arrow keys to the "IN" and "OUT" counter number positions and enter the updated numbers for the new scene. Then press the "ENTER" key. The new scene will be inserted into the EDL. NOTE: The EDL Sub-Mode is for modifying the IN/OUT points of scenes only. - Page 36 Move the cursor to the tape number you wish to edit and then press the "ENTER" key. The following screen will appear: LOAD EDL TO 2. SOURCE-B Move the cursor to the source you wish to edit and then press the "ENTER" key. The following screen will appear: SOURCE/TAPE NO.
- Page 37 6.4.4 Creating a Project with Non-Synchronous Video sources. a) Inserting scenes in different positions in the sequence. (Note: if the sequence you want is simply chronological, you do NOT have to rearrange any scenes at all.) Move cursor up or down the "SN" (scene) column to the "SQ"...
- Page 38 Adding titles to the edited sequence. you created in Titler Sub-Mode and superimpose it over any scene in your edited sequence. i. Move cursor along the "SN" column to the scene where you want to add the title, then press the "GPI" key (same as the "CHAR COLOR" key) or "TITLER"...
- Page 39 SQ : 001 SR : B2 SN : 01 +031001 SP 1 0UT +052002 SP 1 EFFECT PAGE COUNTER TITLER +0033020 ii. With the cursor on line 01 in the "EFFECT" column, press the "GPI" key. The word "GPI-001" will appear in the "EFFECT" column. Note: The "IN"...
- Page 40 The letter indicates Source A or B. The number indicates EDL ("Tape 1", "TAPE 2", "TAPE 3" or "TAPE 4") a) Selecting Source A. The default source setting in the Project Sub-Mode is "A.1" (Source A will be edited according to the EDL you stored in memory as "Tape 1").
- Page 41 SN CAL. DURATION 0030910 +0010612 CUT SP 1 OUT +0041522 CUT SP 1 0061212 +0031001 CUT SP 1 OUT +0 052002 SP 1 0050514 +01345 05 SP 1 OUT +0185019 CUT SP 1 END: 010, TOTAL LENGTH : 0242915 SPEED OF "IN" TRANSITION OF SQ.NO.3 SP1: FAST SP2: SLOW TRANSITION EFFECTS OF...
- Page 42 The SE-200 is available for "A/B ROLL" effects with "SINGLE or DOUBLE" Time Base Corrector. However, there are some points that should be noticed during programming the "A/B ROLL" in the edited sequence as following describes: 1. The following A/B Roll effects in the edited sequence are NOT applicable with the SE-200.
-
Page 43: Record Sub-Mode
6.5 RECORD SUB-MODE 6.5.1 After completing all scene arrangements in Project Sub-Mode, press the "SUB MODE" key to return to the "Editor Mode" menu: Then press the "5" key to enter Record Sub-Mode. The following screen appears: 6.5.2 PREVIEW option: select this to preview all of the scenes in your edited sequence without recording. - Page 44 Notes: Each scene in the sequence will "cue up" - you will see several seconds of video before the scene actually "starts." When the scene cues up, an on-screen status indicator will say "OUT"; when the scene starts, the on- screen status indicator will disappear.
- Page 45 6.5.3 AUTO RECORD option: sequence automatically. a) Make sure a blank tape is inserted and rewound in your recording VCR. If the Record Sub-Mode menu is not on screen, press the "SUB MODE" key to return to Record Sub-Mode: b) Press the "2" key to bring up the Auto Record screen (similar to the Preview screen): c) Press the "EDIT"...
- Page 46 6.5.4 MANUAL RECORD option: This method of editing is faster and less complicated than auto editing. But it is much less accurate, and the final video will not be as smooth and polished as with an auto edit. a) Make sure that a blank tape is inserted and rewound in your recording VCR, that the source player is in playback mode, and that the source tape is cued up to the point where you want to begin editing.
-
Page 47: Audio Processing
To insert a special effect you programmed into the function keys (F1-F30) in S.E.G. Mode: simply press the function key (F1-F30) that you want. h) To trigger a GPI effect from a GPI-compatible external source (video mixer, SEG, etc.): Simply press the "GPI" key. Note: make sure the GPI-compatible external source is connected properly to the SE-200's GPI jack. - Page 48 DUAL CHANNEL TIME BASE CORRECTOR A Time Base Corrector TBC) is used to synchronize two non-synchronous video sources, and it is usually a very expensive piece of equipment. Datavideo, however, provides a low cost TBC with high performance (model TBC-3000), which is easy to hook up with the SE-200 (see page 5) for professional video effects like A/B Roll, A/B Dissolve and A/B Animation.
Need help?
Do you have a question about the SE-200 Pro and is the answer not in the manual?
Questions and answers