Table of Contents
Advertisement
Quick Links
Advertisement
Table of Contents

Related Manuals for Pelgrim PWD112WIT


Summary of Contents for Pelgrim PWD112WIT
- Page 1 DETAILED INSTRUCTIONS HOW TO USE YOUR DRYER PWD112WIT www.pelgrim.com...
- Page 2 We thank you for the confidence you have shown us by purchasing this dryer. Your new dryer complies with the requirements of modern laundry care; it will dry your laundry quickly, leaving it soft and smooth, while use of special programs will not deform it.
-
Page 3: Table Of Contents
TABLE OF CONTENTS INTRODUCTION APPLIANCE Technical information Control panel description SAFETY PRECAUTIONS GETTING 10 INSTALLATION AND CONNECTION STARTED 10 Selecting the room 13 Installation 14 Condensate discharge 15 Electrical connections 16 Moving and transport 16 Subsequent transport 17 Emptying the steam generator tank 18 Ionizer system 18 Steam generator system 19 BEFORE THE FIRST USE... -
Page 4: Appliance
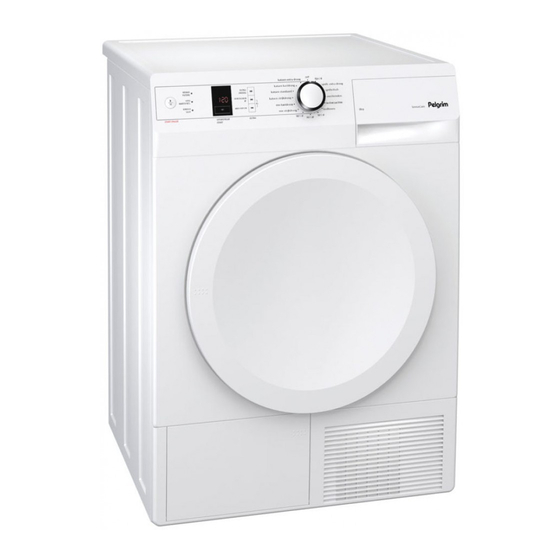
APPLIANCE (DRYER DESCRIPTION) FRONT Program selector dial Control panel Condensate tank Door Net filter Filter on the lower side of the door opening Heat pump filter Air vent Rating plate BACK Condensate discharge pipe Power cord Adjustable feet... -
Page 5: Technical Information
TECHNICAL INFORMATION (DEPENDING ON THE MODEL) The rating plate with the basic information on the dryer is located under the door frame. 600mm Width Height 850mm Depth 600mm Depth with door 1100mm open Weight XX/YY kg (depending on the model) Rated voltage See rating plate Fuse... -
Page 6: Control Panel Description
CONTROL PANEL DESCRIPTION FOR MODELS A) WITH A STEAM GENERATOR AND B) WITHOUT A STEAM GENERATOR A) WITH A STEAM GENERATOR START|PAUSE START/ PAUSE key, a , b , c : SIGNAL START DELAY key, use this key to start or LIGHTS are on: when to select the delayed stop the program. - Page 7 a , b , c : ADDITIONAL MOST USED PROGRAMS ON/OFF and PROGRAM FUNCTION keys, to SELECTOR dial extend or adjust the basic programs. B) WITHOUT A STEAM GENERATOR...
-
Page 8: Safety Precautions
SAFETY PRECAUTIONS Please don´t use the appliance unless you The dryer back wall can be hot danger of have studied and understood the instruction burns. manual. Clean the filters after each drying cycle. If Your dryer is intended solely for household you have removed the filters, replace them use. - Page 9 The appliance is manufactured in Never stop the drying cycle before it is compliance with all effective safety completed; if you do interrupt the cycle standards. for any reason, be careful when removing Nevertheless, we recommend it is not used the laundry from the drum as it is very hot.
-
Page 10: Installation And Connection
INSTALLATION AND CONNECTION SELECTING THE ROOM 10 cm 5 cm 10 cm Ventilation slots and the opening on the front and rear side should always be kept free. Do not install the appliance in a room where there is danger of frost. The room in which the appliance is installed should be adequately ventilated, with temperature between 10°C and 25°C. - Page 11 POSITIONING THE APPLIANCE Positioning the appliance on top of the washing machine by using the vacuum feets or side by side. Dryer can be stand freely on the floor or on a washing machine of the same dimensions – minimum width 517 mm, minimum depth 476 mm. The surface on which the dryer is placed should be clean and level.
- Page 12 Do not place the dryer behind lockable or sliding door or door with a hinge opposite the dryer. Install the dryer in such way that the door can always be freely opened. Never block the cool air opening (see dryer description). Drying machine on top should be placed by at least two persons.
-
Page 13: Installation
INSTALLATION Level the dryer in longitudinal and traverse direction by rotating the adjustable feet which allow levelling by +/- 1 cm. Use key nr. 22 and spirit level. Floor on which the machine is placed must have a concrete base. They must be clean and dry; otherwise, the machine may slide. -
Page 14: Condensate Discharge
CONDENSATE DISCHARGE The moisture from the laundry is extracted in the condenser unit and accumulated in the condensate tank. During the drying process, a control light will warm you of a full condensate tank which has to be emptied. Interruption of the drying cycle due to full condensate tank can be avoided by running the condensate discharge tube found at the back of the appliance directly into a drain. -
Page 15: Electrical Connections
ELECTRICAL CONNECTIONS The dryer should be left to stand still for at least two hours before it is connected to the power mains to allow the system to stabilize. Use the power cord to connect the dryer to the power mains through a power outlet. -
Page 16: Moving And Transport
MOVING AND TRANSPORT If the dryer cannot be transported in the upright position, tilt it to the left side. If the appliance was not transported in compliance with the instructions, the dryer should be left to stand still at least two hours before it is reconnected to the power mains. -
Page 17: Emptying The Steam Generator Tank
EMPTYING THE STEAM GENERATOR TANK (ONLY FOR MODEL WITH STEAM GENERATOR) Before transporting a dryer that has been previously used, the steam generator tank must also be emptied. Otherwise, water from the tank may spill into the dryer interior. Move the dryer approximately 40 cm away from the wall and tilt it backwards. -
Page 18: Ionizer System
IONIZER SYSTEM (CERTAIN MODELS ONLY) Ionizer adds negative ions into the dryer drum, which has a positive effect on the laundry. The fibre will be flexible and your clothes will be tender and easy to iron. The process takes place during the drying programs. STEAM GENERATOR SYSTEM (DEPENDING ON THE MODEL) Care and treatment of your laundry with steam. -
Page 19: Before The First Use
BEFORE THE FIRST USE Open the disconnected dryer by pressing the door on the left side. Clean the dryer drum before using the dryer for the first time. Use a damp cloth and a mild cleaning agent. - Page 20 BEFORE USING THE APPLIANCE FOR THE FIRST TIME (FOR MODEL WITH STEAM GENERATOR) If you select one of the steam programs as the first program to be run with your dryer, first add distilled water to the steam generator tank; the dryer needs the distilled water to generate steam.
- Page 21 FILLING AND REPLENISHING THE STEAM GENERATOR TANK (FOR MODEL WITH STEAM GENERATOR) Remove the condensate tank. Slowly add distilled water to the steam generator tank filter By slowly pouring, you will prevent the water from flowing down the front wall of the appliance. (Steam generator tank is not visible as it is located in the dryer interior;...
-
Page 22: Drying Steps
DRYING STEPS (1 - 6) 1. STEP: CHECK THE TAGS ON YOUR LAUNDRY Normal wash Max. Max. Max. Max. Manual Washing Delicate wash washing washing washing washing washing allowed 95°C 60°C 40°C 30°C Whitening Whitening in cold water Whitening not allowed Dry cleaning Dry cleaning in Perchloret-... - Page 23 2. STEP: PREPARING THE LAUNDRY Sort the laundry by type and thickness of the fabric (see Program Table). Close the buttons and zips, tie any ribbons, and turn the pockets inside out. Place very sensitive clothes in a special-purpose laundry washing bag. The following types of laundry may not be dried in the dryer as this may cause your garments to deform: •...
- Page 24 DRYING IN A BASKET (ONLY WITH SOME MODELS) Prior to first drying remove the basket and any wrappings from the drum. Drying in a basket may be selected only at time defined drying. Mount the basket in the opposite order of the procedure for its removal, but without the transport packaging.
- Page 25 SWITCHING ON THE DRYER Connect the appliance to the power mains by plugging in the power cord. To light up the drum, rotate the program selector dial to any position. LOADING THE DRYER Open the dryer door by pressing it on the left side towards the dryer.
- Page 26 3. STEP: SELECTING A PROGRAM To select a program, rotate the program selector dial (6) to the left or to the right (according to the type of desired level of dryness of the laundry). Model a) with Steam generator Model b) without Steam generator During operation, the dial will not rotate automatically.
- Page 27 PROGRAM TABLE MODEL WITH STEAM GENERATOR Program Max. Laundry Extra functions Dryness levels load 7 kg/ Non-delicate cotton laundry (towels, • Start delay Cotton • Extra dry terry towels, stockinette, T-shirts, 8 kg Ultra • Anticrease extra trousers, kitchen cloths etc.) Storage •...
- Page 28 PROGRAM TABLE MODEL WITHOUT STEAM GENERATOR Program Max. Laundry Extra functions Dryness levels load 7 kg/ Non-delicate cotton laundry (towels, • Air ionizer Cotton • Start delay terry towels, stockinette, T-shirts, 8 kg Ultra • Extra dry trousers, kitchen cloths etc.) Storage •...
- Page 29 4. STEP: ADDITIONAL FUNCTIONS (EXTRA) Activate/deactivate the function by pressing the relevant key (before pressing the START/PAUSE key). Extra dry Each time the key is pressed (three levels), the final level of laundry dryness and drying time will change. Steam (depending on the model), for straightening the creases and refreshing the laundry with steam, only for programs in which steam treatment is possible.
- Page 30 3 3 3 Start delay Use this function to start the drying cycle after a certain amount of time has elapsed. Delay time can be set to up to five hours in 30-minute steps and up to 24 hours in 1-hour steps. The function is activated when the START/PAUSE key is pressed.
- Page 31 SOUND SIGNAL LEVEL Select the acoustic signal loudness by simultaneously pressing a key (5a) and rotating the program selector dial clockwise to the initial position. Each time the key (5a) is pressed, the final loudness level is changed (three levels). Loudness level is indicated on the display unit.
- Page 32 5. STEP: PROGRAM START-UP Press the START/PAUSE key. Start delay time (if selected), or the time remaining until the end of the program and counting down will be indicated on the display unit. Signal lights next to the selected functions will be lit. 6.
- Page 33 CLEANING AND MAINTENANCE The dryer is fitted with a filtering system composed of several filters that prevent any impurity to enter the heat exchanger system. Net filter Filter on the lower side of the door opening Heat pump filter The dryer should never be operated without the filters in place, or with damaged filters as excessive amount of accumulated fibres from the fabric could cause malfunction or failure of the dryer.
- Page 34 CLEANING THE FILTER ON THE LOWER SIDE OF THE DOOR OPENING Before emptying the drum, clean the filter on the lower door opening using your hand or a damp cloth If the filter is clogged and requires washing, remove it from the support bed.
- Page 35 CLEANING THE NET FILTER IN THE DOOR Lift the filter cover. Scrape the filter cover to remove the layer of lint and threads. Close the filter cover. Close the filter cover in the door always carefully not to crush your fingers. If necessary, clean the filter housing and door gasket as well.
- Page 36 CLEANING THE HEAT PUMP FILTER Place an absorbent cloth on the floor in front of the dryer (possible water spill). Open the outer cover (hold the handle on the left side and pull downwards Use the handle to remove the heat pump foam filter.
- Page 37 CLEANING THE STEAM GENERATOR TANK FILTER (FOR MODEL WITH STEAM GENERATOR) Each time you empty the condensate tank, clean the steam generator tank filter as well. The filter is located in the tank housing (visible when the condensate tank is removed). Remove the condensate tank.
- Page 38 EMPTYING THE CONDENSATE TANK Empty the condensate tank after each drying cycle. Remove the condensate tank and turn it. Pour out the water and put the tank back to its place. Pull out the spout for easier emptying (only some models) Water from the condensate tank is not potable.
- Page 39 Use a soft cloth to wipe dry all parts of the dryer. Always disconnect the dryer from the power mains before cleaning. Additional equipment and facilities for maintenance can be seen on: www.pelgrim.com...
- Page 40 INTERRUPTING AND CHANGING THE PROGRAM INTERRUPTIONS CHANGING THE PROGRAM/ FUNCTIONS Interrupting the program process Press the START/PAUSE key and rotate the Press the START/PAUSE key to pause/ program selector dial to the "OFF" position. resume and the program. Select another program/function and press Open door the START/PAUSE key again.
- Page 41 WHAT TO DO...? Disturbances from the environment (e.g. the power grid) may result in various error reports. (see Table on the next page) In such case: • switch off the appliance and wait at least one minute; • switch on the appliance and restart the drying program.
- Page 42 Problem/error Cause What to do ...? The dryer does not work. • No voltage in the power • Check if the power cord plug outlet is correctly inserted into the power outlet. • Check the fuse. There is voltage in the •...
- Page 43 TIPS AND RECOMMENDATIONS FOR DRYING AND ECONOMIC USE OF YOUR DRYER The most economical way of drying is to dry the recommended amount of laundry in each batch (see Program Table). Drying laundry made of particularly delicate fabrics that may be deformed is not recommended.
- Page 44 DISPOSAL Packaging is made of environmentally friendly materials that can be recycled, disposed of, or destroyed without any hazard to the environment. To this end, packaging materials are labelled appropriately. The symbol on the product or its packaging indicates that the product should not be treated as normal household waste.
- Page 45 TYPICAL CONSUMPTION TABLE The table lists the values for remaining moisture, drying time and power consumption for drying of a test batch of laundry with various spinning rpm in the washing machine (with the 'Cottons Standard' program selected). SPK A Residual moisture Drying time Electricity consumption [kWh]...
- Page 48 SP10 CLASS HP PEL en (02-14)
Need help?
Do you have a question about the PWD112WIT and is the answer not in the manual?
Questions and answers