Table of Contents
Advertisement
Quick Links
Advertisement
Table of Contents

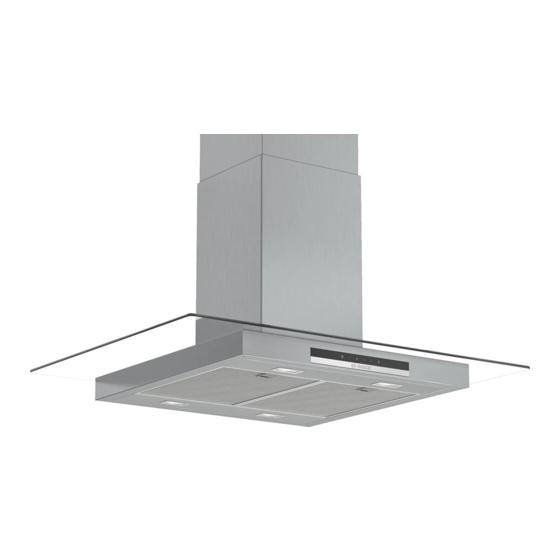
Summary of Contents for Bosch DIG97IM50B
- Page 1 Extractor hood [en] Instructions for installation and use Extractor hood...
-
Page 2: Table Of Contents
This appliance is intended for use up to a Produktinfo Additional information on products, accessories maximum height of 2000 metres above sea and services can be found at bosch and in the level. online shop banyo.co.uk This appliance may be used by children over... -
Page 3: Important Safety Information
Important safety information (Important safety information Warning – Danger of suffocation! I m p o r t a n t s a f e t y i n f o r m a t i o n Packaging material is dangerous to children. Never allow children to play with packaging In any case, consult your responsible Master material. - Page 4 Important safety information Causes of damage Warning – Risk of burns! The accessible parts become very hot when ■ Caution! in operation. Never touch hot parts. Keep Risk of damage due to corrosion. Always children at a safe distance. switch on the appliance while cooking to avoid The appliance becomes hot during Risk of burns! ■...
-
Page 5: Environmental Protection
Environmental protection 7Environmental protection ÇOperating modes E xhaust air mode Y our new appliance is particularly energy-efficient. E n v i r o n m e n t a l p r o t e c t i o n O p e r a t i n g m o d e s Here you can find tips on how to save even more The air which is drawn in is cleaned... -
Page 6: Operating The Appliance
Operating the appliance 1Operating the appliance 2Cleaning and maintenance T hese instructions apply to several appliance variants. Warning – Risk of burns! O p e r a t i n g t h e a p p l i a n c e C l e a n i n g a n d m a i n t e n a n c e It is possible that individual features are described The appliance becomes hot during operation. - Page 7 Cleaning and maintenance Cleaning the metal mesh grease filters Area Cleaning products These instructions apply to several appliance variants. It Stainless steel Hot soapy water: is possible that individual features are described which Clean with a dish cloth and then dry with a do not apply to your appliance.
-
Page 8: Trouble Shooting
Trouble shooting Installing the metal mesh grease filter 3Trouble shooting Warning – Risk of injury! Components inside the appliance may have sharp M alfunctions often have simple explanations. Please T r o u b l e s h o o t i n g edges. -
Page 9: Customer Service
Customer service Accessories 4Customer service (not included in the scope of delivery) W hen calling us, please give the product number (E These instructions apply to several appliance Note: C u s t o m e r s e r v i c e no.) and the production number (FD no.) so that we can models. -
Page 10: Installation Instructions
Installation instructions INSTALLATION INSTRUCTIONS (Important safety I n s t a l l a t i o n i n s t r u c t i o n s I nstallation instructions information R ead these instructions carefully. Only then I m p o r t a n t s a f e t y i n f o r m a t i o n will you be able to operate your appliance safely and correctly. - Page 11 Important safety information Warning – Risk of death! Risk of poisoning from flue gases that are drawn back in. The exhaust air must not be conveyed into a functioning smoke or exhaust gas flue or into a shaft which is used to ventilate installation rooms that contain heating appliances.
-
Page 12: General Information
General information Warning – Risk of electric shock! KGeneral information Components inside the appliance may have ■ sharp edges. These may damage the connecting cable. Do not kink or pinch the E xhaust air mode connecting cable during installation. G e n e r a l i n f o r m a t i o n It must always be possible to disconnect Risk of electric shock! ■... -
Page 13: Installation
Installation Electrical connection 5Installation Warning – Risk of electric shock! Components inside the appliance may have sharp edges. These may damage the connecting cable. Do F itting the upper support frame not kink or pinch the connecting cable during I n s t a l l a t i o n installation. - Page 14 Installation Fitting the lower support frame Fitting the appliance Fasten the upper and lower part of the support frame at Hook the appliance from below into the support the specified total height using 10 screws. frame. Ensure that the mains cable is not trapped. Note: Notes Fasten the appliance to the support frame using...
- Page 15 Installation Attaching the flue duct Warning – Risk of injury! Components inside the appliance may have sharp edges. Wear protective gloves. Separate the flue ducts. To do this, remove the adhesive tape. Remove the protective foil from both sides. Place both parts of the upper flue on the appliance and push together.
- Page 16 *9001359819* 9001359819 980615...


Need help?
Do you have a question about the DIG97IM50B and is the answer not in the manual?
Questions and answers