Table of Contents
Advertisement
Quick Links
Advertisement
Table of Contents

Related Manuals for Hoover HOE3051IN


Summary of Contents for Hoover HOE3051IN
- Page 1 • HOE3161IN • HOT3161BI • HOT3161WI USER INSTRUCTIONS OVENS MANUALE D’ISTRUZIONI FORNO KULLANIM KILAVUZU FIRINLAR POKYNY PRO UŽIVATELE TROUBY CANDY HOOVER GROUP S.R.L. • Via Privata Eden Fumagalli • 20047 Brugherio Milano Italy...
- Page 2 Safety Indications • WARNING: the appliance and accessible parts become hot during use. Be careful not to touch any hot parts. •WARNING: the accessible parts can become hot when the oven is in use. Children must be kept at a safe distance. •WARNING: ensure that the appliance is switched off before replacing the bulb, to avoid the possibility of electric shocks.
- Page 3 having the earth contact connected and in operation. The earth conductor is yellow-green in colour. This operation should be carried out by a suitably qualified professional. In case of incompatibility between the socket and the appliance plug, ask a qualified electrician to substitute the socket with another suitable type.
-
Page 4: Table Of Contents
Summary General Instructions 1.1 Safety indications 1.2 Electrical safety 1.3 Recommendations 1.4 Installation 1.5 Waste management 1.6 Declaration of compliance 2.1 Overview Product Description 2.2 Accessories 2.3 First use Use of the Oven 3.1 Display description 3.2 Cooking modes Oven Cleaning and Maintenance 4.1 General notes on cleaning 4.2 Hydro easy clean function 4.3 Maintenance... -
Page 5: General Instructions
1. General Instructions We thank you for choosing one of our products. For the best results with your oven, you should read this manual carefully and retain it for future reference. Before installing the oven, take note of the serial number so that you can give it to customer service staff if any repairs are required. -
Page 6: Recommendations
NOTE: as the oven could require maintenance work, it is advisable to keep another wall socket available so that the oven can be connected to this if it is removed from the space in which it is installed. The power cable must only be substituted by technical service staff or by technicians with equivalent qualifications. -
Page 7: Product Description
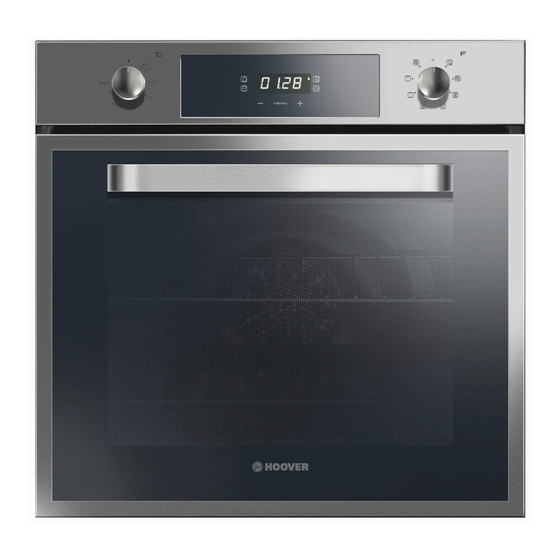
2. Product Description 2.1 Overview 1. Control panel 2. Shelf positions (lateral wire grid if included) 3. Metal grill 4. Drip pan 5. Fan (behind the steel plate) 6. Oven door 2.2 Accessories Drip pan Metal grill Holds baking trays and plates. Collects the residues that drip during the cooking of foods on the grills. -
Page 8: First Use
2.3 First Use PRELIMINARY CLEANING Clean the oven before using for the first time. Wipe over external surfaces with a damp soft cloth. Wash all accessories and wipe inside the oven with a solution of hot water and washing up liquid. Set the empty oven to the maximum temperature and leave on for about 1 hour, this will remove any lingering smells of newness. - Page 9 FUNCTION HOW TO USE HOW TO DEACTIVATE WHAT IT DOES WHY IT IS NEEDED •Child Lock function is •Child Lock function is activated by touching Set deactivated by touching (+) for a minimum of 5 touchpad Set (+) again for s e c o n d s .
-
Page 10: Cooking Modes
3.2 Cooking Modes Function T °C T °C Function (Depends on the oven model) Dial range default LAMP: Turns on the oven light. DEFROST: When the dial is set to this position. The fan circulates air at room 40 ÷ 40 temperature around the frozen food so that it defrosts in a few minutes without the protein content of the food being changed or altered. -
Page 11: Oven Cleaning And Maintenance
4. Oven cleaning and maintenance 4.1 General notes on cleaning The lifecycle of the appliance can be extended through regular cleaning. Wait for the oven to cool before carrying out manual cleaning operations. Never use abrasive detergents, steel wool or sharp objects for cleaning, so as to not irreparably damage the enamelled parts. -
Page 12: Maintenance
4.3 Maintenance REMOVAL AND CLEANING OF THE SIDE RACKS 1. Unscrew the bolt in an anti-clockwise direction. 2. Remove the side racks by pulling them towards you. 3. Clean the side racks in a dishwasher or with a wet sponge and then dry them immediately. 4. -
Page 13: Removal And Cleaning Of The Glass Door
REMOVAL AND CLEANING OF THE GLASS DOOR 1. Open the oven door. 2.3.4. Lock the hinges, remove the screws and remove the upper metal cover by pulling it upwards. 5.6. Remove the glass, carefully extracting it from the oven door (NB: in pyrolytic ovens, also remove the second and third glass (if present)). -
Page 14: Changing The Bulb
CHANGING THE BULB 1. Disconnect the oven from the mains supply. 2. Undo the glass cover, unscrew the bulb and replace it with a new bulb of the same type. 3. Once the defective bulb is replaced, replace the glass cover. 5. - Page 15 INSTALLATION KURULUM INSTALLAZIONE INSTALACE Opening/ Apertura/ Açıklık/ 550 mm Otvor 460 mm x 15 mm 560 mm 580 mm 595 mm 545 mm 595 mm 22 mm If the furniture is equpped with a covarage at the back part, provide an opening for the power supply cable. Se il mobile ha un fondo posteriore, praticare un foro per il passaggio del cavo di alimentazione.
Need help?
Do you have a question about the HOE3051IN and is the answer not in the manual?
Questions and answers