
Related Manuals for Jinko Solar JKS-3-6HLVS-ABI Series


Summary of Contents for Jinko Solar JKS-3-6HLVS-ABI Series
- Page 1 Jinko Solar JKS-3~6HLVS-ABI Series User Manual Jinko Solar Co., Ltd No.1, Jinko Road, Shangrao Economic Development Zone Shangrao City, Jiangxi Province, 334100, P.R. China W:www.jinkosolar.com BESS_AU@Jinkosolar.com...
-
Page 2: Product Description
Brief Introduction 1.1 Preface 1.2 Target Group 1.3 Glossary 1.4 Product Description 1.5 Safety Instructions Safety 2.1 Purpose Use 2.2 Safety Measure 2.3 Symbols Introduction On The JKS Inverter Product Description 3.1 JKS-3~6HLVS-ABI Series Inverter 3.2 Label Explanation 3.3 Size and Weight 3.4 The Advantage of The Unit of JKS Unpacking Installation... - Page 3 Commissioning Product Specification 6.1 Commissioning of JKS 12.1 JKS-3~6HLVS-ABI SeriesMachine 6.2 Operation Modes Product Specification 13.2 DC Input Terminal Parameter 6.3 Display and Button 13.3 Torque 6.4 Communication 6.5 Country Setting 13.4 Appendix Start-Up and Shut Down JKS System Certificate 7.1 Start-Up The JKS System 7.2 Disconnect The JKS System 7.3 Export Limitation and Power Sensor Setting...
-
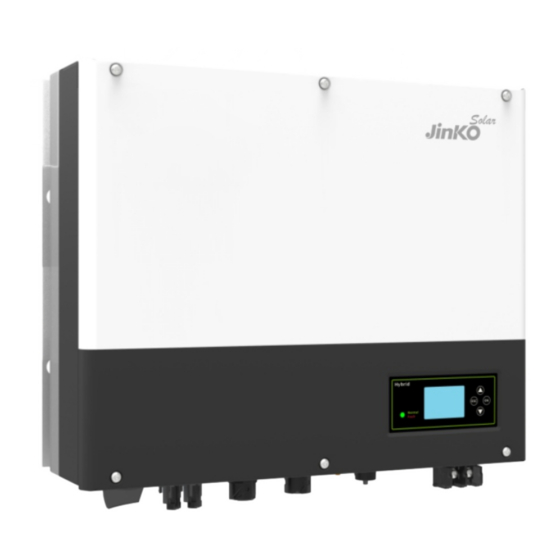
Page 4: Brief Introduction
1.1 Preface BAT is an acronym for lithium or lead acid battery This manual will provide the users who use the JKS-3~6HLVS-ABI Series of Jinko Solar Charging Co., Ltd(Short for Jinko as below) with the detailed product information and the An JKS hybrid inverter charger uses PV energy or grid energy to charge a must be installation instructions. -
Page 5: Safety Instructions
Overview: 1.5 Safety Instructions 1.Please be clear which kind of battery system you want, lithium battery system or lead- acid battery system, if you choose the wrong system, JKS can't work normally. 2.Please read this manual carefully before the installation, the product warranty may be voided if the inverter is not installed according to the instructions of this manual for installation and cause equipment damage. -
Page 6: Purpose Use
Safety 2.1 Purpose Use 2.2 Safety Measure The system chart of JKS: Hybrid Inverter PV Array Battery Risk of high voltage! Relevant operation for professional personnel × Please notice children, disabled, lay people do not close × Supervise and make sure children don't play near the installation position of ×... -
Page 7: Protective Conductor Terminal
Product Description 2.3 Symbols Introduction On The JKS Inverter 3.1 JKS-3~6HLVS-ABI Series Inverter Marks of JKS Symbol Description Mark Description Explanation Caution: Risk of electrical shock! Push-button Operation of display screen and set system Caution : hot surface Green light on JKS run normally Caution: risk of danger Red light on... -
Page 8: Label Explanation
Description of label: 3.2 Label Explanation Hybrid Inverter Model name JKS-6HLVS-ABI PV input data Max. PV voltage 550V d.c.V Hybrid Inverter PV voltage range 120-550 d.c.V Model Name: JKS-6HLVS-ABI PV Isc 16.9 d.c.A*2 PV Input Data Max. PV Voltage 550Vd.c. Max.input current 13.5 d.c.A*2 PV Voltage Range... -
Page 9: Size And Weight
Unpacking 3.3 Size and Weight Please check that the package is in good condition before × unpacking to ensure that there are no transportation or handling damage that may affect the insulation integrity or safety clearance; Failure to do so could result in a safety hazard. ×... -
Page 10: Installation
Installation 5.1 Basic Installation Requirements Item Number Description A.The installation location must be suitable for JKS's weight for a long period time M6 setscrew B.The installation location must conforms with dimension of JKS Battery power terminal C.Do not install the unit on structures constructed of flammable or thermo labile materials screw D. - Page 11 H.Installation position shall not prevent access to the disconnection means. Description I.In order to ensure machine can run normally and easy to operate, please pay attention to provide adequate space for JKS, please refer to below: Press the RJ45 terminal Press battery terminal connector Disconnect PV terminal Unscrew nut...
-
Page 12: Installation Instructions
Installation Instructions 5.3.2 Installation of JKS 1.Project the machine's probably sizes on the wall, the thickness of wall for JKS must be 5.3.1 Attention Layout(Length of Sensors Consider) not less than 60mm. 2.Make sure the drill position, use paper board (installation guide), put the paper board There're three types of sensors for use with JKS. -
Page 13: Grounding Connection
1.Improper operation during the wiring process can cause fatal injury to operator or unrecoverable damage to the inverter. Only qualified personnel can perform the wiring work. 2. Please don't connect PV array positive or negative pole to the ground, it could cause serious damages to the inverter. 3. - Page 14 Similar to the traditional inverter connecting, the input of PV panel energy can be realized by using MC4 PV terminal, the detail steps are as follows: 1.Turn off PV switch. 2.Insert PV panel positive and negative cables into MC4 terminal, then connect positive pole(+) of connection cable to positive pole(+) of PV input connector, connect negative Pressure Seal ring...
- Page 15 Step 3: Push the threaded sleeve into the socket, Tighten up the cap on the terminal. Step5: To remove the AC connector, press the bayonet out of the slot with a small screwdriver and pull it out, or unscrew the threaded sleeve, then pull it out. The Inverter Side Unlock the housing The Inverter Side...
- Page 16 Note: This diagram A is an example for grid system without special requirement on If you want to use on grid only, please refer to chart 5.17 connect electrical wiring connection. × with AC grid and float EPS OUTPUT. If you have no battery now, you can also float BAT terminal, and this ×...
- Page 17 Chart 5.20 Chart 5.22 CT1/MERTER1 Chart 5.21 Chart 5.23 Note:We suggest the distance between battery and JKS no longer than 1.5m, and the Note: power line area must be larger than 5 AWG. 1.The meter and CT can't be installed at same time, please set the sensor model when selecting CT or electricity meter, please refer to section 6.3.3 for details.
- Page 18 During the actual operation, please pay attention to the installation of current transformer as the diagram shows below: ●The position of export limitation CT or Meter must between the Load Inverter & Load and grid. ●Multiple inverter combination is not suitable in Australia. ●The smart meter and CT can be used only up to 2000m altitude.
- Page 19 Mechanics Din rail dimensions 18x118x64 (WxHxD) DIN 43880 Mounting DIN rail 35mm Ingress protection IP51 (indoor) Material self-extinguishing UL94V-0 485B 485A Chart 5.28 Chart 5.27 The following table describes how we can connect EASTRON meter SDM120CT(40mA) to inverter: Meter Pin NO. Description Meter Connection CT-P(White)
- Page 20 5.4.8 Connection of Communication Terminal For Lithium Battery (RS485) 5.4.9 Connection of DRMS terminal (Australia only) When using lithium batteries which need to connect BMS system of the battery, connect When JKS is applied in Australia, the DRMS terminal needs to be connected. The lithium battery terminal (RJ45) steps as follows: connection method is as follows: 1.Unscrew the swivel nut from the cable gland.
- Page 21 5.4.10 Connection of Temperature Probe For Lead-Acid Battery Inverter distribution capable of charging and discharging at the same time. When customer using lead-acid battery, the temperature probe of the lead-acid battery is used to detect the ambient temperature of the lead-acid battery, the battery DRM5 temperature cable of the JKS side connection steps are as follows: 1.Unscrew the swivel nut from the cable gland.
-
Page 22: Dry Contact
5.4.11 Connection of Dry Contact 5.4.12 Grounding Connection JKS must be grounded by cable, the grounding point is showed as follow, and the The dry contact is used to communicate with external devices (such as remote start hot minimum grounding cable wire diameter is 10.0mm . water heater). -
Page 23: Operation Modes
Commissioning Backup mode 6.1 Commissioning of JKS If Grid is lost, system would switch to backup mode (user can disable this function, refer Electrify JKS after all installation of Part5 be finished, here are the steps: to 6.3.4) and AC output is supplied via the EPS LOAD port using energy from PV and 1.Connect PV battery. - Page 24 6.3.2 LED and Button Instruction 6.3 Display and Button 6.3.1 LCD Display Area D E F Chart 6.2 Location Description I J K G L M N Status ESC- button(cancel control) Chart 6.1 Down-button Location Description Enter-button State UP-button Information Notice:...
- Page 25 The A line's concluding information as follow: Note: 1.Standby state: JKS is in standby state. No error in this state, but for other reasons make 1.“Down” control command (if pushing “up” button, command will go back). it in a wait state. 2.Work mode depend on the situation.
- Page 26 1.Under the Basic Para, you can see the setup options below after pressing Enter for 1S: 1.Under the Priority, you can see the setup options below after pressing Enter: If you need to enable AC If battery first is charging function , you choosen need key password Choose...
- Page 27 4.Under the Export Limit, you can see the setup options below after pressing Enter: JKS-WIFI-BI Press “enter” key more Press “enter” than 1 seconds to make sure to make sure WorkMode WorkMode ExportLimit ExportLimit: OFF Press “down” key to the next item WorkMode Range from 00.
-
Page 28: Country Setting
6.5 Country Setting 6.5.3 Switch To Country Table 6.5.1 Section Describes How To Set National Security Specifications Country/region / Country/region / Model display Model display regulations regulations Jinko offers machines in a variety of specifications. For the JKS-3~6HLVS-ABI series, the specifications specified by the national safety regulations are set directly on the LCD, VDE 0126 Danmark-EN50438-1... - Page 29 Reset Region 1.Once the power quality and grid Settings have been selected during debugging, these Settings should be locked and cannot be edited JINKO Country/Area (unless they can be changed by JKS authorization password). Set OK 2.After setting the power quality and power grid, you can check Inverter Australia whether the safety regulations are correct through the mobile APP.
- Page 30 Start-up and Shut Down JKS system Attention of The Installation Environ- ment, Maintenance and Cleaning 7.1 Start-Up The JKS system Users can start-up JKS inverters through following steps: Heat dissipation performance is very important when JKS inverter work under the 1.Connect to PV.
-
Page 31: Fault Removal
Fault removal 9.1 Troubleshooting Method When A Fault Occurs Our products are carried out with strict tests before they take out, if the operation Remark: difficulties in the process of installation, please log on to www.jinkosolar.com website, 1.Prior to removal of any cover for maintenance or repair, turn off the view the Q&A program. - Page 32 Error Message Description Suggestion Error Message Description Suggestion 1.Check the voltage of battery is in the range Grid frequency fault. 1.Check the frequency is in the range of of specification or not. Please refer to the specification or not. Bat Voltage Battery Voltage higher 2.Check the battery connection is right or not High...
-
Page 33: Manufacturer Warranty
Manufacturer Warranty This certificate represents a 10 year warranty for the Jinko products listed below. Error Message Description Suggestion Possession of this certificate validates a standard factory warranty of 10 years from the date of purchase. 1.Restart inverter. Autotest failed Error 123 2.Please contact Jinko service center if restart (only in Italy) -
Page 34: Dismantling The Inverter
Decommissioning 11 11.1 Dismantling The Inverter Liability The liability of Jinko in respect of any defects in its machines shall be limited to 1.Disconnect the storage machine such as mentioned in section 7. compliance with the obligations as stated in these terms and conditions of warranty. 2.Disconnect the upper cable of JKS inverter Maximum liability shall be limited to the sale price of the product. -
Page 35: Product Specification
Product Specification 12.1 JKS-3~6HLVS-ABI Series Inverter Machine Product Specification JKS-3HLVS JKS-3.6HLVS JKS-4HLVS JKS-4.6HLVS JKS-5HLVS JKS-6HLVS Model -ABI -ABI -ABI -ABI -ABI -ABI JKS-4HLVS JKS-4.6HLVS JKS-5HLVS JKS-6HLVS Model JKS-3HLVS JKS-3.6HLVS Specifications -ABI -ABI -ABI -ABI -ABI -ABI Maximum output Specifications 65A(56uS) fault peak curren Input data(DC) Maximum output... - Page 36 JKS-3HLVS JKS-3.6HLVS JKS-4HLVS JKS-4.6HLVS JKS-5HLVS JKS-6HLVS JKS-3HLVS JKS-3.6HLVS JKS-4HLVS JKS-4.6HLVS JKS-5HLVS JKS-6HLVS Model Model -ABI -ABI -ABI -ABI -ABI -ABI -ABI -ABI -ABI -ABI -ABI -ABI Specifications Specifications Euro weighted Self- 97.1% 97.1% 97.2% 97.2% < 10 W efficiency Consumption MPPT efficiency Cooling concept Natural...
- Page 37 The following chart is the inverter machine optional appendix list, if there is a need 3.Inverter communication mode please contact the Jinko Solar Co., Ltd or dealer orders (P/N is only for reference and it 4.Inverter fault information code may be changed).
Need help?
Do you have a question about the JKS-3-6HLVS-ABI Series and is the answer not in the manual?
Questions and answers