Expert Electronics ColibriDDC User Manual
Direct sampling sdr receiver
Hide thumbs
Also See for ColibriDDC:
- User manual (21 pages) ,
- User manual (56 pages) ,
- Getting started (2 pages)

Related Manuals for Expert Electronics ColibriDDC

Summary of Contents for Expert Electronics ColibriDDC
- Page 1 Expert Electronics Direct Sampling SDR receiver ColibriDDC Perfect for remote operation USER MANUAL © 2022 Expert Electronics 1.2.0...
-
Page 3: Table Of Contents
Sound card ..................39 3.3.2.2 Line output ..................39 3.3.3 Display menu ..................40 3.3.3.1 Main window ..................40 3.3.3.2 Spectrum .................... 42 3.3.3.3 Waterfall ..................... 44 3.3.3.4 Grid ....................45 3.3.3.5 Filter ....................45 © 2022 Expert Electronics ColibriDDC User Manual... -
Page 4: Table Of Contents
Other ......................62 5. RECEIVER OPERATIONS Local operation ..................63 Remote operation ..................64 Frequency Tuning ..................65 RIT ......................66 Digital modes operation ................67 6. RESET DEFAULT SETTINGS 7. REGULATORY REQUIREMENTS © 2022 Expert Electronics ColibriDDC User Manual... -
Page 5: Read It First
Features A compact ColibriDDC receiver was designed to work on HF band 0.09 to 55 MHz, for better performance you can add the internal BPF-module (160-10M bands). With the help of external filters, ColibriDDC can effectively operate on frequencies up to 800 MHz. LAN interface allows you to use the receiver remotely via LAN cable and to connect several receivers to one PC at the same time, for various projects. -
Page 6: Supplied Accessories
Before connecting the ColibriDDC to the AC power line, ensure it is grounded. Never use the receiver without grounding! · It is forbidden to connect the ColibriDDC to PC with the voltage presence on it or in the switched condition ·... -
Page 7: Expertsdr2 Software License Agreement
READ IT FIRST · If the ColibriDDC was stored in abnormal climatic conditions, it is recommended to keep it in normal operating temperatures for at least 2 hours before switching on · It is forbidden to use and store the receiver in the dusted rooms and expose it to direct sunlight for a long time ·... -
Page 8: Copyrights
READ IT FIRST New versions of the ColibriDDC receiver software may have different titles from time to time. This license agreement applies to all new versions of the software and may be supplemented and / or amended unilaterally by Expert Electronics. -
Page 9: Hardware Description
READ IT FIRST HARDWARE DESCRIPTION ColibriDDC receiver based on the 4-layered, 110х60 mm PCB. All elements are installed on the top layer of the PCB with SMC assembly. The manufacturing process is fully automatic and is carried out by the high-quality Taiwan manufacturers. All functional units of the receiver are placed on the PCB under the shields. - Page 10 MCU – Microprocessor Control Unit. It is responsible for the data exchange between the receiver and a PC and controls all ColibriDDC systems. · LAN – LAN interface. The data exchange between the ColibriDDC and a PC is carried out via LAN cable with 100 Mbit/sec speed. ·...
-
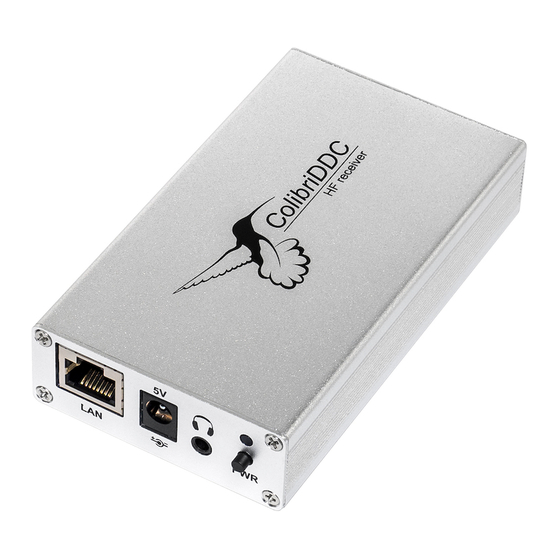
Page 11: Front Panel Description
HARDWARE DESCRIPTION FRONT PANEL DESCRIPTION Name Description LAN connector for connection of the ColibriDDC to the local LAN interface network via the LAN cable. Connector for the unipolar power supply with +5V and max 1 . 2 Power supply connector Receiver has an internal protection from polarity reversal and supply overload. -
Page 12: Rear Panel Description
The antenna should have an SWR level not worse than 1.5:1. If the SWR is worse than 1.5:1, match the cable and the antenna to the desired level. Warning! Always use E-type ferrite beads on antenna and other cables, connected to the receiver! © 2022 Expert Electronics ColibriDDC User Manual... -
Page 13: Grounding
Never use water or gas pipes for grounding! 2.2.3 External Control devices The ColibriDDC receiver allows you to control external devices via seven electronic keys in the EXT CTRL connector. With the keys you can have direct control of antennas, low-noise preamplifiers and external band pass filters. -
Page 14: Connectors Pin-Out
Programmable key with open collector Output Programmable key with open collector Output Input/Outp In reserve. Connection of buttoned detector. Connect to ground. In Input reserve. Programmable key with open collector Output Programmable key with open collector Output © 2022 Expert Electronics ColibriDDC User Manual... - Page 15 Logic inputs of the buttoned detectors are reserved. Warning! While connecting an inductive load (relay, solenoids, fans etc.) to the X1-X8 keys, it's important to connect the protective diode in parallel to the load! © 2022 Expert Electronics ColibriDDC User Manual...
-
Page 16: Expertsdr2 Software Description
All the unmentioned settings cannot cause the fatal damage of the ColibriDDC receiver hardware, so you can safely experiment with them. You're dealing with the software-defined radio – SDR, the main settings and signal processing is held in the software. - Page 17 - enable/disable sound output from the PC's sound card (SC). It doesn't stop sound output from the front panel, it duplicates output from the PC's sound card. - enable/disable button of the frequency memory panel (MEM). © 2022 Expert Electronics ColibriDDC User Manual...
- Page 18 All new profiles will be stacked up to the drop-down menu as a new line. - Options menu described options - About button opens the new window with the info about current version of the ExpertSDR2 software: © 2022 Expert Electronics ColibriDDC User Manual...
-
Page 19: Software Receiver Settings
- volume and balance control menu for the first and second receivers separately (Mixer). When you use only RX1, the Mixer settings are off, but when you enable the RX2, it activates Mixers for both RXs. © 2022 Expert Electronics ColibriDDC User Manual... - Page 20 - IQ-files recording is required for storing the RX bandwidth panorama (IQ). The file is saved to the C:\Users\User_Name\ExpertSDR2\ExpertSDR2\wave\. - turn on the CW Skimmer, more details in CW Skimmer (SKM). - bigger S-meter button (SM). © 2022 Expert Electronics ColibriDDC User Manual...
- Page 21 - AGC sensitivity control slider (Automatic Gain Control on classic transceiver). The adjusted level is saved per band. A panel of mode buttons: - Amplitude Modulation - Synchronous Amplitude Modulation © 2022 Expert Electronics ColibriDDC User Manual...
-
Page 22: Frequency And S-Meter Indicators
(S-meter) and several control buttons. Displaying elements: - VFO B frequency indicator (sub-receiver). Note: · You won’t hear the audio from the VFO B if it is out of the panorama bandwidth. © 2022 Expert Electronics ColibriDDC User Manual... - Page 23 The total stack contains 16 cells. - Band Stacking Memories indicator (VFO A only). Each memory slot has a frequency, mode, and filter settings. Each band has three memory slots associated © 2022 Expert Electronics ColibriDDC User Manual...
-
Page 24: Dsp Control Panel
- In the drop-down menu, you can set the frequency offset in Hz. Reset - resets the offset value to zero (more details in - AGC presets menu. In the drop-down menu, you can select the receiver's AGC preset: © 2022 Expert Electronics ColibriDDC User Manual... - Page 25 NB1 and NB2 Noise Blankers can be used simultaneously. - enable Automatic Notch Filter for adaptive rejection of the narrowband interference in the receiving band (interference, carrier signals, CW signals, etc.). Note: © 2022 Expert Electronics ColibriDDC User Manual...
- Page 26 - WFM mode (50 – 310 kHz); - DRM mode (has one fixed bandwidth 10 kHz); - user can adjust the RX filter bandwidth by himself (available at any modulation type except DRM). © 2022 Expert Electronics ColibriDDC User Manual...
-
Page 27: Panorama Description
If you move the mouse cursor over the vertical scale a hand will appear. Press and hold the right mouse button, then move it up/down to change the dBm scaling or press and hold the left mouse button, then move it up/down to change the spectrum level. © 2022 Expert Electronics ColibriDDC User Manual... - Page 28 There are two ways to change the Zoom position: 1. Press and hold the left mouse button on the Zoom marker and drag it left/right, 2. Click the mouse wheel on the frequency scale. © 2022 Expert Electronics ColibriDDC User Manual...
-
Page 29: Waterfall
The status bar displays the following information (from left to right): · ExpertSDR2 window size in pixels. · CPU load in percent. · Coordinated Universal Time (UTC). · Current date and Local Time. © 2022 Expert Electronics ColibriDDC User Manual... -
Page 30: Options
In the Device menu, you can find software functions of the signal processing and hardware settings. Device – device type menu. Shows that the ExpertSDR2 software works in the ColibriDDC mode. ColibriDDC – here you can find the serial number of the receiver. -
Page 31: Vac
3.3.1.1 VAC If the ExpertSDR2 and digital modes software run on the same computer, they can be connected via a virtual audio cable without wires and sound cards. © 2022 Expert Electronics ColibriDDC User Manual... -
Page 32: Dsp
There you can find fine AGC settings. AGC settings are divided by the processing speed on Long, Slow, Med, Fast and User. Each settings type has its own tab and differs from others in terms of Attack, Decay and Hang time. © 2022 Expert Electronics ColibriDDC User Manual... - Page 33 Each AGC tab has a Default button. Digital processing filter's settings. There you can find fine the settings of the receiver's digital processing filters. DSP functions clear the signal from abnormal noises and crosstalk. These are the standard functions: © 2022 Expert Electronics ColibriDDC User Manual...
- Page 34 The higher the receiver's filter taps value, the more rectangular the filter's shape, but it also increases the signal pass delay. That is why the user should find the best settings for himself, between acceptable filter slopes steepness and signal delay. Optimal filter taps are set by default. © 2022 Expert Electronics ColibriDDC User Manual...
- Page 35 Default - press to return settings to the default state. Each settings category has the Default button. Press the Default button if you set wrong values and don't like the result. © 2022 Expert Electronics ColibriDDC User Manual...
-
Page 36: Ext Ctrl
Here you may set a new IP address and access port of the receiver. User can change these settings according to His LAN settings, but make sure that the required IP address is available. © 2022 Expert Electronics ColibriDDC User Manual... - Page 37 DHCP server – receiver works in the DHCP server mode and can assign two IP addresses at max. DHCP client - receiver works in the DHCP client mode, i.e. its IP address depends on the network where the receiver is connected. © 2022 Expert Electronics ColibriDDC User Manual...
-
Page 38: Sound Card Menu
The audio signal output is carried out via the PHONES connector on the front panel of the receiver. If you use the receiver remotely, you may use PC’s sound card for the audio signal output, which will be simultaneous with audio output from the receiver. © 2022 Expert Electronics ColibriDDC User Manual... -
Page 39: Sound Card
Line output volume has a constant max value and cannot be changed by the operator. · As a rule sound output via the Line output is used for recording communications in contests and other purposes. © 2022 Expert Electronics ColibriDDC User Manual... -
Page 40: Display Menu
"Spectrum" tab · "Waterfall" tab · "Grid" tab · "Filter" tab · "Background" tab 3.3.3.1 Main window On the Main window tab, you can see the settings of the receiver's software main window display. © 2022 Expert Electronics ColibriDDC User Manual... - Page 41 · Display 4K – display mode for 4K monitors. · Amateur region - Amateur region menu. Select the region you are currently in, in the Amateur region menu. © 2022 Expert Electronics ColibriDDC User Manual...
-
Page 42: Spectrum
· Averaging num - A number of samples for averaging. Set the required amount of samples for averaging. The bigger a number of samples, the slower the spectrum will change on the graph. © 2022 Expert Electronics ColibriDDC User Manual... - Page 43 VFOA and VFOB near the cursor. · Auto hide cursor - Automatically hide the cursor from the spectrum scope. Set the Auto hide cursor checkbox to let the cursor disappear after idle 2 seconds. © 2022 Expert Electronics ColibriDDC User Manual...
-
Page 44: Waterfall
Offset bottom - Offset input box by the bottom dB level relatively to signals level. Set the offset in the Offset bottom box to determine the minimum brightness relatively to the min signals' levels. © 2022 Expert Electronics ColibriDDC User Manual... -
Page 45: Grid
Transparency - Grid transparency slider. Set the required grid transparency by moving the slider. 3.3.3.5 Filter On the Filter tab you can set the required color of filters and the necessity to display the additional text information. © 2022 Expert Electronics ColibriDDC User Manual... -
Page 46: Background
Choose the required RIX active zone color from the palette. · Transparency - RIX zone transparency slider. Set the required RIX zone transparency. 3.3.3.6 Background On the Background tab you can see the spectrum scope background settings. © 2022 Expert Electronics ColibriDDC User Manual... - Page 47 Choose the required top gradient color from the palette. · Color bottom – Bottom gradient color of the background. Choose the required bottom gradient color from the palette. In the Image menu available settings are: © 2022 Expert Electronics ColibriDDC User Manual...
-
Page 48: Cat Menu
CAT-protocol. There are two ways to use the ColibriDDC with an external transceiver: 3.3.4.1 ECATv1 ExpertSDR2 software has the ECATv1 protocol, use it to synchronize the ColibriDDC and your transceiver via RigSync software. -
Page 49: Omnirig
Using the OmniRig software you can send a limited set of control commands. · Available control commands: · Set VFO frequency, if no VFOB in the CAT protocol; · Set VFO A frequency; · Set VFO B frequency; · Enable receiver's RIT offset; © 2022 Expert Electronics ColibriDDC User Manual... -
Page 50: Panel Menu
OmniRig RX1 Status - RX1 receiver and OmniRig connection status. OmniRig RX2 Status - RX2 receiver and OmniRig connection status. 3.3.5 Panel menu In the Panel menu you can see the settings of the E-Coder control panel. © 2022 Expert Electronics ColibriDDC User Manual... - Page 51 Note: · If there are several E-Coder panels connected to the PC with ColibriDDC, you'll see several tabs E-Coder 1, E-Coder 2 etc. with identical settings for each panel, in the Panel menu. In the left part of the menu you can see the schematic picture of the E-Coder panel with buttons and knobs.
- Page 52 Listen RX1 in right channel, RX2 in left - listen to the RX1 in the right channel and RX2 in the left channel. Similar settings were added for VFOs: Listen both VFO A/B - default settings, both VFOs have equal volume in both channels. © 2022 Expert Electronics ColibriDDC User Manual...
- Page 53 RIT Offset – adjusting the RIT Offset. In the right part of the menu you can see the main panel settings: Enable - enable E-Coder panel control. Use IF - frequency tuning by moving the filter over the panorama. © 2022 Expert Electronics ColibriDDC User Manual...
-
Page 54: Features Menu
In the Features menu you can set other programs to be launched along with the ExpertSDR2. Enable checkbox - Enable autorun. Set the Enable checkbox in front of the corresponding program in the list. © 2022 Expert Electronics ColibriDDC User Manual... -
Page 55: Expertsync Menu
ExpertSync menu In the ExpertSync menu you can see the network synchronization settings between the ColibriDDC and other Expert Electronics devices. This interface allows you to synchronize the tuning frequency and mode type between several Expert Electronics devices via the ExpertSync software (you may download it from here). -
Page 56: Cw Skimmer Menu
PC. · Port - Data exchange port. Enter the exchange port number in the Port input box. · Callsign - Callsign input box. Enter your callsign if the server requires it. © 2022 Expert Electronics ColibriDDC User Manual... -
Page 57: Shortcuts Menu
In the Shortcuts menu, you can see the shortcut key combinations settings. With the key combinations, you can control the receiver from your keyboard. Note: · Shortcuts will be active only if the receiver's software window is in focus. © 2022 Expert Electronics ColibriDDC User Manual... -
Page 58: Iq Recorder Menu
3.3.10 IQ Recorder menu In the IQ Recorder menu, you can select a folder where you will store IQ recordings. This is the first step on a way to a complete IQ Player. © 2022 Expert Electronics ColibriDDC User Manual... -
Page 59: Tci Menu
In the TCI menu, you can select a port for TCI connection of ExpertSDR2 with a third-party software, with TCI support, and set the Enable checkbox. TCI - Transceiver Control Interface was developed by Expert Electronics company, for simple and still advanced connection between the ExpertSDR2 and third-party software. TCI has all... - Page 60 Add button, it’s done. To delete a server connection, select it and press the Delete button on your keyboard. Note: · Don’t forget to enable the Show spots checkbox in the Spectrum tab © 2022 Expert Electronics ColibriDDC User Manual...
-
Page 61: Technical Characteristics
16 +/- 2.5 (20 +/- 0.5 in older version) Local attenuator, dB -20 dB; 0 dB ColibriDDC has an LPF for HF bands: 0-60 MHz (Chebyshev I - 7 Order) Optional HF octave BPF parameters: 1.73-2.6 MHz (Chebyshev I - 7 Order) 2.6-4.3 MHz (Chebyshev I - 3 Order) -
Page 62: Other
Dimensions L x W x H, cm (inches) (4.41 x 2.52 x 0.94) 0.16 Weight, kg (lbs) (0.66 lbs) DC voltage range, V 4.5...5.5 Current consumption, A 0.64 Maximum power consumption, W 0...+50 Operating temperature, °C (°F) (+32…+122) © 2022 Expert Electronics ColibriDDC User Manual... -
Page 63: Receiver Operations
Antenna, tuned on the HAM bands, has to have impedance around 50 Ohm for those bands, where you plan to operate. ColibriDDC receiver doesn’t require any special drivers. All data exchange between the receiver and PC is carried out via the LAN interface. -
Page 64: Remote Operation
Launch the ExpertSDR2 software and press the Options button. · Set up your Device settings and press Search button, you'll see the window with an available ColibriDDC receiver, press the Use button in front of it, save the settings. · Press the Start button in the ExpertSDR2. -
Page 65: Frequency Tuning
Left button – increase value; right button – decrease value; wheel – all digits on the right become zero. · Rotate mouse wheel on the digit of the frequency indicator. Rotate forward – increase value; rotate backward – decrease the value. © 2022 Expert Electronics ColibriDDC User Manual... -
Page 66: Rit
RX filter. Note: · If the RIT offset wasn't reset, when you disable the RIT its state will be saved. When you activate the RIT next time, the offset will equal the previous value. © 2022 Expert Electronics ColibriDDC User Manual... -
Page 67: Digital Modes Operation
RECEIVER OPERATIONS Digital modes operation The ColibriDDC receiver allows you to operate in digital modes with the help of the certain programs (which are not provided by the manufacturer). Note: · More information about the ColibriDDC operation in digital modes will be explained in the new version of the User Manual. -
Page 68: Reset Default Settings
When the receiver is switched on, the RST button won't be active. Pressing it doesn't have any effect. Warning! Do not switch off the receiver with the PWR button while LED is blinking. © 2022 Expert Electronics ColibriDDC User Manual... -
Page 69: Regulatory Requirements
RESET DEFAULT SETTINGS REGULATORY REQUIREMENTS We Expert Electronics LLC declare that ColibriDDC receiver has been tested in accordance to essential protection requirements of Council Directive 2014/30/EU and found the test results indeed meet the limitation of the relevant test standards listed below: EN 301 489-1: V 1.9.2 (2011)
Need help?
Do you have a question about the ColibriDDC and is the answer not in the manual?
Questions and answers