Chapters
Table of Contents

Related Manuals for Electrolux EWF1142Q7WB


Summary of Contents for Electrolux EWF1142Q7WB
- Page 1 EWF9042Q7WB EWF1042Q7WB EWF1142Q7WB Washing Machine User Manual Mesin Basuh Manual Pengguna 洗衣机 用户手册 WI-FI Connectivity Setup Persediaan Kesambungan Wi-Fi Wi-Fi 连接设置...
-
Page 2: Table Of Contents
Products must be used, installed and operated in accordance with this manual. You may not be able to claim on the Electrolux manufacturer’s warranty in the event that your product fault is due to failure to adhere to this manual. - Page 3 11.5 Electrical Connection ....................39 ENVIRONMENT CONCERNS 12.1 Packaging Materials ....................39 12.2 Old Machine ....................... 39 12.3 Ecological Hints ......................39 WI-FI CONNECTIVITY SETUP 13.1 Download and installing and configuring “Electrolux Life” App*........40 13.2 Remote Start ......................41...
-
Page 4: Safety Information
SAFETY INFORMATION 1.1 Conditions Of Use This appliance is intended to be used in household and similar applications such as: staff kitchen areas in shops, offices and other working environtment; farm houses; by clients in hotels, motels, and other residential type environments;... -
Page 5: Child Safety
ENGLISH 1.2 Child Safety This washing machine is not intended for use by young children or infirm persons without supervision. Young children should be supervised to ensure that they do not play with the appliance. The packaging components (e.g. plastic film, polystyrene) can be dangerous to children - danger of suffocation! Keep them out of children’s reach. -
Page 6: Installation
Under no circumstances should you For safety reasons do not use attempt to repair the machine double adaptors, extension yourself. Repairs carried out by cords and multi-plug adapters. inexperienced persons may cause injury or serious malfunctioning. Contact your local Service Centre. -
Page 7: Product Description
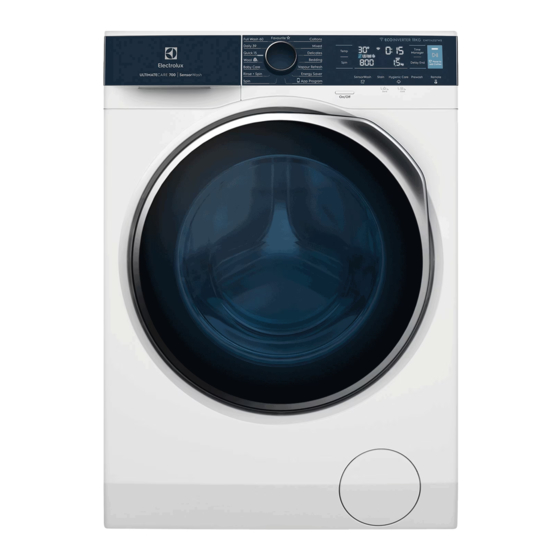
ENGLISH PRODUCT DESCRIPTION 2.1 Parts Worktop Detergent/Softener Control Panel Dispenser (see page 10) (see page 18) Cabinet Door Drain Pump Filter Front Panel (see page 26) Level Adjustment Feet (Front) Mains Cable Transit Bolts Transit Bolts & Hose Support Water Inlet Hose (see page 37) Water Drain Hose (see page 37) -
Page 8: Accessories
Detergent/Softener Dispenser Transit Bolt (when remove) (For more informations, see page 18, 25) Prewash Main Wash Softener Door (when open) (for more informations, see page 18) Transit bolts must be removed Drum Lifter before using the appliance. Stainless 2.2 Accessories... -
Page 9: Load Sensor
ENGLISH 2.3 Load Sensor This machine has “Load Sensing Device” which shows how much load you put in the machine and maximum load recommended for selected wash program. The display shows these indicators when the door is open. The weight shown on display is an approximate weight only. -
Page 10: Control Panel
3. CONTROL PANEL 3.1 Control Panel Description Control Panel Temp touchpad Program knob On/Off button Display SensorWash touchapd Delay End touchpad Stain touchpad Time Manager touchpad Hygienic Care touchpad Pause to add Clothes option Prewash touchpad Start/Pause touchpad Remote touchpad... -
Page 11: Program Chart
ENGLISH 3.2 Program Chart Program; Max. Spin Max. Load Type of load and soil level Temperature Speed (Dry Clothes) range Cottons Max. White and coloured cotton. (Adjust wash 1400 rpm Cold to 90°C time according to soil level. See Time Manager table on page 14) Mixed 1200 rpm... - Page 12 Program; Max. Spin Max. Load Type of load and soil level Temperature Speed (Dry Clothes) range Quick 15 1200 rpm 1.5 kg Lightly soiled synthetics or mixed fabrics. Cold to 30°C Daily 39 1200 rpm 5.5 kg Daily wear coloured cotton clothes such as 30°C to 40°C...
-
Page 13: Program Options Compatibility
ENGLISH 3.3 Program Options Compatibility Option Program Hygienic Rinse Time Delay Sensor Stain Prewash Care Spin Hold Manager Wash Cottons ■ ■ ■ ■ ■ ■ ■ ■ Mixed ■ ■ ■ ■ ■ ■ ■ ■ Delicates ■ ■ ■... - Page 14 Time Manager If you wish to modify or cancel Delay End option after starting the program, follow This option allows you to adjust the wash the steps below: time. Press this touchpad repeatedly to – set the washing machine to PAUSE by decrease or increase the wash time pressing “Start/Pause”...
- Page 15 ENGLISH Hygienic Care ( ) Touchpad Stain Touchpad Select this option to add approximately Press this touchpad to add the stain 30 minutes of tumbling in vapour after phase to a program. The indicator of this the rinse cycle. The indicator of this option comes on.
-
Page 16: Settings
3.5 Settings To deactivate the function, press and hold “Hygienic Care” touchpad about Save Favourite ( ) Program 2 seconds until the icon “ ” goes off. This function remains enabled Program settings that are frequently used even after the appliance is can be saved (e.g. -
Page 17: Start/Pause ( ) And Add Clothes ( ) Touchpad
ENGLISH 3.6 Start/Pause ( ) and Add Clothes ( Add Clothes ( ) Touchpad You can only add clothes when the icon “ ” shown on the This touchpad has 2 functions: display. Start/Pause ( To add clothes: Pressing the “Start/Pause” After you have selected the desired touchpad to pause the program. -
Page 18: Daily Use
DAILY USE 5.1 Loading The Laundry 5.2 Using Detergent And Additives Turn the water tap on. IMPORTANT: Please read Connect the main plug to the main “Detergents Type and Quantity of socket. Detergent”on page 23 before use. Press the On/Off button to turn on the Detergent Dispenser Drawer washing machine. -
Page 19: Options Setting
ENGLISH NOTE: When you use the NOTE liquid detergent The softener amount used must Do not use gelatinous or thick not exceed the “MAX” mark in the liquid detergents. drawer. Do not put more liquid than the If you use thick softeners it is maximum level. -
Page 20: Starting A Cycle ( )
5.4 Starting A Cycle ( 5.7 Changing The Options To start a program, press the Start/Pause It may be possible to change some of the touchpad. The corresponding pilot light options after a wash program has started. will stop flashing and a default program Press the touchpad Start/Pause. -
Page 21: At The End Of The Program
ENGLISH 5.9 At The End Of The To drain the water: Program Press the “Start/Pause ” touchpad. The appliance drains the water and − The appliance stops automatically. spins with the maximum spin speed − for selected program. The acoustic signal will operate. −... -
Page 22: Washing Hints
WASHING HINTS 6.1 Sorting The Laundry Wash bras, pantyhose and other delicates in a Follow the wash code symbols on each mesh laundry bag, garment label and the manufacturer’s which you can purchase washing instructions. Sort the laundry as from your supermarket. -
Page 23: Detergents Type And Quantity Of Detergent
ENGLISH Oil based paint: moisten with benzine Low sudsing detergents designed for stain remover, lay the garment on a soft front load washing machines are labelled cloth and dab the stain; treat several “Front Loading”, “high efficiency”, “HE”, times. such as Cold Power for Front Loaders or “Matic”. -
Page 24: International Wash Code Symbols
Not enough detergent causes: the washload to turn grey, greasy clothes. Too much detergent causes: oversudsing, reduced washing effect, inadequate rinsing. Use less detergent if: you are washing a small load, the laundry is lightly soiled, large amounts of foam during washing. -
Page 25: Care And Cleaning
ENGLISH CARE AND CLEANING 8.5 Cleaning The Dispenser WARNING! Drawer You must DISCONNECT the appliance from the electricity supply, before you can The washing powder and additive carry out any cleaning or maintenance dispenser drawer should be cleaned work. regularly. Remove the drawer by pressing the 8.1 External Cleaning catch downwards and by pulling it out. -
Page 26: Cleaning The Drawer Recess
Flush it out under a tap to remove any WARNING! traces of accumulated powder. 1. Disconnect the mains plug from the mains socket. 2. Do not remove the filter while the appliance is operating. Do not clean the drain pump if the water in the appliance is hot. - Page 27 ENGLISH 3. When the container is full of water, 5. Remove fluff and objects from the put the drainage duct back again and pump (if there are any). empty the container. Do step 2, 3 again and again until no more water flows out from the drain pump.
-
Page 28: Cleaning The Water Inlet Filter
Put the filter back into the housing Clean the filter in the inlet hose with with exposed section facing up. a stiff brush. Make sure that you correctly tighten the filter to prevent leakages. Guide Remove the inlet hose behind the appliance. -
Page 29: Frost Precautions
ENGLISH 8.9 Frost Precautions If the appliance is installed in an area where the temperature can be less than 0 °C, remove the remaining water from the inlet hose and the drain pump. Emergency Drain Disconnect the main plug from the main socket. -
Page 30: Troubleshooting
TROUBLESHOOTING 9.1 Possible Failures Alarm Code: Certain problems are due to lack of The appliance does not fill with water simple maintenance or oversights, properly. which can be solved easily without The appliance does not drain the water. calling out an engineer. Before... - Page 31 ENGLISH Malfunction Possible cause Solution The drain hose is squashed or Check the drain hose kinked. (Error code: connection. The drain pump is clogged. Clean the drain filter. Machine (Error code: does not empty and/or The option “Rinse Hold” has been Press Start/Pause does not selected.
- Page 32 Malfunction Possible cause Solution The laundry is not evenly distributed in Pause the machine and the drum. redistribute laundry manually. Machine vibrates or There is very little laundry in the drum. Load more laundry. is noisy: Unstable floors eg. wooden floors.
-
Page 33: Emergency Door Opening
ENGLISH If you are unable to identify or solve the problem, contact our service centre. Before calling service centre, make a note of the model, serial number and purchase date of your machine: the Service Centre will require this information. 9.2 Emergency Door Opening In case of power failure or appliance failure, the appliance door remains... -
Page 34: Technical Data
220 - 240 V~ / 50 Hz Power supply (Voltage / Frequency) : 2000 W EWF9042Q7WB / EWF1042Q7WB Total power absorbed : 2100 W EWF1142Q7WB Water supply pressure (Maximum / Minimum) 0.8 MPa / 0.05 MPa Program Max. Capacity Cottons Max. - Page 35 ENGLISH Remove the carton box. Remove the Put one of the polystyrene packaging polystyrene packaging materials. elements on the floor behind the appliance. Carefully put down the Remove the plastic bag which cover appliance with the rear side on it. the machine.
-
Page 36: Positioning
Remove the three transit bolts. 9. Pull out the plastic spacers. 11.2 Positioning It is important that your washing machine stands firm and leveled on the floor to ensure correct operation. The appliance must not be installed behind a lockable... -
Page 37: Water Inlet
ENGLISH 11.3 Water Inlet Loosen or tighten the feet to adjust the level. A correct adjustment of the Connect the water inlet hose to a tap appliance level prevents vibration, noise with 3/4” BSP thread. and the movement of the appliance when in operation. - Page 38 In a sink, drain pipe branch. Fitting Hose Guide This branch must be above the trap so that the bend is at least 60 cm above Pull apart to the ground. Hose bend insert hose. Guide hose Max. 90 cm pull hose Min.
-
Page 39: Electrical Connection
ENGLISH 11.5 Electrical Connection This machine is designed to operate CAUTION! on a 220 - 240 V, single-phase, 50 Hz Connect the machine to an supply. earthed socket outlet. “An incorrect power supply may void The manufacturer declines any your warranty.” responsibility for damage or injury through failure to comply Check that your domestic electrical... -
Page 40: Wi-Fi Connectivity Setup
Terms and Conditions software and robotics communities to the and Electrolux’s Privacy Policy in the App to use development project. To access the source the connected features of the laundry appliance. -
Page 41: Remote Start
– (it may take a few moments to appear). on again, the wireless connection is Tap the home button to exit your phone automatically off. settings and then return to the Electrolux Life App. Wait for confirmation of connection which 13.2... - Page 42 KAMI MEMIKIRKAN TENTANG DIRI ANDA Terima kasih kerana membeli perkakas Electrolux. Anda telah memilih produk yang memba- wa bersamanya pengalaman profesional dan inovasi yang telah sudah berkembang sejak berdekad-dekad lamanya. Pintar dan bergaya, ia telah direka bentuk dengan memikirkan tentang diri anda.
-
Page 43: Melayu
....................79 KEPRIHATINAN ALAM SEKITAR 12.1 Bahan Pembungkusan ....................79 12.2 Mesin Lama ....................... 79 12.3 Petua Ekologi ......................79 PERSEDIAAN PENYAMBUNGAN Wi-Fi 13.1 Muat turun dan pasang Aplikasi “Electrolux Life” ............80 13.2 Remote Start (Mula Jarak Jauh) ................82... -
Page 44: Maklumat Keselamatan
MAKLUMAT KESELAMATAN 1.1 Syarat-Syarat Penggunaan Perkakas ini bertujuan untuk digunakan dalam aplikasi rumah dan aplikasi yang serupa seperti: kawasan dapur kakitangan di kedai-kedai, pejabat-pejabat dan lain-lain persekitaran kerja rumah-rumah ladang; rumah ladang; oleh pelanggan di hotel, motel, dan lain-lain jenis persekitaran kediaman;... -
Page 45: Keselamatan Am
MELAYU Komponen pembungkusan (cth. lapik plastik, polistirena) boleh membahayakan kanak-kanak - awas sesak nafas! Jauhkan daripada capaian kanak-kanak. Simpan semua detergen di tempat yang selamat dan jauh daripada capaian kanak-kanak. Pastikan kanak-kanak atau haiwan peliharaan tidak memanjat masuk ke dalam dram. Mesin basuh ini disediakan dengan fungsi keselamatan kanak-kanak ( ) untuk menghindari kanak-kanak daripa-... -
Page 46: Pemasangan
1.4 Pemasangan 1.5 Penggunaan Perkakas ini berat. Hendaklah Basuh fabrik yang ditujukan untuk berjaga-jaga semasa memindahkann- dibasuh dengan mesin sahaja. Arahan di label pakaian hendaklah dipatuhi. Semasa perkakas dikeluarkan daripada bungkusannya, periksa Jangan memuatkan perkakas secara untuk pastikan tiada kerosakan. Jika berlebihan. -
Page 47: Huraian Produk
MELAYU HURAIAN PRODUK 2.1 Bahagian Permukaan atas mesin Tempat Letak Panel Kawalan Detergen/Pelembut (lihat halaman 50) Fabrik (lihat halaman 58) Pintu Kabinet Penapis Pam Alir Panel Depan (lihat halaman 66) Pelaras Kaki (Hadapan) Kabel Wayar Utama Bolt Pangangkutan Bolt Pangangkutan & Pemegang Hos Hos Saliran Air Masuk (lihat halaman 77) -
Page 48: Aksesori
Tempat Letak Detergen/Pelembut Bolt Pangangkutan (apabila dialih keluar) Fabrik (lihat halaman 58, 65) Ruang Prewash Ruang Main Wash Ruang Softener Pintu (apabila dibuka) (lihat halaman 58) Semua bolt pengangkutan (3 alat) Pengangkat mesti dikeluarkan sebelum Dram menggunakan perkakas. Dram Basuhan 2.2 Aksesori... -
Page 49: Load Sensor (Sensor Berat)
MELAYU Load Sensor (Sensor Berat) Mesin ini memiliki “Load Sensing Device” yang menunjukkan berapa banyak muatan yang anda letak di dalam mesin dan muatan maksimum yang disarankan untuk program cucian yang dipilih. Paparan menunjukkan penunjuk ini apabila pintu dibuka. Berat yang dipaparkan pada paparan ialah berat anggaran sahaja. -
Page 50: Panel Kawalan 3.1 Penerangan Panel Kawalan
3. PANEL KONTROL 3.1 Deskripsi Panel Kontrol Tombol Program Pad Sentuh Lara Suhu Butang On/Off (Hidup/Mati) Paparan Pad Sentuh SensorWash Pilihan Tambah Pakaian Pad Sentuh Kotoran Pad Sentuh Pengurus Masa Pad Sentuh Wap Pad Sentuh Tunda Tamat Pad Sentuh Prabasuh... -
Page 51: Carta Program
MELAYU 3.2 Carta Program Program; Max. Muatan Jenis muatan dan tahap kotoran Suhu Kelajuan Maks. Putaran (Pakaian kering) Cottons 1400 rpm Max. Kapas putih dan berwarna. (Laraskan masa (Kapas); mencuci mengikut tahap kotoran. Lihat jadual Sejuk ke 90°C di halaman 54) Mixed 1200 rpm 4 kg Sintetik atau campuran item fabrik. - Page 52 Program; Max. Muatan Jenis muatan dan tahap kotoran Suhu Kelajuan Maks. Putaran (Pakaian kering) Wool 1200 rpm 2 kg Program istimewa yang diuji untuk cucian (Kain wul); pakaian wul yang berlabel “Wul baru tulen, Sejuk ke 40°C tidak mengecut, label basuhan mesin” label.
-
Page 53: Pilihan Program Keserasian
MELAYU 3.3 Pilihan Program Keserasian Pilihan Program Hygienic Rinse Time Delay Sensor Stain Prewash Care Spin Hold Manager Wash Cottons ■ ■ ■ ■ ■ ■ ■ ■ Mixed ■ ■ ■ ■ ■ ■ ■ ■ Delicates ■ ■ ■... - Page 54 Pad Sentuh Pengurus Masa Selepas memilih masa Tunda Akhir (Delay End), tekan pad sentuh Mula/Jeda (Time Manager) (Start/Pause) untuk memulakan program. Pilihan ini membolehkan anda melaras- Kemudian mesin akan mengira detik dan kan masa basuh. Tekan pad sentuh ini...
- Page 55 MELAYU Pad Sentuh Kotoran (Stain) Masa pertama yang dipaparkan pada panel kawalan menunjukkan Tekan pad sentuh ini untuk menambah masa yang diperlukan untuk tahap fasa kotoran pada program. Penunjuk kotoran maksimum. untuk pilihan ini akan menyala. 2) Sensor konduktiviti kedua akan memerik- Gunakan fungsi ini untuk kain cucian sa jumlah residu detergen selepas dibilas dengan kotoran yang sukar ditanggalkan.
-
Page 56: Tetapan
3.5 Tetapan Jika anda menekan sebarang pad sentuh sewaktu Kunci Keselamatan Kanak-kanak Menyimpan Program Kegema- diaktifkan, ikon “ ” akan ran ( berkelip 3 kali pada paparan disertai dengan bunyi pembaz. Tetapan program yang sering digunakan boleh disimpan (cth. Cotton, 60°C, 1200... -
Page 57: Pad Sentuh Mula/Jeda ( ) Dan Tambah Pakaian ( )
MELAYU 3.6 Pad sentuh Mula/Jeda ( dan Tambah Pakaian ( Tambah Pakaian ( Pad sentuh ini mempunyai 2 fungsi: Mula/Jeda ( Anda hanya boleh menambah pakaian apabila ikon “ ” Setelah anda memilih program dan dipaparkan pada paparan. pilihan yang diingini, tekan pad sentuh ini untuk memulakan mesin. -
Page 58: Penggunaan Harian
PENGGUNAAN HARIAN 5.1 Memuat Cucian Mengguna Detergen dan Perapi Tambahan Buka bekalan arus air. PENTING: Sila baca arahan Pasangkan palam utama kepada soket utama. bahan pencuci di muka surat 63 sebelum penggunaan. Tekan butang On/Off untuk meng- hidupkan mesin basuh. Putar dail... -
Page 59: Tetapan Opsyen
MELAYU Apabila anda menggunakan NOTA detergen cecair: Jumlah yang digunakan mesti tidak Jangan gunakan detergen cecair melebihi tanda “MAX” di dalam petak. yang bergelatin atau pekat. Jika anda menggunakan pelembut Jangan letakkan cecair lebih pekat, disarankan agar mencairkann- banyak daripada paras maksimum. ya dengan air dahulu. -
Page 60: Memula Program ( )
5.7 Menukar Opsyen 5.4 Memula Program ( Selepas program bermula, hanya Untuk memulakan program, tekan pad beberapa opsyen boleh ditukarkan. sentuh Start/Pause ( ), lampu panduan yang berkaitan akan berhenti berkelip dan Tekan pad sentuh “Start/Pause”. tempoh program akan dipaparkan pada Penunjuk akan mula berkelip. -
Page 61: Di Penghujung Program
MELAYU 5.9 Di Penghujung Program Untuk menyalurkan air: Tekan pad sentuh “Mula/Jeda ”. Perkakas berhenti secara automatik. Perkakas menyalurkan air dan Isyarat akustik akan beroperasi. memutar pada kelajuan putaran Paparan akan menunjukkan “ ”. maksimum bagi program yang dipilih. Penunjuk pad sentuh Start/Pause Secara alternatif, sebelum menekan (Mula/Jeda) padam. -
Page 62: Petua Membasuh
PETUA MEMBASUH 6.1 Mengasing Pakaian Pastikan anda mencuci pengumpul lin secara berasingan daripada pengeluar Ikut simbol kod cucian pada setiap label lin. pakaian dan arahan cucian pengilang. Jangan basuh pakaian putih dan Asingkan pakaian seperti berikut: putih, berwarna bersama-sama. Pakaian berwarna, sintetik, bahan halus, bahan wul. -
Page 63: Jenis Bahan Pencuci Dan Kuantiti Bahan Pencuci
MELAYU 6.6 Jenis Bahan Pencuci dan Cat berasaskan minyak: lembapkan dengan penghapus kotoran benzin, Kuantiti Bahan Pencuci bentangkan pakaian di atas kain lembut dan pedapkan kotoran tersebut; Detergen kurang buih diperlukan untuk bersihkan beberapa kali. mesin basuh ini bagi mencegah masalah buih yang terlalu banyak, hasil basuhan Kotoran gris kering: lembapkan dengan yang tidak memuaskan hati dan... -
Page 64: Simbol Kod Basuh Antarabangsa
Maklumat tentang kekerasan air dalam Serbuk pencuci yang terlalu banyak kawasan anda boleh diperoleh daripada menyebabkan: syarikat bekalan air yang berkaitan, atau berbuih-buih, dari pihak berkuasa tempatan anda. kesan cucian berkurang, Anda mungkin perlu mencuba menggu- pembilasan kurang baik... -
Page 65: Penjagaan Dan Pembersihan
MELAYU PENJAGAAN DAN PEMBERSIHAN 8.5 Membersih Petak Dispenser AMARAN! Anda mesti MEMUTUSKAN SAMBUNGAN bekalan elektrik daripada Petak dispenser serbuk cucian dan perapi perkakas, sebelum anda boleh tambahan harus kerap dibersihkan. menjalankan pembersihan atau kerja Keluarkan petak dengan menekan selak penyelenggaraan. ke bawah dan teriknya keluar. -
Page 66: Membersih Ceruk Petak
8.6 Membersih Ceruk Petak Untuk membersih pam aliran air keluar: 1. Buka pintu pam aliran air keluar. Selepas petak dikeluarkan, gunakan berus kecil untuk membersihkan bahagian ceruk, pastikan semua sisa serbuk cucian dibuang dari atas dan bawah ceruk. Letak semula petak dan jalankan program bilas tanpa sebarang pakaian di dalam dram. - Page 67 MELAYU 3. Apabila bekas penuh dengan air, 5. Keluarkan sisa bulu dan objek letak semula salur air keluar dan daripada penapis pam (jika ada). kosongkan bekas tadi. Lakukan langkah 2,3 sekali lagi sehingga tiada lagi air mengalir keluar daripada pam air keluar.
-
Page 68: Membersih Penapis Aliran Air Masuk
Letakkan semula penapis ke dalam Bersihkan penuras dalam hos perumah dengan bahagian yang dengan berus keras. terdedah menghadap ke atas. Pastikan anda mengetatkan penapis dengan betul bagi mencegah kebocoran. Alat Pandu atas atas Keluarkan hos aliran air masuk di belakang perkakas. -
Page 69: Langkah Berwaspada Fros
MELAYU 8.9 Langkah Berwaspada Fros Jika perkakas dipasang di tempat yang suhunya boleh turun sehingga kurang daripada 0 °C, buang baki air di dalam hos salur masuk dan pam saliran. Saliran Kecemasan Tanggalkan palam sesalur daripada soket sesalur. Tutup pili air. 2. -
Page 70: Penyelesaian Masalah
PENYELESAIAN MASALAH 9.1 Kegagalan Kemungkinan Kod Penggera: Sesetengah masalah tertentu adalah berpunca Mesin tidak mengisi air. daripada kurang penyelenggaraan yang mudah atau kesilapan yang boleh diselesaikan Mesin tidak menyalir air. dengan mudah tanpa menghubungi jurutera. Sebelum menghubungi Pusat Servis tempatan... - Page 71 MELAYU Malfungsi Kemungkinan Punca Penyelesaian Hos saliran tertindih atau terpiuh. Periksa sambungan hos penyaliran. (Kod ralat: Pam saliran tersumbat. Bersihkan penuras saliran. Mesin tidak (Kod ralat: menyalirkan air Opsyen “Rinse Hold” telah dipilih. Tekan Mula/Jeda untuk mengalir- dan/atau tidak kan air. atau Pilih program putaran memutar: (Spin).
- Page 72 Malfungsi Kemungkinan Punca Penyelesaian Pakaian tidak diagihkan sama rata Jeda mesin dan agihkan di dalam dram. semula pakaian secara manual. Mesin bergegar Jumlah pakaian di dalam dram Muatkan lebih banyak pakaian. atau bunyinya terlalu sedikit. bising: Lantai tidak stabil cth. lantai kayu.
-
Page 73: Membuka Pintu Mesin Semasa Kecemasan
MELAYU NOTA Jika anda tidak dapat mengenal pasti atau menyelesaikan masalah, hubungi pusat perkhidmatan kami. Sebelum menghubungi kami, catat model, nombor siri dan tarikh pembelian mesin anda: Pusat Perkhidmatan akan memerlukan maklumat ini. 9.2 Membuka Pintu Mesin Semasa Kecemasan Pada masa kecemasan apabila mesin mengalami kegagalan fungsi dan pintu dikunci. -
Page 74: Data Teknikal
Bekalan kuasa (Voltan / Frekuensi) 220 - 240 V~ / 50 Hz : 2000 W Jumlah kuasa EWF9042Q7WB / EWF1042Q7WB : 2100 W EWF1142Q7WB 0.8 MPa / 0.05 MPa Tekanan bekalan air (Maksimum / Minimum) Program Maks. Kapasiti Cottons Max. - Page 75 MELAYU Buang kotak karton. Tanggalkan Letakkan salah satu elemen bungku- bahan bungkusan polisterin. san polisterin di atas lantai di belakang perkakas. Dengan berhati-hati Tanggalkan beg plastik yang menutup letakkan perkakas dengan bahagian mesin. belakang di atasnya. Pastikan tidak merosakkan hos. 5.
-
Page 76: Kedudukan Mesin
Longgarkan ketiga-tiga bolt. 9. Tarik keluar peruang plastik. 11.2 Kedudukan Mesin Penting untuk mesin basuh anda didudukan kukuh dan rata di atas lantai untuk memastikan operasi yang betul. Perkakas tidak boleh dipasang di belakang pintu boleh dikunci, pintu gelongsor atau pintu dengan selak pada sisi bertentangan pintu mesin basuh. -
Page 77: Saliran Air Masuk
MELAYU 11.3 Saliran Air Masuk Longgarkan atau ketatkan kaki untuk melaras ketinggian. Pelarasan yang Sambungkan hos penyaliran air masuk betul paras perkakas mencegah getaran, kepada pili air dengan alur BSP 3/4”. bunyi bising dan pergerakan perkakas semasa beroperasi. Gunakan hos yang dibekalkan bersama mesin basuh. - Page 78 Di dalam singki, cabang paip saliran. Memasang Alat Pandu Hos Cabang ini mestilah terletak di bahagian Tarik dan atas perangkap supaya bengkokan Alat renggangkan berada sekurang-kurangnya 60 cm dari Pandu untuk mema- lantai. bengkok- sukkan hos. kan hos Maks.
-
Page 79: Sambungan Elektrik
MELAYU 11.5 Sambungan Elektrik Sambung mesin pada alur AWAS! keluar soket terbumi. Mesin ini direka untuk beroperasi pada Pengilang berhak menolak sebarang 220-240 V, fasa tunggal, 50 Hz. tanggungjawab bagi kerosakan atau Sila semak syarat nilai bekalan kecederaan sekiranya gagal mematuhi kuasa diberi yang disebutkan langkah pencegahan keselamatan di pada Label Rating sebelum anda... -
Page 80: Persediaan Penyambungan Wi-Fi
5.1 dan ke atas. Anda akan perlu memasang (folder NIU5)” Aplikasi Electrolux Life, mencipta akaun Electrolux dan menerima Terma dan Syarat serta Dasar Privasi Electrolux dalam Aplikasi Bab ini menerangkan cara menyambungkan untuk menggunakan ciri-ciri bersambungan pada perkakas pintar kepada rangkaian Wi-Fi dan perkakas dobi. - Page 81 “Wi-Fi”. Tahniah! Pilih rangkaian Wi-Fi perkakas anda. Sekarang anda sudah bersedia. Anda Rangkaian itu bermula dengan “AJ-“ – boleh mula menerokai Aplikasi Electrolux (ini mungkin mengambil sedikit masa Life. untuk muncul). Untuk mematikan sambungan Tekan butang skrin utama untuk...
-
Page 82: Remote Start (Mula Jarak Jauh)
13.2 Remote Start (Mula Jarak Jauh) Apabila Aplikasi dipasang dan sambungan wayarles sudah dilengkapkan, anda boleh memulakan dan menghentikan program dari jarak jauh dengan mengaktifkan “Remote Start”. Kawalan Jauh diaktifkan secara automatik apabila anda menekan butang Start/Pause (Mula/Jeda) untuk memulakan program, tetapi itu juga akan memulakan program. - Page 83 简体中文 www.electrolux.com ........................85 ........................85 ......................85 ..........................86 ..........................86 ........................87 ..........................88 ........................89 ....................... 90 .......................... 91 ......................... 93 ..........................93 ..........................96 ............97 ........................97...
- Page 84 ........................98 ....................98 ........................99 ......................100 ........................100 ........................100 ........................100 ........................100 ........................100 5.10 ................ 101 5.11 ......................101 ......................102 ..........................102 ......................102 ......................... 102 ........................102 ....................103 ......................104 ........................105 ..........................
- Page 85 简体中文...
- Page 86 www.electrolux.com...
- Page 87 简体中文...
- Page 88 www.electrolux.com...
- Page 89 简体中文 – – – –...
- Page 90 ENGLISH 3. 控制面板 3.1 控制面板说明 程序旋钮 温度触控按钮 电源开关按钮 显示屏 传感清洗触摸屏 预约剩余时间触控按钮 污渍触摸屏 时间管理触控键 蒸汽触控按钮 添加衣物触控键 预洗触控按钮 启动/暂停 远程触摸屏 常用程序 脱水选择触控按钮 儿童安全锁功能 显示屏 A A B B C C D D A B C D Time Manager 图标 所选程序的最大衣物量 添加衣物功能图示...
- Page 91 简体中文 3.2 程序表 程序; 脱水速度 最大衣物量 衣物类型和脏污程度 温度 (晾衣服); 1400 rpm Max. Cottons 白色和彩色棉质织物。(根据土壤水平调整 (棉质织物); 洗涤时间。参见第 94 页上的 “时间管理” 冷水 至 90°C 表。) 4 kg 化纤或混合面料织物。(根据土壤水平调整 1200 rpm Mixed (混合织物); 洗涤时间。参见第 94 页上的 “时间管理” 冷水 至 60°C 表。) 1200 rpm 4 kg 的精致织物,如丙烯酸织物、纤维胶、聚酯...
- Page 92 程序; 脱水速度 最大衣物量 衣物类型和脏污程度 温度 (晾衣服); 1200 rpm 5.5 kg 彩色棉,如男女衬衫、毛巾和内衣,一般脏 Daily 39 (日常 39); 污程度。 30°C 至 40°C 1400 rpm Max. 每天穿彩色棉布衣服,例如衬衫,衬衫,毛 Full Wash 60 全洗 60 巾和内衣。 正常水平土壤的理想选择。 30°C 至 60°C - 要调出“我最喜欢的”洗涤程序。 Favourite (我最喜欢的) 1) 最大容量取决于洗衣机的型号(请参阅控制面板上的定义)...
- Page 93 简体中文 Hygienic Rinse Time Delay Sensor Stain Prewash Care Spin Hold Manager Wash Cottons ■ ■ ■ ■ ■ ■ ■ ■ Mixed ■ ■ ■ ■ ■ ■ ■ ■ Delicates ■ ■ ■ ■ ■ ■ ■ ■ Bedding ■...
- Page 94 Delay End (Time Manager) >> >> Time Manager “Delay End”...
- Page 95 简体中文 SensorWash Prewash (Stain) (Hygienic Care)
- Page 96 摸屏 Remote ( “Child Lock” Hygienic Wi-Fi Care On/Off Hygienic Care Stain Favourite SensorWash Stain...
- Page 97 简体中文 Start/Pause Delay End °C...
- Page 98 www.electrolux.com...
- Page 99 简体中文 Spin Temp Time Manager Time Manager Delay End...
- Page 100 PAUSE Remote ( Remote ( ; Vapour Refresh, Spin, Rinse + Spin, Tub Clean)
- Page 101 简体中文 5.11 AUTO Off 5.10 AUTO Off Rinse Hold “ Start/Pause ” “Start/Pause” “ On/Off ” On/Off “ ” “Start/Pause ” “Start/Pause” “Spin” “No Spin ( )” “Start/Pause” “On/Off” Wool...
- Page 102 90°C 60°C 50°C 40°C 30°C Cold...
- Page 103 简体中文...
- Page 104 95 °C 60 °C 40 °C 30 °C 200 °C 150 °C 110 °C...
- Page 105 简体中文 Tub Clean Tub Clean ( Tub Clean...
- Page 106 www.electrolux.com...
- Page 107 简体中文...
- Page 108 www.electrolux.com...
- Page 109 简体中文...
- Page 110 Delay End Delay End Rinse Hold 要么...
- Page 111 简体中文...
- Page 112 www.electrolux.com...
- Page 113 简体中文 On/Off...
- Page 114 85 X 60 X 65.9 cm 220 - 240 V~ / 50 Hz : 2000 W EWF9042Q7WB / EWF1042Q7WB : 2100 W EWF1142Q7WB 0.8 MPa / 0.05 MPa Cottons Max. Mixed 4 kg Delicates 4 kg Bedding 3 kg 1.5 kg...
- Page 115 简体中文...
- Page 116 11.2...
- Page 117 简体中文 11.3 3/4″BSP 35° 45°...
- Page 118 11.4 60 cm 60 cm 90 cm...
- Page 119 简体中文 11.5 220-240 V 50 Hz...
- Page 120 12.1 12.3 >PE<=polyethylene >PS<=polystyrene >PP<=polypropylene 12.2...
- Page 121 (folder NIU5)” 下载并安装该程序“Electrolux Life” App。 本章说明如何将您的知能家电与 Wi-Fi ® 网 络及智能手机连接。步骤也适用于其他智能设 * * 智能设备最低要求:iPhone6 / 备。 iOS 9.3 / Android 5.1 或以上。 这项功能让您可以监测和遥控您的智能家电。 下载了 “Electrolux Life” 应用程 序,您需登记一个新账号。您需接受 您需要以下设备: 使用软件的条例和 Electrolux 的隐私 条例,才可使用此家电智能功能。 • 开启家中 Wi-Fi ® 网络 智能设备最低要求、应用程序和服务 • 智能手机与家中 Wi-Fi ® 连接...
- Page 122 机的设置页面选择您家里的 Wi-Fi , 返回到“Electrolux Life” 应用程序。 当连接已完成,“ ” 字母会从屏 幕消失, 图标将停止闪烁而固定亮 着。 每次开启洗衣机需要花四十五秒进 行自动网络连接。当 图标停止闪 烁,这表示连接已完成。 连接成功! 请往下一页完成您的洗衣机注册。 产品注册:只需填上您的洗衣机型号 和购买日期。 恭喜! 您已完成所有设定。您可开始使用和 探索 “Electrolux Life” 应用程序。 若要关闭无线网路连接, 请持续按 按 钮三秒至听见信号响起, 屏幕会出现 “ ”(关闭)字幕。 若您把洗衣机关闭而后来再次开 启,无线网络连接会自动关闭着。 若要删除无线凭证, 请持续按 按钮十秒至信号响起,屏 幕出现 “ ”。...
- Page 124 www.electrolux.com...
Need help?
Do you have a question about the EWF1142Q7WB and is the answer not in the manual?
Questions and answers