
Related Manuals for Harman AMX MCP-106

Summary of Contents for Harman AMX MCP-106
- Page 1 IN STR U CT IO N MAN U AL M ASS I O C O N T RO LP AD S A N D KE Y PAD S MCP- 10 6, MCP- 10 8, MKP -1 06, MKP -1 08...
- Page 2 IMPORTANT SAFETY INSTRUCTIONS READ these instructions. KEEP these instructions. HEED all warnings. FOLLOW all instructions. DO NOT use this apparatus near water. CLEAN ONLY with dry cloth. DO NOT block any ventilation openings. Install in accordance with the manufacturer's instructions. DO NOT install near any heat sources such as radiators, heat registers, stoves, or other apparatus (including amplifiers) that produce heat.
- Page 3 ESD WARNING To avoid ESD (Electrostatic Discharge) damage to sensitive components, make sure you are properly grounded before touching any internal materials. When working with any equipment manufactured with electronic devices, proper ESD grounding procedures must be followed to make sure people, products, and tools are as free of static charges as possible. Grounding straps, conductive smocks, and conductive work mats are specifically designed for this purpose.
-
Page 4: Table Of Contents
Table of Contents Table of Contents Overview - Massio ControlPads .................7 Features ..............................7 Port Assignments by Massio ControlPad ....................7 Specifications ........................8 MCP-106 ..............................8 MCP-108 ..............................9 Overview - Massio Keypads ................10 Specifications ......................... 10 MKP-106 ............................... 10 MKP-108 ............................... - Page 5 Table of Contents WebConsole ................................ 26 Accessing the WebConsole ..........................26 Default User Names and Passwords........................27 Massio Keypads ......................27 Locating the IP Address of the Keypad ....................27 Toggling Between IP Addressing Modes: DHCP and Static IP ............. 27 Upgrading Firmware ..................28 Overview ..........................
- Page 6 Table of Contents Additional Notes ........................... 37 Setting a Telnet User Name and Password ..................37 Telnet Commands ......................38 ? or Help....................................38 DEVICE STATUS ..................................38 EXIT ......................................38 FACTORYFWIMAGE................................. 38 GET CONFIG .................................... 38 GET CONNECTION................................... 38 GET DEVICE.....................................
-
Page 7: Overview - Massio Controlpads
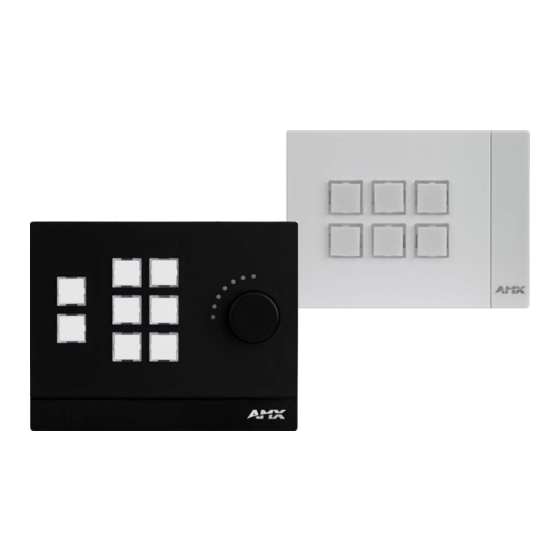
Overview - Massio ControlPads Overview - Massio ControlPads The Massio MCP-106 (FG2102-06) and MCP-108 (FG2102-08) ControlPads each feature built-in Ethernet ports and combine a controller with a 6- or 8-button keypad. The 6-Button Massio ControlPad mounts into a standard 1 gang US, UK, or EU back box. The 8-Button Massio ControlPad mounts into a standard 2 gang US, UK, or EU back box. -
Page 8: Specifications
Overview - Massio ControlPads Specif ications The following sections list the specifications for the Massio ControlPads. MCP-106 The following table lists the specifications for the MCP-106: MCP-106 Specif ications General: Dimensions (HWD): Portrait: 4 11/16" x 3 7/16" x 9/16" (119 mm x 87.5 mm x 13.9 mm) Landscape: 3 7/16"... -
Page 9: Mcp-108
Overview - Massio ControlPads MCP-108 The following table lists the specifications for the MCP-108: MCP-108 Specif ications General: Dimensions (HWD): 4 11/16" x 6" x 1" (119 mm x 152.5 mm x 26 mm) Weight: Approximately 0.41 lb (0.19 kg) Mounting Options: Mount onto standard 2 gang US, UK, or EU back boxes Front Panel Components:... -
Page 10: Overview - Massio Keypads
Overview - Massio Keypads Overview - Massio Keypads The Massio MKP-106 (FG5793-06) and MKP-108 (FG5793-08) Keypads are keypad-only versions of the Massio ControlPad. The keypads can serve as second user interfaces or as primary UI in spaces that already contain a separate controller. Massio Keypads connect to a controller via Ethernet. -
Page 11: Mkp-108
Overview - Massio Keypads MKP-106 Specif ications (Cont.) Environmental: Temperature (Operating): 32º F to 122º F (0º C to 50º C) Temperature (Storage): 14º F to 140º F (-10º C to 60º C) Humidity (Operating): 5% to 85% RH Ethernet: Ethernet Connection: (1) 10/100;... -
Page 12: Wiring And Device Connections
Wiring and Device Connections Wiring and Device Connections Overview This section describes the device connectors and ports available on each type of Massio ControlPad. Here you can find wiring and electrical capacities for each type of connector. FIG. 3 displays the rear panel of the MCP-106. RS-232 port IR/Serial port Ethernet port... -
Page 13: Control Ports And Indicators
Wiring and Device Connections Control Ports and Indicators The following sub-sections describe each control port on the Massio ControlPads. Refer to Overview section on page 12 for the component layout of the rear panels of each type of Massio ControlPad. RS-232 The Massio ControlPads features up to two RS-232 300-115,200 baud connector ports so you can connect up to two serial devices to the ControlPad. -
Page 14: I/O
Wiring and Device Connections The I/O port (available only on the MCP-108) responds to switch closures and voltage level (high/low) changes, or can be used for logic-level outputs. The +12 pin provides +12 V @ 200 mA and is designed as a power output for the PCS Power Current Sensors, VSS2 Video Sync Sensors (or equivalent). -
Page 15: Lan (Rj-45)
Wiring and Device Connections LAN (RJ-45) The LAN RJ-45 port provides 10/100 Mbps communication via Cat5/5e/6 network cable. The LAN port automatically negotiates the connection speed (10 Mbps or 100 Mbps), and whether to use half duplex or full duplex mode. The LAN port is best used for connecting to a network switch. -
Page 16: Id Pushbutton
Wiring and Device Connections ID Pushbutton Each Massio ControlPad and Keypad features a pinhole reset pushbutton located on the bottom of the device. FIG. 13 displays the location of the reset pushbutton on each ControlPad or keypad. 6-button ID pushbutton 8-button Location of the ID Pushbuttons on each ControlPad FIG. - Page 17 Wiring and Device Connections The button assignments are the same on the portrait and landscape versions of the MCP-106 and MKP-106. On a landscape installation, button 1 is in the lower left corner of the device (see FIG. 15). 6-button (landscape) Button layout (6-button landscape) FIG.
-
Page 18: Installation
Installation Installation Overview This chapter describes installing Massio ControlPads and Keypads. The MCP-106 and MKP-106 mount onto standard 1 gang US, UK, or EU back boxes. The MCP-108 and MKP-108 mount onto standard 2 gang US, UK, or EU back boxes. NOTE: Before touching the device, discharge the static electricity from your body by touching a grounded metal object. - Page 19 Installation FIG. 19 illustrates how to connect the device frame to the mounting bracket. Hook top of frame onto the lip of the mounting bracket Attaching the frame to the mounting bracket (MCP-106 displayed) FIG. 19 Press the sides of the device frame to snap them into place. Press the bottom corners of the device frame to snap them into place.
-
Page 20: Button Labeling
Button Labeling Button Labeling Overview Massio ControlPads and Keypads come with a set of clear plastic Button Caps which are designed to fit tightly over the pushbuttons, and allow you to place a label on each button according to the requirements of your particular installation. Massio devices also come with a pre-printed acetate sheet with a range of 70 (pre-cut) button label inserts. -
Page 21: Disassembling The Massio Device
Button Labeling Cone and Diffuser Acetate Button Label (face down) Placing a Button Label inside a Button Cap FIG. 23 Place the cone and diffuser back over the button and snap the cone into place on the faceplate. Repeat steps 2-5 for any additional buttons. When finished, mount the faceplate back onto the device. Disassembling the Massio Device If you are replacing button labels after you have already installed and mounted the Massio device, follow these steps to disassemble the device. -
Page 22: Re-Assembling The Massio Device
Button Labeling FIG. 25 illustrates using a flat-head screwdriver to unlock the device frame of an MCP-106 from the metal clip on the mounting bracket. Unlocking the device frame from the mounting bracket FIG. 25 When the device frame is unlocked from the mounting bracket, lift the device frame upward and away from the top lip of the mounting bracket. -
Page 23: Initial Configuration
Initial Configuration Initial Conf iguration Massio ControlPads This section describes using the NetLinx Studio software application to perform the initial configuration of the Massio ControlPad. You can use NetLinx Studio to perform the following configuration options on a Massio ControlPad: Set up a System number ... -
Page 24: Changing The Controlpad's Network Address Information
Initial Configuration Click Search For Masters to search the network for online Masters in the Search for Masters dialog (FIG. 29). Search for Masters dialog FIG. 29 Click Start Searching to begin listening for "blink" (UDP) messages from NetLinx Masters on the subnet. When you see the IP Address for the ControlPad in the List of Active NetLinx Master Controllers, click Stop Listening. -
Page 25: Connecting To The Controlpad Via Usb
Initial Configuration Click the Set IP Information button to set the new IP address information on the ControlPad. The program will prompt you that the Master Controller will be rebooted when this button is pressed (click OK to proceed). Edit the DNS Address fields as necessary: •... -
Page 26: Toggling Between Ip Addressing Modes: Dhcp And Static Ip
Initial Configuration Select the USB tab. The USB tab features a list of devices connected to your PC via USB. The IP address of the ControlPad appears in the IPv4 Address column. Communications Settings dialog - USB tab FIG. 33 Highlight your ControlPad and click Select to connect to it. -
Page 27: Default User Names And Passwords
Initial Configuration Default User Names and Passwords The following table lists the default user names and passwords for accessing the Massio ControlPads through NetLinx Studio or the WebConsole. Default User Names and Passwords User Name Password NetLinx Studio netlinx password WebConsole administrator password... -
Page 28: Upgrading Firmware
Upgrading Firmware Upgrading Firmware Overview The basic process of upgrading firmware on Massio ControlPads involves downloading the latest firmware files from www.amx.com and using NetLinx Studio to transfer the files to a target ControlPad. Use the OnLine Device tree in NetLinx Studio to view the firmware files currently loaded on the device. FIG. 34 shows an example OnLine Tree indicating an MCP-108: NetLinx Studio - Sample OnLine Tree FIG. -
Page 29: Downloading The Latest Firmware Files From Www.amx.com
Upgrading Firmware Downloading the Latest Firmware Files from www.amx.com NetLinx Controllers Massio ControlPads require two firmware (*.kit) files: Master firmware and Device firmware. The Master firmware file is not the same as the Device firmware file. Both files should be used when upgrading any firmware associated with the Integrated Controllers. NOTE: The process of downloading and transferring f irmware f iles is the same for all types of f irmware. -
Page 30: Upgrading Firmware Via Netlinx Studio
Upgrading Firmware Upgrading Firmware via NetLinx Studio NOTE: These steps assume that you have already established a connection with the target ControlPad (IP connection is preferred.) See the Initial Conf iguration section on page 23 for details. You can also use the NetLinx Diagnostics application to upgrade f irmware, if preferred. - Page 31 Upgrading Firmware Verify the target’s System number matches the value listed within the active System folder in the OnLine Tree. The Device number is always 0 for the ControlPad. Note that the Port field is disabled (FIG. 37). Send to NetLinx Device dialog (showing on-board MCP-106 firmware update) FIG.
-
Page 32: Resetting The Factory Default System And Device Values
Upgrading Firmware Resetting the Factory Default System and Device Values In NetLinx Studio, access the Device Addressing dialog: Right-click on any system device listed in the Workspace and select Device Addressing. Select Diagnostics > Device Addressing from the Main menu. ... -
Page 33: Programming
Programming Programming Programming the Massio ControlPads and Keypads This chapter provides information on programming Massio ControlPads and Keypads, including NetLinx and Telnet commands. NOTE: This chapter lists programming commands unique to Massio ControlPads and Keypads. Please consult the NX-Series Controllers WebConsole & Programming Guide for more details on NetLinx controller commands. Button Layouts The following illustrations indicate the button numbers for each of the Massio ControlPads (MCP-106 and MCP-108) and Keypads (MKP-106 and MKP-108):... -
Page 34: Port Numbers And Levels (Controlpads)
Programming Port Numbers and Levels (ControlPads) Massio ControlPads support the following port numbers and levels: Port Numbers and Levels ControlPad/Keypad Part Port Level Buttons None Knob (MCP-108 only) 2, range is 0-255 LED Bargraph 1, levels indicate 0-255 (MCP-108 only) Port Numbers and Levels (Keypads) Massio Keypads support the following port numbers and levels: Port Numbers and Levels... -
Page 35: Supported Send_Commands
Programming Supported SEND_COMMANDs Massio Keypads support a number of NetLinx SEND_COMMANDs, described in the following section. To use these commands, establish a Telnet session from the PC to the NetLinx master (see the Establishing a Terminal Connection via Telnet section on page 36 for more information.) NOTE: All text is based on a Unicode index. -
Page 36: Terminal (Telnet) Commands
Programming SEND_COMMANDs (Cont.) Command Description LED-EN Enable LEDs on the keypad. LEDs are enabled by default. Syntax: LED-EN Example: SEND_COMMAND DEVICE_1,"'LED-EN'" Enables LEDs on DEVICE_1. REBOOT Reboot the keypad. Syntax: REBOOT Example: SEND_COMMAND DEVICE_1,"'REBOOT'" Reboots DEVICE_1. SET_NDX_DESC Set Friendly name and location for NDP. Syntax: SET_NDX_DESC-friendly name:location Max of 25 characters for friendly name and max of 25 characters for location. -
Page 37: Telnet User Name And Password
Programming Telnet User Name and Password There are two Telnet commands that set the Telnet user name and password: Set Telnet Username (see page 41) Set Telnet Password (see page 41) By default, both the user name and password are blank (empty string). Performing a factory reset on the device will return these values to that default. - Page 38 Programming Telnet Commands The commands listed in the following table can be sent directly to the Keypad via a Telnet terminal session. In your terminal program, type “Help” or a question mark (“?”) and <Enter> to access the Help Menu, and display the Program port commands described below: Terminal Commands Command...
- Page 39 Programming Terminal Commands (Cont.) Command Description GET DNS Get list of DNS entries. Example: >get dns DNS Servers ------------------------------- Domain suffix: amx.internal Entry 1: 192.168.20.7 Entry 2: 192.168.20.9 NOTE: When the module is in DHCP mode, these are active values, NOT the stored values that only apply to static mode.
- Page 40 Programming Terminal Commands (Cont.) Command Description RENEW DHCP Renews/Releases the current DHCP lease for the keypad. Example: >RENEW DHCP RESET FACTORY Resets the device’s stored parameters to factory default state including removal of all security settings, resetting to DHCP. This command will cause an automatic reboot. NOTE: This command does not reset the device to the factory software image.
- Page 41 Programming Terminal Commands (Cont.) Command Description SET FRIENDLY Set the device’s friendly name for NDP to <name>. Syntax: SET FRIENDLY <name> • Maximum length = 25 characters. If the name entered exceeds 25 characters, it will be truncated. • The value is stored in non-volatile memory. •...
- Page 42 Programming Terminal Commands (Cont.) Command Description SHOW CONNECTION STATS Show the connection statistics for the device. Output similar to the following example: >show connection stats Connection Statistics Total Last 15 Minutes ===== =============== ICSP Messages: 10039 received 333 received 10038 transmitted 333 transmitted Blink Messages: 5014 received 166 received...
- Page 43 The AMX Warranty and Return Policy and related documents can be viewed/downloaded at www.amx.com. 3000 RESEARCH DRIVE, RICHARDSON, TX 75082 AMX.com | 800.222.0193 | 469.624.8000 | +1.469.624.7400 | fax 469.624.7153 AMX (UK) LTD, AMX by HARMAN - Unit C, Auster Road, Clifton Moor, York, YO30 4GD United Kingdom • +44 1904-343-100 • www.amx.com/eu/...
Need help?
Do you have a question about the AMX MCP-106 and is the answer not in the manual?
Questions and answers