Table of Contents
Advertisement
Installation & Operation Manual
NPN Non-Condensing Water Heaters
Getting Service
If your water heater requires service, you have several options for getting service:
Contact Technical Support at 1-800-519-8794 or on the website: www.navieninc.com.
●
For warranty service, always contact Technical Support first.
●
Contact the technician or professional who installed your water heater.
●
Contact a licensed professional for the affected system (for example, a plumber or electrician).
●
When you contact Technical Support, please have the following information at hand:
Model number
●
Serial number
●
Date purchased
●
Installation location and type
●
Error code, if any appears on the front panel display
●
800.519.8794
www.navieninc.com
20 Goodyear lrvine, CA 92618
T A N K L E S S
W A T E R
H E A T E R S
Version: 1.0 (January. 2021)
·
B O I L E R S
Advertisement
Table of Contents

Related Manuals for Navien NPN


Summary of Contents for Navien NPN
- Page 1 Installation & Operation Manual NPN Non-Condensing Water Heaters Getting Service If your water heater requires service, you have several options for getting service: Contact Technical Support at 1-800-519-8794 or on the website: www.navieninc.com. ● For warranty service, always contact Technical Support first.
- Page 2 Installation & Operation Manual NPN Non-Condensing Water Heaters Model NPN-160U NPN-180U NPN-199U NPN-120E NPN-160E NPN-180E NPN-199E Keep this manual near this water heater for future reference whenever maintenance or service is required. * The wetted surface of this product contacted by consumable water contains less than one quarter of one percent (0.25%)
-
Page 3: Table Of Contents
2.4 The Front Panel Parts Lists 2.5 Components 6.6 Installation Check list 2.6 Dimensions 6.7 Navien H2Air Add-on Controller Kit (Optional) 2.7 Rating Plate 6.8 Navien HotButton Kit (Optional) 6.9 Requirements for the State of 3. Installing the Water Heater Massachusetts 3.1 Choosing an Installation Location... -
Page 4: Safety Information
1. Safety Information The following safety symbols are used in this manual. Read and follow all safety instructions in DANGER this manual precisely to avoid unsafe operating conditions, fire, explosion, property damage, personal injury, or death. DANGER Indicates an imminently hazardous situation which, if not avoided, could result in severe injury or death. - Page 5 California law requires the following Prop 65 warning to be provided: WARNING WARNING Cancer and Reproductive Harm - www.P65Warnings.ca.gov CAUTION Do not turn on the water heater unless the ● Do not store or use gasoline or other water and gas supplies are fully opened. ●...
- Page 6 DANGER DANGER This water heater’s water temperature is set to 120°F (49°C) at the factory for your safety and comfort. Increasing the temperature increases the risk of accidental scalding. Water temperatures at or above 125°F (52°C) can cause instant scalding, severe burns, or death. Before you decide to change the temperature setting, read the following charts carefully.
-
Page 7: About The Water Heater
When you open the box, you will find the following items with the water heater. Check the box for each of the following items before installing the water heater. External Pump Navien HotButton Connector Kit / H2Air Add-on (<150W,1.5A) Controller Kit Installation &... -
Page 8: Specifications
2.3 Specifications The following table lists the specifications for the water heater. Additional specifications about water, gas, electric, and air supplies (venting) appear in the Installation section. Universal Outdoor NPN-160U- NPN-180U- NPN-199U- NPN-120E- NPN-160E- NPN-180E- NPN-199E- Item NPN-160U- NPN-180U- NPN-199U-... -
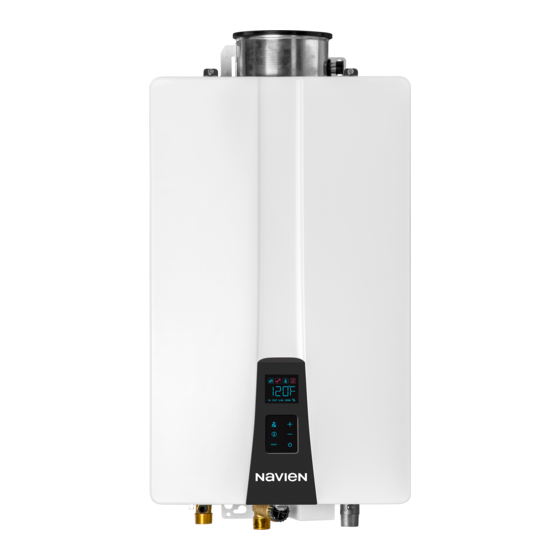
Page 9: The Front Panel
2.4 The Front Panel The front panel allows you to adjust the water temperature and view the operating status or error codes. Remove the protective sheet from the front panel before using it. The front panel of the outdoor model is placed inside the water heater. It is used only for installation Note and maintenance. -
Page 10: Components
Intake Air/Exhaust Duct Condensate Drain STS Heat Exchanger Ignitor&Flame Rod NaviTech Burner Ignition Transformer Front Panel Fan Motor APS (Air Pressure Sensor) Gas Inlet Fitting DHW Supply Fitting Water Inlet Filter Cold Water Inlet Adapter [NPN-160U/180U/199U] About the Water Heater... - Page 11 STS Heat Exchanger Ignitor&Flame Rod NaviTech Burner Ignition Transformer Fan Motor Front Panel APS (Air Pressure Sensor) Gas Inlet Fitting DHW Supply Fitting Water Inlet Filter Cold Water Inlet Adapter [NPN-120E/160E/180E/199E] About the Water Heater...
-
Page 12: Dimensions
Gas Inlet Condensate Drain Overhead View Supply Connections 0.4 in (11.2 mm) 7 in (178 mm) 7 in (178 mm) 2.7 in 3.2 in 4.9 in (68 mm) (80.1 mm) (124.1 mm) 14 in (356 mm) [NPN-160U/180U/199U] About the Water Heater... - Page 13 Supply Connections Description Diameter Hot Water Outlet Cold Water Inlet Gas Inlet Overhead View Supply Connections 0.4 in (11.2 mm) 2.7 in 3.2 in 4.9 in (68 mm) (80.1 mm) (124.1 mm) 14 in (356 mm) [NPN-120E/160E/180E/199E] About the Water Heater...
-
Page 14: Rating Plate
2.7 Rating Plate Water Heaters come from the factory configured for use with Natural Gas (NG) or Propane Gas(LP). Before starting the installation, check the rating plate located on the side of the water heater to ensure that the water heater matches the gas type, gas pressure, water pressure, and electrical supply available in the installation location. -
Page 15: Installing The Water Heater
Carefully consider the following (0-60 mg/L) factors when choosing an installation location: Moderately 4-7 grains/gal Water Softener** Once/Year Hard (61-120 mg/L) or Navien PeakFlow is 7-9 grains/gal Hard CAUTION Recommended (121-160 mg/L) Water Softener** Review the entire installation information in this... - Page 16 “C” valve yet. c. Allow water to flow through the water heater for 5 minutes. d. Close the “A” valve and open the “C” valve. Navien Easy 11. Disconnect all tubes. Valve Kit 12. Remove the cold water inlet filter from the water heater and clean out any residue.
- Page 17 Installing the water heater in a Only)” on page 31. location without a drain will void the warranty and Navien will not be responsible for water damages that occur as a result. WARNING The water heater must be located in an area where...
- Page 18 Proximity to fixtures and appliances For outdoor installation Clearance to Non- Install the water heater near fixtures that deliver to Combustibles from: Combustibles or use hot water, such as bathroom, kitchen, and laundry room faucets. Select a location that 12 in (305 mm) 2 in (51 mm) minimizes the water piping required between major minimum...
-
Page 19: Mounting The Water Heater To The Wall
This water heater may be installed at elevations up to 10,100 ft (3,078 m) for use with Natural Gas and Navien water heaters come with two upper and Propane. Refer to “3.7.2 Setting the Front Panel DIP lower mounting brackets that are pre-drilled at 16 Switches”... -
Page 20: Connecting The Gas Supply
This water heater cannot be converted from ● natural gas to propane or vice versa without a Navien gas conversion kit. Do not attempt a field conversion of this water heater without a Navien gas conversion kit installed by a qualified service agency. - Page 21 Navien recommends connecting the water heater as To connect the gas supply: the first water heater downstream of the gas meter, 1. Determine the gas type and pressure for the to ensure a sufficient gas supply. water heater by referring to the rating plate.
- Page 22 Regulator flow. High (before entering Pressure When using rigid pipe, Navien home or building) ● Regulator recommends the installation of a union on the gas supply line close to the water heater, to facilitate any Gas Tank future maintenance or service.
- Page 23 3.3.1 Gas Pipe Sizing Tables (Referenced from 2012 National Fuel Gas Code) These tables are for reference only. Please consult the gas pipe manufacturer for actual pipe capacities. Maximum Natural Gas Delivery Capacity In cubic feet (ft ) per hour (0.60 specific gravity; 0.5 in WC pressure drop). Contact your gas supplier for BTU/ft ratings.
- Page 24 3.3.2 Measuring the Inlet Gas Pressure WARNING The water heater cannot function properly without sufficient inlet gas pressure. Measuring the inlet gas pressure should be performed by a licensed professional only. The inlet gas pressure must be maintained between 3.5 in and 10.5 in WC for natural gas and between 8.0 in ●...
- Page 25 2. Open a hot water faucet. The water heater 5. Remove the screw from the gas inlet fitting and should turn on and the gas in the gas supply connect a manometer to the pressure port. line will be purged. Reset the manometer to zero before use.
-
Page 26: Connecting The Water Supply
3.4 Connecting the Water Supply The water fittings on the water heater are If the installation site only has in plumbing throughout, it is not necessary to upsize the water lines to When connecting the water supply, follow these guidelines: Use only pipes, fittings, valves, and other ●... - Page 27 H2Air add-on controller. DHW recirculation and Navien H2Air configurations 1. Disconnect the power supply to the water cannot be used at the same time.
- Page 28 5. Put the PCB box back in its original place and secure it using the 2 mounting screws. 6. Remove the plastic insulation from the [NPN-160U/180U/199U] external pump wire with a wire stripper before connecting it to the pump. 7. Connect the External Pump Wire to the proper wires from the pump junction box.
- Page 29 3.4.3 Adjusting the Recirculation 9. Turn on the switch beside the front panel. Parameters 10. Put the water heater cover back on and secure it with the 4 screws. Entering the R&D Information Menu Follow the instructions below to enter the R&D information menu.
- Page 30 Pump Cycle Interval Time Settings Mode Pump Sampling Time Settings Mode (P.12) (P.14) 1. When the P.12 item is displayed on the Items Description Display <PARAMETER INFORMATION MENU MODE> segment, press the [Info] button once to enter Set the pump to the <Preheat Pump Output Time Settings periodically cycle ON.
- Page 31 3.4.4 Connecting a Pressure Relief Valve When installing the valve, follow these guidelines: Ensure that the discharge capacity of the pressure ● relief valve is equal to or greater than the WARNING maximum pressure rating of the water heater. Ensure that the maximum BTU/H rating on the ●...
-
Page 32: Venting The Water Heater (Indoor Models Only)
3.5 Venting the Water Heater The water heater is designed for a concentric venting system, which uses one pipe with two ducts (Indoor Models Only) for combustion air and exhaust air, respectively. The water heater must be properly vented to ensure a constant supply of clean intake air and to DANGER ensure that exhaust air is properly removed from... - Page 33 Do not store hazardous or flammable substances ● near the vent termination. WARNING If this water heater will be installed in areas where ● snow is known to accumulate, protect the vent The vent piece connected to the water heater ●...
- Page 34 3.5.1 About the Vent Installation Detector WARNING The NPN unit comes pre-installed with a Vent The VID is not intended and should not be relied Installation Detector (“VID”) to assist the installer in upon to detect all instances of the vent pipe's...
- Page 35 WARNING WARNING The vent pipe must be inserted 1.3 in (34 ● mm) into the water heater collar. If the vent pipe is not fully inserted, the vent installation detector switch will detect it and the water heater may not operate. Make sure that the pipe is inserted properly and that only the Detectable correctly sized vent pipe materials are used or...
- Page 36 3.5.2 Maintaining Clearances Terminal clearances Maintain the following venting clearances, as required by ANSI Z21.10.3 and the National Fuel Gas Code, ANSI Z223.1/NFPA 54: Inside corner detail Regulator vent outlet In the event no regulator Legend: is present, H and I can Vent terminal be disregarded.
- Page 37 *The manufacturer shall specify a minimum clearance or state “Not applicable” in the table and/or instructions. 1) The minimum distance from adjacent public walkways, adjacent buildings, openable windows, and building openings shall not be less than those values specified in the National Fuel Gas Code, ANSI Z223.1/NFPA 54, and/or the Natural Gas and Propane Installation Code, CSA B149.1;...
- Page 38 To inside corner 12" 12" 12" 12" Between terminals at the same level [NPN-160U/180U/199U] [NPN-160U/180U/199U] Between terminals Between terminals at the same level at the same level 2" 2" 36" 36" To To 12"...
- Page 39 3.5.3 Measuring Vent Length (Indoor Models Only) Refer to the table to find the maximum vent length based on the number of elbows. (Two 45 degree elbows count as one 90 degree elbow.) Vent type Diameter Max number of 90° Elbows Max. Vertical and Horizontal (Total) Vent Length 3 in.
- Page 40 Concentric Elbow 11-1/2" (292mm) Length 21" (533mm) Length 10" (254mm) Length 39" (533mm) Length 45° Elbow 90° Elbow Navien Part #GXXX001891 Navien Part #GXXX001892 Navien Part #GXXX001896 Navien Part #GXXX001897 Navien Part #GXXX001894 Navien Part #GXXX001895 UPC #884954220925 UPC #884954220932...
- Page 41 Metal-Fab, Inc. Venting Components Horizontal Termination Regions with cold climates will produce more Refer to the contact information of the Note condensate in the vent system. The condensate manufacturer if necessary: collector should be used in cold climates. If more Manufacturer: Metal-Fab ●...
- Page 42 Vertical Termination 3.5.5 Draining Condensate (Indoor Models Only) Use a condensate collector in all installations. WARNING If a condensate trap hose is installed, the water inside the hose should be higher than 5.1 in (130 mm), and water should be inside the hose before operating the water heater.
-
Page 43: Connecting The Power Supply
Installation 3.6 Connecting the Power Supply For vertical terminations, install a condensate ● drain and trap as close to the appliance as WARNING possible. Slope the vent in accordance with the vent ● Improperly connecting the power supply can manufacturer’s installation instructions. result in electrical shock and electrocution. - Page 44 Disconnect Switch (Outdoor Models We recommend using a surge protector to ● protect the water heater from power surges. Only) If there is a power failure in cold weather areas, ● the freeze prevention system in the water heater On outdoor models, there must be a disconnect will not operate and may result in freezing of switch installed for the incoming 120 V AC power.
-
Page 45: Setting The Dip Switches
DIP switches appropriately, based on the installation environment. 3.7.1 Circuit Board DIP Switches [NPN-120E/160E/180E/199E] The two sets of DIP switches on the circuit board configure the water heater’s model settings. These configurations are set at the factory and should not be changed. - Page 46 CAUTION Do not configure the system for DHW recirculation when it is configured to run an air handler using the H2Air controller. DHW recirculation and Navien H2Air configurations cannot be used at the same time. Installing the Water Heater...
-
Page 47: Configuring The Remote Controller System
4. Configuring the Remote Controller System 4.1 Included Items 3. Connect the end of the extension cable to the cable connected to the remote controller. When you open the box, you will find the following items with the remote controller. Check the box for each of the following items before installing the remote controller. -
Page 48: Remote Controller
4.4 Remote Controller LCD display LED indicator Indicates functions and Indicates the status of water current status. heater. - Green: Normal Mode. - Red: Error occurred. Preheat & Timer button Lock button - Access the timer settings. Locks the other button - Recirculation ON. -
Page 49: Multi Remote Controller System
4.5 Multi Remote Controller 1. Press the Down button on the remote controller displaying “MAIN” to set its operation mode to System “SUB. ” The multi remote controller system consists of one main remote controller and one sub remote controller. The system must have only one main remote controller. - Page 50 4.5.2 Checking the Multi Remote 4. “SYNC” appears on the LCD display for 5-10 seconds until it syncs with the connected panel Controller System Setting and the main remote controller after the ID is assigned. After completing the multi remote controller setting, you can check the setting by pressing the OK button and Lock button simultaneously for 2 seconds.
-
Page 51: Entering Lock Mode
4.6 Entering Lock Mode 4.7 Setting the clock To prevent accidental pressing of the buttons and to 1. Press the Preheat & Timer button for 2 seconds. prevent children from adjusting the controller, you can activate the Temperature Lock Mode. To activate or deactivate Lock Mode, press the Lock button for 2 seconds. -
Page 52: Setting The Recirculation Timer
4. Press the OK button to finish and save the 2. Set the recirculation activation time by pressing updated time. the Up or Down button. Then, press the OK button to set the deactivation time. 4.8 Setting the Recirculation The recirculation timer settings are Note timer divided in 30 minute increments. -
Page 53: Starting Recirculation
4.10 Canceling all timer settings 5. During the reservation schedule, the preheating icon turns on and the Reservation area starts flashing. Press and hold the Preheat & Timer and OK button simultaneously for 2 seconds. “CLR” appears for 3 seconds and all timer settings are canceled. -
Page 54: Installing A Cascade System
5. Installing a Cascade System When installing a cascade system, carefully consider the design of the system and the features of the installation location. Follow all local codes and regulations, as well as all guidelines for installing the water heater. The following sections describe additional considerations that are specific to installing cascade systems. -
Page 55: Connecting The Communication Cables
Note NPN-199. 5.2 Connecting the Communication Cables Two water heaters can be connected with Navien Ready-Link communication cables. Select one of 2. On the Sub water heater, press and hold the the water heaters in the cascade system as the... -
Page 56: Appendixes
6. Appendixes 6.1 Covering the Clamps with Front Cover Cap After installing the water heater completely, cover the indicated clamps with the front cover caps provided with the product. Appendixes... -
Page 57: Technical Data
6.2 Technical Data 6.2.1 Pressure Drop Curve Water Flow (GPM) [NPN-120E] Water Flow (GPM) [NPN-160U/160E] Water Flow (GPM) [NPN-180U/180E] Water Flow (GPM) [NPN-199U/199E] Appendixes... -
Page 58: Wiring Diagram
6.3 Wiring Diagram FRONT PANEL CON10 CON12 CON3 CON5 Appendixes... -
Page 59: Ladder Diagram
6.4 Ladder Diagram NEUTRAL Main GV Relay 1 120 V AC SGV 1 Relay 2 SGV 2 Relay 3 FILTER SGV 3 Relay 4 SGV 4 Relay 5 Igniter Relay 6 DC 15 V Transformer NEUTRAL Pump Relay 7 Primary Relay 8 Anti Freeze heater Sencondary... -
Page 60: Component Assembly Diagrams And Parts Lists
6.5 Component Assembly Diagrams and Parts Lists 6.5.1 Case Assembly (NPN-160U/180U/199U) Appendixes... - Page 61 Description Service Part # Part # Remark 20047110* 160U Case 20045902* 180U/199U Case Bracket 20048190* Intake Gasket 30022669A 20046639* Condensate Drain Gasket 30022669A 20046641* Condensate Drain Cap 20046642* Exhaust Gasket 30022669A 20046640* Exhaust Switch 30022669A 30024038* 20006973* Rubber Ring 20025127* 20029318* Junction Box 20046065*...
- Page 62 6.5.2 Case Assembly (NPN-120E/160E/180E/199E) Appendixes...
- Page 63 Description Service Part # Part # Remark 20047112* 120E/160E Case 20046059* 180E/199E Case Bracket 20048190* 20006973* Rubber Ring 20025127* 20029318* Junction Box 20046065* Front Cover Bracket 20024042* External Base Toggle Latch 20007514* Gas Control Valve 30022125A 30022700* Air Pressure Sensor 30010238B 30010238* Pipe Clip...
- Page 64 6.5.3 Burner Assembly (NPN-160U/180U/199U) Description Service Part # Part # Remark 30023298A 30023298* 160U Chamber Case 30023299A 30023299* 180U/199U Pressure Test Nipple 20048333* 20047192A 20047192* Gasket 20048027* 30022984A 30022984* 160U Heat Exchanger 30022701A 30022701* 180U/199U 30022893A 30022893* 160U Exhaust Duct...
- Page 65 Description Service Part # Part # Remark 20046289A 20046289* 160U Intake Duct Cap 20045920A 20045920* 180U/199U 30023779A 30023779* 160U Fan Assembly 30023778A 30023778* 180U/199U Intake 30022671A 30022671* Gasket 20045914A 20045914* Intake Packing 20045915A 20045915* Heat Exchanger Back-Up Ring 20021730B 20021730* Heat Exchanger O-Ring 20017211A 20017211*...
- Page 66 6.5.4 Burner Assembly (NPN-120E/160E/180E/199E) Description Service Part # Part # Remark 30025500A 30025500* 120E Chamber Case 30023298A 30023298* 160E 30023299A 30023299* 180E/199E Pressure Test Nipple 20048333* 20047192A 20047192* Gasket 20048027* 30025502A 30025502* 120E Heat Exchanger 30022984A 30022984* 160E 30022701A 30022701*...
- Page 67 Description Service Part # Part # Remark 30025507A 30025507* 120E Exhaust Duct 30022902A 30022902* 160E 30022753A 30022753* 180E/199E 20050745A 20050745* 120E 20046291A 20046291* 160E Gasket 20045926A 20045926* 180E/199E 20046426A 20046426* 30026588A 30026588* 120E Fan Assembly 30022990A 30022990* 160E 30022770A 30022770* 180E/199E Heat Exchanger Back-Up Ring 20021730B...
- Page 68 Description Service Part # Part # Remark 20050758* 120E Exhaust Packing 20046073* 160E/180E/199E Ignitor 30022787A 30022787* 30025510A 20050749* 120E Gas Manifold 30022899A 20046303* 160E 30022704A 20045981* 180E/199E 30025510A 20050748* 120E Gas Stage Valve Body 30022899A 20046306* 160E 30022704A 20045978* 180E/199E Gas Stage Valve 30004431* Ignition Transformer...
- Page 69 6.5.5 Water Assembly Appendixes...
- Page 70 Description Service Part # Part # Remark Heat Exchanger Inlet Adapter 20045990A 20045990* Heat Exchanger Outlet Adapter 20045991A 20045991* Outlet Temperature Sensor 30015178A 30015178* High Limit Switch 30002577A 30002577* 30022890A 30022890* 120/160 Inlet Pipe 30022711A 30022711* 180/199 30022891A 30022891* 120/160 Outlet Pipe 30022712A 30022712*...
-
Page 71: Installation Check List
“Troubleshooting” in the Owner’s Manual. If you have additional questions or need assistance with installation, contact Technical Support at 1-800-519- 8794 or 1-949-420-0420, or refer to the technical support section of Navien’s website (www.navieninc.com). Installing the Water Heater... - Page 72 Connecting a Pressure Relief Valve Have you installed an approved pressure relief valve on the water heater? Does the rating of the pressure relief valve match or exceed the maximum BTU rating of the water heater? Is the pressure relief valve at least in in diameter? Have you installed the pressure relief valve on the hot water outlet pipe near the water heater?
-
Page 73: Navien H2Air Add-On Controller Kit (Optional)
6.7.1 Basic Principles The following diagram shows the basic operation of the heater system with the Navien H2Air add-on controller. CAUTION Do not configure the system for DHW recirculation when it is configured to run an air handler using the H2Air add-on controller. -
Page 74: Navien Hotbutton Kit (Optional)
6.8.1 Basic Principles The following diagram shows the basic operation of the water heater system with the Navien HotButton kit. CAUTION The Navien HotButton can be used ONLY with a water heater system configured for DHW recirculation. -
Page 75: Requirements For The State Of Massachusetts
6.9 Requirements for the State of 4. INSPECTION. The state or local gas inspector of the side wall horizontally vented gas fueled Massachusetts equipment shall not approve the installation unless, upon inspection, the inspector observes carbon monoxide detectors and signage NOTICE BEFORE INSTALLATION installed in accordance with the provisions of 248 CMR 5.09 and 5.12.
Need help?
Do you have a question about the NPN and is the answer not in the manual?
Questions and answers