Table of Contents
Advertisement
Available languages
Available languages
Quick Links
Het toestel-identifi catieplaatje bevindt zich aan de onderkant van het toestel.
The appliance identifi cation card is located on the bottom of the appliance.
Plak hier het toestel-identifi catieplaatje.
Stick the appliance identifi cation card here.
Houd, wanneer u contact opneemt met de serviceafdeling, het complete typenummer bij de hand.
When contacting the service department, have the complete type number to hand.
Adressen en telefoonnummers van de serviceorganisatie vindt u op de garantiekaart.
You will fi nd the addresses and phone numbers of the service organisation on the guarantee card.
gebruiksaanwijzing
gas-inductiekookplaat
instructions for use
gas-induction hob
IGT9472MB
Advertisement
Chapters
Table of Contents

Related Manuals for Atag IGT9472MB


Summary of Contents for Atag IGT9472MB
- Page 1 Houd, wanneer u contact opneemt met de serviceafdeling, het complete typenummer bij de hand. When contacting the service department, have the complete type number to hand. IGT9472MB Adressen en telefoonnummers van de serviceorganisatie vindt u op de garantiekaart. You will fi nd the addresses and phone numbers of the service organisation on the guarantee card.
- Page 2 Handleiding NL 3 - NL 34 Manual EN 3 - EN 34 Gebruikte pictogrammen - Pictograms used Belangrijk om te weten - Important information Tip - Tip...
-
Page 3: Table Of Contents
INHOUDSOPGAVE Uw gas-inductiekookplaat Inleiding Werking van de aanraaktoetsen Beschrijving Bediening inductie zone’s Bediening wokbrander Veiligheid Temperatuurbeveiliging inductie zone’s Kookduurbegrenzing Gebruik inductie Inductiekoken Werking inductie Inductiegeluiden Pannen gebruik wokbrander Pannen Wokbrander plaatsen Bediening Eco stand-by modus Stand-by modus Kinderslot Pauze Herkennen van een modus Timer / Kookwekker Geluidssignaal in- en uitschakelen Bediening inductie... -
Page 4: Uw Gas-Inductiekookplaat
UW GAS-INDUCTIEKOOKPLAAT Inleiding In deze handleiding staat beschreven op welke manier u de kookplaat zo optimaal mogelijk kunt benutten. Naast informatie over de bediening treft u ook achtergrondinformatie aan die van dienst kan zijn bij het gebruik van dit product. Tevens zijn onderhoudstips opgenomen. Lees eerst de gebruiksaanwijzing geheel en aandachtig door voordat u het apparaat gaat gebruiken en bewaar deze zorgvuldig voor latere raadpleging. -
Page 5: Beschrijving
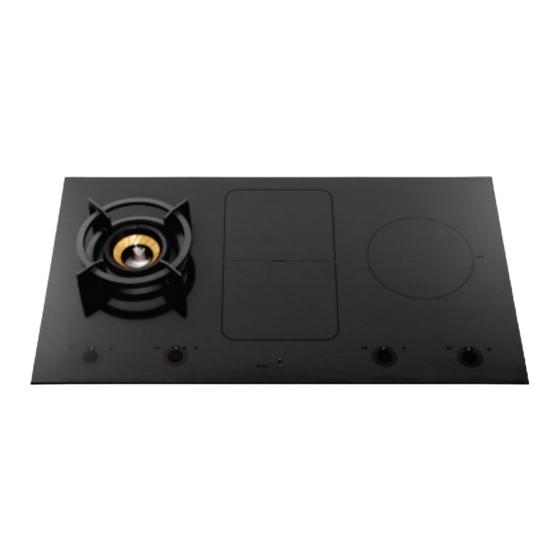
UW GAS-INDUCTIEKOOKPLAAT Beschrijving 1. Wokbrander (gas) 2. Bridge induction zone 3. Inductie zone 4. Bediening wokbrander 5. Bediening bridge induction zone midden-voor 6. Pauzetoets/sleuteltoets 7. Bediening bridge induction zone midden-achter 8. Bediening inductiezone rechts 9. Pauzetoets 10. Pauze-indicatie 11. Kinderslotindicatie (eco stand-by indicatie) 12. -
Page 6: Bediening Inductie Zone's
UW GAS-INDUCTIEKOOKPLAAT Bediening inductie zone’s 1. Menufuncties inductie 2. Slide control (12 standen) 3. Standen-indicatie 4. Boost indicatie 5. Tijd verlagen toets 6. Tijd ophogen toets 7. Timer/kookwekker 8. Minuten indicatie 9. Timer-/kookwekkertoets 10. Kookwekkerindicatie 11. Timerindicatie 12. Bridge toets (alleen voorste zone) 13. -
Page 7: Bediening Wokbrander
UW GAS-INDUCTIEKOOKPLAAT Bediening wokbrander 1. Menufuncties brander programma’s wokbrander 2. Slide control (12 standen) 3. Standen-indicatie 4. Braadstand ‘XL’ indicatie 5. Tijd verlagen toets 6. Tijd ophogen toets 7. Timer/kookwekker 8. Minuten indicatie 9. Timer-/kookwekkertoets 10. Kookwekkerindicatie 11. Timerindicatie 12. Aan-/uittoets 13. -
Page 8: Veiligheid
VEILIGHEID Lees voor gebruik eerst de separate veiligheidsinstructies! Temperatuurbeveiliging inductie zone’s • Elke inductiezone is voorzien van een sensor. Deze sensor controleert de temperatuur van de bodem van de kookpan en van de onderdelen van de kookplaat. Deze voorziening voorkomt oververhitting (bijvoorbeeld door een drooggekookte pan). -
Page 9: Gebruik Inductie
GEBRUIK INDUCTIE Inductiekoken Inductiekoken is snel • In het begin zult u verrast zijn door de snelheid van het toestel. Vooral het op een hogere stand aan de kook brengen gaat zeer snel. Om overkoken of droogkoken te voorkomen, kunt u er het beste altijd bij blijven. -
Page 10: Werking Inductie
GEBRUIK INDUCTIE Werking inductie In het toestel wordt een magnetisch veld opgewekt. Door een pan met een ijzeren bodem op een kookzone te plaatsen ontstaat in de panbodem een inductiestroom. Deze inductiestroom wekt warmte op in de panbodem. Comfortabel De spoel (1) in de kookplaat De elektronische regeling is nauwkeurig en eenvoudig in te stellen. -
Page 11: Pannen
Solide geëmailleerde pannen Porselein Geëmailleerde gietijzeren pannen Koper Kunststof Aluminium Voor de automatische kookprogramma’s wordt geadviseerd om de pannen te gebruiken die door ATAG worden aanbevolen. Voor de bridge induction zone’s zijn speciale accessoires te bestellen (zie www.atag.nl). NL 11... - Page 12 GEBRUIK INDUCTIE Let op! Wees voorzichtig met dunne plaatstaal geëmailleerde pannen: • op een hoge stand kan het emaille er afspringen wanneer de pan droogkookt; • door het hoge vermogen kan de panbodem kromtrekken. Let op! Gebruik nooit pannen met een vervormde bodem. Een holle of bolle bodem kan de werking van de oververhittingsbeveiliging belemmeren.
-
Page 13: Gebruik Wokbrander
GEBRUIK WOKBRANDER Pannen Pannen • Zorg er altijd voor dat de vlammen onder de pan blijven. Als vlammen om de pan heen spelen gaat veel energie verloren. Bovendien kunnen de handgrepen dan te heet worden. • Gebruik geen pannen met een kleinere bodemdiameter dan 12 cm. Kleinere pannen staan niet stabiel. -
Page 14: Wokbrander Plaatsen
GEBRUIK WOKBRANDER Wokbrander plaatsen Plaats de wokbrander op de juiste manier. Het onjuist plaatsen van de wokbranderdelen kan leiden tot een slecht functionerende brander. 1. Plaats de branderkelk (2) in het branderhuis (1). 2. Plaats de binnenring (3) op de branderkelk (2) met gebruik van de positioneernokken. -
Page 15: Bediening
BEDIENING Eco stand-by modus In eco stand-by modus is de kookplaat uitgeschakeld en verbruikt de kookplaat het minste energie. De kookplaat kan naar eco stand-by modus geschakeld worden vanuit de stand-by modus en wanneer er nog kookzones actief zijn. De kookplaat naar eco stand-by modus schakelen •... -
Page 16: Kinderslot
BEDIENING Kinderslot U kunt de kookplaat met het kinderslot vergrendelen. Onbedoeld inschakelen van de kookzones wordt hiermee voorkomen. De kookplaat naar kinderslot schakelen • Druk gedurende 2 seconden op de sleuteltoets. Er klinkt een dubbel geluidssignaal. Alle toetsen zijn nu inactief behalve de sleuteltoets. -
Page 17: Herkennen Van Een Modus
BEDIENING • Indien u binnen 5 minuten nogmaals op de pauzetoets drukt, zullen de gepauzeerde kookprocessen hervatten. Er klinkt een dubbel geluidssignaal, de kookplaat hervat de instellingen zoals deze voor de pauze ingesteld zijn. • Indien u binnen 5 minuten geen verdere actie onderneemt: Worden alle actieve kookzones automatisch uitgeschakeld. -
Page 18: Geluidssignaal In- En Uitschakelen
BEDIENING De kookwekker inschakelen • Druk éénmaal op de timer-/kookwekkertoets van de kookzone. • Druk op de + of - toets om van de timerfunctie naar de kookwekkerfunctie te schakelen. Daarna kunt met de + toets de gewenste kookduur instellen. Vervolgens kunt u met de - toets de ingestelde tijd aanpassen. -
Page 19: Bediening Inductie
BEDIENING INDUCTIE Inschakelen en vermogen instellen 1. Druk op de sleuteltoets. Er klinkt een enkel geluidssignaal. 2. Plaats een pan op het midden van een kookzone. De APd registreert een pan en in de display verschijnt een knipperende ‘-’. Wanneer u geen verdere actie onderneemt, schakelt de kookzone na 10 seconden vanzelf uit. -
Page 20: Restwarmte-Indicatie
BEDIENING INDUCTIE Restwarmte-indicatie Na gebruik van een kookzone kan de gebruikte zone nog een tijd heet blijven. Zolang de kookzone heet is, blijft er een ‘H’ in de display staan. Boost De ‘boost’ functie kunt u gebruiken om gedurende een korte tijd (maximaal 10 minuten) op het hoogste vermogen te koken. -
Page 21: Bridge Induction
BEDIENING INDUCTIE Bridge induction De Bridge induction zones kunnen aan elkaar gekoppeld worden. Hierdoor ontstaat 1 grote zone die gebruikt kan worden voor bijv. een grote vispan of meerdere pannen op hetzelfde vermogen. • Indien de Bridge induction zones gekoppeld zijn kunnen deze niet op boost gezet worden en kunnen de menufuncties niet gebruikt worden. -
Page 22: Uitschakelen
(zie pagina 17). De kookprogramma’s zijn gebaseerd op gangbare hoeveelheden. Deze functie werkt het best met pannen die door ATAG worden geadviseerd (zie hiervoor www.atag.nl). Deze menufuncties werken het best als ze worden opgestart aan het begin van het kookproces. - Page 23 BEDIENING INDUCTIE Let op! De kookprogramma’s zijn niet werkzaam indien de zones gebridged zijn. (Aan)kookfunctie Brengt de inhoud van de pan aan de kook (100 °C) en houdt deze aan de kook. Er klinkt een geluidssignaal als de inhoud aan de kook is of als het gerecht moet worden toegevoegd.
-
Page 24: Kookstanden
BEDIENING INDUCTIE Kookstanden Het onderstaande overzicht is uitsluitend bedoeld als leidraad, omdat de instelwaarde afhankelijk is van de hoeveelheid en samenstelling van het gerecht en de pan. Gebruik ‘boost’ en stand 11 en 12 voor: • snel aan de kook brengen; •... - Page 25 BEDIENING INDUCTIE Gebruik stand 1 t/m 3 voor: • trekken van bouillon; • pocheren; • warmhouden; • bereiden van stoofvlees; • smoren van groenten; • smelten van chocolade; • smelten van kaas. NL 25...
-
Page 26: Bediening Wokbrander
BEDIENING WOKBRANDER Ontsteken en instellen 1. Plaats een pan op het midden van het kookrooster. 2. Druk op de sleuteltoets. Er klinkt een enkel geluidssignaal. 3. Druk op de aan-/uittoets van de wokbrander. De brander ontsteekt en gaat branden op stand 5. In de display verschijnt stand 5 en er klinkt een enkel geluidssignaal. - Page 27 BEDIENING WOKBRANDER Braadstand Gebruik deze stand voor het braden van gerechten. De buitenbrander is ingeschakeld en zorgt voor een egale verdeling van de warmte in de pan. Sudderstand Deze stand is geschikt voor langzaam garen en warmhouden van het gerecht. Met de twaalf instellingen is zeer precies het gewenste vermogen te regelen.
-
Page 28: Onderhoud
ONDERHOUD Reinigen glasplaat Tip! Schakel, voordat u met schoonmaken begint, eerst het kinderslot in. Dagelijkse reiniging • Hoewel overgekookt voedsel niet kan inbranden verdient het aanbeveling de kookplaat direct na gebruik schoon te maken. • Voor de dagelijkse reiniging kunt u het beste een mild reinigingsmiddel en een vochtige doek gebruiken. -
Page 29: Reinigen Wok Branderdelen
ONDERHOUD Reinigen wok branderdelen Let op! Branderdelen mogen niet in de vaatwasser gereinigd worden. De onderdelen kunnen door het vaatwasmiddel aangetast worden! Hardnekkige vlekken op emaille (pandragers, branderdoppen) Hardnekkige vlekken kunt u het beste ver wij de ren met een vloei- baar reinigingsmiddel of een kunststof schuursponsje. -
Page 30: Storingen
STORINGEN Algemeen Indien u een barstje of scheurtje (hoe klein ook) op de glasplaat ziet, schakel dan de kookplaat onmiddellijk uit, maak het toestel spanningsloos (stekker uit het stopcontact) en sluit de gaskraan. Neem vervolgens contact op met de servicedienst. Storingstabel Wanneer u twijfelt over de goede werking van uw kookplaat betekent dit niet automatisch dat er een defect is. - Page 31 STORINGEN Symptoom Mogelijke oorzaak Oplossing Nadat u een kookzone heeft De gebruikte kookpan is Gebruik een goede pan (zie ingeschakeld blijft de display niet geschikt voor koken op pagina 11 en 12). knipperen. inductie of heeft een diameter kleiner dan 12 cm. Een kookzone stopt De ingestelde timertijd is Schakel het signaal uit door...
- Page 32 STORINGEN Symptoom Mogelijke oorzaak Oplossing Foutcode FAN. Luchtcirculatie niet goed. Zorg dat de beluchtingsgaten onderin de kookplaat open zijn. Overige foutcodes. Neem contact op met de servicedienst. Wokbrander Het ruikt naar gas bij het De aansluiting van het toestel Sluit de gashoofdkraan. Neem toestel.
- Page 33 STORINGEN Symptoom Mogelijke oorzaak Oplossing Brander dooft na Thermokoppel (2) is Reinig/droog het thermokoppel het ontsteken. vervuild. Foutcode F3 * Keramische Sluit de gashoofdkraan en neem de stekker glasplaat gebroken. uit het stopcontact. Neem contact op met uw installateur. Let op! Werp een gebarsten keramische glasplaat niet in de glasbak maar lever deze in bij de milieustraat van de gemeente.
-
Page 34: Milieu
MILIEU Afvoeren toestel en verpakking Bij de vervaardiging van dit toestel is gebruik gemaakt van duurzame materialen. Dit toestel moet aan het eind van zijn levenscyclus op verantwoorde wijze worden afgevoerd. De overheid kan u hierover informatie verschaffen. De verpakking van het toestel is recyclebaar. Gebruikt kunnen zijn: •... - Page 35 TABLE OF CONTENTS Your gas induction hob Introduction Operation of the touch-sensitive buttons Description Induction zone operation Wok burner operation Safety Temperature safety induction zones Cooking time limiter Induction use Induction cooking How induction works Induction sounds Pans Wok burner use Pans Wok burner position Operation...
-
Page 36: Your Gas Induction Hob
YOUR GAS INDUCTION HOB Introduction This manual describes how you can make the best possible use of the hob. In addition to information about operation, you will also find background information to assist you in using this product, as well as maintenance tips. -
Page 37: Description
YOUR GAS INDUCTION HOB Description 1. Wok burner (gas) 2. Bridge induction zone 3. Induction zone 4. Wok burner operation 5. Bridge induction zone front middle operation 6. Pause button/key button 7. Bridge induction zone rear middle operation 8. Right induction zone operation 9. -
Page 38: Induction Zone Operation
YOUR GAS INDUCTION HOB Induction zone operation 1. Induction menu functions 2. Slide control (12 settings) 3. Settings indicator 4. Boost indicator 5. Time reduce button 6. Time increase button 7. Timer/kitchen timer 8. Minutes indicator 9. Kitchen timer button/timer button 10. -
Page 39: Wok Burner Operation
YOUR GAS INDUCTION HOB Wok burner operation 1. Menu functions burner wok burner programs 2. Slide control (12 settings) 3. Settings indicator 4. Searing setting ‘XL’ indicator 5. Time reduce button 6. Time increase button 7. Timer/kitchen timer 8. Minutes indicator 9. -
Page 40: Safety
SAFETY Read the separate safety instructions before use! Temperature safety induction zones • Each induction zone is equipped with a sensor. This sensor measures the temperature of the base of the pan and the sections of the hob. This facility prevents overheating (for example through a pan boiling dry). -
Page 41: Induction Use
INDUCTION USE Induction cooking Induction cooking is fast • To start with, you will be surprised by the speed of induction cooking. Especially at higher settings, foods and liquids will come to the boil very rapidly. It is best not to leave pans unattended to avoid them boiling over or boiling dry. -
Page 42: How Induction Works
INDUCTION USE How induction works A magnetic field is generated in the appliance. By placing a pan with an iron base on a cooking zone, a current is induced in the pan base. This induced current generates heat in the base of the pan. -
Page 43: Pans
Stainless steel Solid enamelled pans Porcelain Enamelled cast-iron pans Copper Plastic Aluminium It is advisable to use pans recommended by ATAG for the automatic cooking programs. Special accessories can be ordered for the bridge induction zones (see www.atag.co.uk). EN 11... - Page 44 INDUCTION USE Please note! Be careful with thin enamelled sheet steel pans: • the enamel may come loose from the steel at high settings if the pan boils dry; • high power level settings may cause the base of the pan to warp. Please note! Never use pans with a misshapen base.
-
Page 45: Wok Burner Use
WOK BURNER USE Pans Pans • Always ensure that the flames remain under the pan. A lot of energy is lost when flames burn around the outside of the pan. The handles could also become too hot. • Do not use pans with a base diameter smaller than 12 cm. Smaller pans are not as stable. -
Page 46: Wok Burner Position
WOK BURNER USE Wok burner position Place the wok burner in the correct way. Placing the wok burner parts incorrectly can result in a poorly functioning burner. 1. Place the burner distributor (2) in the burner housing (1). 2. Use the positioning notches to place the inner ring (3) on the burner distributor (2). -
Page 47: Operation
OPERATION Eco standby mode In the eco standby mode the hob is switched off and it uses as little energy as possible. The hob can also be switched to the eco standby mode from the standby mode and when cooking zones are still active. Switching the hob to the eco standby mode •... -
Page 48: Child Lock
OPERATION Child lock Your induction hob is equipped with a childproof lock that lets you lock the appliance. It prevents unintended switching on of the cooking zones. Switching on the childproof lock • Press the key button for 2 seconds. A double audio signal will be heard. -
Page 49: Recognising A Mode
OPERATION • If you press the pause button again within 5 minutes, the paused cooking processes will resume. A double audio signal will be heard, the hob resumes the settings as they were set before the pause. • If you do not undertake any further action within 5 minutes: All active cooking zones will switch off automatically. -
Page 50: Switching The Audio Signal On And Off
OPERATION Switching on the kitchen timer • Press the timer/cooking timer button of the cooking zone once. • Press the + or - button to switch from the timer function to the kitchen timer function. After that you can set the desired cooking time with the + button. -
Page 51: Induction Operation
INDUCTION OPERATION Switching on and power setting 1. Press the key button. A single audio signal sounds. 2. Place a pan in the middle of a cooking zone. The APd registers a pan and a flashing ‘-’ appears in the display. If you don’t do anything else, the cooking zone will switch off automatically after 10 seconds. -
Page 52: Residual Heat Indicator
INDUCTION OPERATION Residual heat indicator After use, the cooking zone used may stay hot for several minutes. As long as the cooking zone is still hot, an ‘H’ will be visible in the display. Boost You can use the ‘boost’ function to cook at the highest power level during a short period of time (max 10 minutes). -
Page 53: Bridge Induction
INDUCTION OPERATION Bridge induction The Bridge induction zones can be linked to each other. This creates 1 large zone that can be used, for example, for a large fish pan or various pans on the same power. • If the Bridge induction zones are linked, they cannot be set to boost and the menu functions cannot be used. -
Page 54: Switching Off
(refer to page 17). The cooking programs are based on regular quantities. This function works best with pans recommended by ATAG (please refer to www.atag.co.uk). These menu functions work best if they are started at the beginning of the cooking process. - Page 55 INDUCTION OPERATION Please note! The cooking programs do not work if the zones are bridged. Heating-up/cooking function This function brings the content of the pan to a boil (100 °C) and keeps it boiling. An audio signal can be heard when the content is cooking or if the food has to be added.
-
Page 56: Cooking Settings
INDUCTION OPERATION Cooking settings Because the settings depend on the quantity and composition of the pan and its contents, the table below is intended as a guideline only. Use ‘boost’ and settings 11 and 12 to: • bring food or liquid to the boil quickly; •... - Page 57 INDUCTION OPERATION Use settings 1 to 3 to: • simmer bouillon; • poach; • keep warm; • stew meats; • simmer vegetables; • melt chocolate; • melt cheese. EN 25...
-
Page 58: Wok Burner Operation
WOK BURNER OPERATION Ignition and adjustment 1. Place the pan in the middle of a cooking grid. 2. Press the key button. A single audio signal sounds. 3. Press the on/off button of the wok burner. The burner will light and will heat at setting 5. - Page 59 WOK BURNER OPERATION Searing setting Use this setting to sear dishes. The outer burner is switched on and provides an equal distribution of heat in the pan. Simmer setting This setting is suitable for slow cooking and keeping your dish warm. With twelve settings, the desired power can be controlled very precisely.
-
Page 60: Maintenance
MAINTENANCE Cleaning glass top Tip! Activate the child lock before cleaning the hob. Daily cleaning • Although food spills cannot burn into the glass, we nevertheless recommend you clean the hob immediately after use. • For daily cleaning, a damp cloth with a mild cleaning agent is best. •... -
Page 61: Cleaning Wok Burner Elements
MAINTENANCE Cleaning wok burner elements Please note! Burner parts should not be cleaned in the dishwasher. Dishwasher detergents can corrode burner parts! Persistent stains on enamel (pan supports, burner caps) Persistent stains can best be removed with a fluid detergent or a plastic scouring sponge. -
Page 62: Faults
If your hob does not work properly, it does not always mean that it is defective. Make sure to check the points mentioned below in the table, or visit our website ‘www.atag.co.uk’. for more information. Please note If the square red light above the pause button flashes (and none of the malfunctions below apply), please contact the service department. - Page 63 FAULTS Symptom Possible cause Solution A cooking zone suddenly The preset time has ended. Switch off the signal by stops working and you hear pressing the - or + button on a signal. the timer. The hob is not working There is no power supply Check the fuses or the and nothing appears in the...
- Page 64 FAULTS Symptom Possible cause Solution Wok burner There is a smell of gas near The appliance connection is Turn off the main gas supply the appliance. leaking. valve. Contact your installer. The burner does not ignite. Electrical connection not Contact your installer. correct.
- Page 65 FAULTS Symptom Possible cause Solution Ceramic glass plate broken. Close the gas main switch and pull the plug out of the socket. Contact your installer. Please note! Do not throw a broken ceramic glass plate in the glass recycling bin, but take it to the municipality’s waste recycling centre.
-
Page 66: Environment
ENVIRONMENT Disposal of the appliance and packaging Sustainable materials have been used during manufacture of this appliance. This appliance must be disposed of responsibly at the end of its service life. The government can provide you with information about this. The appliance packaging is recyclable.
Need help?
Do you have a question about the IGT9472MB and is the answer not in the manual?
Questions and answers