Kenwood NEXEDGE NX-820HG Instruction Manual
Hide thumbs
Also See for NEXEDGE NX-820HG:
- Instruction manual (24 pages) ,
- Service manual (89 pages) ,
- Instruction manual (72 pages)

Related Manuals for Kenwood NEXEDGE NX-820HG


Summary of Contents for Kenwood NEXEDGE NX-820HG
- Page 1 NX-720H NX-720HG NX-820H NX-820HG NX-920 NX-920G INSTRUCTION MANUAL MODE D’EMPLOI MANUAL DE INSTRUCCIONES B62-2560-10 (K)
- Page 3 Object Code into a human-readable form. U.S. Patent Nos. #6,199,037, #6,912,495, #8,200,497, #7,970,606, and #8,359,197. Firmware Copyrights The title to and ownership of copyrights for firmware embedded in KENWOOD product memories are reserved for JVC KENWOOD Corporation.
- Page 4 Terminal Descriptions ACC (D-SUB 15 Pin Connector) Pin No. Name Description Specifi cation DC Power (Switched B) Output 13.6 V ±15% Max. 2 A Min. Input: 10.8 V Igintion Signal Input Max. Input: 16.0 V 4 SP2/PA Loudspeaker Output/ Public Address Output DETO RX Detected Audio Output 280 mV...
- Page 5 THANK YOU We are grateful you have chosen KENWOOD for your personal mobile applications. This instruction manual covers only the basic operations of your mobile radio. Ask your dealer for information on any customized features they may have added to your radio.
-
Page 6: Table Of Contents
◆ The transceiver operates in 12 V negative ground systems only! Check the battery polarity and voltage of the vehicle before installing the transceiver. ◆ Use only the supplied DC power cable or a KENWOOD optional DC power cable. ◆ Do not cut and/or remove the fuse holder on the DC power cable. -
Page 7: Getting Started
GETTING STARTED Note: The following instructions are for use by your KENWOOD dealer, an authorized KENWOOD service facility, or the factory. SUPPLIED ACCESSORIES Carefully unpack the transceiver. We recommend that you identify the items listed below before discarding the packing material. If any items are missing or have been damaged during shipment, fi... - Page 8 ■ Installing the Transceiver For passenger safety, install the transceiver securely using the supplied mounting bracket and screw set, so the transceiver will not break loose in the event of a collision. Note: Before installing the transceiver, check how far the mounting screws will extend below the surface.
-
Page 9: Getting Acquainted
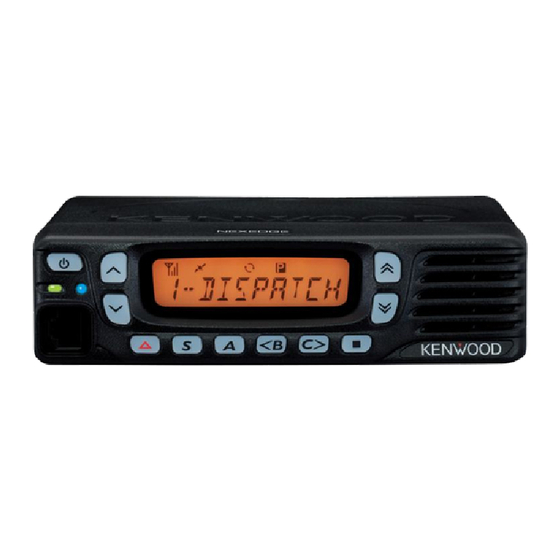
GETTING ACQUAINTED FRONT AND REAR VIEWS (Power) switch Press to switch the transceiver ON or OFF. keys Press to activate their programmable functions {page 5}. keys Press to activate their programmable functions {page 5}. d TX/RX Indicator Lights red while transmitting and green while receiving a signal. Flashes orange when receiving an optional signaling call. - Page 10 DISPLAY Icon Description Displays the signal strength. Not used. Appears when the GPS position is determined. Appears when Monitor or Squelch Off is activated. Blinks when an incoming call matches your Optional Signaling. Appears when the Talk Around function is on. Lights while scanning or while paused on a channel.
-
Page 11: Programmable Functions
PROGRAMMABLE FUNCTIONS , S, A, <B, C>, and ■ keys can be programmed with the functions listed below. Ask your dealer for details on these functions. • None • Lone Worker 1, 10 • 2-tone • Maintenance • Auto Telephone •... -
Page 12: Basic Operations
BASIC OPERATIONS SWITCHING POWER ON/ OFF Press to switch the transceiver ON. • A beep sounds and the display illuminates. • If the Transceiver Password function is programmed, “PASSWORD” will appear on the display. Press again to switch the transceiver OFF. ■... - Page 13 • If the channel is busy, wait until it becomes free. 3 Press the PTT switch and speak into the microphone. Release the PTT switch to receive. • For best sound quality, hold the transceiver approximately 1.5 inches (3 ~ 4 cm) from your mouth.
-
Page 14: Scan
SCAN Scan monitors for signals on the transceiver channels. While scanning, the transceiver checks for a signal on each channel and only stops if a signal is present. To begin scanning, press the key programmed as [Scan]. • indicator appears. •... - Page 15 SCAN DELETE/ADD You can add and remove zones and/or channels/group IDs to and from your scan list. 1 Select your desired zone and/or channel/group ID. 2 Press the key programmed as [Zone Delete/Add] (to add/remove zones) or [Scan Delete/Add] (to add/remove channels/group IDs). •...
-
Page 16: Fleetsync: Alphanumeric 2-Way Paging Function
FleetSync: ALPHANUMERIC 2-WAY PAGING FUNCTION FleetSync is an Alphanumeric 2-way Paging Function, and is a protocol owned by JVC KENWOOD Corporation. Note: This function is available only in analog operation. SELCALL (SELECTIVE CALLING) A Selcall is a voice call to a station or group of stations. - Page 17 5 Press the key to select the status you want to transmit. • If Manual Dialing is enabled, you can enter a station ID by using the microphone DTMF keypad (refer to step 3, above). 6 Press the PTT switch to initiate the call. •...
-
Page 18: Trunking Calls (Analog)
TRUNKING CALLS (ANALOG) PLACING A DISPATCH CALL 1 Select the desired zone and channel/group ID. 2 Press and hold the PTT switch. 3 If the “PTT Proceed” tone sounds, communication is possible; start speaking into the microphone. Release the PTT switch to receive. •... - Page 19 DTMF (DUAL TONE MULTI FREQUENCY) CALLS MANUAL DIALING 1 Press and hold the PTT switch. 2 Enter the desired digits using the microphone DTMF keypad. • If you release the PTT switch, transmit mode will end even if the complete number has not been sent.
- Page 20 ■ Removing an Autodial Entry 1 Press the key programmed as [Autodial Programming]. 2 Press the key to select a memory location number. 3 Press the A or # key. • “DELETE” appears on the display. • Additionally, you can press and hold the A or # key to delete all entries. 4 Press the S or key to confi...
-
Page 21: Advanced Operations
ADVANCED OPERATIONS EMERGENCY CALLS If your transceiver has been programmed with the Emergency function, you can make emergency calls. 1 Press and hold the key programmed as [Emergency]. • Ask your dealer for the length of time necessary to hold this key before the transceiver enters Emergency mode. - Page 22 1 Select your desired channel. 2 Press and hold the key programmed as [OST] for 1 second. 3 Press the key to select your desired tone or code. • Your dealer can set up to 40 tones/codes. 4 When you have fi nished operating using OST, press the [OST] key again to turn the OST function OFF.
- Page 23 current squelch level appears on the display. • 2 Press the key to select your desired squelch level from 0 to 9. 3 Press the S or key to store the new setting. SIGNAL STRENGTH INDICATOR The signal strength indicator displays the strength of received calls. No icon appears when no signal is available.
-
Page 24: Background Operations
BACKGROUND OPERATIONS TIME-OUT TIMER (TOT) The Time-out Timer prevents you from using a channel for an extended duration. If you continuously transmit for a preset time, the transceiver will stop transmitting and an alert tone will sound. Release the PTT switch. AUXILIARY PORT Press the key programmed as [AUX A] or [AUX B] to activate the auxiliary port. - Page 25 Brevets américains n°. #6,199,037, #6,912,495, #8,200,497, #7,970,606 et #8,359,197. Droits d’auteur du micrologiciel Le titre et la propriété des droits d’auteur pour le micrologiciel intégré dans la mémoire du produit KENWOOD sont réservés pour JVC KENWOOD Corporation.
- Page 26 Description de la borne ACC (Connecteur D-SUB 15 broches) N° de Nom de Description Caractéristiques broche broche Sortie d’alimentation CC (commuté B) 13,6 V ± 15% Max 2 A Entrée Min : 10,8 V Entrée du signal d’allumage Entrée Max : 16,0 V 4 ...
- Page 27 MERCI Nous sommes heureux que vous ayez choisi KENWOOD pour vos applications mobiles personnelles. Ce mode d’emploi ne reprend que le fonctionnement de base de votre radio mobile. Renseignez- vous auprès de votre revendeur pour de plus amples informations relatives aux fonctions personnalisées qui ont pu être ajoutées à...
- Page 28 • Si une odeur anormale ou de la fumée est générée par l’émetteur-récepteur, mettez immédiatement l’émetteur-récepteur hors tension et contactez votre revendeur KENWOOD. • Il est possible que l’utilisation de l’émetteur-récepteur lors de la conduite soit contraire aux règles de circulation.
- Page 29 POUR DÉMARRER Remarque : les instructions suivantes sont destinées à votre revendeur KENWOOD, un centre de service agréé KENWOOD ou à l’usine de fabrication. ACCESSOIRES FOURNIS Déballez soigneusement l’émetteur-récepteur. Nous recommandons que vous identifi ez les articles de la liste ci-dessous avant de vous débarrasser des matériaux d’emballage.
- Page 30 • Assurez-vous de laisser suffi samment de jeu aux câble de façon à ce que l’émetteur- récepteur puisse être retiré pour réparation tout en restant connecté à l’alimentation. ■ Installation de l’émetteur-récepteur AVERTISSEMENT Pour la sécurité du passager, et pour éviter que l’émetteur-récepteur ne se détache en cas de collision, fi...
-
Page 31: Familiarisation Avec L'appareil
FAMILIARISATION AVEC L’APPAREIL VUES AVANT ET ARRIÈRE Commutateur (d’alimentation) Appuyez pour mettre sous ou hors tension l’émetteur-récepteur. b Touches Appuyez pour activer leurs fonctions programmables {page 5}. c Touches Appuyez pour activer leurs fonctions programmables {page 5}. d Indicateur TX/RX S’allume en rouge lors de la transmission et en vert lors de la réception d’un signal. - Page 32 AFFICHEUR Icône Description Affi che la puissance du signal. Non utilisé. Apparaît lorsque la position GPS est défi nie. Apparaît lorsque Surveillance ou Silencieux désactivé est activé. Clignote lorsqu’un appel entrant correspond à votre signalisation optionnelle. Apparaît lorsque la fonction Talk Around est activée. S’allume pendant le balayage ou alors qu’il est arrêté...
-
Page 33: Fonctions Programmables
FONCTIONS PROGRAMMABLES , S, A, <B, C> et ■ peuvent être programmées avec les fonctions Les touches énumérées ci-dessous. Demandez à votre revendeur plus de détails concernant ces fonctions. • Aucune • Éclat LCD 1, 10 • 2 tonalités • Travailleur seul •... -
Page 34: Fonctionnement De Base
FONCTIONNEMENT DE BASE MISE SOUS/HORS TENSION Appuyez sur pour mettre l’émetteur-récepteur sous tension. • Un bip retentit et l’affi cheur s’allume. • Si la fonction Mot de passe émetteur-récepteur est programmée, “PASSWORD” apparaîtra sur l’affi cheur. Appuyez à nouveau sur pour mettre l’émetteur-récepteur hors tension. - Page 35 • Pour une meilleure qualité du son, tenez le microphone à environ 1,5 pouces (3 à 4 cm) de votre bouche. ■ Émettre des appels de groupe (numériques) Si une touche a été programmée pour la fonction [Groupe], vous pouvez sélectionner une ID de groupe depuis la liste pour appeler ces autres parties sur un canal conventionnel.
-
Page 36: Balayage
BALAYAGE Le balayage surveille les signaux sur les canaux de l’émetteur-récepteur. Durant le balayage, l’émetteur-récepteur recherche un signal sur chaque canal et s’arrête uniquement si un signal est présent. Pour commencer le balayage, appuyez sur la touche programmée pour la fonction [Balayage]. •... - Page 37 SUPPR./AJOUT AU BALAYAGE Vous pouvez ajouter et enlever des zones et/ou des canaux/ID de groupe à et de la liste de balayage. Sélectionnez la zone et/ou le canal/ID de groupe souhaités. Appuyez sur la touche programmée pour la fonction [Effacement/ajout de zone] (pour ajouter/effacer des zones) ou [Suppr./ajout au balayage] (pour ajouter/effacer des canaux/ ID de groupe).
-
Page 38: Fleetsync: Téléavertisseur Bidirectionnel Alphanumérique
FleetSync: TÉLÉAVERTISSEUR BIDIRECTIONNEL ALPHANUMÉRIQUE FleetSync est un téléavertisseur bidirectionnel alphanumérique et ce protocole appartient à JVC KENWOOD Corporation. Remarque: cette fonction n’est disponible que lors d’une utilisation analogique. SELCALL (APPEL SÉLECTIF) Un selcall est un appel vocal vers une station ou un groupe de stations. - Page 39 Appuyez sur la touche S ou pour passer en mode État. Appuyez sur la touche pour sélectionner l’état que vous souhaitez transmettre. • Si la composition manuelle est activée, vous pouvez saisir une ID de station à l’aide du clavier DTMF à microphone (reportez-vous à l’étape 3 ci-dessus). Appuyez sur le commutateur PTT pour initier l’appel.
-
Page 40: Appels Trunking (Analogiques)
APPELS TRUNKING (ANALOGIQUES) PASSER UN APPEL D’EXPÉDITION Sélectionnez la zone et le canal/ID de groupe souhaités. Appuyez sur le commutateur PTT et maintenez-le enfoncé. Si la tonalité “Exécution PTT” est émise, la communication est possible; commencez à parler dans le microphone. Relâchez le commutateur PTT pour recevoir. •... -
Page 41: Appels Dtmf (Double Tonalité Multi-Fréquence)
APPELS DTMF (DOUBLE TONALITÉ MULTI-FRÉQUENCE) COMPOSITION MANUELLE Appuyez sur le commutateur PTT et maintenez-le enfoncé. Saisissez les chiffres souhaités à l’aide du clavier DTMF à microphone. • Si vous relâchez le commutateur PTT, le mode de transmission s’arrêtera même si le numéro n’a pas été... - Page 42 10 Répétez les étapes 8 et 9 pour saisir le numéro entier. 11 Appuyez sur la touche S ou pour accepter le numéro et enregistrer l’entrée. ■ Effacement d’une entrée de composition automatique Appuyez sur la touche programmée pour la fonction [Programmation de composition automatique].
-
Page 43: Opérations Avancées
OPÉRATIONS AVANCÉES APPELS D’URGENCE Si votre émetteur-récepteur a été programmé avec la fonction Urgence, vous pouvez émettre des appels d’urgence. Appuyez et maintenez enfoncée la touche programmée pour la fonction [Urgence]. • Renseignez-vous auprès de votre revendeur en ce qui concerne le temps nécessaire à maintenir cette touche enfoncée avant que l’émetteur-récepteur entre en mode Urgence. - Page 44 Sélectionnez le canal souhaité. Appuyez sur la touche programmée pour la fonction [OST] et maintenez-la enfoncée pendant 1 seconde. Appuyez sur la touche pour sélectionner la tonalité ou le code de votre choix. • Votre revendeur peut régler jusqu’à 40 tonalités/codes. Lorsque vous avez terminé...
- Page 45 niveau du silencieux actuel apparaît sur l’affi cheur. • Appuyez sur la touche pour sélectionner votre niveau de silencieux souhaité de 0 à Appuyez sur la touche S ou pour enregistrer le nouveau réglage. INDICATEUR DE PUISSANCE DE SIGNAL L’indicateur de puissance de signal affi che la puissance des appels reçus. Aucun icône n’apparaît lorsque aucun signal n’est disponible.
-
Page 46: Opérations En Arrière-Plan
OPÉRATIONS EN ARRIÈRE-PLAN TEMPORISATEUR D’ARRÊT (TOT) L’objectif de la fonction temporisateur d’arrêt vous permet d’utiliser un canal pendant une période prolongée. Si vous transmettez en continu pendant une période prédéfi nie, l’émetteur- récepteur arrêtera de transmettre et une tonalité d’avertissement retentira. Relâchez le commutateur PTT. - Page 47 Los números de patente de los EE.UU. #6,199,037, #6,912,495, #8,200,497, #7,970,606 y #8,359,197. Derechos de propiedad intelectual del firmware La titularidad y propiedad de los derechos de propiedad intelectual del firmware integrado en las memorias de los productos KENWOOD están reservados para JVC KENWOOD Corporation.
- Page 49 MUCHAS GRACIAS Le agradecemos que haya seleccionado KENWOOD para sus aplicaciones móviles personales. Este manual de instrucciones abarca únicamente las operaciones básicas de su radio móvil. Solicite a su proveedor información acerca de las funciones personalizadas que haya podido añadir a su radio.
- Page 50 • Si detecta un olor anormal o humo procedente del transceptor, desconecte inmediatamente la alimentación y póngase en contacto con su proveedor KENWOOD. • El uso del transceptor mientras conduce puede infringir las leyes de tráfi co. Consulte y respete el reglamento de tráfi...
-
Page 51: Introducción
INTRODUCCIÓN Nota: Las siguientes instrucciones son para su proveedor KENWOOD, un centro de reparaciones autorizado KENWOOD o la fábrica. ACCESORIOS SUMINISTRADOS Desembale el transceptor con cuidado. Recomendamos que antes de desechar el material de embalaje, identifi que los elementos indicados en la lista siguiente. Si falta algo o se ha producido algún daño durante el transporte, presente inmediatamente una reclamación a la... - Page 52 ■ Instalación el Transceptor ADVERTENCIA Para la seguridad de los pasajeros, instale el transceptor de forma segura utilizando el soporte de montaje y el juego de tornillos de forma que el transceptor no se suelte en caso de colisión. Nota: Antes de instalar el transceptor, compruebe cuanto se extienden los tornillos por debajo de la superfi...
-
Page 53: Disposición Física
DISPOSICIÓN FÍSICA VISTAS FRONTAL Y TRASERA a Interruptor (encendido) Púlselo para encender o apagar el transceptor. b Teclas Púlselas para activar sus funciones programables {página 5}. c Teclas Púlselas para activar sus funciones programables {página 5}. d Indicador de transmisión/recepción Se ilumina en rojo cuando está... - Page 54 PANTALLA Icono Descripción Muestra la potencia de señal. No utilizado. Aparece cuando se ha determinado la posición GPS. Aparece cuando monitor o desactivar silenciamiento está activado. Parpadea cuando una llamada entrante coincide con la señalización opcional de su aparato. Aparece cuando se activa la función Talk Around. Se ilumina cuando la exploración está...
-
Page 55: Funciones Programables
FUNCIONES PROGRAMABLES , S, A, <B, C> y ■ pueden programarse con las funciones que se detallan Las teclas a continuación. Consulte a su proveedor para más información acerca de estas funciones. • Ninguna • Trabajador solo 1, 10 • 2 tonos •... -
Page 56: Operaciones Básicas
OPERACIONES BÁSICAS ENCENDIDO Y APAGADO Pulse para encender el transceptor. • Suena un pitido breve y se ilumina la pantalla. • Si se ha programado la función Clave del transceptor, aparecerá “PASSWORD” en la pantalla. Pulse de nuevo para apagarlo. ■... - Page 57 • Para obtener una calidad de sonido optima, sujete el transceptor a 3 ó 4 cm (1,5 pulgadas) de la boca. ■ Realización de llamadas de grupo (digitales) Si se ha programado una tecla con la función [Grupo], puede seleccionar un ID de grupo de la lista para realizar una llamada a dichos interlocutores en un canal convencional.
-
Page 58: Exploración
EXPLORACIÓN Exploración permite escuchar señales en los canales del transceptor. Durante la exploración, el transceptor busca una señal en cada canal y sólo se detiene si hay una señal presente. Para iniciar la exploración, pulse la tecla programada con la función [Exploración]. •... - Page 59 SUPR/AÑADIR EXPLORACIÓN Existe la posibilidad de añadir y borrar zonas y/o canales/IDs de grupo a la lista de exploración. Seleccione la zona y/o el canal/ID grupo deseados. Pulse la tecla programada con la función [Borrar/Añadir zona] (para añadir/borrar zonas) o [Supr/Añadir exploración] (para añadir/borrar canales/IDs de grupo).
-
Page 60: Fleetsync: Función De Localización Alfanumérica De 2 Vías
FleetSync: FUNCIÓN DE LOCALIZACIÓN ALFANUMÉRICA DE 2 VÍAS FleetSync es una función de localización alfanumérica de 2 vías y a su vez es un protocolo patentado por JVC KENWOOD Corporation. Nota: Esta función sólo está disponible en analógico. SELCALL (LLAMADA SELECTIVA) Selcall es una llamada de voz a una emisora o a un grupo de emisoras. - Page 61 • Si la marcación manual está activada, puede introducir un ID de emisora a través del teclado DTMF del micrófono (consulte el paso 3 anterior). Presione el conmutador PTT para iniciar la llamada. • Una vez que el estado se ha transmitido correctamente, “COMPLETE” (completada) aparece en la pantalla.
-
Page 62: Llamadas Trunking (Analógicas)
LLAMADAS TRUNKING (ANALÓGICAS) REALIZACIÓN DE UNA LLAMADA DE DISTRIBUCIÓN Seleccione la zona y el canal/ID grupo deseados. Presione prolongadamente el conmutador PTT. Si suena el tono “PTT proceda”, es posible establecer comunicación; empiece a hablar al micrófono. Suelte el conmutador PTT para recibir. •... -
Page 63: Llamadas Dtmf (Multifrecuencia De Doble Tono)
LLAMADAS DTMF (MULTIFRECUENCIA DE DOBLE TONO) MARCACIÓN MANUAL Pulse prolongadamente el conmutador PTT. Introduzca los dígitos deseados utilizando el teclado DTMF del micrófono. • Si suelta el conmutador PTT, fi nalizará el modo de transmisión aunque no se haya enviado el número completo. •... - Page 64 ■ Eliminación de una entrada de autodiscado Pulse la tecla programada con la función [Programación de autodiscado]. Pulse la tecla para seleccionar un número de memoria. Pulse la tecla A o #. • “DELETE” aparece en la pantalla. • También puede pulsar prolongadamente la tecla A o # para borrar todas las entradas.
-
Page 65: Operaciones Avanzadas
OPERACIONES AVANZADAS LLAMADAS DE EMERGENCIA Si su transceptor ha sido programado con la función Emergencia, podrá hacer llamadas de emergencia. Pulse prolongadamente la tecla programada con la función [Emergencia]. • Pregunte a su proveedor cuanto tiempo hay que mantener esta tecla pulsada para que el transceptor pase al modo de emergencia. - Page 66 Pulse la tecla para seleccionar el tono o el código deseado. • Su proveedor puede confi gurar hasta 40 tonos/códigos. Cuando termine de utilizar la función OST, vuelva a pulsar la tecla [OST] para desactivar dicha función. ■ Número de acceso radio (RAN) RAN es un sistema de señalización diseñado para las radiocomunicaciones digitales.
- Page 67 Pulse la tecla S o para guardar la nueva confi guración. INDICADOR DE POTENCIA DE SEÑAL El indicador de potencia de señal muestra la intensidad de las llamadas recibidas. No aparece ningún icono cuando no hay ninguna señal. Intensa Sufi ciente Débil Muy débil parpadea cuando se encuentra fuera de cobertura (sólo trunking NXDN).
-
Page 68: Operaciones De Fondo
OPERACIONES DE FONDO TEMPORIZADOR DE TIEMPO LÍMITE (TOT) El temporizador de tiempo límite impide que pueda utilizar un canal durante demasiado tiempo. Si transmite ininterrumpidamente durante un periodo de tiempo predefi nido, el transceptor dejará de transmitir y sonará un tono de aviso. Suelte el conmutador PTT. PUERTO AUXILIAR Pulse la tecla programada con la función [AUX A] o [AUX B] para activar el puerto auxiliar. - Page 72 © 2015...
Need help?
Do you have a question about the NEXEDGE NX-820HG and is the answer not in the manual?
Questions and answers