Table of Contents
Advertisement
Quick Links
Dear Customer,
Thank you for choosing this quality product from ASKO.
We hope it will meet your expectations and fulfil your needs for many years to
come. Scandinavian design combines clean lines, everyday functionality and
high quality. These are key characteristics of all our products and the reason
they are greatly appreciated throughout the world.
To get the most from your new dishwasher, we recommend that you read the
operating instructions before using the dishwasher. The operating instructions
also include information on how you can help protect the environment.
Operating Instructions
Dishwasher
ASKO D5424
Advertisement
Table of Contents

Related Manuals for Asko D5424WH


Summary of Contents for Asko D5424WH
- Page 1 Dear Customer, Thank you for choosing this quality product from ASKO. We hope it will meet your expectations and fulfil your needs for many years to come. Scandinavian design combines clean lines, everyday functionality and high quality. These are key characteristics of all our products and the reason they are greatly appreciated throughout the world.
-
Page 2: Table Of Contents
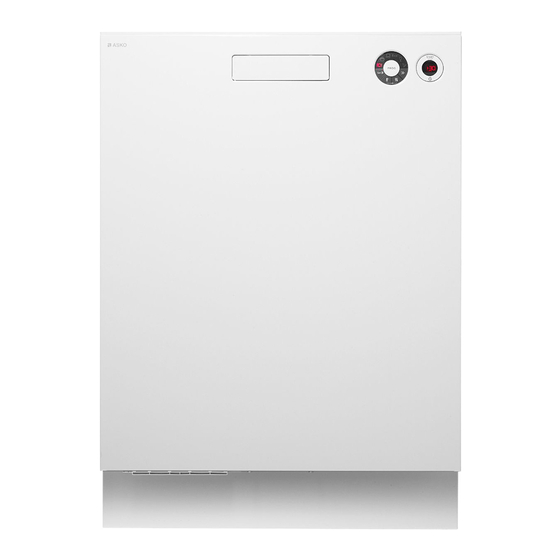
Front panel Troubleshooting Safety instructions Technical information Before washing for the first time Installation Loading the dishwasher ASKO Service Using the dishwasher Program chart Settings Your notes Care and cleaning Front panel To start the machine, press and hold the main power switch until the display lights up. -
Page 3: Safety Instructions
Safety instructions Activate the child safety lock (Kid Lock ) General (only certain models) Read the operating instructions and keep them in a safe place! A child safety lock is fitted to prevent children from opening the Never use the dishwasher for any purpose other than that dishwasher door. -
Page 4: Before Washing For The First Time
Before washing for the first time Loading the dishwasher Checking water hardness Economic dishwashing Contact the local water utility to check the water hardness in your Run programs only with a full load area. This is important with regard to how much detergent and Wait to run a program until the dishwasher is full. - Page 5 The dishwasher's baskets Cutlery basket The dishwasher is equipped with an upper basket and a lower Place cutlery with the handles facing down, except for knives, basket with cutlery basket. and spread them out as much as possible. Ensure that spoons do not stack inside each other.
-
Page 6: Using The Dishwasher
Using the dishwasher Add detergent Program selection Press the Program selector one or more times until the desired program symbol lights. Daily wash A program suitable for day-to-day dishwashing. This program can also clean dried leftovers, but is not intended for burnt food, such as on oven dishes. - Page 7 You can vary the temperature as shown below: NOTE! Heavy wash: 60 °C / 70 °C During the first run of each program, the remaining time dis- played can be slightly misleading, as the dishwasher is estimat- Normal program: 48 °C / 65 °C ing the time.
-
Page 8: Settings
Settings Do as follows to open the settings menu: Button press Description Turn off the dishwasher using the main power switch. Wait about five seconds. Then press the main power switch again. Wait until the numbers appear in the right-hand display before continuing to the next step. - Page 9 Button press Options Settings Description Buzzer volume The dishwasher uses a buzzer to indicate when a (Off) program is finished or when a fault has occurred. (Low) (High) Press Start to save the setting value and continue to the next setting. Operation volume This sound is used to confirm each button press.
-
Page 10: Care And Cleaning
Care and cleaning Coarse filter NOTE! The coarse filter traps larger food particles, which cannot get The dishwasher must not be used without the filter in place! past the drainage pump. Empty the coarse filter as necessary. Diswashing efficiency can be affected if the course filter is in- 1 Lift the coarse filter by the handle. - Page 11 Door When cleaning the edge around the door, use only a slightly damp cloth (with a little cleaner if necessary). WARNING! Do not use a spray bottle or the like around the door lock. This is to ensure that water does not penetrate the door catch and come into contact with the electrical components.
-
Page 12: Troubleshooting
Troubleshooting Display Type of fault Action Overfilling Call the service department. Water outlet fault See "Water remains in the dishwasher" in the table below. Water inlet fault Check that the water tap is on. Check whether dishwasher inlet hose is connected to a pressure limiting valve (some pressure limiting valves may restrict the supply of water to the dishwasher). - Page 13 Problem Possible causes Action Rattling sound when dishwashing. The dishes are not correctly placed or the Check that the dishes are placed securely. spray arms are not rotating. Spin the spray arms to make sure they can rotate. The dishwasher does not start. The Start start button has not been pressed Press and hold Start until the display flashes for long enough.
- Page 14 Problem Possible causes Action The touch buttons do not react when You have pressed the touch buttons too soon Wait a moment then try again. pressed. after opening the door. Dirt on the touch buttons. Clean with a dry or slightly damp cloth. Child lock (button lock) activated.
-
Page 15: Technical Information
Technical information Information for test institute Energy labelling Australian standard: AS/NZS 2007 Number of place settings: Dishwashing programs: Normal program; Low temperature, Short dry (no options) The door should be opened upon completion of the drying cycle a distance of 35 mm at V. Program time: 2:15 hours:minutes Connection:... - Page 16 Technical data Height: 817-872 mm Width: 596 mm Depth: 559 mm Weight: 49 kg Capacity: 14 Place settings Water pressure: 0.03–1.0 MPa 0.3–10 kp/cm 3–100 N/cm Electrical connection: See compliance plate Rated power: See compliance plate Weight can vary due to different specifications. In accordance with standard, AS/NZS 2007.
-
Page 17: Installation
Installation 1198 [mm] 30-94 *Remove locking nuts for an installed height of 820-821 mm. Safety instructions Transport protection for the door Connections to electricity, water and drainage must be per- Do not forget to remove the transport protection for the door when formed by a qualified professional. - Page 18 Suggested machine installations Adjust the height and slide the dishwasher into place The dishwasher can be installed built-in, completely freestanding or partially built-in. 1 Start by measuring the height from the floor to the bottom A. Built-in edge of the worktop. The dishwasher is intended for installation under a worktop.
- Page 19 No part of the drainage hose may be more than 950 mm above NOTE! the bottom of the dishwasher. The hose must not be routed direct- ly to a floor drain or the like. In such cases, the hose can act as Connecting a dishwasher to the water supply via certain types a siphon and empty the dishwasher.
- Page 20 Adjusting the plinth (only when using Set the correct plinth depth as follows toe kick accessory) (Not applicable to all models) The dishwasher is supplied with one or two toe kicks depending on the model. The table shows which toe kick you should use depending on the recess height and plinth depth.
-
Page 21: Asko Service
ASKO Service Information about your product There is a QR code on the compliance plate. Scan the code to view information about your product. Contact the service department Read the chapter Troubleshooting before contacting the service department. Provide the details on the compliance plate in all contact. -
Page 22: Program Chart
Program chart... -
Page 23: Your Notes
Your notes... - Page 24 Use rinse aid to achieve good washing and drying results. (See page 4.) Refill rinse aid indicator. Select a program and any options (See page 6.) Press Start en (04-16) ASKO APPLIANCES AB SOCKERBRUKSGATAN 3, SE-531 40 LIDKÖPING, SWEDEN WWW.ASKO.COM...
Need help?
Do you have a question about the D5424WH and is the answer not in the manual?
Questions and answers