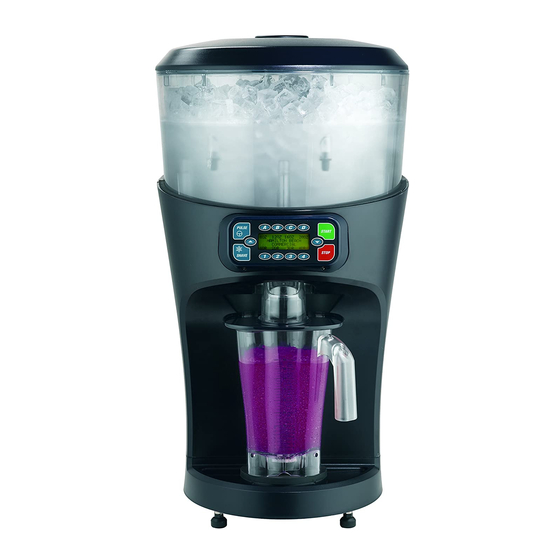
Hamilton Beach Revolution HBS 1200 Quick Start Manual
Ice shaver/blender
Hide thumbs
Also See for Revolution HBS 1200:
- Operation manual (49 pages) ,
- Technical information (12 pages) ,
- Specification (2 pages)

Related Manuals for Hamilton Beach Revolution HBS 1200


Summary of Contents for Hamilton Beach Revolution HBS 1200
- Page 1 Revolution Series Ice Shaver/Blender HBS 1200 840138400 www.commercial.hamiltonbeach.com 9/05...
-
Page 2: Technical Service
Ice Shaver/Blender Safety IMPORTANT: This operation manual should be reviewed with all equipment operators as part of your operator training program. Your safety and the safety of others is very important. We have provided many important safety messages in this manual and on your appliance. Always read and obey all safety messages. -
Page 3: Important Safety Instructions
12. The use of accessory attachments not recommended 27. To prevent burns from hot liquids splashing out of the by Hamilton Beach may cause injuries. container, always remove the filler cap of the container 13. To reduce risk of personal injury and to prevent cover before blending hot liquids. -
Page 4: Parts And Features
Parts and Features The parts and features for the Revolution Ice Shaver/Blender are shown on this page. Become familiar with all parts and features before use. Your Ice Shaver/Blender is designed for blending and mixing beverages and frozen desserts. Ice Hopper Cover Inner Ice Hopper Outer Ice Hopper... - Page 5 Preparation Setting up the Unit The Ice Shaver/Blender must be placed on a Leveling sturdy, level surface. It is recommended that it be Feet located near a sink or other drain location. Leveling the Unit For proper operation and drainage, the unit must be level.
-
Page 6: Operation
Operation Control Panel Familiarize yourself with the control panel and the display messages before using the unit. Scroll up/down buttons Serving Size Buttons A–D Press the L or M button to Press A–D to select the scroll through status and desired serving size. - Page 7 Then plug the unit back on and restart it. 8OZ 12OZ 16OZ 20OZ HAMILTON BEACH COMMERCIAL Diagnostic Messages Diagnostic Messages Service Messages Others, such as service messages, are based on The ice shaver/blender control system has a number of safety and diagnostic features.
- Page 8 8OZ 12OZ 16OZ 20OZ blender continues to run until the end of the cycle. HAMILTON BEACH 8. Remove the jar to serve. COMMERCIAL 9. Clean the jar as directed in “Care and Cleaning.”...
- Page 9 NOTE: Do not overfill the hopper. The ice hopper cover has a safety interlock and the Ice HAMILTON BEACH Shaver/Blender will not work unless the cover is COMMERCIAL seated properly.
- Page 10 The display will show the following message: 1. Remove the ice chute. 2. Place the ingredients to be blended in the HAMILTON BEACH container. COMMERCIAL PULSING... 3. Place the cover and filler cap on the container. 4. Make sure the main power switch is in the ON ( I ) position.
- Page 11 Caring for the Ice Shaver/Blender Cleaning Instructions–General wWARNING wWARNING Cut Hazard Electrical Shock Hazard Unplug unit before general cleaning. Unplug unit before general cleaning. Use extreme care when cleaning ice hopper Do not immerse base in water or and removing ice agitator. other liquid.
- Page 12 Caring for the Ice Shaver/Blender Cleaning Instructions–Blender wWARNING wWARNING Cut Hazard Electrical Shock Hazard Always place cover on jar when blending. Plug into a grounded outlet. Do not put hands, spoons or other utensils Do not remove ground. in jar when blending. Do not use an adapter.
-
Page 13: Troubleshooting Guide
Caring for the Ice Shaver/Blender Troubleshooting Guide Problem . . . Solution . . . Unit will not run or • Check to see if unit is securely plugged into an electric outlet. stops while it is • Check to see if the fuse for the electric outlet has blown or if a circuit breaker running and cannot has tripped. - Page 14 Caring for the Ice Shaver/Blender Troubleshooting Guide – Status Messages The following service messages will scroll across the display twice during the LOADING SETTINGS phase of the power-up cycle. Solution . . . Displayed Message. . . • The blender cutter assembly should be replaced whenever it is worn or SERVICE MESSAGE damaged, or after 90 days of heavy use.
-
Page 15: Maintenance
Caring for the Ice Shaver/Blender Maintenance Inspect the blender and its various parts and replace as follows: Daily Unplug the unit and remove the container from the base, and then inspect the container and cutter unit assembly for wear, nicks, and broken or loose blades. Replace if necessary. If the blades are loose, discontinue use immediately and replace the blades. -
Page 16: Product Warranty
Reasonable proof of date of purchase must be presented; otherwise the effective date of the warranty will be based upon the date of manufacture plus ninety (90) days. Hamilton Beach/Proctor-Silex, Inc. Commercial Technical Service 261 Yadkin Road... - Page 17 Commercial will ship a replacement product to your location. Step Three: Once the replacement unit is received, you send the troubled unit back to Hamilton Beach Commercial (we’ll provide the box and supporting materials to return the unit). Hamilton Beach Commercial will pay the freight cost for the returned unit.
Need help?
Do you have a question about the Revolution HBS 1200 and is the answer not in the manual?
Questions and answers