Table of Contents
Advertisement
Quick Links
User Instruction & Installation Manual
A2213 – FX560D 1Kw 240v
A2243 – FX560DP 1Kw 240v
A2215 – FX560C 1Kw 240v
A2245 – FX560CP 1Kw 240v
Manufacturer's details:
Francis Searchlights Ltd
Union Road, Bolton
Lancashire, BL2 2HJ, UK
Tel:
+44 (0) 1204 558960
Fax:
+44 (0) 1204 558979
http://www.francis.co.uk
E-mail: sales@francis.co.uk
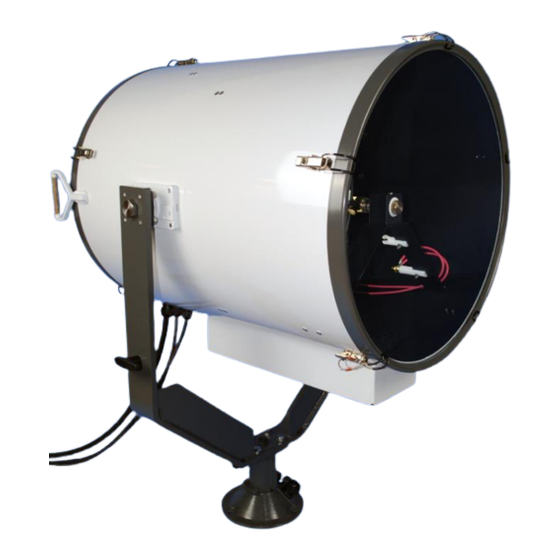
FX560 Manual Control
1Kw Xenon Searchlight
Product Reference Number:
Manual Part Number: C23187
29.4.15 Issue: 6
A2212 – FX560D 1Kw 115v
A2217 – FX560DP 1Kw 115v
A2214 – FX560C 1Kw 115v
A2244 – FX560CP 1Kw 115v
Distributor details:
Advertisement
Table of Contents

Subscribe to Our Youtube Channel
Related Manuals for Francis Searchlights A2213


Summary of Contents for Francis Searchlights A2213
- Page 1 User Instruction & Installation Manual FX560 Manual Control 1Kw Xenon Searchlight Product Reference Number: A2213 – FX560D 1Kw 240v A2212 – FX560D 1Kw 115v A2243 – FX560DP 1Kw 240v A2217 – FX560DP 1Kw 115v A2215 – FX560C 1Kw 240v A2214 – FX560C 1Kw 115v A2245 –...
-
Page 2: Table Of Contents
CONTENTS - Introduction - Safety Precautions - Technical Information - Unpacking and Installation Instructions - Electrical Installation - Operating Instructions - Fault Finding - Maintenance and Servicing - Wiring Diagram & General Assembly Drawings - Spare Parts List... -
Page 3: Introduction
For your future reference please keep this manual in a safe place. Thank you for specifying a product from the Francis Searchlights range. All Francis products are designed to give complete customer satisfaction and are manufactured to the highest engineering standards in order to ensure optimum performance and service life. -
Page 4: Safety Precautions
2 - Safety Precautions The following instructions must be adhered to, in order to ensure a safe working environment and the safety of the user. Note: When unpacking or manoeuvring the searchlight into its fixing position, the lifting handles must be used in order to prevent damage to the equipment or personal injury. ... -
Page 5: Technical Information
3 - Technical Information This product has been designed to operate in accordance with the product specification. The FX560 1000 watt searchlight has the following features: All marine grade materials and fixings; Electronic power supply unit; Parabolic glass reflector; ... - Page 12 Back To Top...
-
Page 13: Unpacking And Installation Instructions
4 - Unpacking and Installation Instructions The following instructions should be read and fully understood prior to installing the equipment to ensure that the correct procedures are followed, and all safety precautions are observed. Note: If the equipment has been in storage for a considerable amount of time, it is advisable to conduct a routine maintenance check on all parts before installation. -
Page 14: Electrical Installation
5 - Electrical Installation For safety purposes, only competent personnel should perform the electrical installation. All equipment should be installed to current Electrical Regulations and Standards. In order to obtain the maximum light output from the searchlight, it is essential that the full operating voltage of the lamp fitted be applied to the lampholder contacts. - Page 15 Installation Guidelines A typical installation and connection routine for the searchlights is as follows: Referring to wiring diagram X4737, a 240v or 115v AC supply should be connected to the Power Supply Unit as shown, which then provides a common feed to all other functions and equipment.
- Page 16 Fitting instructions for the 1Kw xenon lamp Referring to the diagram overleaf: Unfasten the ten latches (A) on the front and rear of the searchlight; Remove the front bezel (B) and rear bezel (C) assemblies; Unscrew the two M6 hexagon screws (D) from the front lampholder mounting block (E) and remove the front lampholder assembly from the mounting bracket;...
- Page 17 Back To Top...
-
Page 18: Operating Instructions
6 - Operating Instructions This equipment is designed for use out of doors, in free air. Never place anything on, or cover, the searchlight when in use as this may present a hazard. The PSU should be housed below deck. The searchlight can be positioned using the elevation and base lockwheels. - Page 19 Setting to Work Safe service in use necessitates the strict observance of the following precautions. Any article fabricated from quartz or glass is inherently fragile and care should therefore be taken, at all times, when handling lamps; Eye protection must be worn when handling lamps that have been removed from their packaging materials.
- Page 20 Notes: 1) XBO lamps are designed for dc operation only. The dc current may only be varied within the limits of the current control range. An XBO lamp operates best at rated current; over the life of the lamp, the current may be increased to its maximum value to compensate for loss of light.
-
Page 21: Fault Finding
7- Fault Finding All fault finding must be conducted by a competent person or qualified Electrical Engineer. Please refer to the following table for the trouble-shooting of Xenon lamps. Fault Cause Remedy Wrong Polarity Lamp incorrectly fitted Anode (large electrode) ... - Page 22 Failure of Lamp to Ignite In the event of the xenon lamp failing to light the following steps should be taken: 1) Check that the mains supply is connected to the input of the PSU. On operating the switch, if the lamp does not light switch off mains supply and check all fuses; 2) If the lamp still does not ignite, check the searchlight head.
-
Page 23: Maintenance And Servicing
8 - Maintenance and Servicing In order to prolong the service life and performance of your searchlight, the following maintenance guidelines are recommended: Maintenance checks should be conducted before every voyage or at least every three months; Before checking, disconnect the equipment from the supply; ... -
Page 24: Wiring Diagram & General Assembly Drawings
9 –Wiring Diagram & General Assembly Drawings Drawing Number Description A2213 / A2212 FX560D 1Kw GA A2243 / A2217 FX560DP 1Kw GA A2215 / A2214 FX560C 1Kw GA A2245 / A2244 FX560CP 1Kw GA X4737 1Kw Xenon Wiring Diagram C26807 / C26808... -
Page 31: Spare Parts List
Switch Sealing Boot In order to prolong the life and performance of your product, we recommend that you only specify Francis Searchlights spare parts. This will ensure that any warranties on your equipment will not be invalidated. When ordering spare parts please contact the Sales Department at Francis Searchlights Limited.
Need help?
Do you have a question about the A2213 and is the answer not in the manual?
Questions and answers