Table of Contents
Advertisement
Quick Links
Advertisement
Table of Contents

Related Manuals for Ocean Instruments SoundTrap ST400


Summary of Contents for Ocean Instruments SoundTrap ST400
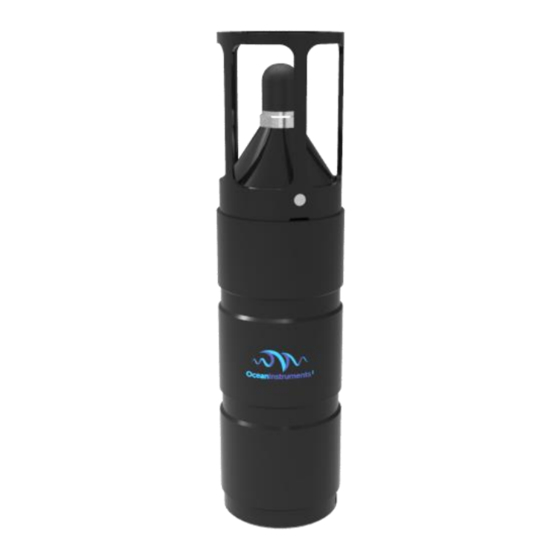
- Page 1 SoundTrap ST400 User Guide September 2021...
-
Page 2: Table Of Contents
About this guide ..........................4 Quick start guide ..........................5 Opening and closing the housing ..................5 Batteries ........................... 6 Memory ..........................7 Install the SoundTrap host on your PC ................8 Connect SoundTrap to your PC ..................8 Check SoundTrap Status ....................10 Configure the deployment ..................... - Page 3 4.1.1 Click detector ......................21 4.1.2 Snippet extractor ....................21 4.1.3 User parameters ..................... 22 4.1.4 Output File formats ....................23 4.1.5 Click Detector Caveats and Cautions ..............24...
-
Page 4: About This Guide
1 About this guide This guide begins with a ‘Quick start’ section to help you get going with your new SoundTrap, including software installation and basic deployment instructions. This is followed by several sections containing more detailed information around operation, deployment, maintenance and troubleshooting. It is highly recommended you read the entire guide to ensure you have a good understanding of the instrument and how to get the most from its capabilities. -
Page 5: Quick Start Guide
2 Quick start guide 2.1 Opening and closing the housing Before opening an underwater housing always check for flooding by shaking and listening for water sloshing around inside. If flooding is suspected, then be aware that the housing may be pressurised and therefore hazardous. -
Page 6: Batteries
BATTERY WARNING. Lithium ion batteries may explode or burn due to improper use. Careful attention should be paid to your battery suppliers safety recommendations. The SoundTrap ST400 is powered by 2 Panasonic NCR18650B (flat top) lithium-ion batteries. These are loaded individually, meaning you can use one or two batteries. However we recommend loading both batteries to provide a level of redundancy. -
Page 7: Memory
2.3 Memory The SoundTrap ST400 series have capacity for up to 4 microSD cards. Important things to note about memory: 1. You should only use the recommended memory cards – Samsung Evo MicroSD (up to 512GB). Counterfeits of these cards exist, so only source from reputable suppliers. Using other card types or counterfeits may result in performance issues such as increased power consumption, sampling gaps or unreliable recording. -
Page 8: Install The Soundtrap Host On Your Pc
2.4 Install the SoundTrap host on your PC To start using your SoundTrap you’ll need to install the SoundTrap Host software. For correct operation of your ST400 it is critical to use SoundTrap Host version 4.0.0 or later. • Pre-installation Notes: o The SoundTrap host software supports Windows 7, 8 &... - Page 9 Figure 1 - The Device List...
-
Page 10: Check Soundtrap Status
2.6 Check SoundTrap Status Note the ‘Status’ panel on the right (Figure 4). Carefully review the state of memory and batteries in the right-hand pane, checking that all batteries show 100% charge and all memory show 0% used. Figure 2 – Deploy Control 2.7 Configure the deployment •... - Page 11 o The ‘Recording Schedule’ section provides selection of continuous or periodic recording. For continuous recording simply leave the ‘Periodic Recording’ option unchecked. o Options available in the ‘Audio Options’ will vary according to your device’s capabilities. Options include the following: ▪...
-
Page 12: Begin Recording Using The Ir Remote Control
2.8 Begin recording using the IR Remote Control You may use the remote control to start recording. The recorder housing must be open to receive the signal from the remote. • Press ‘START’ to start recording. • Press ‘STOP’ to stop recording. •... -
Page 13: Data Offload
2.9 Data Offload Once you’re done recording, reconnect your SoundTrap to your PC and select the Retrieve Tab, as shown in figure 5. Figure 3 – Retrieve Tab • Each memory card can be selected using the drop down list. •... -
Page 14: More Details
• For faster download in the field, or to save disk space, un-check the ‘Decompress’ checkbox. This will disable the decompression step of the offload process, meaning you will end up with ‘sud‘ files only. These can be decompressed into wav files at a later time using the ‘File Extraction’... -
Page 15: Calculation Of Deployment Endurance
This will result in inefficient usage of memory, and the deployment may be artificially memory limited. For example, a SoundTrap ST400 has 256 GB of memory; dividing this by the minimum file size of 4 MB gives a maximum of 64000 files. -
Page 16: Deployment Hardware
Thankfully SoundTraps are more easily deployed than traditional acoustic recorders due to their small size. A SoundTrap ST400’s weight in water is approximately 0.2 Most often the hydrophone is located near the sea floor, using an anchored line. This involves running a line between a heavy anchor weight and either a surface or sub-surface float. -
Page 17: Msp Firmware Updates
generally straightforward – simply install the new software over top of the existing, by running the msi file and following the usual Windows software install prompts. The software updates will typically include updates to both the windows software as well as the device firmware. - Page 18 Solution: Please try removing all memory cards and lithium batteries. Then disconnect and reconned the USB cable. If this resolves the problem, try reloading each of the memory cards and batteries to see which one is causing a problem. Problem: Offload process reports errors and produces smaller than expected files. Solution: This indicates errors with USB communication.
-
Page 19: Calibration
250 Hz, performed for both low and high gain settings. The calibration data is not shipped with the hydrophone, but instead made available online from the calibration page of the Ocean Instruments website http://www.oceaninstruments.co.nz/ The calibration data is provided as an end-to-end value. This measure is provided for both high and low gain settings, and represents the SPL that will result in a normalised (±1.0) wav file with a... -
Page 20: Appendices
PAMGuide PAMGuide provides several convenient calibration schemes. For SoundTrap data select the end- toend calibration type and enter a system sensitivity of the calibration value * -1.0 (eg -176.0). Audacity Audacity reports SPL in units of dB re full scale. To scale SoundTrap data use the following: Value in dB re 1 uPa = audacity value + end-to-end calibration –... -
Page 21: Click Detector
times of interest more quickly when you get the data back. The downside of course is that you do not have the full wideband recording on the SoundTrap. This is mitigated in SoundTrap’s detector by recording a short snippet of wideband sound around each detection. A few 100's of µs is often all that is needed to classify odontocete clicks into general classes. -
Page 22: User Parameters
4.1.3 User parameters The user parameters can be set by clicking the ‘Configure’ button in the Detector section. Threshold: The level in dB that the power-in-band must exceed the ambient noise level by for a detection to take place. A value of 12 dB will have a high detection rate but will produce many false positives. -
Page 23: Output File Formats
4.1.4 Output File formats The ST click detector produces two additional output files per recording with suffixes 'bcl' and 'dwv'. These are in addition to the .wav and .xml files generated normally. The Pamguard interface automatically interprets these files when displaying detection and continuous recording results. For users interested in accessing the data using other interfaces, the details of the file formats are given below: •... -
Page 24: Click Detector Caveats And Cautions
0) and the noise level at the time of the detection. Fields Info3 and Info4 are not used in detection reports. The second report type is an effort report which has a type of 'E'. The effort report indicates the times over which the detector was operating. There will usually be an on-effort report at the start of each recording (i.e., with a detector state of 1) and an off-effort report at the end of each recording.
Need help?
Do you have a question about the SoundTrap ST400 and is the answer not in the manual?
Questions and answers