Table of Contents
Advertisement
Liquid Propane Gas (LPG) Grill
Models BTE2614(A,B)LP, BTE3212(A,B)LP & BTE3812BLP
Natural Gas (NG ) Grill
Models BTE2614(A,B)NG, BTE3212(A,B)NG & BTE3812BNG
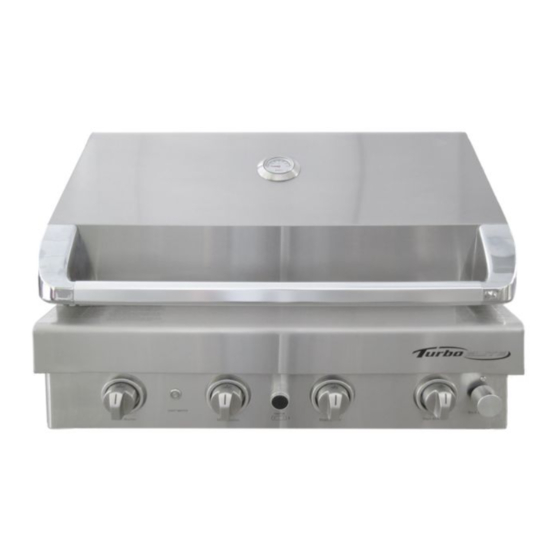
BTE2614BLP/NG
FREE HELP
Grill Information Center:
FROM THE GRILL EXPERTS
Grand Hall is the expert on this product
and trained to help you with:
Ÿ
Assembly Questions
Ÿ
Grill Operation
Ÿ
Replacement of Damaged or Missing parts
visit www.grandhall.com or call:
1-800-474-5587
Monday - Friday 8:00am-4:30pm PST
IMPORTANT:
Ÿ
NOTE TO ASSEMBLER / INSTALLER:
Leave this manual with the consumer.
Ÿ
NOTE TO CONSUMER:
Keep this manual for future reference.
Ÿ
RECORD YOUR SERIAL #
__________________
(see silver CSA label on main body of grill)
BTE3212BLP/NG
BTE2614ALP/NG
(
BTE2614B+UN2614ACT
!
Ÿ
Failure to comply with these instructions could
result in a fire or explosion that could cause
serious bodily injury, death or property damage.
Ÿ
Whether this grill was assembled by you or
someone else, you must read this entire manual
before using your grill to ensure the grill is
properly assembled, installed and maintained.
Ÿ
Use your grill at least 3 feet away from any
wall or surface. Use your grill at least 3 feet
away from combustible objects that can melt or
catch fire such as vinyl or wood siding, fences
and overhangs or sources of ignition including
pilot lights on water heaters and live electrical
appliances.
Ÿ
THIS GAS APPLIANCE IS DESIGNED FOR
OUTDOOR USE ONLY.
Ÿ
Never use your gas grill in a garage, porch,
shed, breezeway or any other enclosed area.
Ÿ
Never obstruct the flow of ventilation air
around your gas grill housing.
Ÿ
Never disconnect the gas regulator or any gas
fitting while your grill is lit. A lit grill can ignite
leaking gas and cause a fire or explosion which
could result in property damage, personal injury
or death.
Operator's Manual
)
(
WARNING
Manual # P80151141D -
BTE3812BLP/NG
BTE3212ALP/NG
BTE3212B+UN3212ACT
!
Date:2015/06/29
)
Advertisement
Table of Contents

Related Manuals for TURBO ELITE BTE2614ALP


Summary of Contents for TURBO ELITE BTE2614ALP
- Page 1 Operator's Manual Liquid Propane Gas (LPG) Grill Models BTE2614(A,B)LP, BTE3212(A,B)LP & BTE3812BLP Natural Gas (NG ) Grill Models BTE2614(A,B)NG, BTE3212(A,B)NG & BTE3812BNG BTE3812BLP/NG BTE3212BLP/NG BTE2614BLP/NG BTE2614ALP/NG BTE3212ALP/NG BTE2614B+UN2614ACT BTE3212B+UN3212ACT FREE HELP WARNING Grill Information Center: FROM THE GRILL EXPERTS Ÿ...
-
Page 2: Table Of Contents
Table of Contents WARNING Primary Safety Warnings......1-3 Pre-Assembly Instructions.......3 Do not store or use gasoline or other Part Diagrams and Lists......4-14 flammable liquids or vapors in the Assembly Instructions.........15-18 vicinity of this or any other appli- Use & Care Instructions: ances. -
Page 3: Pre-Assembly Instructions
Pre-Assembly Instructions For Your Safety PRE-ASSEMBLY CAUTION Read and perform the following pre-assembly instruc- tions: Failure to comply with these instructions may result Tools Required for Assembly in a hazardous situation which, if not avoided, may • protective work gloves result in injury. - Page 4 Hardware Parts List for Models BTE2614BLP/NG & BTE3212BLP/NG & BTE3812BLP/NG PART # PART DESCRIPTION PURPOSE OF PART For use in assembly of Model BTE2614B, BTE3212B, P06013018C Hardware Pack BTE3812B, BTH3214B,BTH2614B S182G03061 Pan Head Screw 3/16" x 3/8" Install the Transformer Bracket(BTE3212B, BTE3812B Only) S182G03061 Pan Head Screw 3/16"...
- Page 5 Parts Diagram for Models BTE2614BLP & BTE2614BNG...
- Page 6 Parts List for Models BTE2614BLP & BTE2614BNG DESCRIPTION PART# QTY. P0014633AA Lid Assembly P00601551A Temperature Gauge Temperature Gauge Seat P00614031A Lid Handle Bracket, Left P00307052E Lid Handle Bracket, Right P00308052E Lid Handle P00215041H Protective Pad P05518002I Lid Assembly Bracket, Left P03320007C Lid Assembly Bracket, Right P03320008C...
- Page 7 Parts List for Models BTE2614BLP & BTE2614BNG DESCRIPTION PART# QTY. Back Burner Assem bly (LPG) Y0030028 Back Burner Assem bly (NG) Y0030029 Back Burner Thermocouple Protector P03328050C Therm ocouple for Back Burner P05305072B Back Burner Electrode P02614015C Back Burner Extension Tube P03701011A Back Burner Wind Shield(LPG) P06906103C...
- Page 8 Parts Diagram for Models BTE3212BLP & BTE3212BNG 26 25...
- Page 9 Parts List for Models BTE3212BLP & BTE3212BNG DESCRIPTION PART# QTY. Lid Assembly P0014748AA Temperature Gauge P00601551A Temperature Gauge Seat P00614031A Lid Handle Bracket, Left P00307052E Lid Handle Bracket, Right P00308052E Lid Handle P00215039H Protective Pad P05518002I Lid Assembly Bracket, Left P03320007C Lid Assembly Bracket, Right P03320008C...
- Page 10 Parts List for Models BTE3212BLP & BTE3212BNG DESCRIPTION PART# QTY. Lamp Wire Set Protector P05533011A Lamp,12V, 10W P05352012B Lamp Cover P05352013E Back Burner Frame P02011075B Back Burner Assembly (LPG) Y0030028 Back Burner Assembly (NG) Y0030029 Back Burner Extension Tube P03701011A Back Burner Cover(LPG) P06906099C Back Burner Cover(NG)
- Page 11 Parts Diagram for Model BTE3812BLP & BTE3812BNG 25 24...
- Page 12 Parts List for Model BTE3812BLP & BTE3812BNG DESCRIPTION PART# QTY. Lid Assembly P0011979AA Temperature Gauge P00601551A Temperature Gauge Seat P00614031A Lid Handle Bracket, Left P00307052E Lid Handle Bracket, Right P00308052E Lid Handle P00215040H Protective Pad P05518002I Lid Assembly Bracket, Left P03320007C Lid Assembly Bracket, Right P03320008C...
- Page 13 Parts List for Model BTE3812BLP & BTE3812BNG DESCRIPTION PART# QTY. Lamp Cover P05352013E Back Burner Frame P02011076B Back Burner Assem bly (LPG) Y0030028 Back Burner Assem bly (NG) Y0030029 Back Burner Extension Tube P03701011A Back Burner Cover (LPG) P06906100C Back Burner Cover (NG) P06906106C Therm ocouple Protector P03328050C...
- Page 14 Rotisserie Assembly Parts Diagram for BTE2614(A,B)LP/NG, BTE3212(A,B)LP/NG & BTE3812BLP/NG Rotisserie Assembly Parts List for BTE2614(A,B)LP/NG, BTE3212(A,B)LP/NG & BTE3812BLP/NG PART# DESCRIPTION Rot. Collar P05508254A Rot. Thumbscrew 1/4"x1/2" S196G04081 Rot. Spit (for BTE2614(A,B)LP/NG Models) P05508253A P05508230A Rot. Spit (for BTE3212(A,B)LP/NG Models) P05508231A Rot.
- Page 15 Installation Instructions for Models BTE2614BLP/NG, BTE3212BLP/NG & BTE3812BLP/NG NOTE: The grill head you purchased is to be installed on the island which is not included in this purchase. You either need to purchase a prebuilt island or you have to build your own island. Before building your grill island, please read the construction guidelines and clearances in Fig.6 and on pages 16 &...
- Page 16 Install Natural Gas(NG) Regulator and 12 Foot Hose Connect the NG regulator to the inlet of gas manifold. (See Fig. 4) Connect the swivel nut of the 12 ft. NG hose to the vertical fitting of the NG Regulator. WHEN YOU FINISHED THIS STEP, PLEASE SKIP TO STEP 6. NOTE: Make sure the 12 ft.
- Page 17 Install Partition Panel The gas grill is designed for use with a maximum of 20 lb tank. As per standard, a partition panel (not included) or equivalent device is required to be installed in the left cabinet of the island for preventing the use of 30 lb tank.
- Page 18 Main Burner Electrode Check with the Warming Rack assistance of another person, perform this Electrode Check before proceeding. Cooking Grids This test will ensure that the Spark Electrode Flame Tamer Tips are properly positioned so your grill lights easily. Flame Tamer Rack Be sure all control knobs are set to "OFF"...
-
Page 19: Use & Care Instructions
USE AND CARE INSTRUCTIONS Keep fire extinguisher readily accessible. In the event CORRECT LP GAS TANK USE of a oil/grease fire, do not attempt to extinguish with LP Gas grill models are designed for use with a standard water. Use type B extinguisher or smother with dirt, 20 lb. - Page 20 USE AND CARE INSTRUCTIONS LP Gas Model only: NOTE about LP Gas Tank Exchange Programs Secure a 20lb LP Gas Tank to Gas Grill Ÿ Many retailers that sell grills offer you the option of (for BTE26(A,B)LP, BTE3212(A,B)LP & BTE3812BLP) replacing your empty LP Gas tank through an exchange service.
- Page 21 USE AND CARE INSTRUCTIONS LP Gas Model only: Check all connections for LP Gas Leaks Connect Regulator with Hose to your LP Gas Tank Never test for leaks with an open flame. Prior to first use, at the beginning of each season, or every time Turn all Burner Valves to the OFF position.
-
Page 22: Natural Gas Connection
Natural Gas Connection Fig.1 Natural Gas Model only: Connecting Natural Gas To Your Grill Connect the Swivel nut of the 12' Natural Gas Hose to the vertical fitting of NG Regulator as Vertical Fitting shown in Fig.1. Connect the other hose end (male plug) to the gas supply line from your Swivel Nut home. - Page 23 USE AND CARE INSTRUCTIONS Grill Lighting Instructions Before each use, check all hoses for cracks, nicks, cuts, burns or abrasions. If a hose is damaged in any way, do (for Model BTE2614(A,B)LP/NG) not use your grill before replacing the hose with an Main Burner Back Burner authorized part from the Parts List.
-
Page 24: Troubleshooting
USE AND CARE INSTRUCTIONS Troubleshooting To purge air from your gas line and/or reset If the grill fails to light : the regulator excess gas flow device: Turn gas off at source and turn Control Knobs to OFF. Wait at least 5 minutes for gas to clear, then retry. Turn Control Knobs to the OFF position. - Page 25 USE AND CARE INSTRUCTIONS WARNING CORRECT ROTISSERIE USE Read all instructions before initial use. IMPORTANT: When using electrical appliances, basic safety To protect against electrical shock, do not immerse precautions should always be used. The Rotisserie Motor is set for 120V, 60Hz AC current. electrical cord, plugs or motor in water or expose to The Rotisserie is for outdoor use only.
-
Page 26: Rotisserie Instruction
Rotisserie Instructions 1. Remove all components from the carton. Attach the Motor Bracket on the outside of the right bowl side panel. Align the two holes of the Bracket with the holes on the right bowl side panel. Tighten securely using 2 Rotisserie Screws 3/16"x1/2" UNC, 2 Rotisserie Washers 3/16", and 2 Hex Nuts 3/16"... - Page 27 Slide the pointed end of the Spit through the piece of meat. Place the Holding Forks onto each end of the Spit. Adjust spacing between Holding Forks to accommodate your food, then tighten the Thumbscrews to keep the Holding Forks in position. Slide the Collar onto the square end of the Spit. Do not tighten the Collar Thumbscrew until the Rotisserie is placed into your grill.
-
Page 28: Cleaning And Maintenance
CLEANING AND MAINTENANCE Cleaning Exterior Stainless Steel Surfaces: Routine care and maintenance is required to preserve Proper care and maintenance will keep your grill in top operating the appearance and corrosion resistance of stainless condition and prolong its life. Follow these cleaning procedures steel. - Page 29 2. 2. CLEANING THE BURNER TUBES AND BURNER PORTS Regardless of which Burner cleaning procedure you To reduce the chance of FLASHBACK FIRE you must clean use, we recommend that you also complete the follow- the Burner Tubes as follows at least once a month in ing cleaning regimens to help prolong Burner life.
- Page 30 Cooking Instructions Burn-Off Indirect Cooking using Main Burners Before cooking on your gas grill for the first time, you should "burn off" the grill to eliminate any odor or foreign The indirect cooking method can also be used with the matter.
- Page 31 Guide to Grilling using the Main Burners and Direct Cooking Method Approximate Cooking Times Grilling Steak and Ribs Cut of Meat Rare: 4-8 minutes Turn the grill Burners on , close Lid and preheat your grill T-bone steak Medium: 10-14 minutes 10 to 15 minutes.
- Page 32 Guide to Roasting and Baking Using the Main Burners Food preparation An Important Note About Heat Settings Trim meat of excess fat. Truss meat and poultry with cooking The suggested heat settings shown are approximate. There string to retain shape if desired. Bacon strips can be used to are many factors such as outside temperature, wind condi- cover the outside surface of lean meat and poultry to help tions and grill location that affect your grill performance.
- Page 33 Guide to Rotisserie Cooking Guide to Smoking Slow Cooking with a Rotisserie Preparing to Smoke Rotisserie cooking produces foods that are moist, flavor- Smoking gives food a distinctive, delicious flavor. You will find ful and attractive. The rotisserie system is most com- a variety of wood chips available for use in smoking grilled monly used for cooking meat or poultry and is designed foods.
-
Page 34: Warranty
Question: Question: Can I convert my grill from one fuel type to another in Sometimes I hear a humming sound coming from my regulator. What causes this? And - My grill has a low other words from LPG to NG or vice versa? flame and sometimes will not light. - Page 35 Question: The Regulator and Hose supplied with my gas grill After every use (after your grill has cooled down), wipe does not fit the older LP Gas tank I’ve used for years. stainless surfaces with a soft, soapy cloth or sponge Why not? then rinse with water.
- Page 36 Grand Hall Limited Warranty Grand Hall will warrant to the ORIGINAL PURCHASER of this product that it will be free of defects in material and workmanship for set periods below from the date of purchase when used under normal outdoor use and correct assembly: Cooking Grids and SS Burners - 5 Year Limited Warranty(No rust through or burn through) Infrared Burner - 3 Year Limited Warranty...
Need help?
Do you have a question about the BTE2614ALP and is the answer not in the manual?
Questions and answers