
Related Manuals for Samsung XE700T1A


Summary of Contents for Samsung XE700T1A
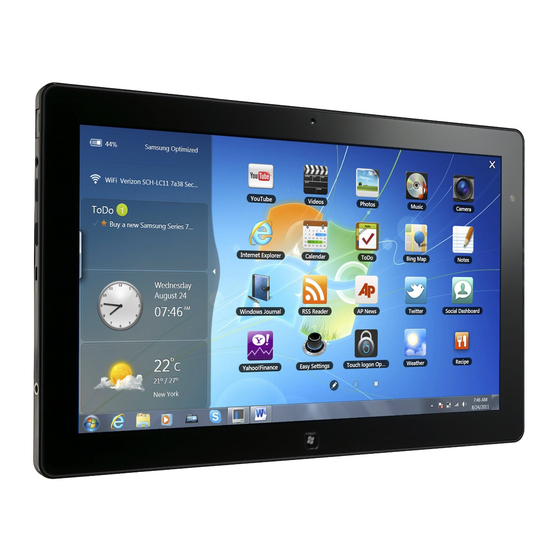
- Page 1 Getting Started Using the Slate PC U s i n t h e S l a t e P C www.samsungcomputer.com...
- Page 2 Before Reading This Guide Before Reading This Guide • This guide describes the general functions provided with Samsung Slate PC. Some functions and devices may not be provided or the version may differ depending on the product. Please note that the descriptions in this guide may not match your computer’s environment exactly. • The images on the cover and the main content of this guide are images of representative Samsung Slate PC models and may differ from your actual product. Copyright © 2011 Samsung Electronics Co., Ltd. This guide is the property of Samsung Electronics Co., Ltd. and is protected by copyright. No information contained herein may be distributed or copied in any form whatsoever without the prior written consent of Samsung Electronics Co., Ltd. Information in this guide is subject to change due to functional enhancements of the product and other reasons without prior notice. Getting Started...
-
Page 3: Table Of Contents
Using the Touch Getting Started Feature Overview Using the Basic Gestures Turning the Slate PC On and Off Using the Applied Gestures Using the Touch Logon Screen Calibration LCD (Touch Screen) Brightness- Entering Letters Using the Control Touch Screen Using the Home Button Using the Touch Launcher Using the Easy Settings Using the Touch Supporter... -
Page 4: Getting Started
Getting Started Getting Started Overview Turning the Slate PC On and Off Using the Touch Logon LCD (Touch Screen) Brightness Control Using the Home Button Using the Easy Settings... -
Page 5: Overview
Overview Top View Micro SD Card Slot Left View Front View USB Port Ear-set / headset Jack Volume Control Button Micro HDMI Port DC Jack Bottom View Microphone Camera Illumination Sensor Home button speaker Slate PC Dock Port Getting Started Right View Power Button Rotation Lock... -
Page 6: Turning The Slate Pc On And Off
Turning the Slate PC On and Off Turning the computer on Connect the AC adapter. Press the Power button to turn the computer on. Power button LED is lit while the computer is turned on. Setting up the Windows When you use the computer for the first time, you have to Set up the Windows. - Page 7 Turning the Slate PC On and Off Once the Windows set-up is complete, you can use the computer. Entering Sleep mode When the computer is turned on, press the computer’s power button once briefly. To wake the computer up, briefl y press the Power button of the computer again. Turning the computer off > Shut down mode Click Start computer. Getting Started to shutdown the...
-
Page 8: Using The Touch Logon
Configuring the Touch Logon program To use the Touch Logon function, you have to setup the Touch Logon function in the Windows Logon screen. Click Start > All Programs > Samsung > Touch Logon > Touch Logon Options. Select Use Touch Logon. - Page 9 Using the Touch Logon Choose a Touch Logon theme. If you touch a theme, you can view a video that shows you how to use the theme to logon. Select a theme and touch Next. Touch OK and enter the previously configured Windows password.
- Page 10 Using the Touch Logon Using the Touch Logon function To logon by touch in the Windows logon screen Press the Power button to turn the computer on. When the Windows logon screen appears, touch your account to log on. When the following screen appears, touch the bottom of the screen and drag it to the top while your finger maintains contact.
- Page 11 Using the Touch Logon Changing the Touch Logon Settings /Removing Touch Logon Click Start > All Programs > Samsung > Touch Logon > Touch Logon Options. You can change the Touch Logon settings or remove the Touch Logon function according to the instructions on the screen.
-
Page 12: Lcd (Touch Screen) Brightness
LCD (Touch Screen) Brightness Control The LCD brightness is automatically controlled using the illumination sensor. You can manually control the LCD brightness as follows. Launch the Easy Settings. Click Display > Screen Brightness and set the brightness level. Getting Started Maintaining the changed LCD brightness even ● after turning the computer on again To maintain the LCD brightness set by using the brightness control keys or through the Power Options, follow the procedures below. For Windows 7 ► Control Panel > Hardware and Sound > . C lick Power Options Change the settings... -
Page 13: Using The Home Button
Using the Home Button Using the Home button, you can conveniently execute the Touch Launcher or switch to the Windows Desktop screen. Touching Launches the Touch Launcher. Once Touching shows the Windows Desktop screen. and holding Touching performs the role of the Win + Tab key Twice combination. -
Page 14: Using The Easy Settings
Using the Easy Settings Easy Settings is the integrated Samsung software control program Click Start > All Programs > Samsung > Easy Settings. To configure a function, select the corresponding item. The functions of the Easy Settings Touch The Touch Logon setting and the screen calibration text font size setting. -
Page 15: Using The Touch Feature
Using the Touch Feature Using the Touch Feature Using the Basic Gestures Using the Applied Gestures Screen Calibration Entering Letters Using the Touch Screen Using the Touch Launcher Using the Touch Supporter Using the digitizer pen... -
Page 16: Using The Basic Gestures
Using the Basic Gestures Learning basic touch screen operations Touch Operation Single-tap (click) Double-tap (double-click) Moving (drag) Press and take off (mouse right-click) Tapping two fingers in succession (mouse right-click) Moving finger (scroll) Function To select an item, tap over the item with your finger. This is the same as left- clicking once with a mouse. -
Page 17: Using The Applied Gestures
Using the Applied Gestures Touch Operation Drag two fingers apart / together (zoom-in/zoom-out) Flick one finger fast (page move) Quickly draw with two fingers (this runs the Touch Launcher) Tapping three fingers (Launching the Touch Supporter) Tapping five fingers (Launching the keyboard program) Learning about touch operations Select Start >... -
Page 18: Screen Calibration
Screen Calibration When you use the touch screen for the fi rst time or the pointer on the screen does not precisely match the points you touch, calibrate the touch screen using the Tablet PC Settings menu. Screen Calibration The calibration process for the touch screen may differ depending on the operating system and may not be available in some operating systems. - Page 19 Entering Letters Using the Touch Screen You can enter letters using either the Tablet PC input panel. Launching the Tablet PC Input Panel If you touch the touch screen with your finger, the Tablet PC Input Panel appears with the cursor at the bottom left on the Desktop. If you touch the Tablet PC Input Panel tab, the Tablet PC Input Panel appears.
- Page 20 Entering Letters Using the Touch Screen Entering Letters Using the Touch Screen Using the touch keyboard, you can enter letters by touching the corresponding keys on the keyboard that is displayed on the screen as you do with a normal keyboard. In the Tablet PC input panel , touch the...
-
Page 21: Using The Touch Launcher
Touch Launcher Functions On the touch screen, drag two fingers from top to bottom quickly. Alternatively, Click Start > All Programs > Samsung > Play Touch select to launch it. Touch Launcher... - Page 22 Using the Touch Launcher Launching a Program To launch a program added to the Touch Launcher, quickly touch a program icon twice. Navigating Pages To navigate pages in the Touch Launcher flick one finger to the left or right. Using the Touch Feature , touch the page icon...
- Page 23 Using the Touch Launcher기 Editing Program Icons In Edit mode, you can add or remove a program, add a group, move a program icon and change the background image. To edit program icons Touch the Edit mode icon. If the program icon changes to Edit mode the new location.
-
Page 24: Using The Touch Supporter
Using the Touch Supporter This program helps you to use functions that cannot be easily used with touch operations more easily. Using the Touch Supporter If you touch the screen with three fingers simultaneously the touch support program is launched. Ctrl Ctrl+X Ctrl+V... -
Page 25: Using The Digitizer Pen
Using the digitizer pen If a digitizer pen is supplied with the product, you can operate the computer with the pen instead of your fi ngers. You can use the digitizer pen as you would use your fi ngers. Digitizer pen structure and functions Pen eraser Pen button Pen tip... - Page 26 Using the digitizer pen Replacing the pen tip If the pen tip is damaged, you can replace the pen tip as follows: Hold the pen tip by inserting it into the hole of the ring and remove the tip by pulling it out. Insert the new pen tip into the digitizer pen.
-
Page 27: Using The Slate Pc
Using the Slate PC Using the Slate PC Using the Auto Screen Rotation Function Adjusting the Volume Wireless Network Using the camera Using the Bluetooth keyboard Using the Slate PC Dock... -
Page 28: Using The Auto Screen Rotation
Using the Auto Screen Rotation Function Using the Slate PC If the Auto Screen Rotation function is activated, the screen orientation automatically changes as the computer is rotated. To disable the Auto Screen Rotation function Press the Orientation Lock button. If the Orientation Lock function is activated, the screen orientation does not change regardless of the rotation of the computer. -
Page 29: Adjusting The Volume
Adjusting the Volume You can control the volume using the volume control buttons or the volume control program. Method 1 Adjusting the volume with the buttons You can control the volume by pressing the volume control button on the left side of the computer. Method 2 Adjusting the Volume using the Volume Adjustment Program Click the... -
Page 30: Wireless Network
Connecting to a Wireless LAN through Easy Settings Click Start > All Programs > Samsung > Easy Settings Confi gure the Wireless Network and set the Touch an AP in the AP list. If the computer is properly connected to the wireless network, the wireless LAN icon appears in the system tray. -
Page 31: Using The Camera
Using the camera This product has 2 cameras(Optional). One is at the front and the other is at the back. Using the touch camera program, you can conveniently take a picture or record a video using touch operations. Using the Camera program Click the Touch Launcher and launch the... -
Page 32: Using The Bluetooth Keyboard
Using the Bluetooth keyboard You can connect and use an external type keyboard. Now let’s look at how to connect the Bluetooth wireless keyboard (optional) provided by Samsung Electronics. What is Bluetooth? Bluetooth is wireless communications technology that allows access to nearby devices such as another computer, a cell phone, printer, keyboard, mouse, etc. - Page 33 Using the Bluetooth keyboard If you press and hold the keyboard power button 3 seconds after starting the computer, the will blink in blue. Click > Bluetooth Devices > Add a Device Select the keyboard to be connected and click Enter the number displayed on the screen and press will connect the keyboard.
-
Page 34: Using The Slate Pc Dock
Using the Slate PC Dock By connecting the computer to the Slate PC Dock, you can use various types of ports. Installing/Removing the Dock Before installing a computer to the docking station, make sure to disconnect all the cables connected to the computer. Installing and separating the Slate PC Dock after turning the computer off is recommended. - Page 35 Using the Slate PC Dock Ports Provided by the Dock The back of the Dock A jack to connect the AC adapter that DC Jack supplies power to the computer. Wired LAN Port Connect the Ethernet cable to this port. Digital Video/ You can connect an HDMI cable to this Audio Port...
- Page 36 Rev 1.00...
Need help?
Do you have a question about the XE700T1A and is the answer not in the manual?
Questions and answers