Table of Contents
Advertisement
Quick Links
Advertisement
Table of Contents

Subscribe to Our Youtube Channel
Related Manuals for Siemens LJ67BAM60


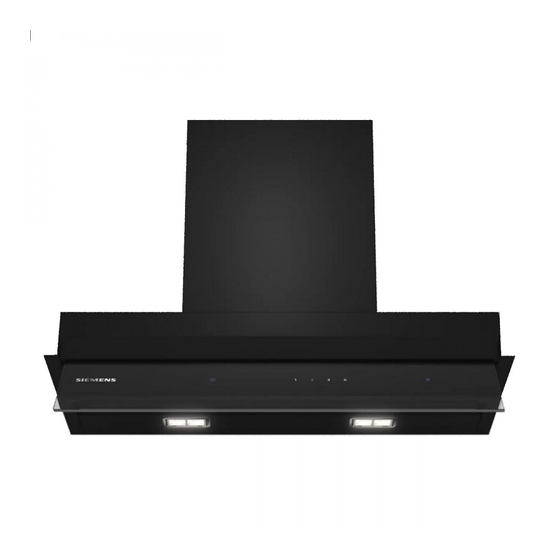
Summary of Contents for Siemens LJ67BAM60
- Page 1 Extractor hood LJ67BAM60, LJ67BAM60B, LJ97BAM60, LJ97BAM60B User manual and installation instructions Register your product on My Siemens and discover exclusive ser- vices and offers. siemens-home.bsh-group.com/welcome The future moving in. Siemens Home Appliances...
-
Page 2: Table Of Contents
en Safety Do not use the appliance: Table of contents ¡ With an external timer. 1.3 Restriction on user group USER MANUAL This appliance may be used by children aged 8 or over and by people who have reduced Safety .............. 2 physical, sensory or mental abilities or inad- Avoiding material damage........ -
Page 3: Safety
Safety en When gas burners are in operation without any cookware placed on them, they can build up a lot of heat. A ventilation appliance in- stalled above the cooker may become dam- aged or catch fire. ▶ Only operate the gas burners with cook- ware on them. -
Page 4: Avoiding Material Damage
en Avoiding material damage ▶ If the appliance or the power cord is dam- ▶ Do not use steam- or high-pressure clean- aged, immediately unplug the power cord ers to clean the appliance. or switch off the fuse in the fuse box. WARNING ‒ Risk of explosion! ▶... -
Page 5: Operating Modes
Operating modes en 4 Operating modes You can use your appliance in air extraction mode or circulating-air mode. 4.1 Air extraction mode The air which is drawn in is cleaned by the grease fil- ters and conveyed to the exterior by a pipe system. The air must not be discharged into a flue that is used for exhausting fumes from appliances burning gas or other... -
Page 6: Familiarising Yourself With Your Appliance
en Familiarising yourself with your appliance 5 Familiarising yourself with your appliance 5.1 Control panel You can use the control panel to configure all functions of your appliance and to obtain information about the operat- ing status. Switching the appliance on or off Switching on fan setting 3 Switching on fan setting 1 Switching on intensive mode... -
Page 7: Cleaning And Servicing
Cleaning and servicing en 7 Cleaning and servicing To keep your appliance working efficiently for a long Clean plastic using a soft cloth and glass ‒ time, it is important to clean and maintain it carefully. cleaner. Clean glass using a soft cloth and glass cleaner. ‒... -
Page 8: Troubleshooting
en Troubleshooting Use special grease solvent for stubborn dirt. You 7.7 Installing the grease filters can obtain grease solvents from after-sales service ATTENTION! or the online shop. Falling grease filters may damage the hob below. Use a brush to clean the grease filters. Grip below the grease filter with one hand. -
Page 9: Disposal
– replacement your appliance in our catalogue, in the online shop or Clean Air Plus air recircu- LZ11IXC16 from our after-sales service. lation set www.siemens-home.bsh-group.com Clean Air Plus odour filter LZ11IXB16 Accessories Order number Long Life air recirculation LZ11ITD11 Chimney extension –... -
Page 10: Installation Instructions
en Installation instructions 12 Installation instructions Observe this information when installing the appliance. 12.3 Secure installation Follow these safety instructions when in- stalling the appliance. WARNING ‒ Risk of poisoning! Risk of poisoning from flue gases being drawn back in. Room-air-dependent heat-pro- 12.1 Included with the appliance ducing appliances (e.g. - Page 11 Installation instructions en ▶ Unrestricted operation is possible if the ap- WARNING ‒ Risk of injury! pliance is operated exclusively in circulat- Components inside the appliance may have ing-air mode. sharp edges. Risk of poisoning from flue gases being ▶ Wear protective gloves. drawn back in.
- Page 12 en Installation instructions the permanent electrical installation accord- 12.6 Information on the installation situation ing to the conditions of Overvoltage Cat- ¡ Install this appliance in a kitchen cupboard. egory III and according to the installation ¡ To install additional special accessory parts, ob- regulations.
- Page 13 Installation instructions en Make the cut-out for the exhaust pipe in the cabinet. For a wall thickness of 16 mm: Place the installation aids on the rails and screw the rails into the side walls of the cabinet . Make the cut-out for the exhaust pipe in the interme- diate floor.
- Page 14 en Installation instructions Mount the upper wall filler strip. Slide the appliance up to at least halfway into the rails and guide the mains plug through the cut-out . Slide the appliance as far as it will go into the cab- inet.
- Page 15 Installation instructions en Note: Ensure that the front of the appliance does Note: Before removing the appliance, remove any not protrude over the front of the cabinet after it is objects from the shelf. screwed in. Carefully remove the covers. Tighten the threaded pins through the recess in the rail hand-tight until the appliance is flush with the cabinet.
- Page 16 en Installation instructions Unscrew the rails and, if used, unscrew the installa- tion aids.
- Page 20 Valid within Great Britain: Imported to Great Britain by BSH Home Appliances Ltd. Grand Union House Old Wolverton Road Wolverton, Milton Keynes MK12 5PT United Kingdom Manufactured by BSH Hausgeräte GmbH under the trademark licence of Siemens AG *9001619625* 9001619625 (020119)
Need help?
Do you have a question about the LJ67BAM60 and is the answer not in the manual?
Questions and answers