Table of Contents
Advertisement
Quick Links
Infra-red Motion Detector - Wall Switch
•
Please read these instructions carefully before installation and keep safe for future
reference.
IMPORTANT
This product should be installed by a competent person and in accordance with the
current IET Wiring Regulations and Building Regulations.
If in doubt,consult a qualified electrician.
•
Always turn off the mains supply before commencing work.
As the detector responds to changes in temperature, avoid the following situations:-
•
Avoid pointing the detector towards objects with highly reflective surfaces, such as
mirrors etc.
•
Avoid mounting the detector near heat sources, such as heating vents, air conditioning
units, lights etc.
•
Avoid pointing the detector towards objects that may move in the wind, such as
curtains, tall plants etc.
Switch the mains supply OFF first to prevent electric shock.
1.
Unclip both face plates using a small
flat-blade screwdriver, refer to Dia:1.
Dia:1
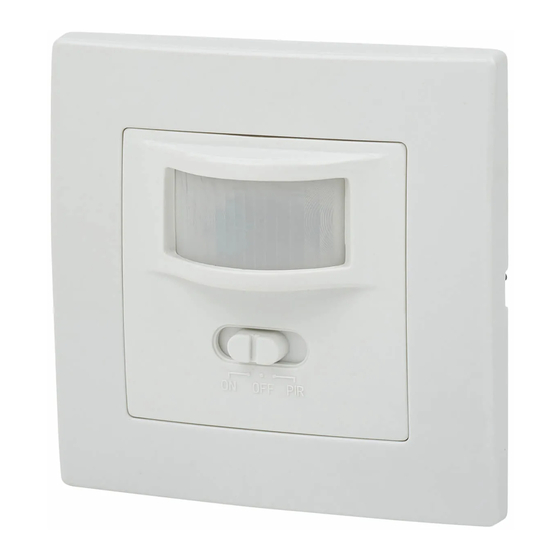
'Orion Range'
Model: OD100
Important Safety Instructions
Note:
Suitable for wall mounting only.
Not suitable for parallel connections.
Model: OD100 -
'ON'
'OFF'
'PIR"
FIELD OF DETECTION
INSTALLATION
= Permanently ON
= Permanently OFF
= PIR Control
2.
Connect the Live in wire to the 'L'
terminal and Load out wire to the 'A'
terminal, refer to Dia:2.
L
Dia:2
Advertisement
Table of Contents

Related Manuals for Green Brook OD100


Summary of Contents for Green Brook OD100
- Page 1 If in doubt,consult a qualified electrician. • Always turn off the mains supply before commencing work. Note: Suitable for wall mounting only. Not suitable for parallel connections. Model: OD100 - Function Switch: ‘ON’ = Permanently ON ‘OFF’ = Permanently OFF ‘PIR”...
- Page 2 Dia:4. Note: The OD100 has prongs which make it slightly awkward to fit into a socket box, fit at an angle first then rotate to fit into the socket box.
Need help?
Do you have a question about the OD100 and is the answer not in the manual?
Questions and answers