Table of Contents
Advertisement
Quick Links
Welcome to the family. Let's get started.
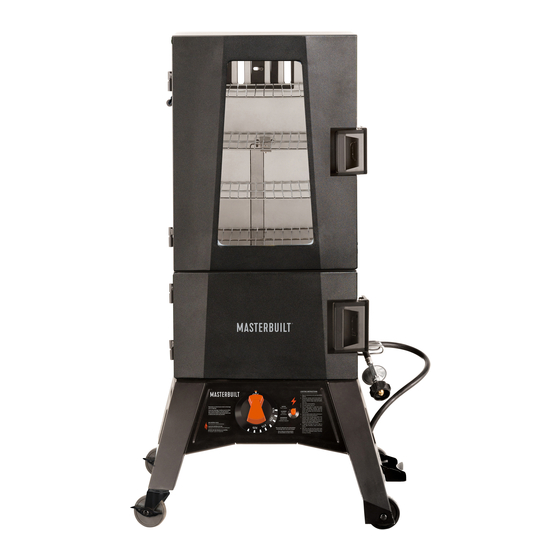
MPS 330G, MPS 340G
PROPANE SMOKER
Manual applies to the following model number(s)
MB20053718, MB20053818, MB20053918, MB20054018,
MB20054118, MB20054218
Your model number
Mfg. Date - Serial Number
These numbers are located on the rating label of the unit.
IMPORTANT
Please record this information immediately and keep in a safe place for future use.
AGA certificate No. 8687 G
Master it. Masterbuilt.
Manual Code: 9805180020 180830-GSB
Advertisement
Table of Contents

Related Manuals for Masterbuilt MPS 340 G


Summary of Contents for Masterbuilt MPS 340 G
- Page 1 Mfg. Date - Serial Number These numbers are located on the rating label of the unit. IMPORTANT Please record this information immediately and keep in a safe place for future use. Manual Code: 9805180020 180830-GSB AGA certificate No. 8687 G Master it. Masterbuilt.
-
Page 2: Carbon Monoxide Hazard
CARBON MONOXIDE DANGER HAZARD IF YOU SMELL GAS: Burning wood chips gives off carbon monoxide, which has no odor and can cause death. 1. Shut off gas to the appliance. DO NOT burn wood chips inside homes, 2. Extinguish any open flame. vehicles, tents, 3. -
Page 3: General Warnings And Safety Information
• Never use unit for anything other than its intended use. This unit is NOT for commercial use. • Accessory attachments not supplied by Masterbuilt Manufacturing, LLC are NOT recommended and may cause injury. • Use of alcohol, prescription or non-prescription drugs may impair user’s ability to properly assemble or safely operate unit. - Page 4 GENERAL WARNINGS AND SAFETY INFORMATION WARNINGS & IMPORTANT SAFEGUARDS CONTINUED FROM PAGE 3 • LP gas cylinder being used must be constructed and marked in accordance with specifications for LP gas cylinders of the US Department of Transportation (DOT) or the Standard for Cylinders, Spheres and Tubes for the Transportation for Dangerous Goods, CAN/CSA-B339.
- Page 5 • Store only when fire is completely out and all surfaces are cold. • When not in frequent use and using a cover, remember to check your smoker periodically to avoid possible rust and corrosion due to moisture buildup. CHECK OUT MASTERBUILT.COM FOR MORE TIPS AND RECIPE VIDEOS.
- Page 6 WARNING PERFORM “SOAPY WATER TEST” BEFORE EACH USE. SEE “SOAPY WATER TEST” SECTION IN MANUAL. EXTINGUISH ALL OPEN FLAMES BEFORE CONNECTING REGULATOR TO GAS CYLINDER. TURN GAS OFF AFTER EACH USE. SOAPY WATER TEST WARNINGS & PROCEDURES WARNINGS • Soapy Water Test MUST be performed each time gas cylinder is connected to burner/hose or each time it is used.
-
Page 7: Ignition Instructions
IGNITION INSTRUCTIONS REGULATOR, BURNER AND GAS VALVE CONNECTION & OPERATION • Inspect hose before each use. If there are signs of abrasion, wear, cuts, or leaks, the hose must be COUNTER CLOCKWISE CLOCKWISE replaced. DO NOT USE. • Inspect burner before each use. Check burner and burner venturi tube for insects and insect nests. A clogged tube can lead to a fire beneath unit. -
Page 8: Troubleshooting Guide
Gas leaking from cracked, cut or burned hose Damaged hose Turn off gas at LP cylinder. Replace hose. Contact Masterbuilt at 1.800.489.1581. Gas leaking from LP cylinder Failure due to rust or mishandled equipment Replace LP cylinder. Gas leaking from gas cylinder valve Failure of valve due to rust, mechanical failure or mishandled Turn off gas cylinder valve and return cylinder to gas provider/supplier. -
Page 9: Parts List
TROUBLESHOOTING SOLUTIONS: “CAUSES” LOW OR NO FLOW/VAPOR LOCK/EXCESS FLOW Symptom Cause Possible Solution Burner doesn’t light after pressing ignitor button Low/no gas flow Turn smoker control knob to “Off” position. Turn gas cylinder valve knob to OFF. Vapor lock at coupling nut to LP cylinder Disconnect regulator from cylinder to relieve vapor lock. -
Page 10: Hardware List
HARDWARE LIST M5x10 M4.2x8 M4x8 M6x12 Qty-4 Qty-15 Qty-6 Qty-45 M6 Lock M5x10 Qty-1 Qty-2 Qty-22 PARTS LIST DESCRIPTION Air Damper Top Smoker Body Top Smoker Door Bottom Smoker Body Bottom Smoker Door Top Cabinet Temperature Sensor Cover Bottom Cabinet Temperature Sensor Cover Top Door Handle Bottom Door Handle Smoking Rack... - Page 11 WARNING • Smoker should only • Smoker should never be be rolled on smooth rolled up/down stairs or surface. uneven surface. • Potential damage to smoker or harm to user may result from failure to follow warnings. DO NOT RETURN TO RETAILER for assembly assistance, missing or damaged parts. Please contact Customer Service at 1300 174 876.
- Page 12 ASSEMBLY Actual product may differ from picture shown.
- Page 13 ASSEMBLY Do not tighten all screws yet. Swivel Casters FRONT AVANT FRENTE Swivel Casters Tighten all screws. FRONT...
- Page 14 ASSEMBLY Cabinet Venturi Temperature Sensor Wire Valve Orifice Cabinet Temperature Piezo Sensor Wire Ignition Wire Ignitor Flame Sensor Wire Ignition Wire Align venturi over valve orifices and attach ignition wire to piezo ignitor on control panel. Carefully uncoil the cabinet temperature sensor wire and locate the hole at the back of the smoker body (shown here).
- Page 15 ASSEMBLY Carefully thread cabinet temperature sensor wire down through the body of the smoker. Place cabinet temperature sensor wire behind the cover before installing...
- Page 16 ASSEMBLY Turn smoker over onto legs.
-
Page 17: Assembly, Assemblage
ENSAMBLAJE ASSEMBLY, ASSEMBLAGE, Take out the racks to clean after each use. - Page 18 ENSAMBLAJE ASSEMBLY, ASSEMBLAGE, Take out the grease tray to clean after each use.
- Page 19 GASMATE BARBEQUES AND ACCESSORIES PRODUCT RANGE SITRO GROUP AUSTRALIA (S.G.A.) warrants the purchaser of this product against defects in workmanship and materials for the following periods from the date of purchase: For domestic use, this table applies:- Stainless steel components 5 years (surface oxidization excluded) Enamel components 5 years (chips excluded)
- Page 20 Rest assured, we’re here to help. Do not return to place of purchase. For any queries or assistance call Customer Service (Australia Only) 1300 174 876 Hours of operation: Monday to Friday 8am - 5pm EST Keep your purchase receipt. This will be required to make any claims under the 12 month warranty.
Need help?
Do you have a question about the MPS 340 G and is the answer not in the manual?
Questions and answers