Table of Contents
Advertisement
Available languages
Available languages
Quick Links
Advertisement
Chapters
Table of Contents

Subscribe to Our Youtube Channel
Related Manuals for Beko B9597NEX


Summary of Contents for Beko B9597NEX
- Page 1 Buzdolabı Kullanma kılavuzu B9597NEX DNM520 TR G B 9480 NMS B9477NMN D9520NEX A+++ 9530 KM B9479NEXN DNMNEGBBLUETOOTH 9520 KEX A+++ B 9530 NMXK B 9481 NMB 9597 KE 670520 MBC B 9482 NMSB 670520 MSC 670530 MB 670530 MI 670520 MB...
- Page 2 Ürünü kullanmadan önce lütfen bu kılavuzu okuyun! Değerli Müşterimiz, Modern tesislerde özenli bir şekilde ve detaylı kalite kontrollerinden geçirilerek imal edilmiş olan ürününüzü en iyi şekilde kullanmanızı dileriz. Bu nedenle, ürünü kullanmadan önce bu kullanım kılavuzunun tamamını okumanızı öneririz. Ürünün el değiştirmesi durumunda, ürünle birlikte kılavuzu da ürünün yeni sahibine vermeyi unutmayın.
-
Page 3: Table Of Contents
1 . Güvenlikle ve Çevreyle İlgili 5 Ürünün kullanımı Önemli Talimatlar 5.1. Sıcaklık ayar düğmesi... 13 1.1. Kullanım amacı....3 5.2. -
Page 4: Güvenlikle Ve Çevreyle İlgili Önemli Talimatlar
. Güvenlikle ve Çevreyle İlgili Önemli Talimatlar Bu kısım, bedensel yaralanma ya uygulamalarda. da malın hasar görmesi riskinden 1.1.1 Genel Güvenlik korunmanıza yardımcı olacak Bu ürün, fiziksel, duyusal, güvenlik talimatları içermektedir. • zihinsel engelleri bulunan; Bu talimatlara uyulmaması tecrübe ve bilgi eksiği halinde ürün herhangi bir garanti olan kişilerin ve çocukların kapsamında olmayacaktır. - Page 5 Güvenlik ve çevre talimatları Şişe ve kutulardaki sıvı Ürünü prizden asla kabloyu • • içecekleri dondurucu çekerek çıkarmayın; her bölmesine koymayın. zaman fişi, prizden tutarak Patlayabilirler! çekin. Buzdolabını temizlemek • ya da buzlarını çözmek için asla buhar ya da buhar destekli temizlik malzemeleri kullanmayın.
- Page 6 Güvenlik ve çevre talimatları Benzer sorunlar, ürün Yangın ya da patlama riski • üzerine herhangi bir nesne olabileceğinden, ürünün yerleştirildiğinde de ortaya yakınında gazlı spreyler çıkabilir. kullanmayın! Üründe kapı kolu Yanıcı ve yanıcı gaz ihtiva • • bulunuyorsa ürünün yerini eden mamulleri (ör.
-
Page 7: Hidrokarbon (Hc) Uyarısı
Güvenlik ve çevre talimatları saklanması, buz ve Ürününüzdeki dondurma yapımı ve soğutma sistemi saklanması için kullanılır. R134a gazı içeriyorsa Bir, iki ve üç yıldızlı bölmeler • bu uyarıyı dikkate taze gıdaların dondurulması almayın. için uygun değildir. Eğer soğutucu ürün uzun Ürününüzün •... -
Page 8: Kullanım Amacı
Güvenlik ve çevre talimatları minimum 0,6°C (33°F) ve TEHLİKE: maksimum 38°C (100°F) Eski buzdolabınızı ya da olmalıdır. dondurucunuzu atmadan UYARI: önce: Ürünü kesinlikle Çocuklar içinde • 550 kPa ve üzeri kalabilir. (80 psi) basınçlı Kapılarını çıkarın. • soğuk su şebekesine Çocukların ürünün •... -
Page 9: Rohs Direktifine Uygunluk
Güvenlik ve çevre talimatları 1.5. RoHS Direktifine TEHLİKE: Uygunluk: Yangın ya da Patlama Satın almış olduğunuz bu ürün Riski: AB RoHS Direktifine (2011/65/ Yanıcı soğutucu AB) uygundur. Ürün, bu • malzeme Direktifte belirtilen zararlı ve kullanılmaktadır. yasak malzemeleri içermez. Buzdolabının •... -
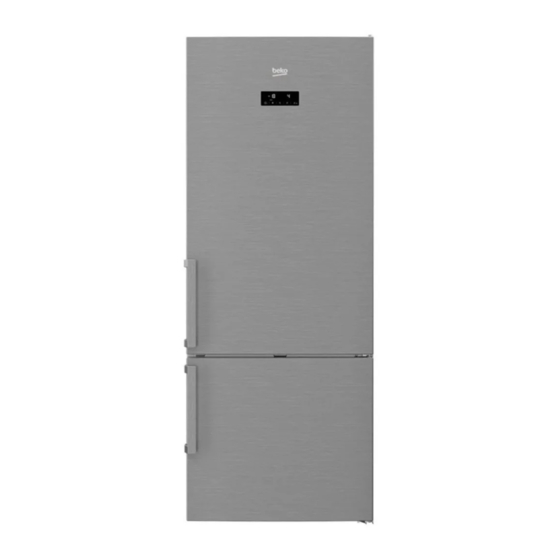
Page 10: Buzdolabınız
Buzdolabınız 1. Soğutucu bölme kapı rafı 10. Buzmatik Su pınarı doldurma haznesi 11. Sebzelik Yumurtalık 12. Sıfır derece bölmesi Su pınarı deposu 13. Aydınlatma lambası 5. Şişe rafı 14. Soğutucu bölme cam rafı 6. Kayar saklama kabı 15. Sıcaklık ayar düğmesi 7. Ayarlanabilir ayaklar 16. Soğutucu bölme 8. Derin dondurucu bölmesi... -
Page 11: Kurulum
Kurulum 3.1. Kurulum için 3.2. Plastik takozların doğru yer takılması Ürünün kurulumu için Yetkili Servisi Ürünle duvar arasındaki hava dolaşımını arayın. Ürünü kullanıma hazır duruma sağlayacak mesafe’yi korumak için getirmek için, kullanma kılavuzundaki ürün içerisinden çıkan plastik takozlar kullanılmaktadır. bilgilere bakarak elektrik tesisatı ve su 1. Takozları... -
Page 12: Elektrik Bağlantısı
Kurulum 3.4. Elektrik bağlantısı Uzatma kabloları ya da UYARI: çoklu prizlerle bağlantı yapmayın. Hasar görmüş elektrik UYARI: kablosu Yetkili Servis tarafından değiştirilmelidir. İki soğutucu yan yana yerleştiriliyorsa aralarında en az 4 cm boşluk bırakılmalıdır. • Ürünün ulusal yönetmeliklere uygun topraklama ve elektrik bağlantısı... -
Page 13: Ön Hazırlık
Ön hazırlık 4.1. Enerji tasarrufu için • Yiyecekleri aşağıdaki şekilde belirtilen yapılması gerekenler soğutucu bölme sıcaklık sensörüne temas ettirmeyin. Ürünün elektronik enerji tasarruf sistemlerine bağlanması, ürüne zarar verebileceği için sakıncalıdır. • Buzdolabınızın kapılarını uzun süre açık tutmayın. • Buzdolabınıza sıcak yiyecek ya da içecek koymayın. -
Page 14: Ürünün Kullanımı
Ürünün kullanımı 5.2. Hızlı dondurma 5.1. Sıcaklık ayar düğmesi Büyük miktarda taze gıda dondurmak Buzdolabınızın iç sıcaklığı aşağıda belirtilen istiyorsanız gıdaları hızlı dondurma nedenlerden dolayı değişiklik gösterir: bölmesine koymadan 24 saat önce • Mevsim sıcaklıkları, sıcaklık ayar düğmesini ( )konumuna • Kapısının sık sık açılması... -
Page 15: Tatil Fonksiyonu
Ürünün kullanımı 5.3. Tatil fonksiyonu Sıcaklık ayar düğmesi en sıcak konuma ( )alındıktan sonra ürünün kapıları en az 12 saat açılmaz ise Tatil fonksiyonu otomatik olarak devreye girecektir. Fonksiyonu iptal etmek için düğme ayarı değiştirilmelidir. Tatil fonksiyonu aktifken soğutucu bölmede gıda saklanması önerilmez. • Ayar işlemi tamamlandıktan sonra, sıcaklık ayar düğmesi’ni içeri bastırarak gizlenmesini... -
Page 16: Gösterge Paneli
Ürünün kullanımı 5.4. Gösterge paneli Gösterge panelleri, ürününüzün modeline göre değişiklik gösterebilir. Gösterge panelindeki işitsel ve görsel fonksiyonlar ürünü kullanmanıza yardımcı olur. Soğutucu bölme göstergesi Hata durumu göstergesi Sıcaklık göstergesi Tatil fonksiyon düğmesi Sıcaklık ayar düğmesi Bölme seçim düğmesi Dondurucu bölme göstergesi Ekonomi modu göstergesi Tatil fonksiyonu göstergesi *opsiyonel... - Page 17 Ürünün kullanımı 1. Soğutucu bölme göstergesi 6. Bölme seçim düğmesi Soğutucu bölme sıcaklığı ayarlanırken Seçim düğmesi soğutucu ve soğutucu bölme ışığı yanar. dondurucu bölmeleri arasında geçiş yapmak için buzdolabı bölme seçim 2. Hata durumu göstergesi düğmesine basın.( ) Buzdolabınız yeterli soğutma 7.
- Page 18 Ürünün kullanımı Gösterge paneli Gösterge paneli, ürünün kapısını açmadan sıcaklığı ayarlamanızı ve ürünle ilgili diğer fonksiyonları kontrol etmenizi sağlar. Fonksiyon ayarları için sadece ilgili düğmelerin yazılarına dokunmanız yeterlidir. otomatik olarak devreye girer ve 1. Elektrik kesintisi/Yüksek sıcaklık enerji tasarrufu simgesi yanar.( / hata uyarısı...
- Page 19 Ürünün kullanımı 5.Tatil fonksiyonu 3.Hızlı soğutma fonksiyonu Tatil fonksiyonunu aktive etmek Düğmenin iki fonksiyonu vardır. Hızlı için bu düğmeye ( )3 saniye soğutma fonksiyonunu etkinleştirmek basın, tatil modu göstergesi ( veya devre dışı bırakmak için basıp devreye girer.Tatil fonksiyonu aktif bırakın.
- Page 20 Ürünün kullanımı basılı tutun. Fonksiyon aktifken Buzmatiği açmak veya kapatmak için dondurucu en az 6 saat sonra ise yaklaşık 3 saniye basılı tutun. en ekonomik modda çalışmaya Hızlı dondurma fonksiyonunu başlayacak ve ekonomik kullanım dondurucu bölmeye göstergesi yanacaktır.( ) Eko fuzzy koyduğunuz yiyecekleri fonksiyonunu devre dışı...
- Page 21 Ürünün kullanımı *7.2 *7.1 1- Ekonomik kullanım 2- Yüksek sıcaklık / hata uyarısı 3- Enerji tasarrufu (ekran kapalı) 4- Hızlı soğutma 5- Tatil fonksiyonu 6- Dondurucu bölme sıcaklık ayarı 7- Enerji tasarrufu (ekran kapalı)/ Alarm off uyarısı 8- Tuş kilidi 9- Eko fuzzy 10- Soğutucu bölme sıcaklık ayarı...
- Page 22 Ürünün kullanımı 5. Tatil fonksiyonu 1. Ekonomik kullanım Bu simge, en ekonomik ayar değerleri Tatil fonksiyonunu aktive etmek olarak dondurucu bölme -18°C'ye için düğmeye ( )3 saniye ayarlandığında yanar.( ) Hızlı basın, tatil modu göstergesi ( soğut veya hızlı dondur fonksiyonları devreye girer.Tatil fonksiyonu aktif seçildiğinde ekonomik kullanım olduğunda, soğutucu bölmesi sıcaklık...
- Page 23 Ürünün kullanımı 7.2 Alarm off uyarısı 10. Soğutucu bölme sıcaklık ayarı Elektrik kesintisi/yüksek sıcaklık Düğmeye basıldığında soğutucu alarmı durumunda dondurucu bölme bölme sıcaklığı sırayla 8,7,6,5,4,3,2 ve gıdaları kontrol edildikten sonra alarm 1 değerlerine ayarlanabilir.( off düğmesine basılarak uyarı silinir. 11. Hızlı dondurma 8.
-
Page 24: Buz Kabı
Ürünün kullanımı 5.7. Fan 5.5. Buz kabı Fan buzdolabınızın içindeki soğuk (Bu özellik opsiyoneldir) havanın homojen olarak dağılmasını • Buz kabını dondurucu bölmeden ve dolaşmasını sağlamak için çıkarın. tasarlanmıştır. Fanın çalışma zamanı • Buz kabını suyla doldurun. ürününüzün özelliğine göre farklılık • Buz kabını... -
Page 25: Hareketli Kapı Rafı
Ürünün kullanımı 5.11. Kayar 5.10. Hareketli saklama kabı kapı rafı (Bu özellik opsiyoneldir) (Bu özellik opsiyoneldir) Bu aksesuar kapı raflarının kullanım Hareketli Kapı Rafı, 3 ayrı hacmini arttırmak için tasarlanmıştır. pozisyonda sabitlenebilmektedir. Sağa ve sola hareket etme özelliği Rafı hareket ettirmek için sayesinde bir alttaki şişe rafına kenarlarda görülen butonlara aynı... -
Page 26: Nem Kontrollü Sebzelik
Ürünün kullanımı 5.13. Nem kontrollü 5.14. Otomatik sebzelik buz makinası (Bu özellik opsiyoneldir) (Bu özellik opsiyoneldir) Nem kontrollü sebzelik özelliği ile Otomatik buz makinası, buzdolabında sebze ve meyvelerin nem oranları kolayca buz yapmanızı sağlar. Buz kontrol altında tutulmakta ve gıdaların makinasından buz elde etmek için daha uzun süre taze kalmaları... -
Page 27: Buzmatik Ve Buz Saklama Kabı
Ürünün kullanımı 5.16. Su pınarı 5.15. Buzmatik ve Buz Saklama Kabı (Bu özellik opsiyoneldir) Su pınarı, dolabınızın kapısını aç- (Bazı Modellerde) madan soğuk suya ulaşmaya da- Buzmatik’in kullanılması yalı son derece kullanışlı bir özellik- Buzmatiği su ile doldurup yerine tir. Buzdolabınızın kapısını sık açma- koyunuz. - Page 28 Ürünün kullanımı Dikkat! Su pınarının su deposunun • Su deposuna su dışında, meyve doldurulması suyu, karbonatlı gazlı içecekler, alkollü Su deposu doldurma haznesi kapı içecekler gibi su pınarıyla kullanıma rafının içindedir. Haznenin kapağını uygun olmayan başka bir sıvı açarak saf ve temiz içme suyunu doldurmayın. Bu tür sıvılar kullanılırsa doldurabilirsiniz.
-
Page 29: Su Deposunun Temizlenmesi
Ürünün kullanımı 5.18. Su deposunun temizlenmesi • Kapı rafı içindeki su doldurma haznesini çıkarın. •Kapı rafını her iki tarafından tutarak yerinden çıkarın. tutarak 45 ∘ derece açı ile yerinden •Su deposunu her iki tarafından çıkarın. •Su deposu kapağını çıkararak temizleyin. Su deposu ve su pınarı bileşenleri bulaşık maki- nesinde yıkanmamalıdır. 28 /37 TR Buzdolabı / Kullanma Kılavuzu... -
Page 30: Su Tepsisi
Ürünün kullanımı 5.19. Su tepsisi 5.20. HerbBox/ HerbFresh Su pınarı kullanılırken damlayan su, damlama tepsisinde birikir. (Bu özellik opsiyoneldir) Plastik süzgeç parçasını şemada gös- Film muhafazasını HerbBox/ terildiği gibi çıkartın. HerbFresh+’dan çıkarınız. Kuru ve temiz bir bez ile biriken suyu Filmi torbasından çıkararak şekildeki temizleyin. -
Page 31: Taze Yiyeceklerin Dondurulması
Ürünün kullanımı • Dondurulmuş gıdalar çözüldükten 5.21. Taze yiyeceklerin sonra derhal kullanılmalı ve tekrar dondurulması dondurulmamalıdır. • Gıdaların kalitesinin korunabilmesi • Çok fazla miktarda yiyeceği bir için dondurucu bölmeye seferde dondurmayın. konulduğunda mümkün olduğunca hızlı dondurulmalıdır, bunun için 5.22. Donmuş gıdaların hızlı... -
Page 32: Derin Dondurucu Bilgileri
Ürünün kullanımı 5.23. Derin Soğutucu Küçük ve paketlenmiş dondurucu bilgileri bölme kapı gıda ya da içecekler rafları IEC 62552 standartlarına göre, her 100 litre dondurucu bölme hacmi Sebzelik Sebzeler ve meyveler için ürünün 25°C oda sıcaklığında Şarküteri ürünleri 4,5 kg'lık gıda maddesini -18°C veya Taze gıda (kahvaltılık ürünler daha düşük sıcaklıklarda 24 saatte... -
Page 33: Bakım Ve Temizlik
Bakım ve temizlik Ürünün düzenli temizlenmesi halinde Ancak uygun olmayan yiyecek saklamaya kullanım ömrü uzar ve ürün iç yüzeyinin gerektiği şekilde temizlenmemesine bağlı olarak koku Buzdolabınızı UYARI: ortaya çıkabilir. temizlemeden önce elektrik bağlantısını kesin. Bu sorunu önlemek için 15 günde bir karbonatlı... - Page 34 Bakım ve temizlik Camların yüzeyinde bir kaplama vardır. (Potasyum) Rb (Rubidyum), Cs Bu kaplama leke oluşumunu en aza (Sezyum) ile yapay ve radyoaktif indiren ve oluşan lekelerin ve kirlerin Fr (Fan-siyum) metallerine ALKALİ kolay temizlenmesini sağlayan bir METALLER denir. kaplamadır. Kaplama ile korunmamış camlar, kısa sürede ve kolayca, lekelenmeye ve fiziksel hasara yol açan kireç...
-
Page 35: Sorun Giderme
Sorun Giderme Servis çağırmadan önce bu listeyi gözden • Buzdolabı soğutma sistemindeki geçirin. Bu, zamandan ve paradan gazın basıncı henüz dengelenmemiş tasarruf etmenizi sağlar. Bu liste hatalı olduğu için ani elektrik kesintisinde işçiliğe ya da malzeme kullanımına bağlı veya fişin çıkarılıp takılmasında olmayan, sık rastlanabilecek şikayetleri kompresör koruyucu termiği atar. - Page 36 Sorun giderme • Dondurucu bölme sıcaklığı çok • Yeni ürününüz eskisinden daha düşük bir değere ayarlanmıştır. büyük olabilir. Daha büyük >>> Dondurucu bölme sıcaklığını buzdolapları daha uzun süre çalışır. daha yüksek bir dereceye ayarlayıp • Oda sıcaklığı yüksek olabilir. >>> kontrol edin.
- Page 37 Sorun giderme Buzdolabının içi kötü kokuyor. Sarsılma ya da gürültü. • Düzenli temizlik yapılmamıştır. >>> • Zemin sabit veya düz değildir. Buzdolabının içini sünger, ılık su veya >>> Buzdolabı hafiften hareket karbonatlı su ile temizleyin. ettirildiğinde sallanıyorsa • Bazı kaplar veya paketleme ayaklarından ayarlayarak dengede malzemeleri kokuya neden durmasını...
- Page 38 Sorun giderme Kapı açıldığında fan çalışmaya devam ediyor. Dondurucu kapısı açıldığında fan çalışmaya devam edebilir. : Bu bölümdeki talimatları UYARI uygulamanıza rağmen sorun devam ediyorsa bayinize veya Yetkili Servise danışın. Çalışmayan bir ürünü asla kendiniz onarmaya çalışmayın. 37/37 TR Buzdolabı / Kullanma Kılavuzu...
-
Page 39: Müşteri Hizmetleri
Kanallarımız: * Çağrı Merkezimiz: * Faks Numaramız: 444 0 888 0216-423-2353 (Sabit telefonlardan veya cep * Web Adresimiz: telefonlarından www.beko.com.tr alan kodu çevirmeden arayın*) * e-posta Adresimiz: * Diğer Numaramız - musteri.hizmetleri@beko.com 0216 585 8 888 * Sosyal Medya Hesaplarımız: - Çağrı Merkezimiz haftanın 7 günü 24 https://www.instagram.com/bekoturkiye/ saat hizmet vermektedir. https://twitter.com/beko_tr - Çağrı Merkezimiz ile yaptığınız https://www.facebook.com/bekoturkiye/ görüşmeler iletişim hizmeti aldığınız operatör firma tarafından sizin için https://www.youtube.com/user/BekoChannel tanımlanan tarifeye göre ücretlendirilir. - Page 40 Müşteri Memnuniyeti Politikası...
- Page 41 Garanti ile ilgili olarak müşterinin dikkat etmesi gereken hususlar Kullanım Hataları ve Garanti ile İlgili Dikkat Edilmesi Gereken Diğer Hususlar: Aşağıda belirtilen sorunların giderilmesi ücret karşılığında yapılır. Bu durumlar için garanti şartları uygulanmaz; 1)Kullanım hatalarından kaynaklanan hasar ve arızalar, 2)Malın tüketiciye tesliminden sonraki yükleme, boşaltma, taşıma vb. sırasında oluşan hasar ve arızalar, 3)Malın kullanıldığı...
- Page 42 Malın belirlenmiş o mala ilişkin azami tamir süresi içerisinde düzenlenmesi zorunludur. Markası: Beko Unvanı: Buzdolabı B9597NEX-B9477NMN-B9479NEXN-B 9530 NMXK-670520 MBC-670530 MB Sütlüce / İSTANBUL DNM520 TR G-D9520NEX A+++-DNMNEGBBLUETOOTH-B 9481 NMB-B 9482 NMSB-670530 MI (0-216) 585 8 888 Telefonu: ARÇELİK A.Ș. B 9480 NMS-9530 KM-9520 KEX A+++-9597 KE-670520 MSC-670520 MB...
- Page 44 Please read this manual before using the product! Dear Valued Customer, We wish you to get the best results from your product that has been manufactured meticulously at modern plants and tested with detailed quality control checks. For this reason, we recommend that you read this user manual thoroughly before starting the product. If you hand over the product to someone else, please remember to give the user manual as well.
- Page 45 1. Safety and environment instructions 3 5 Using the product 1.1. General safety..... . . 3 5.1. Temperature adjustment button ..13 1.1.1 HC warning .
-
Page 46: Safety And Environment Instructions
Safety and environment instructions This section provides the safety instructions and instruction of a person responsible necessary to prevent the risk of injury and material for their safety. Children should not be damage. Failure to observe these instructions will allowed to play with this device. invalidate all types of product warranty. - Page 47 Safety and environment instructions In case of malfunction, do not use • the product, as it may cause electric shock. Contact the authorised service before doing anything. Plug the product into an earthed • socket. Earthing must be done by a qualified electrician.
-
Page 48: Hc Warning
Safety and environment instructions Two-star frozen-food compartments • Consult Professional plumbers if you are suitable for storing pre-frozen are not sure that there is no water hammer effect in your installation. food, storing or making icecream Do not install on the hot water inlet. •... -
Page 49: Compliance With Weee Directive And Disposing
Safety and environment instructions 1.4. Compliance with WEEE Directive and Disposing of the Waste Product This product complies with EU WEEE Directive (2012/19/EU). This product bears a classification symbol for waste electrical and electronic equipment (WEEE). This product has been manufactured with high quality parts and materials which can be reused and are suitable for... -
Page 50: Your Refrigerator
Your Refrigerator 1. Cooler compartment door shelf 10. Ice cube tray & Ice bank 2. Water dispenser filling tank 11. Vegetable bin 3. Egg section 12. Zero degree compartment 4. Water dispenser reservoir 13. Interior light 5. Bottle shelf 14. Cooler compartment glass shelf 15. -
Page 51: Installation
Installation 3.1. Right place for installation 3.2. Attaching the plastic wedges Contact the Authorized Service for the product's Use the plastic wedges in the provided with installation. To ready the product for installation, the product to provide sufficient space for air see the information in the user guide and make circulation between the product and the wall. -
Page 52: Power Connection
Installation 3.4. Power connection WARNING: Do not use extension or multi sockets in power connection. WARNING: Damaged power cable must be replaced by Authorized Service. When placing two coolers in adjacent position, leave at least 4 cm distance between the two units. • Our firm will not assume responsibility for any damages due to usage without earthing and power connection in compliance with... -
Page 53: Reversing The Doors
Installation 3.5. Reversing the doors Proceed in numerical order . Refrigerator / User Guide 10 /34 EN... - Page 54 Installation 3.6. Reversing the doors Proceed in numerical order . (13) 45 ° 180° Refrigerator / User Guide 11/34 EN...
-
Page 55: Preparation
Preparation 4.1. What to do for energy saving • Make sure the foods are not in contact with the cooler compartment temperature sensor Connecting the product to electronic described below. energy-saving systems is harmful, as it may damage the product. • Do not keep the refrigerator doors open for long periods. -
Page 56: Using The Product
Using the product 5.1. Temperature adjustment button 5.2. Rapid freezing If you want to freeze large amounts of fresh food, Internal temperature of your refrigerator varies switch the temperature adjustment button to depending on the following reasons: • Seasonal temperatures, ) position before putting the food into the • Opening the door frequently and leaving it quick freezing compartment. -
Page 57: Vacation Function
Using the product 5.3. Vacation function If doors of the product is not ( ) opened for at least 12 hours after adjusting the temperature setting button to the highest, vacation function is automatically activated. Button setting must be changed to cancel the function. -
Page 58: Indicator Panel
Using the product 5.4. Indicator panel Indicator panels may vary according to the product model. Audio – visual functions on the indicator panel helps you in using your product. 1. Fridge Compartment Indicator 2. Error status indicator 3. Temperature indicator 4. - Page 59 Using the product 1. Fridge compartment indicator 8. Economy mode indicator Fridge compartment light is illuminated while Indicates that the refrigerator operates the fridge compartment temperature is set. in energy saving mode. This display shall be activated if the freezer compartment 2.
- Page 60 Using the product 5.5. Indicator panel Indicator panel allows you to set the temperature and control the other functions related to the product without opening the door of the product. Just press the inscriptions on relevant buttons for function settings. When energy saving function is activated, 1.
- Page 61 Using the product Other compartments shall be continued to be Use quick cooling function when you cooled as per their set temperature. want to quickly cool the food placed in the fridge compartment. If you want To cancel this function press Vacation to cool large amounts of fresh food, function button again.
- Page 62 Using the product 10. Icematic off indicator Economic usage indicator is turned Indicates whether the icematic is on or off. ( off when quick cooling or quick freeze functions are selected. )If On, then the icematic is not operating. To operate the icematic again press and hold the On-Off button for 3 seconds.
- Page 63 Using the product *7.2 *7.1 1- Economic use 2- High temperature / fault alert 3- Energy saving function (display off) 4- Rapid cooling 5- Vacation function 6- Cooler compartment temperature setting 7- Energy saving (display off) / Alarm off warning 8- Keypad lock 9- Eco-fuzzy 10- Freezer compartment temperature...
- Page 64 Using the product 4. Rapid cooling 1. Economic use When the rapid cooling function is turned on, the This sign will light up when the freezer rapid cool indicator will light up ( ) and the co- compartment is set to -18°C', the most oler compartment temperature indicator will disp- economical setting.
- Page 65 Using the product 10. Freezer compartment temperature 7.1. Energy saving (display off) setting Pressing this button ( ) will light up the The temperature in the freezer compartment is energy saving sign ( ) and the Energy-saving function will activate. Activating the energy- adjustable.
-
Page 66: Ice Bucket
Using the product 5.6. Ice bucket 5.8. Fan *optional Fan was designed to distribute circulate the • Take the ice bucket from the freezer cold air inside your refrigerator homogeneously. compartment. Operating time of the fan might vary depending • Fill the ice bucket with water. the features of your product. -
Page 67: Moving Door Rack
Using the product 5.12. Sliding storage box 5.11. Moving door rack *optional *optional This accessory has been designed to increase Moving door rack can be fixed in 3 different the usage volume of the door racks. positions. Thanks to its ability to move sideways, it In order to move the rack, push the buttons enables you to easily place long bottle, jar or on the side evenly. -
Page 68: Moisture Controlled Vegetable Bin
Using the product 5.13. Moisture controlled 5.14. Automatic ice machine vegetable bin *optional *optional Automatic ice machine enables you to easily With moisture control feature, moisture rates make ice in your refrigerator. In order to obtain of vegetables and fruits are kept under control ice from the ice machine, take out the water and ensures a longer freshness period for tank in the cooler compartment, fill it with... -
Page 69: Icematic And Ice Storage Container
Using the product 5.16. Using the water dispenser 5.15. Icematic and ice storage container *optional *optional It is normal for the first few glasses Using the Icematic of water taken from the dispenser Fill the Icematic with water and place it into its to be warm. -
Page 70: Filling The Water Dispenser's Tank
Using the product 5.17. Filling the water dispenser's tank Water tank filling reservoir is located inside the door rack. 1. Open the cover of the tank. 2. Fill the tank with fresh drinking water. 3. Close the cover. Do not fill the water tank with any other liquid except for water such as fruit juices, carbonated beverages or alcoholic drinks... -
Page 71: Cleaning The Water Tank
Using the product Capacity of the water tank is 3 litres; do not overfill. 5.18. Cleaning the water tank 1. Remove the water filling reservoir inside the door rack. 2. Remove the door rack by holding from both sides. 3. Grab the water tank from both sides and re- move it with an angle of 45°C. -
Page 72: Drip Tray
Using the product 5.19. Drip tray 5.20. HerbBox/HerbFresh Water that dripped while using the water Remove the film container from HerbBox/ dispenser accumulates in the spillage tray. HerbFresh+ Remove the plastic filter as shown in the figure. Take the film out of the bag and put it into the film container as shown in the image. -
Page 73: Freezing Fresh Food
Using the product 5.21. Freezing fresh food • Mark each food pack by writing the date on the package before freezing. This will allow • To preserve food quality, the food items you to determine the freshness of each placed in the freezer compartment must be pack every time the freezer is opened. -
Page 74: Deep Freezer Details
Using the product 5.23. Deep freezer details 5.25. Door open alert As per the IEC 62552 standards, the freezer (Optional) must have the capacity to freeze 4,5 kg of An audible alert will be heard if the product's food items at -18°C or lower temperatures door remains open for at least 1 minute. -
Page 75: Maintenance And Cleaning
Maintenance and cleaning • Never keep the food that have expired best before dates and spoiled in the refrigerator. Service life of the product is increase if it is regularly cleaned 6.2. Protecting the plastic surfaces Clean with arm water immediately as the oil may WARNING: First unplug the product cause damage on the surface when it is poured on... - Page 76 Troubleshooting Please review this list before calling the service. • Protective thermal of the compressor will This will save you time and money. This list contains blow out during sudden power failures or frequently encountered problems that are not plug-out plug-ins as the refrigerant pressure results of faulty workmanship or material use.
-
Page 77: Troubleshooting
Troubleshooting • Your new product may be bigger than the • The fridge compartment temperature may be previous one. Larger refrigerators operate for set to a very high value. >>> Set the fridge a longer period of time. compartment temperature to a lower value • The room temperature may be high. - Page 78 Troubleshooting Damp accumulates on the inner walls of • Foods may be touching the upper wall of the refrigerator. crisper. >>>Re-organise the foods in the crisper. • Hot and humid weather increases icing and condensation. This is normal and not a fault. If The Surface Of The Product Is Hot.
- Page 79 57 5318 0000/BI TR-EN www.beko.com.tr www.beko.com.tr...
Need help?
Do you have a question about the B9597NEX and is the answer not in the manual?
Questions and answers