Table of Contents
Advertisement
Advertisement
Table of Contents

Related Manuals for Samsung NP-R439E


Summary of Contents for Samsung NP-R439E
-
Page 1: User Guide
SAMSUNG P428/R428/R429/R439/R478 User Guide... -
Page 3: Table Of Contents
Contents Chapter 1. Getting Started Cautions Regarding OS Support Before You Start Safety Precautions Proper Posture During Computer Use 20 Important Safety Information Replacement Parts and Accessories Regulatory Compliance Statements WEEE SYMBOL INFORMATION Basic Items Overview Front View Status Indicators Right View Left View Back View... - Page 5 Chapter 1. Getting Started Cautions Regarding OS Support Before You Start Safety Precautions Proper Posture During Computer Use Important Safety Information Replacement Parts and Accessories Regulatory Compliance Statements WEEE SYMBOL INFORMATION Basic Items Overview Front View Status Indicators Right View Left View Back View Bottom View...
-
Page 6: Cautions Regarding Os Support
PC. For the installation procedures and any issues with the operating systems or applications not supplied by Samsung Computer, contact the corresponding software company. The company will not provide a replacement or refund due to the reason service engineer visits you due to this problem, a service charge will be applied. -
Page 7: Before You Start
The information in this document is subject to change without notice due to improving the performance of the product. Samsung Electronics shall not be liable for any data loss. Please take care to avoid losing any important data and backup your data to prevent any such data loss. - Page 8 About the Product Capacity Representation Standard About HDD Capacity Representation The capacity of the storage device (HDD, SSD) of the manufacturer is calculated assuming that 1KB=1,000 Bytes. However, the operating system (Windows) calculates the storage device capacity assuming that 1KB=1,024 Bytes, and therefore the capacity representation of the HDD in Windows is smaller than the actual capacity due to the difference in capacity calculation.
-
Page 9: Safety Precautions
Safety Precautions For your security and to prevent damage, please read the following safety instructions carefully. Since this is commonly applied to Samsung Computers, some pictures may differ from actual products. Warning Failing to follow instructions marked with this symbol may cause personal injury and even fatality. - Page 10 Warning Failing to follow instructions marked with this symbol may cause personal injury and even fatality. Power Related The power plug and wall outlet figures may differ depending on the country specifications and the product model. Do not touch the main plug or power cord with wet hands.
- Page 11 Warning Failing to follow instructions marked with this symbol may cause personal injury and even fatality. If water or another substance enters the power input jack, AC adapter or the computer, disconnect the power cord and contact the service center. Damage to the device within the computer may cause electric shock or fire hazard.
- Page 12 Parts Use an authorized battery and AC adapter only. Please use an authorized battery and adapter approved by Samsung Electronics. Unauthorized batteries and adapters may not meet the proper safety requirements and may cause problems or malfunctions and result in an explosion or fire.
- Page 13 Warning Failing to follow instructions marked with this symbol may cause personal injury and even fatality. Never heat the battery or put the battery into a fire. Do not put or use the battery in a hot location such as a sauna, inside a vehicle exposed to the heat, and so on.
- Page 14 Warning Failing to follow instructions marked with this symbol may cause personal injury and even fatality. Do not place any container filled with water or chemicals over or near the computer. If water or chemicals enter the computer, this may cause fire or electric shock.
- Page 15 Warning Failing to follow instructions marked with this symbol may cause personal injury and even fatality. Use only authorized parts (multi-plug, battery and memory) and never disassemble parts. There is a danger of damaging the product, electric shock or fire hazard. Shut down the computer and disconnect all cables before disassembling...
- Page 16 This may cause an injury, fire or explosion. Use only a battery authorized by Samsung Electronics. Failing to do so may cause an explosion. Avoid contact with metal objects such as car keys or clips when keeping or carrying a battery.
- Page 17 Make sure to have the product tested by a safety service engineer after repairing the product. Authorized Samsung Repair Centers will carry out safety checks after a repair. Using a repaired product without testing it for safety may cause an electric shock or fire.
- Page 18 There is a danger of electric shock if your body touches an internal part. Use parts authorized by Samsung Electronics only. Failing to do so, may cause fire or damage the product. Never disassemble or repair the product by yourself.
-
Page 19: Cautions On Preventing Data Loss
Caution Failing to follow instructions marked with this symbol may cause slight injury or damage to the product. Custody and Movement Related When moving the product, turn the power off and separate all connected cables first. The product might be damaged or users may trip over the cables. -
Page 20: Proper Posture During Computer Use
Proper Posture During Computer Use Maintaining a proper posture during computer use is very important to prevent physical harm. The following instructions are about maintaining a proper posture during computer use developed through human engineering. Please read and follow them carefully when using the computer. - Page 21 Eye Position Keep the monitor or LCD away from your eyes by at least 50cm. Adjust the height of the monitor and the LCD screen so that its top height is equal to or lower than your eyes. Avoid setting the monitor and LCD excessively bright.
-
Page 22: Volume Control
Volume Control (Headphones and Speakers) Check your volume first to listen to music. Check your volume! Check if the volume is too loud before using headphones. It is not recommended using headphones for long periods of time. Any deviation from the equalizer default setting could cause hearing impairment. -
Page 23: Important Safety Information
Important Safety Information Safety Instructions Your system is designed and tested to meet the latest standards for safety of information technology equipment. However, to ensure safe use of this product, it is important that the safety instructions marked on the product and in the documentation are followed. - Page 24 Care During Use Do not walk on the power cord or allow anything to rest on it. Do not spill anything on the system. The best way to avoid spills is to not eat or drink near your system. ...
-
Page 25: Replacement Parts And Accessories
Do not put rechargeable batteries or products powered by non- removable rechargeable batteries in the garbage. Contact the Samsung Helpline for information on how to dispose of batteries that you cannot use or recharge any longer. Follow all local regulations when disposing of old batteries. -
Page 26: General Requirements
Connect and Disconnect the AC adapter The socket-outlet shall be installed near the equipment and shall be easily accessible. Do not unplug the power cord out by pulling the cable only. Power Cord Requirements The power cord set (wall plug, cable and AC adapter plug) you received with your computer meets the requirements for use in the country where you purchased your... -
Page 27: Regulatory Compliance Statements
Regulatory Compliance Statements Wireless Guidance (If fitted with 2.4G band or 5G band) Low power, Radio LAN type devices (radio frequency (RF) wireless communication devices), operating in the 2.4GHz/5GHz Band, may be present (embedded) in your notebook system. The following section is a general overview of considerations while operating a wireless device. Additional limitations, cautions, and concerns for specific countries are listed in the specific country sections (or country group sections). - Page 28 Radio frequency wireless communication can interfere with equipment on commercial aircraft. Current aviation regulations require wireless devices to be turned off while traveling in an airplane. 802.11ABGN (also known as wireless Ethernet or Wifi) and Bluetooth communication devices are examples of devices that provide wireless communication. ...
- Page 29 United States of America USA and Canada Safety Requirements and Notices Do not touch or move antenna while the unit is transmitting or receiving. Do not hold any component containing the radio such that the antenna is very close or touching any exposed parts of the body, especially the face or eyes, while transmitting.
- Page 30 Unintentional Emitter per FCC Part This device complies with Part 15 of the FCC Rules. Operation is subject to the following two conditions:(1) this device may not cause harmful interference, and (2) this device must accept any interference received, including interference that may cause undesired operation.
- Page 31 Intentional emitter per FCC Part 15 (If fitted with 2.4G band or 5G band) Low power, Radio LAN type devices (radio frequency (RF) wireless communication devices), operating in the 2.4GHz/5GHz Band, may be present (embedded) in your notebook system. This section is only applicable if these devices are present.
- Page 32 FCC Part 68 (If fitted with a modem device.) This equipment compiles with part of the FCC rules. On the back of this equipment is a label that contains, among other information, the FCC registration number and ringer equivalence number (REN) for this equipment.
- Page 33 Canada Unintentional Emitter per ICES-003 This digital apparatus does not exceed the Class B limits for radio noise emissions from digital apparatus as set out in the radio interference regulations of Industry Canada. Le présent appareil numérique n’émet pas de bruits radioélectriques dépassant les limitesapplicables aux appareils numériques de Classe B prescrites dans le règlement sur le brouillage radioélectrique édicté...
- Page 34 Telecommunications per DOC notice (for products fitted with an IC- compliant modem) The Industry Canada label identifies certified equipment. This certification means that the equipment meets certain telecommunications network protective, operation, and safety requirements. The Department does not guarantee the equipment will operate to the users’...
- Page 35 Co., Ltd. No. 198, Fangzhou Road, Suzhou Industrial Park, Jiangsu Province, 215021, China Tel:+86-512-6253-8988 For the web or the phone number of Samsung Service Centre, see the Warranty or contact the retailer where you purchased your product. European Radio Approval Information...
- Page 36 EU R&TTE Compliance Statements Samsung tímto prohlašuje, že tento Notebook PC je ve shodě se Česky základními požadavky a dalšími příslušnými ustanoveními směrnice [Czech] 1999/5/ES. Undertegnede Samsung erklærer herved, at følgende udstyr Notebook Dansk PC overholder de væsentlige krav og øvrige relevante krav i direktiv [Danish] 1999/5/EF.
- Page 37 överensstämmelse med de väsentliga egenskapskrav och övriga [Swedish] relevanta bestämmelser som framgår av direktiv 1999/5/EG. Íslenska Hér með lýsir Samsung yfi r því að Notebook PC er í samræmi við [Icelandic] grunnkröfur og aðrar kröfur, sem gerðar eru í tilskipun 1999/5/EC. Norsk Samsung erklærer herved at utstyret Notebook PC er i samsvar med de...
- Page 38 European Economic Area Restrictions Local Restriction of 802.11b/802.11g Radio Usage [Note to integrator: The following statements on local restrictions must be published in all end-user documentation provided with the system or product incorporating the wireless product.] Due to the fact that the frequencies used by 802.11b/802.11g wireless LAN devices may not yet be harmonized in all countries,...
- Page 39 European Telecommunication Information (for products fitted with EU-approved modems) Marking by the symbol indicates compliance of this equipment to the Radio and Telecom Terminal Equipment Directive 1999/5/EC. Such marking is indicative that this equipment meets or exceeds the following technical standards: CTR 21 - Attachment requirements for pan-European approval for connection to the analogue Public Switched Telephone...
-
Page 40: Weee Symbol Information
This Perchlorate warning applies only to primary CR (Maganese Dioxide) Lithium coin cells in the product sold or distributed ONLY in California USA. “Perchlorate Material- special handling may apply, See www.dtsc.ca.gov/hazardouswaste/ perchlorate.” Contains Mercury, Dispose According to Local, State or Federal Laws. For details see lamprecycle.org, eise.org, or call 1-800-Samsung. -
Page 41: Basic Items
Basic Items The items included in the package may vary depending on your selection of the optional items. Some items may be replaced with similar products and the color of some items may differ from that in this document. AC Adapter Computer Standard Battery Warranty... -
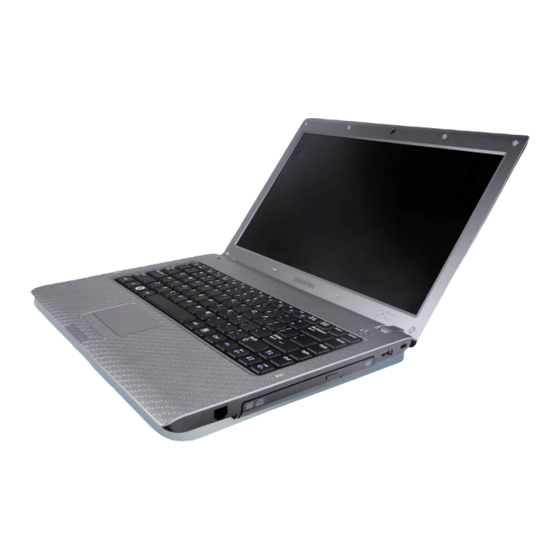
Page 42: Overview
Overview Before You Start! Optional items may be changed or may not be provided depending on the computer model. The actual color and appearance of the computer may differ from the pictures used in this guide. Front View Camera Lens (Optional) Power Button Keyboard... -
Page 43: Status Indicators
Status Indicators Caps Lock This turns on when the Caps Lock key is pressed allowing capital letters to be typed without holding the Shift button down. HDD/ODD This tuns on when the hard disk or ODD is being accessed. Wireless LAN This turns on when the wireless LAN is operating. -
Page 44: Right View
Right View Either type A or B is provided depending on the model. ► Model A Modem Port (Optional) CD Drive(ODD) (Optional) USB Port Security Lock Port ► Model B ExpressCard Slot (Optional) CD Drive(ODD) (Optional) USB Port Security Lock Port A port to which a telephone cable is connected to in order to dial up to the Internet. -
Page 45: Left View
Charging a device through a Chargeable USB takes longer than using a regular charger. Press the F2 key when the Samsung logo appears in the booting sequence to enter the BIOS Setup, select Advanced > USB Charge In Sleep Mode, and set it to Enable. -
Page 46: Back View
Back View Battery This is a Lithium-Ion rechargeable battery that supplies power to the computer. Fan Vents The internal heat of the computer is emitted through these holes. Bottom View Battery Latches Memory Compartment Cover/Hard Disk Drive Compartment Cover Speaker If the vents are blocked the computer may overheat. -
Page 47: Turn On The Computer
Turn on the computer Attaching the Battery Battery preparation. Attaching the Battery. Connect the AC adapter Connect the AC adapter. Connect the power cable. Power AC Adapter Cable Charge the battery fully when using the computer for the fi rst time. When using the power cable, insert the power cable completely into the AC adapter. ... -
Page 48: Turn On The Computer
Turn on the computer Charge the battery fully when using the computer for the fi rst time. Lift up the LCD panel. Press the Power button to turn the computer on. Power button LED is lit while the computer is turned on. Press the Fn+ You can only use this function after installing Windows XP/Windows Vista/Windows 7 and installing the Easy Display Manager program with the system software media... -
Page 49: Using Sleep Mode
Using Sleep Mode You can use the Sleep mode after installing Windows XP/Windows Vista/Windows 7. Sleep mode enables switching the computer to Standby mode in order to minimize power consumption and enables users to use the computer instantly by pressing any key on the mouse or keyboard. - Page 51 Chapter 2. Using the computer Keyboard Touchpad CD Drive (ODD, Optional) Inserting and Ejecting a CD Multi Card Slot (Optional) ExpressCard Slot (Optional) Adjusting the Volume...
-
Page 52: Keyboard
Keyboard Shortcut key functions and procedures are discussed in the following sections. The keyboard image may differ from the actual keyboard. The keyboard may differ depending on your country. The following mainly describes the shortcut keys. Either type A or B is provided depending on the model. ... - Page 53 You can turn the sound on or off after installing Windows Mute XP/Windows Vista/Windows 7. System diagnosis, recovery and Internet consultation program, Samsung Support Center, will be launched. (Optional) You can only use this function after installing Windows Samsung XP/Windows Vista/Windows 7 and installing the Samsung Support Magic Doctor program with the system software media disk.
- Page 54 Name Function Turns on or off wireless network device in a model equipped with wireless network device. Wireless You can only use this function after installing Windows network XP/Windows Vista/Windows 7 and installing the Magic Keyboard program and the wireless LAN driver with the system software media disk.
- Page 55 Screen Brightness Control To adjust the LCD brightness press the Fn + combination. The changed screen brightness is displayed at the center of the screen for a moment. You can use the screen brightness control keys after installing Windows and Easy Display Manager.
-
Page 56: Touchpad
Touchpad The touchpad provides the same function as a mouse and the left and right buttons of the touchpad plays the role of the left and right buttons of a mouse. Before You Start! Use the Touchpad with your fingers. Using a sharp object may damage the ... -
Page 57: Cd Drive (Odd, Optional)
CD Drive (ODD, Optional) An optical disk drive is optional and may differ depending on your computer model. For detailed specifications, refer to the catalogue. Do not insert a cracked or scratched CD. Otherwise, the CD may break and damage the optical disk drive when the CD rotates at a high speed. - Page 58 When the CD tray pops out, insert a CD or DVD until it clicks. Push the CD tray inward until it clicks. The CD drive status indicator is turned on. A CD drive’s reading and writing speed may differ depending on the condition and type of the media. To eject a CD when the CD drive does not work or the computer is off, place the end of a paper clip ( ) into the Emergency Hole until the CD tray is ejected.
-
Page 59: Multi Card Slot (Optional)
Multi Card Slot Using the multi card slot, you can read and write data to a SD, SDHC, MMC And SDXC cards. You can use a card as a removable disk and conveniently exchange data with digital devices such as a digital camera, digital camcorder, MP3, etc. You can only use it after installing Windows XP/Windows Vista/Windows 7. - Page 60 However, depending on the adapter’s body material, some RS- MMC cards may not be recognized properly. Samsung recommend that you check the card is recognized correctly prior to purchasing. To remove a memory card Take hold of the end of the card and remove the card.
-
Page 61: Expresscard Slot (Optional)
ExpressCard Slot You can only use it after installing Windows XP/Windows Vista/Windows 7. You can use Express cards using this slot. The ExpressCard slot can be regarded as the next generation PCMCIA card specification and supports LAN, TV Tuner and Sound cards. This computer’s slot supports the Express Card/34 specifications. -
Page 62: Adjusting The Volume
Adjusting the Volume You can adjust the volume using the keyboard and the volume control program. Adjusting the Volume using the Keyboard Press the Fn + key combination or Fn + key combination to adjust the volume. Press the Fn + key combination to turn the volume on or off. -
Page 63: Upgrade
Chapter 3. Settings and Upgrade LCD Brightness Control BIOS Setup Entering the BIOS Setup The BIOS Setup Screen Setting a Boot Password Changing the Boot Priority Upgrading Memory Battery Installing/Removing the Battery Charging the Battery Measuring the Remaining Battery Charge 74 Extending the Battery Usage Time Using the Security Lock Port... -
Page 64: Lcd Brightness Control
To maintain the LCD brightness set by using the brightness control keys or through the Power Options, follow the procedures below. 1. Turn the computer on and press the F2 key when the SAMSUNG logo appears on the screen to enter the BIOS Setup. -
Page 65: Bios Setup
The BIOS Setup menus and items may differ depending on your computer model. Entering the BIOS Setup Turn the computer on. When the booting screen (SAMSUNG logo) appears, press the F2 key to enter the BIOS Setup. Press the F12 key while the booting screen(SAMSUNG logo) appears, the system will try to boot from the network. After a moment, the BIOS setup screen appears. The items in the BIOS setup may differ depending on the product. -
Page 66: The Bios Setup Screen
The BIOS Setup Screen XXXXXXXX Setup Menu Main Used to change the basic system and environment settings. Advanced Used to configure advanced functions on your computer for devices and chipsets. Security Used to configure security functions, including passwords. Boot Used to set the boot priority and other boot options. Exit Used to exit the Setup either saving the changes or not. - Page 67 System Setup Keys In the Setup, you have to use the keyboard. Up & Down Keys F5/F6 Left & Right Keys Enter The keyboard image may differ from the actual keyboard. Press to view the Setup Help. Press to move up and down. Press to change the item value.
-
Page 68: Setting A Boot Password
Before You Start! Do not lose or forget your password. If you have forgotten your password, contact a Samsung service center. In this case, a service fee will be charged. Setting a Supervisor Password... - Page 69 Before configuring a user password, a supervisor password must have been configured. Deactivating the supervisor password also deactivates the user password. In the Set User Password item, press <Enter> and complete the procedures from Step 3 of Setting a Supervisor Password. Setting up a Hard Disk Drive Password (Optional) A supervisor password must be set using the...
-
Page 70: Changing The Boot Priority
Changing the Boot Priority The default boot priority of your computer is the CD-ROM first, then a removable device and then the hard disk drive in this order. By default, the highest boot priority device is set to the CD-ROM/DVD drive. As an example, the procedures to change the highest boot priority device to the hard disk drive are described below. -
Page 71: Upgrading Memory
Upgrading Memory One or more memory modules are installed on the computer. There are 2 memory slots and users can replace the installed memory or add new memory. Before You Start! Replace new memory only after shutting the computer down completely. Do not replace memory when the computer is in Sleep mode. - Page 72 Push the memory module down so that it is completely fixed. If the memory does not fit easily, push the memory module down while pulling the memory module latches outward. Close the memory compartment cover and fasten the screw. Removing a memory module Pull the memory module latches outward. The memory module will pop up. Remove the memory module out at an angle of 30 degrees.
-
Page 73: Battery
Battery Please refer to the following instructions when running the computer on battery power without connecting the AC power. A Lithium-Ion smart battery is supplied with this computer. Before You Start! Carefully read and follow the precautions printed on the battery before using the battery. -
Page 74: Charging The Battery
To install the battery again, slide the battery into the system. The battery latches move inwards and fix the battery automatically. Check if the battery latch has been moved inwards. Charging the Battery Attach the battery and connect the AC adapter to the DC-in jack of the computer. The battery will then start charging. When charging is complete, the Charge LED turns red. Status Charge LED Charging Charging complete AC adapter not connected Measuring the Remaining Battery Charge You can view the battery charge status by completing the following procedures. -
Page 75: Extending The Battery Usage Time
Extending the Battery Usage Time Decreasing the LCD Brightness Press the Fn + keys on the keyboard to decrease the LCD brightness to extend the battery usage time. You can only use this function after installing Windows XP/ Windows Vista/Windows 7 Vista and installing the Easy Display Manager program with the system software media disk. - Page 76 In this case, the actual battery charge and the remaining charge display will be the same by discharging the battery completely using the Battery Calibration function, and then recharging it again. Disconnect the AC power adapter after turning off the computer. Restart your computer and press the F2 button when the Samsung logo appears, to start the BIOS Setup. Move to the Boot > Smart Battery Calibration item using the direction keys and press <Enter>. Highlight Yes in the Battery Calibration Confirmation window and press <Enter>.
-
Page 77: Using The Security Lock Port
Using the Security Lock Port You can connect a Kensington lock to the Security Lock port to prevent your computer from being stolen when you have to use the computer in a public place. To use this feature, you have to purchase the Kensington lock additionally. To use the Kensington lock, refer to the product manual. -
Page 79: Chapter 4. Appendix
Chapter 4. Appendix Product Specifi cations... -
Page 80: Product Specifications
Product Specifications The system specifications may differ depending on the derived models. For detailed system specifications, refer to the product catalogue. NP-P428/R428/R429/R439/R478 Intel Core™ i5/ Core™ i4/ Core™ i3 / Intel Core 2 Duo/ CPU (Optional) Intel Pentium Dual Core Processor Memory type: DDR2 SODIMM Main Memory (Optional) Main Chipset (Optional) - Page 81 Microsoft, MS-DOS, and Windows are registered trademarks of the Microsoft Corporation. All other product or company names mentioned herein are registered trademarks of their respective companies. ENERGY STAR® Partner As an ENERGY STAR® Partner, SAMSUNG has determined that this product meets the ENERGY STAR® guidelines for energy efficiency.
- Page 84 BA81-08985A23 100831 BA81- 08985A23...
Need help?
Do you have a question about the NP-R439E and is the answer not in the manual?
Questions and answers