Table of Contents
Advertisement
Quick Links
Advertisement
Table of Contents

Related Manuals for Pelgrim CKT764


Summary of Contents for Pelgrim CKT764
- Page 1 CKT764 CKT774 CKT795 Instructions for use ceramic hob...
- Page 2 Manual GB 3 - GB 31 Pictograms used Important information...
-
Page 3: Table Of Contents
CONTENTS Your ceramic hob Introduction GB 4 Control panel GB 5 Description GB 6 Safety instructions What you should pay attention to GB 7 Connection and repair GB 7 During use GB 7 Cooking time limiter GB 9 Using the touch controls GB 10 Pans GB 10... -
Page 4: Your Ceramic Hob
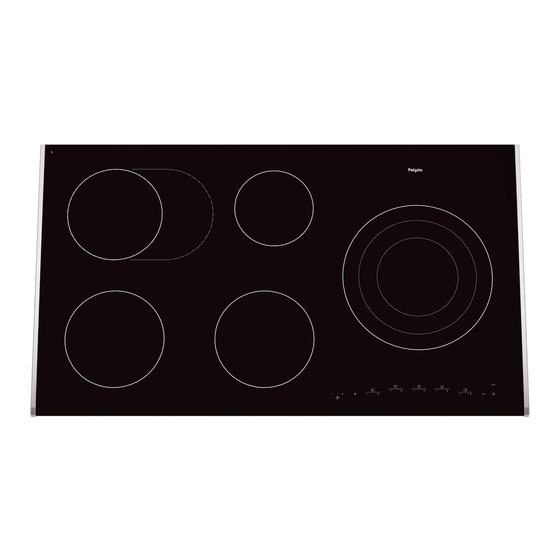
YOUR CERAMIC HOB Introduction This hob has been designed for the real lover of cooking. The hob is equipped with ‘Cooklight’ elements. These are very rapid-heating, radiant elements with a high efficiency, which is very favourable for heating-up times. What’s more, these elements also have very good heat distribution. -
Page 5: Control Panel
YOUR CERAMIC HOB Control panel Type CKT764/774 Type CKT795 Extra zone element button + indicator light 12. Setting indicator zone front left 2. Decrease power zone front left 13. Indicator kitchen timer zone rear right 3. Cooking zone indicator front left 14. - Page 6 YOUR CERAMIC HOB Description CKT764 CKT774 CKT795 Cooking zone Ø 145 1,2 kW Cooking zone Ø 170/170x265 1,5/2,4 kW Cooking zone Ø 160 1,5 kW Cooking zone Ø 120/180x210 0,8/1,6/2,3 kW Cooking zone Ø 180 1,8 kW Cooking zone Ø 120/180/230 0,8/1,6/2,5 kW Cooking zone Ø...
-
Page 7: What You Should Pay Attention To
SAFETY What you should pay attention to • Ceramic cooking is extremely safe. Various devices have been incorporated in the hob such as a residual heat indicator and a cooking time limiter. There are nevertheless a number of precautions you should take. Connection and repair •... - Page 8 SAFETY • Do not allow pans to boil dry. The hob itself is protected against overheating but the pan will get very hot indeed and could be damaged. • The guarantee does not cover any damage caused by an unsuitable pan or a pan boiling dry.
-
Page 9: Cooking Time Limiter
SAFETY Cooking time limiter • The cooking time limiter is a safety function of your cooking appliance. It will operate if you forget to switch off your hob. • Depending on the setting you have chosen, the cooking time will be limited as follows: Setting The cooking zone switches off... -
Page 10: Use
Using the touch controls The touch controls may take some getting used to if you are used to other (rotary) controls. Place the tip of your finger flat on the control to achieve the best results. You do not have to apply any pressure. Pans Pans for ceramic cooking Ceramic cooking requires a particular quality of pan. - Page 11 Attention • Grains of sand may cause scratches which cannot be removed. Only put pans with a clean base on the cooking surface and always pick pans up to move them. • Always keep the lid on the pan when cooking, in order to avoid energy loss.
-
Page 12: Operation
OPERATION Switching on the hob and setting the power The power has 9 levels. • Put a pan on a cooking zone. • Touch the On/Off button of the hob. You will hear a short beep and the display for each cooking zone will show ‘0.’. -
Page 13: Residual Heat Indicator
OPERATION Attention • The hob saves the latest settings with regard to the extra zone element. When switching the hob on again, the hob will resume using the saved settings. • You can switch off the hob if the (child) lock is set or the pause mode is active. -
Page 14: Stand-By Mode
OPERATION • Touch the + button or - button of the desired cooking zone. Beside the display of the cooking zone, the fish pan zone element icon or the 2 zone element icon appears. The extra zone element is activated immediately. If the + button or - button is not pressed, the red light to the right of the extra zone element button wil flash for 3 seconds and then turns off. - Page 15 OPERATION (Standard) lock mode Child lock mode The (standard) lock mode The child lock mode prevents prevents settings from being the hob from being accidentally accidentally changed. switched on. All of the set cooking processes All of the cooking zones and the remain active.
-
Page 16: Pause
OPERATION Pause Use the pause function to ‘pause’ the whole hob for 5 minutes while cooking. The power supply to the cooking zone stops, without losing any settings. Please note the cooking zone will remain hot for some time. Preferably remove delicate dishes from the cooking zone. Switching the hob to pause mode One or more cooking zones are active. - Page 17 Type CKT764/774 Switching on the egg timer The hob is switched on. • Touch the + button and the - button of the kitchen / egg timer simultaneously once.
- Page 18 OPERATION • Use the - button and the + buttons to set the desired cooking time. The kitchen timer can be set until the dot next to the set time disappears. The red light for the kitchen timer of the active cooking zone continues flashing.
-
Page 19: Automatic Heat-Up Function
OPERATION Automatic heat-up function The automatic heat-up function temporarily increases the power (setting ‘9.’) to heat the contents of the pan faster. This function is available in all settings except setting ‘9.’. Switching on the automatic heat-up function The cooking zone is switched on and active. •... -
Page 20: Cooking
Healthy cooking Burning point of different types of oil To ensure your food is fried as healthily as possible, Pelgrim recommends choosing the type of oil according to the frying temperature. Each oil has a different burning point at which toxic gasses are released. -
Page 21: Cooking Settings
COOKING Cooking settings Because the settings depend on the quantity and composition of the contents of the pan, the table below is intended as a guideline only. Use setting 9 to: • bring the food or liquid to the boil quickly; •... -
Page 22: Maintenance
MAINTENANCE Cleaning Set the child lock before you start cleaning the hob. Daily cleaning • Best for daily cleaning is a damp cloth with a mild cleaning agent. • Dry with kitchen paper or a dry teacloth. • Special cleaning agents for ceramic hobs have the advantage that a thin film remains on the glass surface so that over-cooked food and lime scale are less likely to get burnt into the hob, making it easier to clean the next time. -
Page 23: Faults
FAULTS General If you notice a crack in the glass top (however small), switch the hob off immediately, unplug the hob, turn off the (automatic) fuse switch(es) in the meter cupboard or, in the event of a permanent connection, set the switch in the power supply lead to zero.) Contact the service department. - Page 24 FAULTS Symptom Possible cause Solution Spontaneous changing of the - The pan is too close to the - Keep the pan at a distance cooking setting. touch controls. of at least 2 cm from the touch controls. Fault code U400 Overvoltage, 400V appliance Connect appliance according connected incorrectly.
-
Page 25: Installation
• Damage caused by incorrect connection, installation or use, will not be covered by the guarantee. Clearance Sufficient all-round clearance is essential to the safe use of the hob. Check that there is enough clearance. CKT764: 640 mm cooker hood CKT774: 770 mm cabinet CKT795: 900 mm... - Page 26 INSTALLATION Installation dimensions The dimensions and recesses are shown in the illustrations beneath. min.50 CKT764 min.50 CKT774 GB 26...
- Page 27 INSTALLATION min.50 CKT795 If the hob is wider than the cupboard, with a worktop less than 43 mm thick, saw a cut-out in both sides of the cupboard, so the appliance is detached from the cupboard. Building-in dimensions in corpus x<43 mm: y = 43 mm - x x>= 43 mm: y = 0 mm GB 27...
-
Page 28: Electrical Connection
INSTALLATION Electrical connection Common connections: • 3 phases with 1 zero connection (3 1N, 400 V ~ / 50 Hz): ▷ The voltage between the phases and the zero is 230 V ~. The voltage between the phases is 400 V ~. Fit a connecting bridge between connecting points 4-5. -
Page 29: Building In
INSTALLATION Building in Check if the cabinet and the cut-out meet the dimension and ventilation requirement. Threat the sawn ends of wooden or synthetic worktops with sealing varnish if necessary, to prevent moisture causing the worktop to swell. Lay the hob upside down on the worktop. Remove the protective layer from the sealing tape and apply the tape in the groove of the aluminium profile or on the edge of the glass plate. - Page 30 INSTALLATION Technical details This appliance complies with all relevant CE directives. Hob type CKT764 CKT774 CKT795 Ceramic Connection 230V - 50Hz 230V - 50Hz 230V - 50Hz Max. capacity cooking zones Front left 0,8/1,6/2,3 kW 0,8/1,6/2,5 kW 1,8 kW Rear left...
-
Page 31: Environmental Aspects
ENVIRONMENTAL ASPECTS Disposal of packaging and appliance In the manufacturing of this appliance durable materials were used. Make sure to dispose of this equipment responsibly at the end of its lifecycle. Ask the authorities for more information regarding this. The appliance packaging is recyclable. The following may have been used: •... - Page 32 GB 32...
- Page 34 Het toestel-identifi catieplaatje bevindt zich aan de onderkant van het toestel. The appliance identifi cation card is located on the bottom of the appliance. Plak hier het toestel-identifi catieplaatje. Stick the appliance identifi cation card here. Houd, wanneer u contact opneemt met de serviceafdeling, het complete typenummer bij de hand. When contacting the service department, have the complete type number to hand.
Need help?
Do you have a question about the CKT764 and is the answer not in the manual?
Questions and answers