Table of Contents
Advertisement
Quick Links
Advertisement
Table of Contents

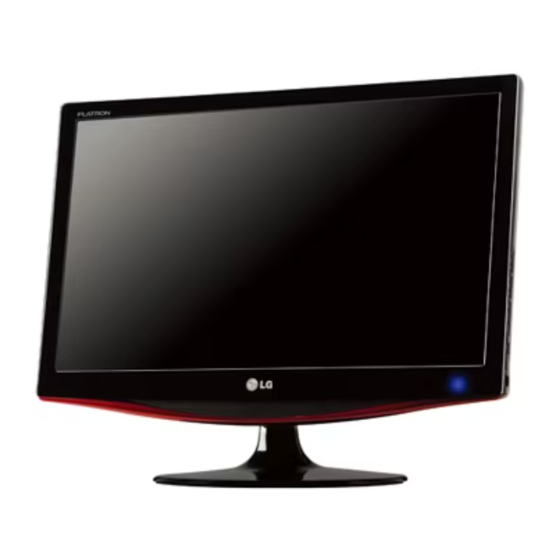
Related Manuals for LG LSM1850HU


Summary of Contents for LG LSM1850HU
- Page 1 User’s Guide LSM1850 LSM2150 ake sure to read the Important Precautions before using the product. Keep the User's Guide(CD) in an accessible place for future reference. ee the label attached on the product and give the information to your dealer when you ask for service.
-
Page 2: Important Precautions
Important Precautions This unit has been engineered and manufactured to ensure your personal safety, however improper use may result in potential electrical shock or fire hazards. In order to allow the proper operation of all safeguards incorporated in this display, observe the following basic rules for its installation, use, and servicing. - Page 3 Important Precautions NOTE THE MANUFACTURER IS NOT RESPONSIBLE FOR ANY RADIO OR TV INTRERFERENCE CAUSED BY UNAUTHORIZED MODIFICATIONS TO THIS EQUIPMENT.SUCH MODIFICATIONS COULD VOID THE USER'S AUTHORITY TO OPERATE THE EQUIPMENT. NOTE This epuipment has been tested and found to comply with the limits for a class B digital device,pursuant to part 15 of the FCC Rules.These limits are designed to provide reasonable protection against harmful interference in a residential installation.This equipment generates,uses and can radiate radio frequency...
- Page 4 Important Precautions On Installation Do not allow anything to rest upon or roll over the power cord, and do not place the display where the power cord is subject to damage. Do not use this display near water such as near a bathtub, washbowl, kitchen sink, laundry tub, in a wet basement, or near a swimming pool.
-
Page 5: On Disposal (Only, Hg Lamp Used Lcd Monitor)
Important Precautions On Cleaning Unplug the display before cleaning the face of the display screen. Use a slightly damp (not wet) cloth. Do not use an aerosol directly on the display screen because over-spraying may cause electrical shock. When cleaning the product, unplug the power cord and scrub gently with a soft cloth to prevent scratching. - Page 6 Accessories !!! Thank for selecting LGE products !!! Please make sure the following items are included with your monitor. If any items are missing, contact your dealer. 15-pin D-Sub Signal Cable User's Guide/Cards Power Cord (To set it up, this signal cable may be attached to this product before shipping out.) Remote Control/Batteries...
-
Page 7: Before Connecting To The Pc
Before Connecting to the PC Stand Installation Before setting up the product, ensure that the power supply, the computer system, and other attached devices is turned off. Carefully place the product screen side down on a cushioned surface that will protect product and screen from damage. -
Page 8: Detaching Stand
Before Connecting to the PC Detaching Stand Before setting up the product, ensure that the power supply, the computer system, and other attached devices is turned off. Place the set screen side down on a Detach the monitor to the Stand cushion or soft cloth. -
Page 9: Positioning Your Display
Before Connecting to the PC Before setting up the product, ensure that the power supply, the computer system, and other attached devices is turned off. Positioning your display Adjust the position of the panel in various ways for maximum comfort. Tilt Range 15°... -
Page 10: Wall Mount: Horizontal Installation
Before Connecting to the PC WALL MOUNT:HORIZONTAL INSTALLATION For proper ventilation,allow a clearance of 4 inches on each side and from the wall. Detailed installation instructions are available from your dealer,see the optional Tilt Wall Mounting Bracket Installation and Setup Guide. 4 inches 4 inches 4 inches... -
Page 11: Name And Function Of The Parts
Name and Function of the Parts Name of the Remote Control Buttons Input ID. POWER POWER Turn the monitor on or off. RGB,HDMI,DVI,VIDEO1,VIDEO2 VIDEO1 VIDEO2 HDMI Select input sources. Number buttons Used for input ID. MENU Use this button to enter the On Screen Display menu. MUTE Switches the sound on or off. -
Page 12: Rear View
Name and Function of the Parts Rear View AC IN AC IN VIDEO1 DVI-D HDMI AC IN VIDEO2 AUDIO IN (RGB/DVI) RGB Analog Signal Connector Power Connector : Connect the power cord. HDMI Digital Signal Connector RGB, DVI Sound Jack : Connect to the jack in the PC sound card. -
Page 13: Connecting To External Devices
Connecting to External Devices Connecting to your PC First of all, see if the computer, product and the peripherals are turned off. Then, connect the signal input cable. Rear side of the product. VIDEO1 DVI-D HDMI AC IN VIDEO2 AUDIO IN (RGB/DVI) Connecting with the D-Sub signal input cable. - Page 14 Connecting to External Devices Connect the power cord. Rear side of the product. VIDEO1 DVI-D HDMI AC IN AUDIO IN VIDEO2 (RGB/DVI) Turn on power by pressing the AV 1 Power Power button power button on the product. Turn on the PC. AC IN Select an input signal.
-
Page 15: Connecting To Vcr/Dvd
Connecting to External Devices Connecting to VCR/DVD Connect the video/audio cable as shown in the figure below and then connect the power cord . Connect the input terminal with a proper colour match. • VCR/DVD Rear side of the Product RCA Cable VIDEO (Not included) -
Page 16: When Watching Hdmi From The Dvd/Set-Top Box
Connecting to External Devices When watching HDMI from the DVD/Set-top Box Connect the HDMI cable as shown in the below figure and then connect the power cord. [Rear side of the Product] [Rear side of the Product] RCA Stereo cable (not included) HDMI to DVI cable (not included) -
Page 17: To Arrange Cables Using Cable Management
To arrange cables using cable management Tie cables together with a cable management as shown in the illustration. Cable management... -
Page 18: Adjusting The Screen
Adjusting the Screen Name of the Buttons in the Screen Adjustment Unit Power Power Button • Use this button to turn the product on and off. • Use this button to select an icon or adjust the setting in the OSD screen. OSD Select/Adjust Button •... - Page 19 Adjusting the Screen Name of the Buttons in the Screen Adjustment Unit INPUT Button Input VIDEO1 CVBS VIDEO2 CVBS VIDEO1 RGB PC D-Sub analog signal VIDEO2 DVI Digital signal RGB PC HDMI HDMI Digital signal HDMI Each time you press the Input button it will change to VIDEO1 VIDEO2 RGB PC HDMI.
- Page 20 Adjusting the Screen OSD Menu Icon Function Description Adjusts screen brightness, contrast and colour that you prefer. Picture Adjusts the audio options. Audio Adjusts the timer options. Time Adjusts the screen status according to the circumstances. Option Note OSD(On Screen Display) The OSD function enables you to adjust the screen status conveniently since it provides graphical presentation.
-
Page 21: How To Adjust The Osd (On Screen Display) Screen
Adjusting the Screen How to adjust the OSD (On Screen Display) screen RETURN Save Move where Move where Return to Pops up Select a Select a Adjust the status adjustment the menu you want to you want to last step. menu icon menu icon screen... -
Page 22: On-Screen Menu Language Selection
Adjusting the Screen On-Screen Menu Language Selection Language menu appears on product screen when it is turned on for the first time. Language English Deut sch Franςa is Español Ita l i a n o Sve nska Por tuguês Polsk i Русский... -
Page 23: Adjusting Screen Colour
Adjusting the Screen Adjusting Screen Colour Picture Picture Mode Picture Mode v Vivid Colour Temperature Standard Cinema Advanced Sport Aspect Ratio Game Picture Reset User1 Screen User2 ▲▼ RETURN Toggles between screen presets. • Vivid : Select this option to display with a sharp image. •... - Page 24 Adjusting the Screen Adjusting Screen Colour Colour Picture Temperature Picture Mode Colour Temperature v Cool [VIDEO/HDMI] Medium Advanced Warm Aspect Ratio User Picture Reset Screen ▲▼ RETURN Colour Settings • Cool : Slightly purplish white. • Medium : Slightly bluish white. •...
- Page 25 Adjusting the Screen Adjusting Screen Colour XD is LG Electronics' unique picture improving technology that displays a real HD source through an advanced digital signal processing algorithm. This function is not available in RGB-PC or DVI modes. This menu is activated after selecting User1 or User2 of Picture Mode.
- Page 26 Adjusting the Screen Adjusting Screen Colour Advanced This function is available only in VIDEO1,VIDEO2 modes. Picture Picture Mode Colour Temperature Advanced To set Aspect Ratio Picture Reset Screen RETURN • Gamma : Set your own gamma level : Low,Medium,High. On the monitor, high gamma values display whitish images and low gamma values display blackish images.
- Page 27 Adjusting the Screen Adjusting Screen Colour Aspect Ratio To select the image size of the screen. Picture Picture Mode Colour Temperature Advanced Aspect Ratio v 16:9 Picture Reset Screen RETURN Widescreen mode. 16:9 The aspect ratio is not adjusted from the original. It is set by the program Original being watched.
- Page 28 Adjusting the Screen Adjusting Screen Colour Picture Reset Picture Mode Colour Temperature Return , Advanced to the default factory settings. Picture Picture Mode Colour Temperature Advanced Aspect Ratio Picture Reset To Set ▶ Screen RETURN (RGB PC input only) Adjust the screen video. Screen Picture Picture Mode...
-
Page 29: Adjusting The Audio Function
Adjusting the Screen Adjusting the audio function Sound The best sound tone quality will be selected automatically depending on the video type that you're currently watching. Mode Audio Sound Mode v Clear Voice ▶ Speaker Standard Music Cinema Sport Game User RETURN •... -
Page 30: Adjusting The Time Function
Adjusting the Screen Adjusting the time function Time Clock ▶ ㅡㅡ : ㅡㅡ Off Time On Time Sleep Timer Auto Sleep RETURN Clock This function is used to set up of current time. You must set the time correctly before using On/Off time function. 1) Press the MENU button and then use button to select the TIME menu. -
Page 31: Selecting The Options
Adjusting the Screen Selecting the options Option Language To Set Key lock ISM Method Set ID DDC-CI Power Indicator Factory Reset RETURN Language To choose the language in which the control names are displayed. Key Lock Use the buttons to select On or Off. The monitor can be set up so that it can only be used with the remote control. -
Page 32: Troubleshooting
Troubleshooting No image is displayed G Is the product's power cord • Check if the power cord is properly connected to the outlet. connected? G Is the power indicator turning on? • See if the power switch is turned on. •... -
Page 33: The Screen Image Looks Abnormal
Troubleshooting The screen image looks abnormal. G Is the screen position wrong? • Adjust the Position menu in OSD . • See if the video card resolution and frequency are supported by the product. If the frequency is out of range, set to the recommended resolution in the Control Panel –... -
Page 34: The Audio Function Does Not Work
Troubleshooting The audio function does not work. G No sound? • Check if the audio cable is connected properly. • Adjust the volume. • Check if the sound is set properly. G Sound is too low. • Adjust the volume. Screen colour is abnormal. -
Page 35: Specifications
Specifications The product specifications can change without prior notice for product improvement. LSM1850 LCD Panel Screen Type 18.51 inches Wide (47.01 cm) TFT (Thin Film Transistor) LCD (Liquid Crystal Display) Panel Visible diagonal size: 47.01 cm 0.300(H) x 0.300(V) mm Pixel Pitch Video Signal Max. - Page 36 Specifications The product specifications can change without prior notice for product improvement. LSM2150 21.53 inches Wide (54.68 cm) TFT (Thin Film Transistor) LCD Panel Screen Type LCD (Liquid Crystal Display) Panel Visible diagonal size: 54.68 cm 0.248(H) x 0.248(V) mm Pixel Pitch 1920 X 1080 @60 Hz Video Signal...
-
Page 37: Preset Modes (Resolution)
Specifications Preset Modes (Resolution) PC Mode 18 inch monitor Display Modes (Resolution) Horizontal Freq. (kHz) Vertical Freq. (Hz) 720 x 400 31.468 640 x 480 31.469 640 x 480 37.500 800 x 600 37.879 800 x 600 46.875 1024 x 768 48.363 1024 x 768 60.123... -
Page 38: Dtv Mode
Specifications Preset Modes (Resolution) DTV Mode Display Modes (Resolution) Horizontal Freq. (kHz) Vertical Freq. (Hz) 720 x 480 15.75 720 x 480 15.73 720 x 576 15.625 720 x 480 31.47 720 x 480 31.50 720 x 576 31.25 1280 x 720 44.96 1280 x 720 45.00... - Page 39 Digitally yours...
Need help?
Do you have a question about the LSM1850HU and is the answer not in the manual?
Questions and answers