Table of Contents
Advertisement
Quick Links
Advertisement
Table of Contents

Related Manuals for E-Image MTGH10L


Summary of Contents for E-Image MTGH10L
- Page 1 User s Manual...
- Page 3 PREFACE FLUID HEAD Thanks for your purchasing E-IMAGE professional heads and EIMAGE GENTING series is upgraded generation of tripods.As the manual is an important part of the equipment EIMAGE fluid heads. More international outlooking, and is aimed at personnal who operate and maintain the innovative design, with more advanced functions.
-
Page 4: Table Of Contents
CONTENTS CONTENTS Fluid head specification……………………...1 Tripod specification………………………………………….. 15-16 Parts(GH03) ………………………………....2 Parts(AT7402A) ……………………………………………...17 Set up & Use (GH03)………………………..3-5 Use AT7402A ……………………………………………...18-19 1. Install Panbar…………………………...... . 3 1. Loose & lock leg tube……………………………….......18 2. Remove quick release plate…………....... 3 2. Adjusting tripod height……………………………......18 3. -
Page 5: Fluid Head Specification
PARTS(GH03) SPECIFICATIONS Head No. Fluid Head IMAGE No. Load Grades of Temperature Model Bowl Tilt range Counterbalance size weight capacity drag range GH03 75mm +90°~-60° -40℃~80℃ Variable Instable GH05 75mm 1.7kg 3-8kg Instable +90°~-45° -30℃~60℃ GH06 75mm 1.6kg +90°~-60° -40℃~80℃ GH08 75mm 1.7kg +90°~-60°... -
Page 6: Set Up & Use (Gh03)
3.Adjusting tilt position SET UP & USE (GH03) Lock or Loose locking knob "G" to adjust tilt position. 1.Install Panbar Open the panbar,adjust the panbar to your request position, then screwing the panbar knob "D" to "F " hole, and lock it. loose loose lock... -
Page 7: Mounting The Camera
MOUNTING THE CAMERA EXTRA FUNCTIONS OF GH03,GH06 PLATE 8.Extra functions of GH03,GH06 plate 6.Attach the slide plate to the camcorder, screwing camera 1/4" screw or 3/8" screw into the camcorder's threaded hole WITHOUT APPLYING With special desigh, the plate of GH03,GH06 have special function as FORCE(such as using a coin). -
Page 8: Parts(Gh06-Gh25)
PARTS(GH06~GH25) SET UP & USE(GH06-GH25) 1. Installing Panbar Open the panbar, screwing the panbar knob "A" to "M" hole, and lock it. Loose knob "B" , you can extend the length and adjust the pan bar angle,that you like. loose loose lock lock... -
Page 9: Mounting The Camcorder
MOUTING THE CAMCORDER VIA ADAPTER MOUNTING THE CAMERA 4.Mounting the camcorder via adapter 5.Mouting the camera 4.1 Attach the slide plate to the camcorder adapter, screwing camera 5.1 Attach the slide plate to the camcorder, screwing camera 1/4" screw 1/4" screw or 3/8" screw into the camcorder adapter's threaded hole or 3/8"... -
Page 10: Adjusting Counterbalance
ADJUSTING COUNTERBALANCE & DRAG ADJUSTING PAN DRAG 6.Adjusting counterbalance 8. Adjusting pan drag Loose the tilt locking knob. Hold the camera by securing the pan bar. Turn the counterbalance dial to that number which can make camera remaining Loose pan locking knob, turn the pan drag dial to the required setting , then in position with hands free. -
Page 11: Change Of The Batteries (Gh08/08L/10/10L )
CHANGE BATTERY OF ILLUMINATED LEVELING BUBBLE (GH08 GH08L GH10 GH10L) CHANGE BATTERY OF ILLUMINATED LEVELING BUBBLE (GH15 GH25) 9.Change of the batteries (GH08, GH08L ,GH10,GH10L) 10. Change of the batteries (GH15,GH25) 9.1 Illuminated leveling bubble.Just press the illuminous button "N" when 10.1 Change battery of illuminated leveling bubble (GH15,GH25) shooting at the night, lamp will be illuminated and turn off after 25 s automatically. - Page 12 TRIPOD SPECIFICATIONS Section Bowl Size Material IMAGE No. Transport Payload Bowl Height Range Weight Model No. Descrition Size length rang Two stage 3.3kg 40kg AT7402A 75mm 695mm 650-1510mm Aluminum EIMAGE GENTING series is upgraded generation of Single stage 2.9kg 40kg GA751 75mm 780-1380mm...
-
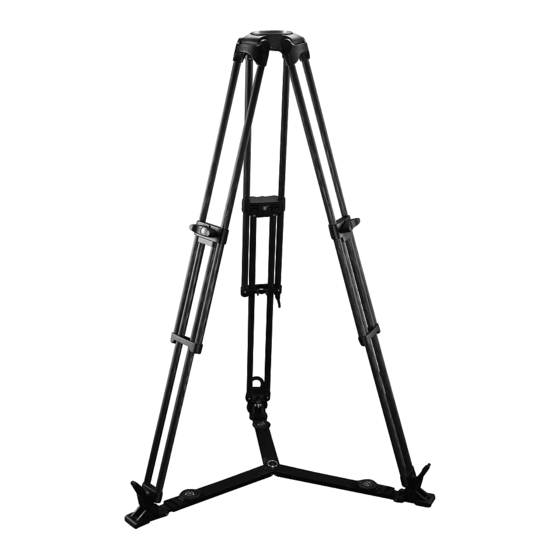
Page 13: Parts(At7402A)
PARTS(AT7402A) USE AT7402A & 1.Loose lock leg tube Loose: turn locking knob "C" anti-clockwise Bowl base Lock: turn locking knob "C" clockwise Leg tube Locking knob Retractable easy hook Mid spreader ෭ࣅ Foot with spike Anti slide rubber pad lock Pad-removing tab loose Important message: before unfold the tripod, please loose all the locking... - Page 14 PARTS(GA101/GC101) USE AT7402A 4. Folding tripod Bowl base a: Loose the locking knobs of each stages and adjust the legs to minimum length, then locking all the knobs. Leg tube Patent united lock for two stage lock Retractable easy hook Locking knob of ground speader Pull ring Ground spreader...
-
Page 15: Parts(Ga/Gc101)
PARTS(GA102/GC102) PARTS(GA/GC751 GA/GC752) Bowl base Leg tube Patent united lock for two stage lock Retractable easy hook Locking knob of ground speader Pull ring Ground spreader Foot with spike Anti slide rubber pad Pad removing tab... -
Page 16: Use(Ga/Gc751 Ga/Gc752 Ga/Gc101 Ga/Gc102)
USE(GA/GC751 GA/GC752 GA/GC101 GA/GC102) USE(GA/GC751 GA/GC752 GA/GC101 GA/GC102) 4.If you don't need mid-level spreader, pull out the locking bolts "K" of 3 arms and remove it. 1.Loose & lock leg tube Loose: turn the locking knob "C" anti-clockwise Lock: turn the locking knob "C" clockwise until tight lock 5.Install &... -
Page 17: Maintenance
Please check the tripod payload and head locking condition, In the event on the product becoming defective, the unit should be returned to an authorized E-IMAGE service agent. in order to avoid the accident Please check and adjust tripod and head locking condition regularly, in order to increase service life.
Need help?
Do you have a question about the MTGH10L and is the answer not in the manual?
Questions and answers