
Related Manuals for Whispbar K677W


Summary of Contents for Whispbar K677W
- Page 1 K677W Fitting Kit Fitting Instructions for Basic Carrier Revision No: 2B...
- Page 2 Fitting Kit K677W MAX kgs (lbs) Mitsubishi Outlander Aspire, 5dr SUV 12-+ 75 kgs (165 lbs) 75 kgs (165 lbs) Outlander ES, 5dr SUV 12-+ 75 kgs (165 lbs) 75 kgs (165 lbs) Outlander ES, 5dr SUV 13-+ 75 kgs (165 lbs)
- Page 3 Fitting Kit K677W Outlander Aspire, 5dr SUV 12-+ (AU) -300mm 450mm 960mm 910mm -11 -13/16ths" 17 11/16ths" 37 13/16ths" 35 13/16ths" Outlander ES, 5dr SUV 12-+ (AU) -300mm 450mm 960mm 910mm -11 -13/16ths" 17 11/16ths" 37 13/16ths" 35 13/16ths" Outlander ES, 5dr SUV 13-+ (US)
-
Page 4: First Time Installation
Fitting Kit K677W First Time Installation Remove parts from inside the package and check. Contact your dealer if any parts are missing or damaged. This kit fits type A, B, C and D. These instructions show type A crossbar fitted. They also apply to type B, C and D. - Page 5 Fitting Kit K677W Use hex screwdriver to reverse adjusting screw 10 turns. Press adjusting screw and pull crossbar legs out. Refer to the crossbar instructions for crossbar adjustment method. Ensure each end of the crossbar is adjusted equally. Attaches to factory-fitted mounting points...
- Page 6 Fitting Kit K677W Tighten adjusting screw to 5 Nm (3.7 ft lb) hand tight. Remove plastic clamp block by gripping bar leg with fingers and push firmly with thumbs until clamp block drops out behind leg. Select plastic internal block (from fitting kit) and insert into foot.
- Page 7 Fitting Kit K677W Drilling not needed for US vehicles. Fitment Pull ditch moulding back towards you. (For US vehicles, skip this step.) Mark reference point with a pen onto removed section of ditch mould. (For US vehicles, skip this step.)
- Page 8 Fitting Kit K677W Use drill bit supplied, to drill holes in marked positions. (For US vehicles, skip this step.) Re-install rubber ditch mould in roof channel. (For US vehicles, skip this step.) (This step is for US vehicles only.) Open or remove fixed-point covers.
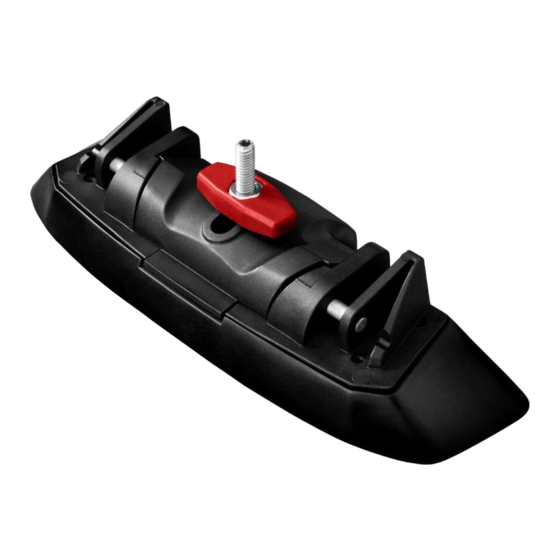
- Page 9 Fitting Kit K677W Select grubscrews and screw into the vehicle's fixed points. Do not over tighten. Repeat for all four positions. Refer to the underside of the pad for the part number. Place crossbars on pads ensuring the pads fit into the holes underneath the foot and the grubscrew passes through the hole in the foot.
- Page 10 Fitting Kit K677W Tighten the plastic knob. The side with the nut showing should be facing up. Ensure the plastic knob is in the position shown when fully tightened. Repeat for all legs. Check crossbar is securely attached to the vehicle.
- Page 11 Fitting Kit K677W If crossbars are removed, please install the rubber plugs into the ditch moulding. CAUTION: Recheck all fasteners immediately after a load is applied to the crossbars. Regularly check screws are tight.
-
Page 12: Maintenance
Fitting Kit K677W Maintenance Never drive into a car wash with the roof rack system fitted. Lubricate locks and adjusting screws at regular intervals. Remove the products from the vehicle when not in use. Make sure all loose parts are stored safely. - Page 13 Fitting Kit K677W Set crossbars a minimum distance of 700mm (27 1/2") apart where no other distance is specified in the fitting instructions. This is especially important when carrying long loads. Check unit is securely attached whenever you refit it to the vehicle. If the unit feels loose, refer to the fitting instructions and readjust.
-
Page 14: Warranty And Disclaimer
Make a claim as soon as practicable by contacting the Whispbar dealer from whom you purchased the product, who will give you instructions on how to proceed. If you are unable to contact the Whispbar dealer, or the dealer is not able to remedy the defect, you should contact Yakima as soon as practicable at: Call: 0800 4776 722 (NZ) or 1800 143 548 (AU) Email: warranty@yakima.co.nz or warranty@yakima.com.au... - Page 15 Yakima or the Whispbar dealer will be borne by you. Following receipt of the product and purchase invoice or receipt, Yakima or the Whispbar dealer must inspect the product to determine whether the claim falls within the warranty. If: 4.1 the claim falls within the warranty, Yakima will remedy any defects in materials or workmanship becoming apparent during the...
Need help?
Do you have a question about the K677W and is the answer not in the manual?
Questions and answers