
Subscribe to Our Youtube Channel
Related Manuals for Capital GSCR305CC


Summary of Contents for Capital GSCR305CC
- Page 1 U S E A N D C A R E / I N S TA L L AT I O N G U I D E 30” R a n g e ™ G a s S e l f C l e a n w i t h C o n v e c t i o n G a s M a n u a l C l e a n w i t h C o n v e c t i o n...
- Page 2 Because of the unique features found in our appliances, we urge you to read this manual thoroughly before installation and use. And please retain this manual for future reference; it is an invaluable guide to help you better understand your Capital Cooking appliance.
-
Page 3: Table Of Contents
T A B L E O F C O N T E N T S 30 Precision Features Models Warnings Safety Practices / Electrical, General Safety Practices / Cooking Range Parts Identification Using The Range-top / Power-flo™ Burners Using The Rangetop Using Your Oven Using Your Oven - Self Clean Mode Care And Maintenance / Locating the Rating Plate... -
Page 4: Precision Features
24” range does not feature and seared Ahi in the comfort of your own kitchen. glass infrared broil.) Capital’s exclusive Infra-Q ™ infrared-BBQ Grill system utilizes 15,000 BTUs and sears up to STAY-KOOL™ KNOBS 1500 degrees, while allowing you the control... - Page 5 3 0 ” P R E C I S I O N S E R I E S M O D E L S ( S E L F C L E A N / M A N U A L C L E A N ) GCR304 GSCR305 / GCR305 /...
-
Page 6: Warnings
W A R N I N G S ! WARNING! If the information in this manual is • DO NOT use water or a wet dishcloth on fire. Electrical Code, ANSI/NFPA 70 not followed exactly, a fire or explosion may A violent steam explosion will result. -
Page 7: Safety Practices / Electrical, General
S A F E T Y P R A C T I C E S / E L E C T R I C A L , G E N E R A L ELECTRICAL SAFETY: *It is recommended that a dedicated circuit servicing •... -
Page 8: Safety Practices / Cooking
S A F E T Y P R A C T I C E S / C O O K I N G • NEVER let clothing, potholders, or other flammable of utensil may break with sudden temperature • CLEAN THE RANGE-TOP SECTION WITH CAUTION. materials come into contact with or too close to any changes. - Page 9 S A F E T Y P R A C T I C E S / C O O K I N G • Place oven racks in desired position while oven is 1. Remove all packing materials and labels from cool.
-
Page 10: Range Parts Identification
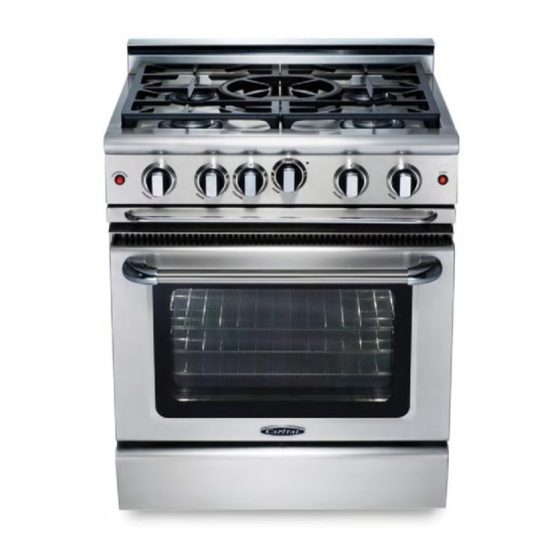
R A N G E P A R T S I D E N T I F I C A T I O N 30” Model Shown, model # SC305 OVEN PARTS IDENTIFICATION 1. Oven 2. Oven Light 3. Broiler Burner (behind glass) 4. -
Page 11: Using The Range-Top / Power-Flo™ Burners
U S I N G T H E R A N G E - T O P / P O W E R - F L O ™ B U R N E R S POWER-FLO™ BURNERS ELECTRONIC IGNITERS the appliance may cause an orange flame. This will Your new gas range is equipped with the latest in If a burner does not ignite, listen for the clicking disappear with use. -
Page 12: Using The Rangetop
U S I N G T H E R A N G E T O P BURNER SETTINGS finer department stores, specialty cooking shops, or Wok cooking, or stir-fry cooking, requires intense, The rangetop burners have an infinite number of restaurant supply stores. - Page 13 U S I N G T H E R A N G E T O P poultry, it may be necessary to turn the heat to After the first use, discoloration will occur. This is COOKING ON THE GRIDDLE a lower setting after the initial browning. This natural and unavoidable.
-
Page 14: Using Your Oven
U S I N G Y O U R O V E N USING CONVECTION BAKE AND REGULAR BAKE FOODS SUITABLE FOR CONVECTION BAKE product. Aluminum pans work best for all types of Air Leavened Foods (angel food cake, soufflés, baked goods. - Page 15 U S I N G Y O U R O V E N FOODS SUITABLE FOR BAKE • Do not open the oven door “just to peek,” use the i.e. cakes, breads, etc. There may be a cost Appetizers interior oven light and look through the window. for the bulletins.
- Page 16 U S I N G Y O U R O V E N CAUTION: Pay special attention when setting the retains more juices and natural flavor inside with and 160°F to 165°F for well done. If you are cooking Oven Control Knob on “BROIL”. If you set the knob less shrinkage.
- Page 17 U S I N G Y O U R O V E N foods (fillet of fish, Ham slices, etc.). Liver slices NOTE: For Convection Rotisserie, simply follow the OVEN SELF-CLEANING must be turned over. same steps and first press the rotisserie button, The self-cleaning oven of your new range features followed by the convection button.
-
Page 18: Using Your Oven - Self Clean Mode
U S I N G Y O U R O V E N / S E L F C L E A N M O D E 4 C lean the oven front frame and outer door edges. CAUTION: The interior of the oven will still be at cool before starring to clean the rangetop. -
Page 19: Care And Maintenance / Locating The Rating Plate
C A R E A N D M A I N T E N A N C E that were given for the burner grates. A bristle brush replace these knobs on the correct gas valve on the coated. It is acid resistant, but not acid proof. can be used to clean out the toothed burner ports, control panel. - Page 20 C A R E A N D M A I N T E N A N C E / L O C A T I N G R A T I N G P L A T E OVEN LIGHT BULB REPLACEMENT LOCATING RATING PLATE For oven light bulb replacement use only a 40 watt, SERIAL #, MODEL # AND VERIFYING GAS TYPE...
-
Page 21: Troubleshooting
T R O U B L E S H O O T I N G RANGES AND RANGE-TOPS PROBLEM POSSIBLE CAUSE PROPOSED SOLUTION Range non-functional No electricity or gas supply Turn on gas supply valve Check circuit breakers Technical Call for authorized service One or more burners will not light No electricity Check circuit breakers... - Page 22 T R O U B L E S H O O T I N G RANGE OVENS PROBLEM POSSIBLE CAUSE PROPOSED SOLUTION No oven light No electricity Check circuit breakers Check plug at wall Loose bulb Ensure bulb is properly screwed in Burned out bulb Replace bulb No oven heat (bake)
-
Page 23: Installation Instructions
INSTALLATION INSTRUCTIONS P R E C I S I O N S E R I E S R a n g e s SELF CLEAN GAS CONVECTION MODELS: GSCR30 (4Q, 4G, 5) GSCR36 (4Q, 4G, 4W, 6) GSCR48 (4G, 4W, 4QG, 6Q, 6G, 8) GSCR60 (4QG,4QW, 4GW, 6QG, 6G, 6W) MANUAL CLEAN GAS CONVECTION MODELS: GCR30 (4, 5) - Page 24 T A B L E O F C O N T E N T S Important Information 30” - All Models 36” - All Models 48” - All Models 60” - All Models Unpacking and Ventilation Requirements Cabinet Preparation Cabinet Install Drawing / Front View Cabinet Install Drawing / Side View Installation Instructions Gas Hook-Up / Testing and Adjustments...
-
Page 25: Important Information
B E F O R E P R O C E E D I N G . range. The Capital PRECISION SERIES Low Back or IMPORTANT! Installation must conform with local codes. - Page 26 3 0 ” - A L L M O D E L S GSCR304G - 4 Burner Gas Self Clean Range w/ 9” Thermo-Griddle GCR304 - 4 Burner Gas Convection range GSCR305 - 5 Burner Gas Self Clean Range w/ Wok Burner GCR305 - 5 Burner Gas Convection Range w/ Wok Burner GRT305 - 5 Burner Gas Range Top w/ Wok Burner GSCR304Q - 4 Burner Gas Self Clean Range w/ 9”...
- Page 27 3 6 ” A L L M O D E L S GSCR366 -- 6 Burner Gas Self Clean Range GSCR364W -- 4 Burner Gas Self Clean Range w/ Wok GCR366 -- 6 Burner Gas Convection Range GRT364W -- 4 Burner Gas RangeTop w/ Wok GRT366 -- 6 Burner Gas RangeTop Note: 366 = 19K BTU Power-Flo Burners...
- Page 28 4 8 ” A L L M O D E L S GSCR484G - 4 Burner Gas Self Clean Range w/24” Griddle GSCR486Q - 6 Burner Gas Self Clean Range w/12” Infra-BBQ GCR484G - 4 Burner Gas Convection Range w/ 24” Griddle GCR486B - 6 Burner Gas Convection Range w/ 12”...
- Page 29 6 0 ” A L L M O D E L S GSCR604GW -- 4 Burner Gas Self Clean Range w/12” Griddle + 24” Wok GSCR604QG -- 4 Burner Gas Self Clean Range w/12” Infra-BBQ + 24” Griddle GRT604GW -- 4 Burner Gas RangeTop w/12” Griddle + 24” Wok GRT604QG -- 4 Burner Gas RangeTop w/12”...
-
Page 30: Unpacking And Ventilation Requirements
40” above When clearance to combustible material D is 48” 595-695 the cooking surface. over 12”, a Capital Island Trim may be used (See Fig. 2B). Figures 2A and 2B indicate the 60” 700-850 STEP 3: CABINET PREPARATION space required for each type of back guard. - Page 31 U N P A C K I N G A N D V E N T I L A T I O N R E Q U I R E M E N T S combustible materials, gasoline, and other flammable vapors and liquids.
-
Page 32: Cabinet Install Drawing / Front View
C A B I N E T I N S T A L L D R A W I N G / F R O N T V I E W FIG 1A. Cabinet Clearances:... -
Page 33: Cabinet Install Drawing / Side View
C A B I N E T I N S T A L L D R A W I N G / S I D E V I E W FIG 2A Side View:... -
Page 34: Installation Instructions
I N S T A L L A T I O N I N S T R U C T I O N S WALL MOUNT BACKGUARD INSTALLATION NOTE: ALL PRECISION SERIES RANGES come with an island trim. • Secure the back guard (19” High Shelf, or 9” Low Back) directly on the wall behind range and above the factory installed island trim. - Page 35 WARNING: ELECTRICAL SHOCK HAZARD! gas combustion at specified altitudes. • Use extreme caution when drilling holes into the NOTE: Capital DOES NOT supply ranges to match wall or floor. There may be concealed electrical ANTI-TIP BRACKET varying altitudes. Orifices to adjust for combustion wires located behind the wall or under the floor.
-
Page 36: Gas Hook-Up / Testing And Adjustments
G A S H O O K - U P / T E S T I N G A N D A D J U S T M E N T S CAUTION! When connecting unit to Propane (LP) that has been permanently mounted with the range body. gas, make certain the propane tank is equipped with its own high-pressure regulator in addition to •... -
Page 37: Post-Install Check
P O S T - I N S T A L L C H E C K NOTE: NO air shutter adjustment is necessary or ELECTRICAL possible with the sealed top burners. q Receptacle with correct over current protection is provided for service cord connection q Proper ground connection q Proper polarity at receptacle q Kick panel in place and 3 screws secure. -
Page 38: Service & Warranty Info
• Five (5) years parts and two (2) years labor, in lieu of all warranties, expressed or implied and Capital E.S.P. (Extended Service Plan) may be purchased on all Burners: Oven, Broiler, Stainless BBQ burner, all other obligations or liability in connection with at an additional cost. - Page 39 N O T E S...
- Page 40 N O T E S...
- Page 41 D E S I G N Y O U R D R E A M K I T C H E N...
- Page 42 WITH A HEATING AND VENTILATING ENGINEER FOR YOUR SPECIFIC VENTILATION REQUIREMENTS. FOR THE MOST UP TO DATE USE AND CARE AND INSTALLATION INSTRUCTIONS CONTACT CAPITAL COOKING EQUIPMENT, INC. INDICATING THE MODEL #. DUE TO ONGOING PRODUCT IMPROVEMENTS, WE RESERVE THE RIGHT TO CHANGE THESE SPECIFICATIONS, OR DESIGNS WITHOUT NOTICE.
Need help?
Do you have a question about the GSCR305CC and is the answer not in the manual?
Questions and answers