Table of Contents
Advertisement
Quick Links
Advertisement
Table of Contents

Related Manuals for Remotec Scene Master


Summary of Contents for Remotec Scene Master
- Page 1 ZRC-90 (Scene Master) Operating Instructions Master your home, Master your life...
- Page 2 The ZRC-90 is a great solution for triggering events more quickly than taking out your smart-phone and running a home control App. The Scene Master is ideal for kids, elderlies and guests who may not have full access to your smart home’s mobile application and hence may not have the rights to switch on various lighting, heating, air conditioning and other home appliance.
-
Page 3: Key Features
Key Features Controls up to 8x2 pre-set scenes and 8 groups dimming function One learn-key setup and simple operation Report for key pressed 1 time, 2 times, released and held down Unlimited controlling capability through gateway Able to act as a primary or secondary controller Z-Wave Plus compliant Super thin, elegant design and able to mount to the wall-bracket Glossary... - Page 4 When a SUC is also configured as a node ID server (SIS) it enables all other controllers to include/exclude nodes. The SIS SUC ID Server automatically becomes the Primary (SIS) Controller in the network when enabled. There can only be one SIS in each individual network.
-
Page 5: Product Overview
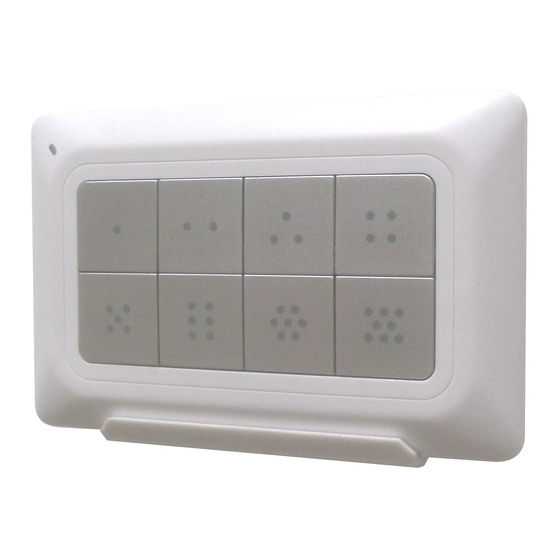
Product Overview LED indication for Operation and Setup Wall mount bracket Scene control keyboard Back block for plastic insert LED indication Upgrade slide for Operation switch and Setup Upgrade Setup buttons header Battery door Figure 2 Setup and control keys of ZRC-90... -
Page 6: Description Of Function Keys
Description of Function Keys Keys Functions Scene control buttons Learn mode (Click once) Wake up (Click once) Remove device (Click once) Add device (Press the keys until LED light up) Create Primary (Press the keys until LED light up) Create Secondary (Press the keys until LED light up) Reset to factory default (Press and keep holding 10... -
Page 7: Setup And Operations
Setup and Operations Before using the ZRC-90, please install the batteries: • 2xAAA (alkaline is recommended) batteries are required for operation. • Remove the battery cover on the back of your remote. • Check the polarity of the batteries and the "+/-" marks inside the battery compartment. - Page 8 When prompted by your primary LED will flash slowly controller (gateway), click once on until complete the the “L” button. step of inclusion / exclusion. (The primary controller should indicate the action was successful. If the controller indicates the action was unsuccessful, please repeat above procedure.) User can perform scene control by...
- Page 9 Notes: Association Group-1 will be a default status report channel in Z- Wave+ lifeline requirement. Only one node can be assigned to this association group. Z-Wave Wakeup (Listening mode) There are multiple usages by entering this mode: • Version information: To get application software version, the Z- Wave protocol version and the supported Z-Wave command version of this controller.
- Page 10 into ZRC-90 Z-Wave network. Press the program button on the LED flash once then target device. stay off if the device is included into the network LED flashes 6 times rapidly then stay off if the operation is invalid Notes: If you can’t add your Z-Wave device, this device might have been included in another Z-Wave network.
-
Page 11: Create A Primary Controller
Notes: In a Z-Wave network, only the primary controller or inclusion controller can remove or exclude devices from its network. If ZRC-90 is configured as a secondary controller, it will report “Error” if users attempt to use ZRC-90 to remove a device from its network. -
Page 12: Create A Secondary Controller
Create a Secondary Controller (Copying Network Information to a Secondary Controller) You can add a secondary controller to your network and copy all of ZRC-90 primary controller’s network information to the secondary controller by following the steps below. Setup LED Indication Step Setup Key on ZRC-90... -
Page 13: Battery Low Indication
Battery low indication The unit will detect battery status after key pressed, the LED will flashes 3 times rapidly then stay off when battery low is detected. Meanwhile, it will report battery low status to gateway automatically. Physical Installation In case you need to mount the ZRC-90 into the wall bracket, please be sure to fully read the following precautions and procedures. -
Page 14: Technical Specifications
MOUNTING PROCEDURE The ZRC-90 can be mounted to a wall or wooden racks using the two key holes in the wall bracket. Notes: The RF reception sensitivity and transmit power are varies depending on the antenna direction. Before mounting to a wall, be sure to fully read the precautions. Mount to the wall bracket Dismount from wall bracket Figure 3 Installation... -
Page 15: Checking Accessories
60g (main unit and batteries excluded) Weight 15g (wall mount bracket) Checking Accessories After opening the cover of the packing box, check that the following accessories are included. • ZRC-90 Scene Master • Plastic insert • Wall mount bracket • Wall anchor x 2pcs •... -
Page 16: Wireless Information
Wireless Information This device has an open-air line-of-sight transmission distance of 132 feet (40m) which complies with the Z-Wave standards. Performance can vary depending on the amount of objects in between Z-Wave devices such as walls and furniture. Every Z-Wave device set up in your network will act as a signal repeater allowing devices to talk to each other and find alternate routes in the case of a reception dead spot. - Page 17 Reorient or relocate the receiving antenna. Increase the separation between the equipment and receiver. Connect the equipment into an outlet on a circuit different from that to which the receiver is connected. Consult the dealer or an experienced radio/TV technician for help. Notice: Changes or modifications to this unit not expressly approved by the party responsible for compliance could void the user authority to operate the equipment.
Need help?
Do you have a question about the Scene Master and is the answer not in the manual?
Questions and answers