
Related Manuals for Philips FWM143/77


Summary of Contents for Philips FWM143/77
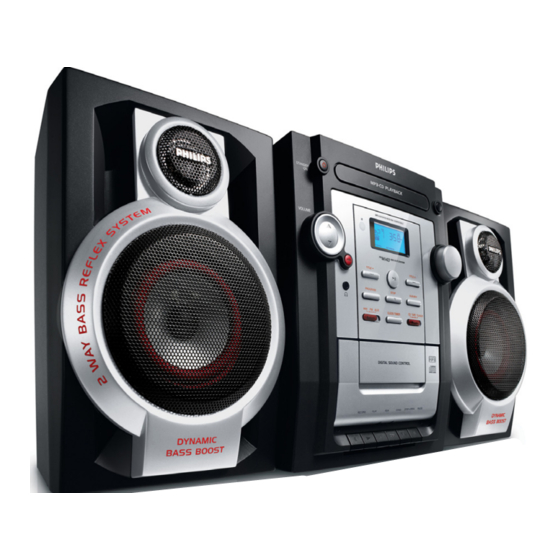
- Page 1 MP3-CD Mini Hi-Fi System FWM143 Register your product and get support at www.philips.com/welcome User Manual Manual de usuario...
- Page 2 CAUTION Use of controls or adjustments or performance of procedures other than herein may result in hazardous radiation exposure or other unsafe operation.
- Page 3 ™ ¡ £ § &...
- Page 4 Hearing Safety Listen at a moderate volume. ● Using headphones at a high volume can impair your hearing. This product can produce sounds in decibel ranges that may cause hearing loss for a normal person, even for exposure less than a minute.
- Page 5 Index English ------------------------------------------------ 6 Español --------------------------------------------- 21...
-
Page 6: Table Of Contents
Contents General Information External sources Environmental information ........ 7 Listening to external source ......16 Supplied accessories ..........7 Safety information ..........7 Clock/Timer Setting the clock ..........17 Preparation Setting the timer ..........17 Rear connections ..........8 Activating and deactivating TIMER ....17 Optional connection ........... -
Page 7: General Information
● Place the system in a location with adequate To fully benifit from the support that ventilation to prevent internal heat build-up in Philips offers, register your product at your system. Allow at least 10 cm (4 inches) www.philips.com/welcome. clearance from the rear and the top of the unit and 5 cm (2 inches) from each side. -
Page 8: Rear Connections
Preparations speaker speaker (right) (left) Speakers Connection Rear connections Front Speakers The type plate is located at the back of the Connect the speaker wires to the SPEAKERS system. terminals, right speaker to "R" and left speaker to "L", coloured (marked) wire to "+" and black Power (unmarked) wire to "-". -
Page 9: Optional Connection
Preparations Optional connection Inserting batteries into the The optional equipment and connecting cords remote control are not supplied. Refer to the operating Insert two batteries type R03 or AAA into the instructions of the connected equipment for remote control with the correct polarity as details. -
Page 10: Control
Controls (illustrations on page 3) Controls on the system and – connect headphones. remote control & Tape Deck Operation LCD Display RECORD 0 ..starts recording. – shows the status of the system. PLAY 2 ....starts playback. REW à /F.FWD á iR SENSOR ........ -
Page 11: Basic Functions
Basic Functions Adjusting volume and sound Press VOLUME 3/4 to increase or decrease volume. ➜ Display shows the volume level UoL and a number from 0-40. Press DBB to switch bass enhancement on or off. ➜ Display shows: DBB if the DBB is activated. -
Page 12: Cd/Mp3 Operation
CD/MP3 Operation To pause playback press 2;. Press 2; again to resume play. ➜ The display freezes and the elapsed playing time flashes when playback is interrupted. To stop disc playback, press STOP 9. Note: CD playback will also stop when; –... -
Page 13: Different Play Modes: Shuffle And Repeat
CD/MP3 Operation Programming track numbers Supported MP3 disc formats: – ISO9660, Joliet, UDF 1.5 Programme in the STOP position to select and – Maximum title number: 511 (depending on store your disc tracks in the desired sequence. If filename length) you like, store any track more than once. -
Page 14: Radio Reception
Radio Reception Tuning to radio stations Adjust the source selector to select TU/AUX. Adjust the mode selector to select your desired waveband: MW or FM. ➜ is displayed. Adjust the TUNING control knob to tune to a desired radio frequency. Note: –... -
Page 15: Tape Operation/Recording
Tape Operation / Recording General information on recording ● Recording is permissible insofar as copyright or other rights of third par ties are not infringed. ● For recording, use only NORMAL (IEC type I) tapes on which the tabs have not yet been broken. -
Page 16: Recording From The Radio
Tape Operation / Recording Recording from the radio To select and record a particular passage within a CD track: Tune to the desired radio station (see Tuning to ● Press and hold down on REW à or F.FWD radio stations). á. -
Page 17: Clock/Timer
Clock/Timer ➜ The clock digits for the minutes flash. Setting the clock Press TITILE-/+ ¡1 / 2™ (í/ë on the In any mode, press CLOCK/TIMER twice. remote)to set the minutes. ➜ The clock digits for the hours flash. Press CLOCK/TIMER to confirm the time Press TITILE-/+ ¡1 / 2™... -
Page 18: Maintenance
● After prolonged use, dir t or dust may accumulate at the disc lens. To ensure good Demagnetising the heads playback quality, clean the disc lens with Philips ● Use a demagnetising tape available at your CD Lens Cleaner or any commercially available dealer. -
Page 19: Troubleshooting
Troubleshooting WARNING Under no circumstances should you try to repair the system yourself, as this will invalidate the warranty. Do not open the system as there is a risk of electric shock. If a fault occurs, first check the points listed below before taking the system for repair. If you are unable to remedy a problem by following these hints, consult your dealer or service centre. - Page 20 Troubleshooting – Reduce the distance between the remote control The remote control does not function and the system. – Insert the batteries with their polarities (+/– signs) aligned as indicated. – Replace the batteries. – Point the remote control directly toward IR sensor on the front of the system.
Need help?
Do you have a question about the FWM143/77 and is the answer not in the manual?
Questions and answers