Table of Contents
Advertisement
Quick Links
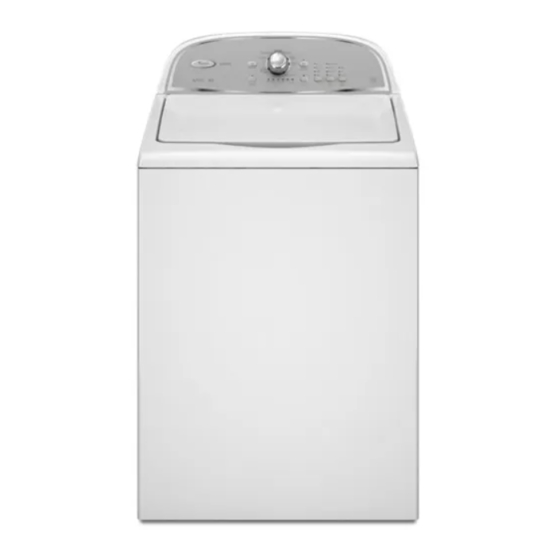
W10045637A
TOP-LOADING
HIGH EFFICIENCY
LOW-WATER WASHER
USE AND CARE GUIDE
Table of Contents
WASHER SAFETY ..................................................... 2
WASHER DISPOSAL................................................. 3
WHAT'S NEW UNDER THE LID? ............................. 4
CONTROL PANEL AND FEATURES ........................ 5
CYCLE GUIDE ........................................................... 6
USING YOUR WASHER ............................................ 7
Using Laundry Product Dispensers ............................ 8
Starting Your Washer .................................................... 8
................................................... 12
........................................... 10
......................................... 16
Designed to use only HE High Efficiency
detergents.
MODEL 6AWTW5550XW
Advertisement
Table of Contents

Related Manuals for Whirlpool 6AWTW5550XW0


Summary of Contents for Whirlpool 6AWTW5550XW0
-
Page 1: Table Of Contents
TOP-LOADING HIGH EFFICIENCY LOW-WATER WASHER USE AND CARE GUIDE Table of Contents WASHER SAFETY ............. 2 WASHER DISPOSAL..........3 WHAT’S NEW UNDER THE LID? ......4 CONTROL PANEL AND FEATURES ......5 CYCLE GUIDE ............6 USING YOUR WASHER ..........7 Using Laundry Product Dispensers ...... -
Page 2: Washer Safety
WASHER SAFETY IMPORTANT SAFETY INSTRUCTIONS WARNING: To reduce the risk of re, electric shock, or injury to persons when using the washer, follow basic precautions, including the following: This appliance is not intended for use by persons (including Read all instructions before using the washer. children) with reduced physical, sensory or mental Do not wash articles that have been previously cleaned capabilities, or lack of experience and knowledge, unless... -
Page 3: Washer Disposal
WASHER DISPOSAL... -
Page 4: What's New Under The Lid
WHAT’S NEW UNDER THE LID? Cleaning with Less Water Washplate Washer with low-water Traditional agitator-style washplate wash system washer As the washer dampens and moves the load, the level of the The most striking difference in your new washer is the clothes will settle in the basket. -
Page 5: Control Panel And Features
CONTROL PANEL AND FEATURES WASH CYCLE KNOB CYCLE STATUS LIGHTS INDICATOR Use the Wash Cycle knob to select available cycles on your The Cycle Status Lights show the progress of a cycle. washer. Turn the knob to select a cycle for your laundry load. At each stage of the process, you may notice sounds or See “Cycle Guide”... -
Page 6: Cycle Guide
LID LOCK If you need to open the lid, press To allow for proper load sensing, the lid will lock and the START/Pause/Unlock. The lid will unlock Lid Lock light will turn on. This light indicates that the lid once the washer movement has stopped. is locked and cannot be opened. -
Page 7: Using Your Washer
USING YOUR WASHER Sort and prepare your laundry Load laundry into washer • Empty pockets. Loose change, buttons, or any small object can pass under the washplate and become trapped, causing unexpected sounds. • Sort items by recommended cycle, water temperature, Load garments in loose heaps evenly around basket wall. -
Page 8: Using Laundry Product Dispensers
Using Laundry Product Dispensers Add HE detergent to dispenser Add fabric softener to dispenser Detergent tray Fabric softener tray Add a measured amount of HE Pour a measured amount of liquid fabric softener detergent or dissolve detergent in warm into tray. Always follow manufacturer’s directions water and pour into detergent tray. - Page 9 Select cycle settings Press START/Pause/Unlock to begin wash cycle Once you select a cycle, the default settings for that cycle will be lit. Press the cycle settings buttons to change the Temperature, Press the START/Pause/Unlock button to start the wash cycle. Soil Level, and Spin Speed, if desired.
-
Page 10: Washer Maintenance
WASHER MAINTENANCE WATER INLET HOSES CLEANING YOUR DISPENSER TRAY Replace inlet hoses after 5 years of use to reduce the risk You may find laundry product residue in your dispenser of hose failure. Periodically inspect and replace inlet hoses trays. To remove residue, follow this recommended cleaning if bulges, kinks, cuts, wear, or leaks are found. - Page 11 TRANSPORTING YOUR WASHER 1. Shut off both water taps. Disconnect and drain water inlet hoses. 2. If washer will be moved during freezing weather, follow “Winter Storage Care” directions before moving. 3. Disconnect drain from drain system and drain any remaining water into a pan or bucket.
-
Page 12: Troubleshooting
TROUBLESHOOTING First try the solutions suggested here for assistance and to possibly avoid a service call. If you experience Solution Possible Causes Vibration or Off-Balance Check the following for Feet may not be in contact with the Front and rear feet must be in firm contact with floor, and washer proper installation or see floor and locked. - Page 13 TROUBLESHOOTING First try the solutions suggested here for assistance and to possibly avoid a service call. Solution If you experience Possible Causes Washer not performing as expected (cont.) Both hoses must be attached and have water flowing to Washer won’t run or fill, Check for proper water supply.
- Page 14 TROUBLESHOOTING First try the solutions suggested here for assistance and to possibly avoid a service call. Possible causes Solution If you experience Washer not performing as expected (cont.) Washer not draining/ Small items may have been caught in pump or between basket Empty pockets and use garment bags spinning, loads are and tub, which can slow draining.
- Page 15 TROUBLESHOOTING First try the solutions suggested here for assistance and to possibly avoid a service call. If you experience Possible Causes Solution Washer not performing as expected (cont.) Sand, pet hair, lint, etc. Heavy sand, pet hair, lint, and Add an Extra Rinse to the selected cycle. on load after washing detergent or bleach residues may require additional rinsing.
-
Page 16: Assistance Or Service
This information will “Troubleshooting.” It may save you the cost of a service call. help us to better respond to your request. If you still need help, contact the dealer from whom you purchased the washer, or a Whirlpool designated service company. - Page 17 NOTES...
- Page 18 NOTES...
- Page 19 NOTES...
- Page 20 W10045637A © 2011 Whirlpool Corporation. 04/11 All rights reserved. Printed in U.S.A. ® Registered Trademark/TM Trademark of Whirlpool, U.S.A.
Need help?
Do you have a question about the 6AWTW5550XW0 and is the answer not in the manual?
Questions and answers