Table of Contents
Advertisement
Available languages
Available languages
Quick Links
Advertisement
Chapters
Table of Contents

Subscribe to Our Youtube Channel
Related Manuals for Laurus LMWE208

Summary of Contents for Laurus LMWE208
- Page 1 LMWE208 Bedienungsanleitung Operating instructions Mode d’emploi Bedieningsinstructies Instrucciones de uso Istruzioni per l’uso Bruksanvisnig August 2019 Version: 1.0...
-
Page 2: Table Of Contents
5.7 Lebensmittel auftauen (Schnellauftaufunktion) 5.8 Kochen in mehreren Etappen 5.9 Einstellen des Timers, um den Kochvorgang zu einem späteren Zeitpunkt zu starten 5.10 Verwendung der Kindersicherung 5.11 Automatische Garfunktion 6 Wartung und Reinigung 7 Fehlersuche 8 Demontage und Entsorgung 9 Garantie LAURUS LMWE208... -
Page 3: Einleitung
Wenn Sie Fragen haben, weitere Informationen benötigen oder weitere Exemplare dieser Einbau- und Bedienungsanleitung bestellen möchten, kontaktieren Sie uns bitte unter: VESTEL Germany GmbH Parkring 6 (Business Campus) 85748 Garching b. München Deutschland +49 89 21129 555 +49 89 55295-2000 weisseware@kundendienst.email www.vestel-germany.de LAURUS LMWE208... -
Page 4: Bestimmungsgemäße Verwendung
Erhitzen von korrosiven Chemikalien oder Dämpfen; • den Einsatz im Freien; • das Trocknen von Lebensmitteln oder Kleidung sowie das Erwärmen von Wärmekissen, Pantoffeln, Schwämmen, feuchten Tüchern und ähnlichen Gegenständen. Alle anderen als in dieser Gebrauchsanweisung beschriebenen Verwendungszwecke gelten als nicht bestimmungsgemäße Verwendung. LAURUS LMWE208... -
Page 5: In Dieser Anleitung Verwendete Sicherheitssymbole
Dieses Symbol weist auf eine potenziell Dieses Symbol weist auf eine Situation gefährliche Situation hin, die, falls sie hin, die, falls sie nicht vermieden wird, nicht vermieden wird, zu schweren oder zu Schäden am Gerät führen kann. tödlichen Verletzungen führen kann. LAURUS LMWE208... -
Page 6: Beschreibung Der Mikrowelle
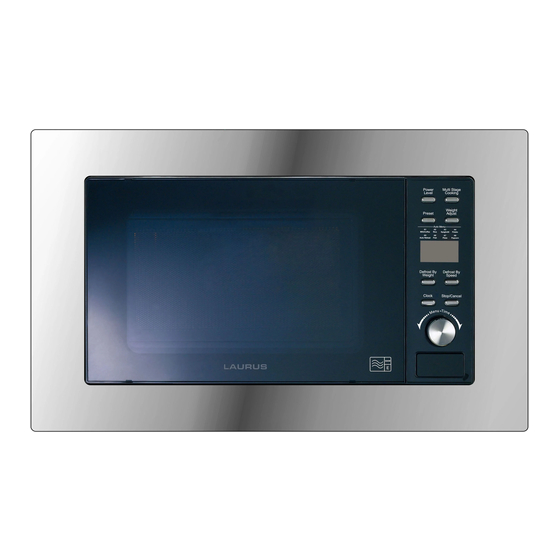
Beschreibung der Mikrowelle Produktbestandteile Sichtfenster des Mikrowellenofens Drehteller aus Glas Rollenring Antriebswelle Wellenleiter Bedienfeld Türöffnungstaste Sicherheitsverriegelungssystem der Tür LAURUS LMWE208... -
Page 7: Bedienfeld
Mit dieser Taste wird die Uhr eingestellt. STOP/CANCEL (STOPP/LÖSCHEN) Um den Kochvorgang zu unterbrechen, alle Einstellungen zu löschen oder die Kindersicherung einzustellen. TIME/MENU (ZEIT/MENÜ) Wird verwendet, um die Zeit einzustellen, das Gerät zu starten, das Schnellstartprogramm zu starten oder automatische Garmenüs auszuwählen. LAURUS LMWE208... -
Page 8: Technische Daten
230 - 240 V; 50Hz Nennleistung (Mikrowelle) 700 W Betriebsfrequenz 2450MHz Steckertyp Schuko Außenmaße des Geräts 390×595×330mm Innenmaße des Garraums 198×315×297mm Fassungsvermögen 20 Liter Gewicht Etwa 10,5 kg Betriebstemperatur -10 ºC bis + 40 ºC Relative Luftfeuchtigkeit 10 %~95 % RLF Gerätetyp Einbaugerät LAURUS LMWE208... -
Page 9: Sicherheitshinweise
Verwenden Sie dieses Gerät nur für seinen bestimmungsgemäßen Verwendungszweck und innerhalb der angegebenen Leistungsgrenzen. • Dieses Gerät ist nicht für den Betrieb über eine externe Zeitschaltuhr oder eine separate Fernbedienung vorgesehen. • Halten Sie das Gerät von Feuchtigkeit fern. LAURUS LMWE208... - Page 10 Stellen Sie das Gerät nicht in der Nähe von Wärmequellen auf. Halten Sie das Gerät fern von Feuchtigkeit, hoher Luftfeuchtigkeit oder brennbaren Materialien. • Achten Sie darauf, dass das Gerät nicht mit anderen Gegenständen in Berührung kommt. 10 | LAURUS LMWE208...
- Page 11 Stellen Sie keine Gegenstände zwischen Gerätevorderseite und Tür. • Achten Sie darauf, dass sich keine Schmutz- oder Reinigungsmittelrückstände auf den Dichtflächen ansammeln. • Verwenden Sie das Gerät nicht, wenn die Tür oder die Türdichtung beschädigt ist. 11 | LAURUS LMWE208...
- Page 12 Siedeverzug kommen kann. Handhaben Sie den Behälter daher sorgsam und mit Bedacht. • Braten Sie keine Lebensmittel im Gerät. Heißes Öl kann die Geräteteile und das Kochgeschirr beschädigen und im schlimmsten Fall Hautverbrennungen verursachen. 12 | LAURUS LMWE208...
- Page 13 Wohnheimen, die direkt an ein Niederspannungsnetz angeschlossen sind, welches das für Haushaltszwecke genutzte Wohngebäude mit Strom versorgt. • Das Gerät sollte nach jedem Gebrauch vom Stromnetz getrennt werden, um eine Gefährdung von Mensch und Haustieren auszuschließen. 13 | LAURUS LMWE208...
- Page 14 Sie es nicht und setzen Sie es keinem hohen Druck aus. • Umbauten des Geräts und technische Modifikationen sind nicht gestattet. • Ist das Stromkabel beschädigt, muss es von einem qualifizierten Elektriker repariert werden. Alle örtlichen Vorschriften sind einzuhalten. 14 | LAURUS LMWE208...
-
Page 15: Installation
1 x Blende • 4 x Schrauben 4X10 mm • 4 x Füßchen • 2 x Befestigungsbügel Montage des Geräts So montieren Sie Ihr Gerät: Achten Sie darauf, dass alle Verpackungsmaterialien von der Innenseite der Tür entfernt werden. 15 | LAURUS LMWE208... - Page 16 Servicepersonal. Bauen Sie einen Schrank entsprechend den in der untenstehenden Abbildung angegebenen Maßen. HINWEIS Achten Sie darauf, dass eine Lüftungsöffnung wie abgebildet vorhanden ist. Befestigen Sie die vier Füßchen an der Unterseite des Geräts. 4×8mm*4 16 | LAURUS LMWE208...
- Page 17 HINWEIS Achten Sie darauf, dass die Gerätevorderseite und die Blendenfläche bündig abschließen, d. h. auf einer Ebene liegen. An der Rückseite der Blende ist die Aufschrift „TOP” (Oberseite) zu finden, welche die Oberseite der Blende markiert. 4×10mm*4 Bündig in einer Ebene 17 | LAURUS LMWE208...
- Page 18 Gerät mittig im Schrank steht. mindestens 20 cm freier Luftraum oberhalb des Geräts und 5 cm Freiraum an beiden Seiten vorhanden ist, um eine ausreichende Luftzirkulation zu gewährleisten. ausreichend Luftraum an allen Seiten der Blende vorhanden ist. 18 | LAURUS LMWE208...
- Page 19 Fixieren Sie das Gerät mit den vier 3x25 mm Schrauben am Schrank. 3×25mm*4 9a) Alternative Befestigungsmöglichkeit mittels Befestigungsbügel mit vier 3x25mm Schrauben. 19 | LAURUS LMWE208...
- Page 20 Sie das Gerät zum ersten Mal am Stromnetz anschließen, ertönt ein Piepton. Auf dem Display wird und „1:00“ angezeigt. Siehe Zeiteinstellung, um die Uhrzeit auf dem Gerät einzustellen. 11. Achten Sie darauf, dass das Netzkabel nicht unter dem Ofen oder über eine heiße oder scharfkantige Oberfläche verläuft. 20 | LAURUS LMWE208...
-
Page 21: Verwendung Des Geräts
Kochzeit von Lebensmitteln, wie Hühnchen, Hamburgern und von großen Produkten, wie Braten, verkürzen. • Schichten Sie Speisen wie Fleischbällchen nach der Hälfte der Kochzeit von oben nach unten und von der Mitte an den Rand um. 21 | LAURUS LMWE208... -
Page 22: Verwendung Von Kochgeschirr
Die nachfolgende Liste enthält eine allgemeine Übersicht, die Ihnen bei der Auswahl des richtigen Geschirrs hilft. KOCHGESCHIRR MIKROWELLE Hitzebeständiges Glas Nicht hitzebeständiges Glas Kein Hitzebeständiges Keramik Mikrowellenfestes Geschirr aus Kunststoff Küchenpapier Metallschale Kein Grillrost aus Metall Kein Alufolie & Behälter aus Alufolie Kein 22 | LAURUS LMWE208... -
Page 23: Zeiteinstellung
Kochleistung einzustellen. HINWEIS Sie können diesen Schritt überspringen, wenn Sie die Speisen mit 100 % Leistung garen möchten. POWER LEVEL (LEISTUNG/STUFE) Kochleistung drücken 1 Mal 100 % 2 Mal 80 % 3 Mal 60 % 4 Mal 40 % 5 Mal 20 % 6 Mal 0 % 23 | LAURUS LMWE208... -
Page 24: Verwendung Der Schnellstart-Funktion (Quick Start)
So tauen Sie Lebensmittel auf: Drücken Sie die WEIGHT DEFROST-Taste (AUFTAUEN NACH GEWICHT). Drücken Sie nun die WEIGHT ADJUST-Taste (GEWICHT) mehrmals, um das gewünschte Lebensmittelgewicht einzugeben. Drücken Sie nun die TIME/MENU-Taste (ZEIT/MENÜ), um den Vorgang zu starten. 24 | LAURUS LMWE208... -
Page 25: Lebensmittel Auftauen (Schnellauftaufunktion)
Einstellung des mehrstufigen Garbetriebs: Stellen Sie die erste Stufe des Garprogramms ein. HINWEIS Drücken Sie nicht die MENU/TIME-Taste (ZEIT/MENÜ). Drücken Sie die MULTI STAGE COOKING-Taste (MEHRSTUFIGER GARBETRIEB). Drücken Sie nun die TIME/MENU-Taste (ZEIT/MENÜ), um den Vorgang zu starten. 25 | LAURUS LMWE208... -
Page 26: Einstellen Des Timers, Um Den Kochvorgang Zu Einem Späteren Zeitpunkt Zu Starten
Um das voreingestellte Programm zu löschen: • Drücken Sie die STOP/CANCEL-Taste (STOPP/LÖSCHEN), wenn auf dem Display die Zeit angezeigt wird. 5.10 Verwendung der Kindersicherung Die Kindersicherungsfunktion kann aktiviert werden, um einen unbeaufsichtigten Betrieb des Ofens durch Kinder zu verhindern. 26 | LAURUS LMWE208... -
Page 27: 5.11 Automatische Garfunktion
Vorlieben, wie gut durchgegart Aufwärmen (g) Sie bestimmte Speisen mögen, und sogar, Fisch (g) wie Sie die Lebensmittel in das Gerät legen. Pizza (g) Wenn das Ergebnis nicht zufriedenstellend ist, Popcorn (g) passen Sie bitte die Garzeit entsprechend an. 27 | LAURUS LMWE208... - Page 28 Drehen Sie den TIME/MENU-Regler (ZEIT/MENÜ) im Standby-Modus gegen den Uhrzeigersinn, um den gewünschten Lebensmittelcode auszuwählen. Drücken Sie nun die WEIGHT ADJUST-Taste (GEWICHT) wiederholt, um das jeweilige Lebensmittelgewicht oder die Portionen einzugeben. Bestätigen Sie mit der TIME/MENU-Taste (ZEIT/MENÜ). 28 | LAURUS LMWE208...
-
Page 29: Wartung Und Reinigung
Reinigung des Bedienfelds: Öffnen Sie die Tür, um zu verhindern, dass sich das Gerät versehentlich einschaltet. Reinigen Sie das Bedienfeld anschließend mit einem weichen, feuchten Tuch. HINWEIS Achten Sie darauf, dass das Bedienfeld nicht nass wird. 29 | LAURUS LMWE208... - Page 30 Eventuell vorhandene Gerüche können Sie aus Ihrem Gerät entfernen, indem Sie eine Tasse Wasser mit dem Saft und der Schale einer ganzen Zitrone in eine mikrowellenfeste Schale geben. 5 Minuten lang kochen lassen. Wischen Sie das Gerät gründlich aus, anschließend mit einem weichen Tuch trocknen. 30 | LAURUS LMWE208...
-
Page 31: Fehlersuche
Neugeräte erzeugen Dämpfe Bei der ersten Inbetriebnahme Geruchsentwicklung. und Gerüche, die durch des Geräts kann es Verbrennung von Schmieröl daher zu Rauch- und entstehen. Geruchsentwicklung kommen. Dies ist normal. Dieses Phänomen wird nach einiger Zeit verschwinden. 31 | LAURUS LMWE208... -
Page 32: Demontage Und Entsorgung
Gefahren für die Umwelt und die Gesundheit zu vermeiden. Das Symbol auf der Außenverpackung zeigt an, dass die Verpackung aus Pappe (PAP) besteht. Das von Ihnen erworbene Produkt erfüllt die Vorgaben der EU-RoHS Direktive (2011/65/EU). Es enthält keine in der Direktive angegebenen gefährlichen und unzulässigen Materialien. 32 | LAURUS LMWE208... -
Page 33: Garantie
Defekt auf eine der folgenden Ursachen zurückzuführen ist: • Gewalteinwirkung von außen • Unsachgemäße Wartung • Nichtbeachtung der Bedienungsanleitung • Beschädigung durch Blitzschlag Vertrieben von: VESTEL Germany GmbH Parkring 6 (Business Campus) 85748 Garching b. München Deutschland www.vestel-germany.de 33 | LAURUS LMWE208... - Page 34 5.9 How to preset the microwave to start at a later time 5.10 How to use the child lock 5.11 How to auto-cook food 6 Maintenance and cleaning 7 Troubleshooting 8 Dismantling and disposal 9 Warranty 34 | LAURUS LMWE208...
-
Page 35: Introduction
If you have any questions, require further information or wish to order more copies of these installation and operating instructions, please contact: VESTEL Germany GmbH Parkring 6 (Business Campus) 85748 Garching b. München Germany +49 89 21129 555 +49 89 55295-2000 weisseware@kundendienst.email www.vestel-germany.de 35 | LAURUS LMWE208... -
Page 36: Intended Use
• outdoor use; • drying of food or clothing and heating of warming pads, slippers, sponges, damp cloth and similar products. All uses other than those described in this manual shall be considered inappropriate uses. 36 | LAURUS LMWE208... -
Page 37: Safety Symbols Used In This Manual
This symbol is used to indicate a This symbol is used to indicate a potentially hazardous situation which, situation which, if not avoided, could if not avoided, could result in death or result in damage to the appliance. serious injury. 37 | LAURUS LMWE208... -
Page 38: Description Of The Microwave
Description of the microwave Product elements Oven Window Glass Tray Roller Ring Shaft Wave Guide Control Panel Door Release Button Door Safety Lock System 38 | LAURUS LMWE208... -
Page 39: Control Panel
Use to set the time of clock. STOP/CANCEL Use to pause a cooking, cancel all settings or set child lock program. TIME/MENU Use to set time, start the appliance, set quick start program or select auto cook menus. 39 | LAURUS LMWE208... -
Page 40: Technical Data
Technical data Model identification code LMWE208 Appliance name LAURUS Microwave oven Power consumption (microwave) 1200 W Voltage 230 - 240V; 50Hz Rated output power (microwave) 700 W Operation frequency 2450MHz Plug type Schuko Outside dimensions 390×595×330mm Oven cavity dimensions 198×315×297mm... -
Page 41: Safety Instructions
Even a moment of inattentiveness can lead to serious accidents and injuries when using electrical equipment. 41 | LAURUS LMWE208... - Page 42 It is particularly important to ensure that damage is avoided to the plug and at the point where the cord exits from the appliance. 42 | LAURUS LMWE208...
- Page 43 • Risk of fire! Do not use the cavity for storage purposes. Do not leave paper products, cooking utensils, or food in the cavity when not in use. 43 | LAURUS LMWE208...
- Page 44 After each use the appliance should be disconnected from the mains to ensure that it does not represent a risk to humans and domestic animals. • Always grasp the plug, not the cord itself. Never touch a mains plug with wet hands. 44 | LAURUS LMWE208...
- Page 45 • Alterations to the appliance and technical modifications are not permitted. • If the power cord is damaged, the repair must be undertaken by a qualified electrician. All local regulations must be followed. 45 | LAURUS LMWE208...
-
Page 46: Installation
4 x screw 4X10mm • 4 x foot • 2 x Mounting bracket How to install the appliance To install the appliance: Make sure that all the packing materials are removed from the inside of the door. 46 | LAURUS LMWE208... - Page 47 If there is any damage, do not operate the appliance and contact qualified service personnel. Create a cabinet with the dimensions according to below illustration. NOTICE Make sure there is a ventilation space as illustrated. Attach the four feet to the bottom of the appliance. 47 | LAURUS LMWE208 4×8mm*4...
- Page 48 Make sure that the front of the appliance and the front of the shutter are in the same plane. The word “TOP” is market at the backside of the shutter to indicate the upper side of the shutter. 4×10mm*4 The same plane 48 | LAURUS LMWE208...
- Page 49 20cm of free space above the top surface of the appliance and 5cm at both sides for sufficient airflow. there is ventilation space on all sides of the shutter. 49 | LAURUS LMWE208...
- Page 50 Attach the appliance to the cabinet with the four 3x25mm screws. 3×25mm*4 9a) Alternative mounting option by means of two mounting brackets with four 3x25mm screws. 50 | LAURUS LMWE208...
- Page 51 “1:00”. See How to set the time to set the time on the appliance. 11. Make sure that the power supply cord does not run under the oven or over any hot or sharp surfaces. 51 | LAURUS LMWE208...
-
Page 52: Using The Appliance
Metallic containers for food and beverages are not allowed for microwave cooking. This requirement is not applicable if the manufacturer of the food to be prepared indicated that the metallic containers is suitable for microwave cooking. 52 | LAURUS LMWE208... - Page 53 The list below is a general overview to help you select the correct utensils. COOKWARE MICROWAVE Heat–Resistant Glass Non Heat–Resistant Glass Heat–Resistant Ceramics Microwave–Safe Plastic Dish Kitchen Paper Metal Tray Metal Rack Aluminium Foil & Foil Containers 53 | LAURUS LMWE208...
-
Page 54: How To Set The Time
2 times 3 times 4 times 5 times 6 times Turn the TIME/MENU control button clockwise to set the cooking time. NOTICE The longest possible time is 95 minutes. Press the TIME/MENU control button to start. 54 | LAURUS LMWE208... -
Page 55: How To Use The Quick Start Feature
How to defrost food (speed defrost) To speed defrost food: Press the SPEED DEFROST button. Turn the TIME/MENU control button to set the defrosting time. NOTICE The longest possible time is 95 minutes. Press the MENU/TIME button to start. 55 | LAURUS LMWE208... -
Page 56: How To Cook In Multi-Stages
Set a cooking program. NOTICE Do not press the MENU/TIME control button. Press the PRESET button. Turn the TIME/MENU control button to set the hours. Press the PRESET button to confirm. Turn the TIME/MENU control button to set the minutes. Press the TIME/MENU control button to confirm. 56 | LAURUS LMWE208... -
Page 57: 5.10 How To Use The Child Lock
“beep” sound. When in child lock mode, the appliance cannot be operated. To cancel the child lock: • When in child lock mode, press the STOP/CANCEL button for three seconds until you hear a “beep” sound. 57 | LAURUS LMWE208... -
Page 58: 5.11 How To Auto-Cook Food
To use the auto-cook feature: In standby mode, turn the TIME/MENU control button counter-clockwise to select the food code. Press the WEIGHT ADJUST button repeatedly to select the food weight or shares. Press the TIME/MENU button to confirm. 58 | LAURUS LMWE208... -
Page 59: Maintenance And Cleaning
Remove odours from your appliance by combining a cup of water with the juice and skin of one lemon in a microwaveable bowl. Cook for 5 minutes. Wipe the appliance thoroughly and dry with a soft cloth. 59 | LAURUS LMWE208... -
Page 60: Troubleshooting
The appliance produces When the appliance produced. fumes and odour is first used, it may generated by burning the produce some smoke lubricating oil. and odour. This is normal. This phenomenon will disappear after a period of using. 60 | LAURUS LMWE208... -
Page 61: Dismantling And Disposal
The symbol on the outer packaging indicates that the packaging is made of PAP. The product you have purchased complies with EU RoHS Directive (2011/65/EU). It does not contain harmful and prohibited materials specified in the Directive. 61 | LAURUS LMWE208... -
Page 62: Warranty
The warranty will be void in cases in which the malfunction is attributable to: • Use of external force • Improper maintenance • Failure to comply with operating instructions • Damage caused by lightning Distributed by: VESTEL Germany GmbH Parkring 6 (Business Campus) 85748 Garching b. München Germany www.vestel-germany.de 62 | LAURUS LMWE208... - Page 63 5.8 Comment cuire en plusieurs étapes 5.9 Comment prérégler le micro-ondes pour qu’il démarre ultérieurement 5.10 Comment utiliser le verrouillage enfant 5.11 Comment cuire automatiquement des aliments 6 Maintenance et nettoyage 7 Dépannage 8 Démantèlement et élimination 9 Garantie 63 | LAURUS LMWE208...
-
Page 64: Introduction
VESTEL Germany GmbH Parkring 6 (Business Campus) 85748 Garching b. Munich Allemagne +49 89 21129 555 +49 89 55295-2000 weisseware@kundendienst.email www.vestel-germany.de 64 | LAURUS LMWE208... -
Page 65: Utilisation Prévue
éponges, chiffons humides et autres produits similaires. Toutes les utilisations autres que celles décrites dans le présent manuel doivent être considérées comme des utilisations inappropriées. 65 | LAURUS LMWE208... -
Page 66: Symboles De Sécurité Utilisés Dans Ce Manuel
Ce symbole indique une situation Ce symbole est utilisé pour indiquer une potentiellement dangereuse qui, si elle situation qui, si elle n’est pas évitée, n’est pas évitée, peut entraîner un décès pourrait endommager l’appareil. ou des blessures graves. 66 | LAURUS LMWE208... -
Page 67: Description Du Micro-Ondes
Description du micro-ondes Éléments du produit Fenêtre du four Plateau en verre Anneau à roulettes Arbre Guide d’ondes Panneau de commande Bouton de déverrouillage de la porte Système de verrouillage de la porte 67 | LAURUS LMWE208... -
Page 68: Panneau De Commande
TIME/MENU (HEURE/MENU) Permet de régler l’heure, de démarrer l’appareil, de régler le programme de démarrage rapide ou de sélectionner des menus de cuisson automatique. 68 | LAURUS LMWE208... -
Page 69: Données Techniques
Données techniques Code d’identification du modèle LMWE208 Nom de l’appareil Four à micro-ondes LAURUS Consommation électrique (micro-ondes) 1200 W Tension 230 - 240V ; 50Hz Puissance de sortie nominale (micro- 700 W ondes) Fréquence de service 2450MHz Type de fiche Schuko Dimensions extérieures... -
Page 70: Informations Relatives À La Sécurité
Utilisez l’appareil conformément à son usage prévu et dans les limites de performances spécifiées. • L’appareil n’est pas conçu pour fonctionner avec une minuterie externe ou un système de télécommande séparé. • Conservez l’appareil à l’écart de l’humidité. 70 | LAURUS LMWE208... - Page 71 Ne jamais retirer le support de distance situé à l’arrière ou sur les côtés de l’appareil, car il garantit une distance minimale au mur pour la circulation de l’air. • Ne pas retirer la plaque de mica recouvrant le guide d’onde. 71 | LAURUS LMWE208...
- Page 72 Si l’assemblage du plateau en verre ou du plateau tournant présente des fissures ou des ruptures, contactez le centre de service agréé le plus proche. • Ne pas utiliser la grille du gril en mode micro-ondes. 72 | LAURUS LMWE208...
- Page 73 • Risque de brûlure ! Pendant l’utilisation, l’appareil devient chaud. Ne touchez aucun élément chauffant. • Risque de brûlure ! De la vapeur peut s’échapper lors de l’ouverture des couvercles ou du film d’emballage. 73 | LAURUS LMWE208...
- Page 74 à une pression élevée. • Aucun changement apporté au produit ni modifications techniques ne sont autorisés. • Si le cordon d’alimentation est endommagé, la réparation doit être effectuée par un électricien qualifié. Toutes les réglementations locales doivent être respectées. 74 | LAURUS LMWE208...
-
Page 75: Installation
• 1 volet • 4 vis de 4X10mm • 4 pieds • 2 x supports de montage Comment installer l’appareil Pour installer l’appareil : Assurez-vous que tous les matériaux d’emballage soient retirés de l’intérieur de la porte. 75 | LAURUS LMWE208... - Page 76 Créez une armoire avec les dimensions conformément à l’illustration ci- dessous. REMARQUE Assurez-vous qu’il y ait un espace de ventilation comme illustré. Fixez les quatre pieds au bas de l’appareil. 76 | LAURUS LMWE208 4×8mm*4...
- Page 77 Assurez-vous que l’avant de l’appareil et l’avant du volet soient dans le même plan. Le mot « TOP » (SUPÉRIEUR) est marqué à l’arrière du volet pour indiquer le côté supérieur du volet. 4×10mm*4 le même plan 77 | LAURUS LMWE208...
- Page 78 20 cm d’espace libre au-dessus de la surface supérieure de l’appareil et 5 cm des deux côtés afin d’assurer une circulation d’air suffisante. il y ait un espace de ventilation de tous les côtés du volet. 78 | LAURUS LMWE208...
- Page 79 Fixez l’appareil à l’armoire avec les quatre vis de 3x25 mm. 3×25mm*4 9a) Autre possibilité de montage au moyen de deux supports de montage avec quatre vis de 3x25 mm 79 | LAURUS LMWE208...
- Page 80 L’affichage indique et « 1:00 ». Voir Comment régler l’heure pour régler l’heure sur l’appareil. 11. Assurez-vous que le cordon d’alimentation ne passe pas sous le four ni sur des surfaces chaudes ou coupantes. 80 | LAURUS LMWE208...
-
Page 81: Utiliser L'appareil
• Disposez à nouveau les aliments tels que les boulettes de viande à mi- cuisson, du haut vers le bas et du centre du plat vers l’extérieur. 81 | LAURUS LMWE208... -
Page 82: Comment Utiliser Les Ustensiles De Cuisine
Verre résistant à la chaleur Verre non résistant à la chaleur Céramique résistante à la chaleur Plats en plastique compatible au micro-ondes Papier de cuisine Plateau en métal Grille en métal Papier d’aluminium et contenants en aluminium 82 | LAURUS LMWE208... -
Page 83: Comment Régler L'heure
étape si vous souhaitez cuire à un niveau de puissance de 100 %. Appuyez sur POWER LEVEL Puissance de cuisson (NIVEAU DE PUISSANCE) 1 fois 100 % 2 fois 80 % 3 fois 60 % 4 fois 40 % 5 fois 20 % 6 fois 83 | LAURUS LMWE208... -
Page 84: Comment Utiliser La Fonction Démarrage Rapide
Comment décongeler des aliments (décongélation au poids) L’appareil permet de décongeler de la viande. La durée de décongélation et le niveau de puissance sont automatiquement réglés une fois le poids programmé. Le poids des aliments congelés varie de 100 g à 1800g. 84 | LAURUS LMWE208... -
Page 85: Comment Décongeler Des Aliments (Décongélation Rapide)
X, suivie par une cuisson au micro-ondes au niveau de puissance Y. REMARQUE Le démarrage rapide, la décongélation rapide, la décongélation au poids et la cuisson automatique ne peuvent pas être réglés en mode cuisson en plusieurs étapes. 85 | LAURUS LMWE208... -
Page 86: Comment Prérégler Le Micro-Ondes Pour Qu'il Démarre Ultérieurement
Appuyez sur le bouton de commande TIME/MENU (HEURE/MENU) pour confirmer. Pour voir l’heure préréglée : • Appuyez sur le bouton PRESET (PRÉRÉGLAGE). Pour annuler le programme préréglé : • Lorsque l’écran affiche l’heure, appuyez sur le bouton STOP/CANCEL (STOP/ANNULER). 86 | LAURUS LMWE208... -
Page 87: 5.10 Comment Utiliser Le Verrouillage Enfant
Réchauffage de certains aliments et même la manière dont automatique (g) vous disposez les aliments dans l’appareil. Si Poisson (g) vous jugez le résultat non satisfaisant, ajustez Pizza (g) le temps de cuisson. Pop-corn (g) 87 | LAURUS LMWE208... - Page 88 Appuyez à plusieurs reprises sur le bouton WEIGHT ADJUST (RÉGLAGE DU POIDS) pour sélectionner le poids ou les portions d’aliments. Appuyez sur le bouton TIME/MENU (HEURE/MENU) pour confirmer. 88 | LAURUS LMWE208...
-
Page 89: Maintenance Et Nettoyage
Éliminez les odeurs de votre appareil en combinant une tasse d’eau avec le jus et la peau d’un citron dans un bol compatible avec le micro-ondes. Cuire 5 minutes. Essuyez soigneusement l’appareil et séchez-le avec un chiffon doux. 89 | LAURUS LMWE208... -
Page 90: Dépannage
C’est normal. Ce phénomène disparaîtra après une certaine période d’utilisation. 90 | LAURUS LMWE208... -
Page 91: Démantèlement Et Élimination
PAP. L’appareil que vous avez acheté est conforme à la directive LdSD (2011/65/UE) de l’Union européenne. Il ne comporte pas les matériels dangereux et interdits mentionnés dans la directive. 91 | LAURUS LMWE208... -
Page 92: Garantie
L'utilisation d'une force externe • Une maintenance inadéquate • Le non-respect des instructions • Des dommages causés par la foudre Distribué par : VESTEL Germany GmbH Parkring 6 (Business Campus) 85748 Garching b. Munich Allemagne www.vestel-germany.de 92 | LAURUS LMWE208... - Page 93 5.8 Het bereiden van eten in meerdere stappen 5.9 De magnetron instellen om op een later moment te beginnen. 5.10 Het kinderslot gebruiken 5.11 Voedsel automatisch bereiden 6 Onderhoud en reiniging 7 Problemen oplossen 8 Ontmanteling en afvoer 9 Garantie 93 | LAURUS LMWE208...
-
Page 94: Inleiding
Bij vragen, als u aanvullende informatie nodig hebt of als u meer exemplaren van deze installatie- en gebruiksaanwijzing wilt hebben, neem contact met ons op: VESTEL Germany GmbH Parkring 6 (Business Campus) 85748 Garching b. München Duitsland +49 89 21129 555 +49 89 55295-2000 weissware@kundendienst.email www.vestel-germany.de 94 | LAURUS LMWE208... -
Page 95: Beoogd Gebruik
• buitengebruik; • het drogen van voedsel of kleding en het verwarmen van verwarmingskussens, slippers, sponzen, vochtige doeken en soortgelijke producten. Elk ander gebruik dan wat in deze handleiding is beschreven wordt gezien als ongepast gebruik. 95 | LAURUS LMWE208... -
Page 96: Veiligheidssymbolen Die In Deze Handleiding Worden Gebruikt
Dit symbool wordt gebruikt om een mogelijk gevaarlijke situatie aan te situatie aan te geven die, indien niet geven die, indien niet vermeden, kan vermeden, kan leiden tot schade aan leiden tot de dood of ernstig letsel. het apparaat. 96 | LAURUS LMWE208... -
Page 97: Beschrijving Van De Magnetron
Beschrijving van de magnetron Productelementen Ovenvenster Glazen plateau Rolring Golfgeleider Bedieningspaneel Deurontgrendelingsknop Deurslotvergrendelingssysteem 97 | LAURUS LMWE208... -
Page 98: Bedieningspaneel
Gebruik om een bereiding te pauzeren, alle instellingen te wissen of een kindvergrendelingsprogramma in te stellen. TIME/MENU (TIJD/MENU) Gebruik om de tijd in te stellen, het apparaat te starten, het snelstartprogramma in te stellen of automatische bereidingsprogramma's te selecteren. 98 | LAURUS LMWE208... -
Page 99: Technische Gegevens
700 W (magnetron) Bedrijfsfrequentie 2450MHz Stekkertype Schuko Buitenafmetingen 390×595×330mm Afmetingen ovenruimte 198×315×297mm Capaciteit oven 20 liter Gewicht Ong. 10,5 kg Bedrijfstemperatuur -10 ºC tot + 40 ºC Relatieve luchtvochtigheid 10 %~95 % RV Type apparaat ingebouwd 99 | LAURUS LMWE208... -
Page 100: Veiligheidsinstructies
Gebruik geen elektrische apparatuur als u een verminderde concentratie of bewustzijn hebt of als u onder invloed bent van drugs, alcohol of medicijnen. Slechts één moment van onoplettendheid kan al leiden tot ernstige ongelukken of verwondingen bij het gebruik van elektrische apparatuur. 100 | LAURUS LMWE208... - Page 101 • Sluit het apparaat aan op een geschikte, correct geïnstalleerde, geaarde en eenvoudig toegankelijke stopcontactaansluiting. Zorg ervoor dat het apparaat te allen tijde van het spanningsnet kan worden losgekoppeld. 101 | LAURUS LMWE208...
- Page 102 • Gebruik nooit het grillrooster in de magnetronfunctie. • Bij het gebruik van het grillrooster in de grillfunctie moet het rek altijd op het glazen plateau geplaatst worden. 102 | LAURUS LMWE208...
- Page 103 • Gevaar voor brandwonden! Het apparaat kan tijdens gebruik heet worden. Raak geen verwarmde elementen aan. • Gevaar voor brandwonden! Bij het openen van deksels of afwikkelen van folie kan er stoom ontsnappen. 103 | LAURUS LMWE208...
- Page 104 • Wijzigingen aan het apparaat en technische aanpassingen zijn niet toegestaan. • Als het netsnoer is beschadigd, moet de reparatie door een erkend elektricien uitgevoerd worden. Alle plaatselijke voorschriften moeten in acht worden genomen. 104 | LAURUS LMWE208...
-
Page 105: Installatie
• 4 x schroef 4X10mm • 4 x voetjes • 2 x montagebeugels Installeren van het apparaat Het installeren van het apparaat: Zorg ervoor dat al het verpakkingsmateriaal aan de binnenkant van de deur verwijderd is. 105 | LAURUS LMWE208... - Page 106 Maak een kast met de afmetingen volgens onderstaande afbeelding. OPMERKING Zorg voor een ventilatieruimte zoals is afgebeeld. Bevestig de vier voetjes aan de onderzijde van het apparaat. 4×8mm*4 106 | LAURUS LMWE208...
- Page 107 OPMERKING Zorg ervoor dat de voorzijde van het apparaat en de voorkant van de dekplaat in hetzelfde vlak liggen. Op de achterzijde van de dekplaat geeft het woord “TOP” (bovenzijde) de bovenzijde van de dekplaat aan. 4×10mm*4 Hetzelfde vlak 107 | LAURUS LMWE208...
- Page 108 20 cm vrije ruimte boven het bovenoppervlak van het apparaat en 5 cm aan beide zijden over is om voldoende luchtstroom te waarborgen. er aan alle zijden van de dekplaat ventilatieruimte is. 108 | LAURUS LMWE208...
- Page 109 Bevestig het apparaat aan de kast met de vier schroeven van 3x25mm. 3×25mm*4 9a) Alternatieve montagemogelijkheid door middel van twee montagebeugels met vier 3x25mm schroeven 109 | LAURUS LMWE208...
- Page 110 Het beeldscherm toont en “1:00”. Zie Het instellen van de tijd voor het instellen van de tijd op het apparaat. 11. Zorg ervoor dat het netsnoer niet onder de oven of over hete of scherpe oppervlakken loopt. 110 | LAURUS LMWE208...
-
Page 111: Gebruik Van Het Apparaat
Draai het voedsel tijdens het bereiden altijd een keer om. Dit versnelt het bereiden van voedsel zoals kip, hamburgers en grote gerechten zoals braadstukken. • Herschik voedsel zoals gehaktballetjes halverwege de bereiding, zowel van boven naar onder als van het midden van de schaal naar buiten. 111 | LAURUS LMWE208... -
Page 112: Het Gebruik Van Het Keukengerei
De onderstaande lijst is een algemeen overzicht om u te helpen het juiste keukengerei te kiezen. KOOKGEREI MAGNETRON Hittebestendig glas Niet-hittebestendig glas Hittebestendig keramiek Magnetronveilige plastic schaal Keukenpapier Metalen plateau Metalen rek Aluminiumfolie en folieverpakkingen Nee 112 | LAURUS LMWE208... -
Page 113: Het Instellen Van De Tijd
5 maal 6 maal Draai de regelknop TIME/MENU (TIJD/MENU) met de klok mee om de bereidingstijd in te stellen. OPMERKING De langst mogelijke tijd is 95 minuten. Druk op de regelknop TIME/MENU (TIJD/MENU) om te beginnen. 113 | LAURUS LMWE208... -
Page 114: Het Gebruik Van De Functie Quick Start (Snelstart)
Druk op de toets MENU/TIME (TIJD/MENU) om te beginnen. OPMERKING Gedurende het ontdooien pauzeert het apparaat om u eraan te herinneren het voedsel om te draaien. Wanneer u het voedsel hebt omgedraaid, druk op de toets MENU/TIME (MENU/TIJD) om te hervatten. 114 | LAURUS LMWE208... -
Page 115: Het Ontdooien Van Voedsel (Speed Defrost (Snel Ontdooien))
Druk op de toets MENU/TIME (TIJD/MENU) om te beginnen. De magnetron instellen om op een later moment te beginnen. Met de voorinstellingsfunctie kan het apparaat op een later moment beginnen. OPMERKING Snelstart kan in de voorinstellingsmodus niet ingesteld worden. 115 | LAURUS LMWE208... -
Page 116: 5.10 Het Kinderslot Gebruiken
(STOP/ANNULEREN) totdat u een “piep”-geluid hoort. In de kinderslotmodus kan het apparaat niet gebruikt worden. Het annuleren van het kinderslot: • Druk in de kinderslotmodus drie seconden op de toets STOP/CANCEL (STOP/ANNULEREN) totdat u een “piep”-geluid hoort. 116 | LAURUS LMWE208... -
Page 117: 5.11 Voedsel Automatisch Bereiden
In standby-modus draai de regelknop TIME/MENU (TIJD/MENU) tegen de klok in om de voedselcode te selecteren. Druk herhaaldelijk op de toets WEIGHT ADJUST (GEWICHT AANPASSEN) om het gewicht van het voedsel of de porties te selecteren. Druk op de toets TIME/MENU (TIJD/MENU) om te bevestigen. 117 | LAURUS LMWE208... -
Page 118: Onderhoud En Reiniging
Verwijder geurtjes uit uw apparaat door een kop water met het sap en de schil van één citroen in een kom die in de magnetron mag te plaatsen. Kook dit 5 minuten. Veeg het apparaat grondig schoon en droog met een zachte doek. 118 | LAURUS LMWE208... -
Page 119: Problemen Oplossen
Wanneer het apparaat voor geproduceerd. dampen en geuren die het eerst gebruikt wordt, gegenereerd worden door kan het wat rook en geur het verbranden van de produceren. Dit is normaal. smeerolie. Dit fenomeen zal na een bepaalde gebruiksperiode verdwijnen. 119 | LAURUS LMWE208... -
Page 120: Ontmanteling En Afvoer
Het symbool op de buitenverpakking geeft aan dat de verpakking gemaakt is van PAP. Het door u aangekochte product voldoet aan de EU-richtlijn RoHS (2011/65/EU). Het bevat geen schadelijke en verboden materialen die in deze richtlijn zijn opgenomen. 120 | LAURUS LMWE208... -
Page 121: Garantie
Het gebruik van een externe kracht • Onjuist onderhoud • Het niet naleven van de gebruiksaanwijzing • Schade veroorzaakt door blikseminslag Gedistribueerd door: VESTEL Germany GmbH Parkring 6 (Business Campus) 85748 Garching b. München Duitsland www.vestel-germany.de 121 | LAURUS LMWE208... - Page 122 5.9 Cómo preajustar el microondas para que comience a una hora más tarde 5.10 Cómo utilizar el bloqueo para niños 5.11 Cómo usar la cocción automática con alimentos 6 Mantenimiento y limpieza 7 Solución de problemas 8 Desmontaje y eliminación 9 Garantía 122 | LAURUS LMWE208...
-
Page 123: Introducción
Si tiene alguna pregunta, necesita información ampliada o desea solicitar más copias de estas instrucciones de instalación y de funcionamiento, póngase en contacto con: VESTEL Germany GmbH Parkring 6 (Business Campus) 85748 Garching b. München Alemania +49 89 21129 555 +49 89 55295-2000 weisseware@kundendienst.email www.vestel-germany.de 123 | LAURUS LMWE208... -
Page 124: Uso Previsto
• uso en exteriores; • secar alimentos o ropa y calentar almohadillas térmicas, pantuflas, esponjas, paños húmedos y productos similares. Cualquier otro uso distinto al descrito en este manual será considerado inapropiado. 124 | LAURUS LMWE208... -
Page 125: Símbolos De Seguridad Utilizados En Este Manual
Este símbolo se utiliza para indicar una Este símbolo se utiliza para indicar una situación potencialmente peligrosa que, situación que, si no se evita, podría si no se evita, podría provocar la muerte provocar daños al aparato. o lesiones graves. 125 | LAURUS LMWE208... -
Page 126: Descripción Del Microondas
Descripción del microondas Elementos del producto Ventana del horno Bandeja de vidrio Anillo giratorio Guía de ondas Panel de control Botón de liberación de la puerta Sistema de bloqueo de seguridad de la puerta 126 | LAURUS LMWE208... -
Page 127: Panel De Control
TIME/MENU (TIEMPO/MENÚ) Se usa para establecer el tiempo, poner el aparato en marcha, establecer el programa de inicio rápido o seleccionar los menú de cocción automática. 127 | LAURUS LMWE208... -
Page 128: Datos Técnicos
Datos técnicos Código de identificación del modelo LMWE208 Nombre del aparato Horno microondas LAURUS Consumo eléctrico (microondas) 1200 W Tensión 230 - 240V; 50Hz Potencia nominal de salida 700 W (microondas) Frecuencia de funcionamiento 2450MHz Tipo de enchufe Schuko Dimensiones exteriores 390×595×330 mm... -
Page 129: Instrucciones De Seguridad
Un simple despiste puede provocar accidentes y lesiones graves al utilizar un equipo eléctrico. 129 | LAURUS LMWE208... - Page 130 • Conecte el aparato a una toma de corriente eléctrica correctamente instalada, puesta a tierra y de fácil acceso. Asegúrese de que el aparato pueda ser desconectado de la red eléctrica en cualquier momento. 130 | LAURUS LMWE208...
- Page 131 • No utilice la rejilla del grill en la función microondas. • Cuando se utilice la rejilla del grill en la función de grill, coloque siempre la rejilla sobre la bandeja de vidrio. 131 | LAURUS LMWE208...
- Page 132 ¡Riesgo de quemaduras! El aparato se pone caliente durante el uso. No toque ningún elemento calentado. • ¡Riesgo de quemaduras! Puede salir vapor al abrir las tapas o el papel envolvente. • Utilice únicamente los utensilios que sean adecuados para el uso en el aparato. 132 | LAURUS LMWE208...
- Page 133 • No se permite realizar alteraciones ni modificaciones técnicas al aparato. • Si el cable de alimentación está dañado, la reparación deberá ser emprendida por un electricista cualificado. Deben seguirse todas las regulaciones locales. 133 | LAURUS LMWE208...
-
Page 134: Instalación
4 x tornillos 4X10 mm • 4 x pies • 2 x soportes de montaje Cómo instalar el aparato Para instalar el aparato: Asegúrese de que todos los materiales de embalaje hayan sido quitados del lado interior de la puerta. 134 | LAURUS LMWE208... - Page 135 Cree un armario con las dimensiones de acuerdo con la ilustración inferior. AVISO Asegúrese de que haya un espacio de ventilación según se ilustra. Fije los cuatro pies a la parte inferior del aparato. 4×8mm*4 135 | LAURUS LMWE208...
- Page 136 La palabra «TOP» está marcada en el lado posterior de la contraventana para indicar el lado superior de la misma. 4×10mm*4 El mismo plano 136 | LAURUS LMWE208...
- Page 137 20 cm de espacio libre por encima de la superficie superior del aparato y de 5 cm a ambos lados para un flujo de aire suficiente. hay espacio de ventilación suficiente en todos los lados de la contraventana. 137 | LAURUS LMWE208...
- Page 138 Fije el aparato al armario con los cuatro tornillos 3x25 mm. 3×25mm*4 9a) Opción de montaje alternativo mediante dos soportes de montaje con cuatro tornillos de 3x25mm 138 | LAURUS LMWE208...
- Page 139 La pantalla mostrará y «1:00». Véase Cómo ajustar la hora en el aparato. 11. Asegúrese de que el cable de suministro eléctrico no transcurra por debajo del horno ni por encima de ninguna superficie caliente o afilada. 139 | LAURUS LMWE208...
-
Page 140: Uso Del Aparato
• Reorganice los alimentos como las albóndigas a mitad de cocción, tanto de arriba a abajo como desde el centro del plato hacia fuera. 140 | LAURUS LMWE208... -
Page 141: Cómo Utilizar Los Utensilios De Conexión
Vidrio no resistente al calor Cerámica resistente al calor Sí Plato de plástico a prueba de Sí microondas Papel de cocina Sí Bandeja metálica Rejilla de metal Papel de aluminio y envases de papel de aluminio 141 | LAURUS LMWE208... -
Page 142: Cómo Ajustar La Hora
Gire el botón de control TIME/MENU (TIEMPO/MENÚ) en el sentido de las agujas del reloj para fijar el tiempo de cocción. AVISO El tiempo máximo posible es 95 minutos. Pulse el botón de control TIME/MENU (TIEMPO/MENÚ) para iniciar. 142 | LAURUS LMWE208... -
Page 143: Cómo Usar La Opción De Inicio Rápido
Pulse el botón MENU/TIME (MENÚ/TIEMPO) para iniciar. AVISO Durante el proceso de descongelación, el aparato efectuará una pausa para recordarle que le dé una vuelta al alimento. Cuando le haya dado la vuelta al alimento, pulse el botón MENU/TIME (MENÚ/TIEMPO) para reanudar. 143 | LAURUS LMWE208... -
Page 144: Cómo Descongelar Alimentos (Descongelación Por Velocidad)
Cómo preajustar el microondas para que comience a una hora más tarde La función de preajuste permite que el aparato comience a una hora más tarde. AVISO El inicio rápido no se puede ajustar en el modo de preajuste. 144 | LAURUS LMWE208... -
Page 145: 5.10 Cómo Utilizar El Bloqueo Para Niños
Para cancelar el bloqueo para niños: • Cuando esté en modo de bloqueo para niños, pulse el botón STOP/ CANCEL (PARAR/CANCELAR) durante tres segundos hasta que escuche un pitido. 145 | LAURUS LMWE208... -
Page 146: 5.11 Cómo Usar La Cocción Automática Con Alimentos
Pulse repetidamente el botón WEIGHT ADJUST (AJUSTE DEL PESO) para seleccionar el peso o las porciones del alimento. Pulse el botón TIME/MENU (TIEMPO/MENÚ) para confirmar. 146 | LAURUS LMWE208... -
Page 147: Mantenimiento Y Limpieza
Elimine los olores de su aparato combinando una taza de agua con el jugo y la piel de un limón en un bol apto para microondas. Cocine durante 5 minutos. Limpie a fondo el aparato y séquelo con un paño suave. 147 | LAURUS LMWE208... -
Page 148: Solución De Problemas
Cuando el aparato se utiliza gases y olor generados por primera vez, puede por la quema del aceite producir algo de humo y lubricante. olor. Esto es normal. Este fenómeno desaparecerá al cabo de un tiempo de uso. 148 | LAURUS LMWE208... -
Page 149: Desmontaje Y Eliminación
El símbolo en el envase exterior indica que el envase está fabricado con PAP. El producto que ha adquirido cumple con la directiva RoHS de la UE (2011/65/UE). No contiene materiales peligroso ni prohibidos especificados en la Directiva. 149 | LAURUS LMWE208... -
Page 150: Garantía
• Uso de fuerza externa • Mantenimiento inapropiado • Incumplimiento de las instrucciones de funcionamiento • Daños causados por rayo Distribuido por: VESTEL Germany GmbH Parkring 6 (Business Campus) 85748 Garching b. München Alemania www.vestel-germany.de 150 | LAURUS LMWE208... - Page 151 5.9 Come impostare il microonde per avviarsi in un momento successivo 5.10 Come utilizzare il blocco per bambini 5.11 Come cuocere gli alimenti automaticamente 6 Manutenzione e pulizia 7 Risoluzione dei problemi 8 Smontaggio e smaltimento 9 Garanzia 151 | LAURUS LMWE208...
-
Page 152: Introduzione
In caso di domande, necessità di ulteriori informazioni e se si desidera ordinare ulteriori copie di queste istruzioni di installazione e utilizzo, contattare: VESTEL Germany GmbH Parkring 6 (Business Campus) 85748 Garching b. München Germania +49 89 21129 555 +49 89 55295-2000 weisseware@kundendienst.email www.vestel-germany.de 152 | LAURUS LMWE208... -
Page 153: Utilizzo Previsto
• l’utilizzo in esterni; • l’asciugatura di alimenti o abbigliamento o il riscaldamento di borse riscaldanti, pantofole, spugne, panni umidi o prodotti simili. Qualsiasi utilizzo diverso da quanto descritto in questo manuale è considerato errato. 153 | LAURUS LMWE208... -
Page 154: Simboli Di Sicurezza Utilizzati Nel Manuale
Questo simbolo è utilizzato per Questo simbolo è utilizzato per indicare una situazione potenzialmente indicare una situazione che, se non pericolosa che, se non evitata, potrebbe evitata, potrebbe comportare danni comportare morte o lesioni gravi. all’apparecchio. 154 | LAURUS LMWE208... -
Page 155: Descrizione Del Microonde
Descrizione del microonde Elementi del prodotto Finestra del forno Vassoio in vetro Anello a rulli Albero Guida d’onda Pannello di controllo Pulsante di rilascio sportello Sistema di blocco di sicurezza sportello 155 | LAURUS LMWE208... -
Page 156: Pannello Di Controllo
Utilizzarlo per mettere in pausa la cottura, annullare tutte le impostazioni o impostare il programma di blocco per bambini. TIME/MENU (TEMPO/MENU) Utilizzarlo per impostare i tempi, avviare l’apparecchio, impostare un programma di avvio rapido o selezionare i menu di cottura automatica. 156 | LAURUS LMWE208... -
Page 157: Dati Tecnici
Dati tecnici Codice identificativo del modello LMWE208 Nome dell’apparecchio Forno a microonde LAURUS Consumo di elettricità (microonde) 1200 W Tensione 230 - 240 V; 50 Hz Potenza nominale in uscita (microonde) 700 W Frequenza d’esercizio 2450MHz Tipo di spina Schuko Dimensioni esterne 390×595×330 mm... -
Page 158: Istruzioni Di Sicurezza
Prestare sempre la massima attenzione e cautela. Non utilizzare dispositivi elettrici in caso di mancanza di concentrazione o di consapevolezza, oppure sotto l’influenza di droghe, alcol o farmaci. Quando si utilizzano dispositivi elettrici, un solo istante di disattenzione può causare gravi incidenti e lesioni. 158 | LAURUS LMWE208... - Page 159 • Collegare l’apparecchio a una presa elettrica adeguata installata correttamente, dotata di messa a terra e di facile accesso. Assicurarsi che l’apparecchio possa essere facilmente scollegato dalla rete elettrica in qualsiasi momento. 159 | LAURUS LMWE208...
- Page 160 • Non utilizzare la griglia per il grill con la funzione microonde. • Quando si utilizza la griglia per il grill con la funzione grill, poggiarla sempre sul vassoio di vetro. 160 | LAURUS LMWE208...
- Page 161 • Rischio di ustioni! Quando si aprono coperchi o pellicole di alluminio potrebbe fuoriuscire del vapore. • Utilizzare solo utensili idonei all’utilizzo nell’apparecchio. • Non rimuovere alcuna copertura di protezione dall’esposizione alle microonde. 161 | LAURUS LMWE208...
- Page 162 • Non sono consentite alterazioni all’apparecchio e modifiche tecniche. • Se il cavo di alimentazione è danneggiato, la riparazione deve essere effettuata da un elettricista qualificato. È necessario attenersi a tutte le normative locali. 162 | LAURUS LMWE208...
-
Page 163: Installazione
1 x portello • 4 x viti 4X10 mm • 4 x piedini • 2 x staffe di montaggio Come installare l’apparecchio Per installare l’apparecchio: Assicurarsi di rimuovere tutti i materiali di imballaggio dall’interno dello sportello. 163 | LAURUS LMWE208... - Page 164 Creare un armadietto con le dimensioni illustrate di seguito. NOTA Assicurarsi che vi sia spazio a sufficienza per la ventilazione, come illustrato. Fissare i quattro piedini alla parte inferiore dell’apparecchio. 164 | LAURUS LMWE208 4×8mm*4...
- Page 165 Fissare il portello con le quattro viti 4x10 mm all’apparecchio. NOTA Assicurarsi che la parte anteriore dell’apparecchio e la parte anteriore del portello siano sullo stesso piano. Sul retro del portello è indicata la parola “TOP” a indicarne il lato superiore. 4×10mm*4 Lo stesso piano 165 | LAURUS LMWE208...
- Page 166 20 cm sopra la superficie superiore dell’apparecchio e 5 cm su entrambi i lati per una ventilazione sufficiente. vi sia spazio di ventilazione a sufficienza su tutti i lati del portello. 166 | LAURUS LMWE208...
- Page 167 Fissare l’apparecchio all’armadietto con le quattro viti 3x25 mm. 3×25mm*4 9a) Opzione di montaggio alternativa mediante due staffe di montaggio con quattro viti 3x25mm 167 | LAURUS LMWE208...
- Page 168 Il display mostra e “1:00”. Vedere Come impostare l’orario per impostare l’orario sull’apparecchio. 11. Assicurarsi che il cavo di alimentazione non sia sotto il forno o lungo eventuali superfici calde o taglienti. 168 | LAURUS LMWE208...
-
Page 169: Utilizzo Dell'apparecchio
• Ridistribuire gli alimenti come le polpette a metà cottura, sia dall’alto in basso che dal centro del piatto verso l’esterno. 169 | LAURUS LMWE208... -
Page 170: Come Utilizzare Gli Utensili Di Cottura
Vetro resistente al calore Sì Vetro non resistente al calore Ceramica resistente al calore Sì Piatto in plastica per microonde Sì Carta da cucina Sì Vassoio in metallo Griglia in metallo Pellicola di alluminio e contenitori di alluminio 170 | LAURUS LMWE208... -
Page 171: Come Impostare L'orario
100%. Premere POWER LEVEL (LIVELLO Potenza di cottura DI POTENZA) 1 volta 100% 2 volte 3 volte 4 volte 5 volte 6 volte 171 | LAURUS LMWE208... -
Page 172: Come Utilizzare La Funzione Avvio Rapido
Il peso dell’alimento congelato può variare da 100 g a 1800 g. Per scongelare gli alimenti: Premere il pulsante WEIGHT DEFROST (SCONGELAMENTO A PESO). Premere il pulsante WEIGHT ADJUST (REGOLAZIONE PESO) ripetutamente per selezionare il peso degli alimenti. Premere il pulsante MENU/TIME (MENU/TEMPO) per avviare. 172 | LAURUS LMWE208... -
Page 173: Come Scongelare Gli Alimenti (Scongelamento Rapido)
Per impostare la cottura in più fasi: Impostare il programma di cottura per la prima fase. NOTA Non premere il pulsante di controllo MENU/TIME (MENU/TEMPO). Premere il pulsante MULTI STAGE COOKING (COTTURA MULTI-FASE). Premere il pulsante MENU/TIME (MENU/TEMPO) per avviare. 173 | LAURUS LMWE208... -
Page 174: Come Impostare Il Microonde Per Avviarsi In Un Momento Successivo
Quando il display mostra il tempo, premere il pulsante STOP/CANCEL (STOP/ANNULLA). 5.10 Come utilizzare il blocco per bambini La funzione di blocco per bambini può essere impostata per prevenire l’utilizzo del forno da parte dei bambini senza il controllo di un adulto. 174 | LAURUS LMWE208... -
Page 175: 5.11 Come Cuocere Gli Alimenti Automaticamente
In modalità standby, ruotare il pulsante di controllo TIME/MENU (TEMPO/ MENU) in senso antiorario per selezionare il codice dell’alimento. Premere il pulsante WEIGHT ADJUST (REGOLAZIONE PESO) ripetutamente per selezionare il peso o le porzioni degli alimenti. Premere il pulsante TIME/MENU (TEMPO/MENU) per confermare. 175 | LAURUS LMWE208... -
Page 176: Manutenzione E Pulizia
Rimuovere gli odori dall’apparecchio miscelando una tazza d’acqua con il succo e la scorza di un limone in una ciotola adatta al microonde. Attivare il microonde per 5 minuti. Strofinare l’apparecchio a fondo e asciugare con un panno morbido. 176 | LAURUS LMWE208... -
Page 177: Risoluzione Dei Problemi
Quando l’apparecchio viene o dell’odore. fumi e odori causati dalla utilizzato per la prima volta combustione dell’olio potrebbe generare del fumo lubrificante. e un certo odore. È normale. Dopo un certo periodo di utilizzo questo fenomeno cessa. 177 | LAURUS LMWE208... -
Page 178: Smontaggio E Smaltimento
Il simbolo riportato sulla confezione esterna indica che l’imballaggio è realizzato in cartone (PAP). L‘apparecchio acquistato è conforme alla Direttiva UE RoHS (2011/65/EU). Non contiene materiali pericolosi o proibiti specificati nella Direttiva. 178 | LAURUS LMWE208... -
Page 179: Garanzia
• Uso di forza esterna • Manutenzione inadeguata • Mancata osservanza delle istruzioni d’uso • Danni causati da fulmini Distribuito da: VESTEL Germany GmbH Parkring 6 (Business Campus) 85748 Garching b. München Germania www.vestel-germany.de 179 | LAURUS LMWE208... - Page 180 5.8 Hur man kokar i flera steg 5.9 Hur man förinställer mikrovågsugnen till fördröjd start 5.10 Hur man använder barnlåset 5.11 Hur man kokar matvaror automatiskt 6 Underhåll och rengöring 7 Felsökning 8 Demontering och bortskaffning 9 Garanti 180 | LAURUS LMWE208...
-
Page 181: Introduktion
Om du har frågor, behöver ytterligare information eller önskar beställa fler kopior av dessa installations- och handhavandeanvisningar, var god kontakta: VESTEL Germany GmbH Parkring 6 (Business Campus) 85748 Garching b. München Tyskland +49 89 21129 555 +49 89 55295-2000 weisseware@kundendienst.email www.vestel-germany.de 181 | LAURUS LMWE208... -
Page 182: Avsedd Användning
ångor; • användning utomhus; • torkning av matvaror eller kläder och värmning av värmedynor, tofflor, tvättsvampar, fuktiga trasor och liknande produkter. Alla andra användningar än de som beskrivs i denna bruksanvisning anses vara olämpliga användningar. 182 | LAURUS LMWE208... -
Page 183: I Denna Bruksanvisning Använda Säkerhetssymboler
Denna symbol används för att markera Denna symbol används för att markera en potentiellt farlig situation som, om en situation som, om den inte undviks, den inte undviks, kan resultera i dödsfall kan resultera i skada på apparaten. eller svåra personskador. 183 | LAURUS LMWE208... -
Page 184: Beskrivning Av Mikrovågsugnen
Beskrivning av mikrovågsugnen Produktens delar Ugnsfönster Glasbricka Rullring Axel Vågledare Kontrollpanel Dörrens frigöringsknapp Dörrens säkerhetslåssystem 184 | LAURUS LMWE208... -
Page 185: Kontrollpanel
Används för att ställa in tiden. STOP/CANCEL (STOPP/AVBRYT) Används för att pausera en kokning, upphäva alla inställningar och ställa in barnlåsprogram. TIME/MENU (TID/MENY) Används för att ställa in tid, starta apparaten, ställa in snabbstartsprogram eller välja automatiska kokmenyer. 185 | LAURUS LMWE208... -
Page 186: Tekniska Data
Stickkontakt typ Schuko Ytterdimensioner 390 x 595 x 330 mm Ugnsskåpets dimensioner 198 x 315 x 297 mm Ugnens volym 20 liter Vikt Cirka 10,5 kg Drifttemperatur –10 ºC till + 40 ºC Relativ fuktighet 10 % - 95 % RH Apparat typ inbyggnad 186 | LAURUS LMWE208... -
Page 187: Säkerhetsanvisningar
är nedsatt eller när du är påverkad av droger, alkohol eller mediciner. Även ett ögonblicks ouppmärksamhet kan leda till allvarliga olyckor och skador i samband med användning av elektrisk utrustning. 187 | LAURUS LMWE208... - Page 188 Skydda nätsladden från att skadas, klämmas eller böjas, och placera den på ett sådant sätt att inga personer riskerar att snubbla över den. Det är särskilt viktigt att säkerställa att stickkontakten och den punkt där sladden kommer ut ur apparaten inte skadas. 188 | LAURUS LMWE208...
- Page 189 Risk för brand! I händelse av rökutveckling, stäng av apparaten, dra stickkontakten ur eluttaget och håll dörren stängd för att kväva lågorna. • Risk för brand! Använd inte ugnsskåpet som förvaringsutrymme. Lämna inte kvar pappersprodukter, köksredskap eller matvaror i ugnsskåpet när ugnen inte används. 189 | LAURUS LMWE208...
- Page 190 Apparaten ska kopplas bort från kraftförsörjningen efter varje användning för att säkerställa att den inte utgör en risk för människor och sällskapsdjur. • Håll alltid i kontakten, inte i själva sladden. Vidrör aldrig en nätkontakt med våta händer. 190 | LAURUS LMWE208...
- Page 191 Försök inte öppna, modifiera eller reparera apparaten. Utsätt inte apparaten för fall, slag, stötar eller högt tryck. • Ändringar på apparaten och tekniska modifieringar är inte tillåtna. • Om nätsladden är skadad måste den bytas av en kvalificerad elektriker. Följ alla lokala bestämmelser. 191 | LAURUS LMWE208...
-
Page 192: Installation
• 1 st. frontram • 4 st. skruvar 4 x 10 mm • 4 st. fötter • 2 x monteringsfäste Hur man installerar apparaten Att installera apparaten: Säkerställ att allt emballagematerial har avlägsnats från dörrens insida. 192 | LAURUS LMWE208... - Page 193 VARNING! Om skada påträffas, använd inte apparaten och kontakta kvalificerad servicepersonal. Tillverka ett skåp med dimensioner enligt nedanstående illustration. OBSERVERA Säkerställ att det finns ett ventilationsutrymme enligt illustrationen. Fäst de fyra fötterna på apparatens undersida. 193 | LAURUS LMWE208 4×8mm*4...
- Page 194 Fäst frontramen med de fyra skruvarna 4 x 10 mm på apparaten. OBSERVERA Säkerställ att apparatens frontpanel och frontramens framsida är i samma plan. Ordet “TOP” är märkt på frontramens baksida och anger ramens övre sida. 4×10mm*4 Samma plan 194 | LAURUS LMWE208...
- Page 195 är minst 20 cm fritt utrymme ovanför apparatens övre yta och 5 cm på båda sidor för att tillåta erforderligt luftflöde. det finns utrymme för ventilation på frontramens alla sidor. 195 | LAURUS LMWE208...
- Page 196 Fäst apparaten i skåpet med de fyra skruvarna 3 x 25 mm. 3×25mm*4 9a) Monteringsalternativ med en monteringsbygel med fyra 3x25mm skruvar. 196 | LAURUS LMWE208...
- Page 197 Displayen kommer att visa och ”1:00”. Se Hur man ställer in tiden angående tidens inställning på apparaten. 11. Säkerställ att nätsladden inte ligger under ugnen eller över heta eller vassa ytor. 197 | LAURUS LMWE208...
-
Page 198: Att Använda Apparaten
Vänd alltid matvarorna en gång under kokningen. Detta bidrar till att påskynda kokning av matvaror såsom kyckling, hamburgare och stora bitar såsom stekar. • Arrangera om matvaror såsom köttbullar halvvägs genom kokningen, både överst till längst er och från fatets mitt till dess utsida. 198 | LAURUS LMWE208... -
Page 199: Hur Man Använder Kokkärl
Använd inte apparaten utan glasbrickan, rullringen och axeln korrekt installerade. • Nedanstående lista är en allmän översikt till hjälp att välja korrekta redskap. KOKKÄRL MIKROVÅG Värmetåligt glas Icke värmetåligt glas Värmetålig keramik Mikrovågssäkert plastfat Hushållspapper Metallbricka Metallställning Aluminiumfolie och behållare av folie 199 | LAURUS LMWE208... -
Page 200: Hur Man Ställer In Tiden
60 % 4 gånger 40 % 5 gånger 20 % 6 gånger Vrid vredet TIME/MENU (TID/MENY) medurs för att ställa in koktiden. OBSERVERA Längsta möjliga tid är 95 minuter. Tryck på knappen TIME/MENU (TID/MENY) för att starta. 200 | LAURUS LMWE208... -
Page 201: Hur Man Använder Snabbstartsfunktionen
Tryck på knappen MENU/TIME (MENY/TID) för att starta. OBSERVERA Apparaten kommer att pausera för att påminna om att vända matvarorna under upptiningsprocessen. När du har vänt matvarorna, tryck på knappen MENU/TIME (MENY/TID) för att fortsätta. 201 | LAURUS LMWE208... -
Page 202: Hur Man Tinar Upp Matvaror (Snabbupptining)
Förinställningsfunktionen möjliggör att apparaten startar vid en senare tidpunkt. OBSERVERA Snabbstart kan inte ställas in i förinställningsläget. Att förinställa apparaten: Säkerställ innan denna funktion används att tiden är korrekt inställd. Ställ in ett kokningsprogram. OBSERVERA Tryck inte på knappen MENU/TIME (MENY/TID). 202 | LAURUS LMWE208... -
Page 203: 5.10 Hur Man Använder Barnlåset
AVBRYT) intryckt i tre sekunder tills du hör en ljudsignal. Apparaten kan inte användas när barnlåsfunktionen är aktiverad. Att upphäva barnlåset: • I läge barnlås, tryck på och håll knappen STOP/CANCEL (STOPP/AVBRYT) intryckt i tre sekunder tills du hör en ljudsignal. 203 | LAURUS LMWE208... -
Page 204: 5.11 Hur Man Kokar Matvaror Automatiskt
I standby-läge, vrid vredet TIME/MENU (TID/MENY) moturs för att välja matvarans kod. Tryck upprepade gånger på knappen WEIGHT ADJUST (VIKTJUSTERING) för att välja matvarornas vikt eller antalet portioner. Tryck på knappen TIME/MENU (TID/MENY) för att bekräfta. 204 | LAURUS LMWE208... -
Page 205: Underhåll Och Rengöring
Avlägsna lukter från din apparat genom att blanda en kopp vatten med saften och skalet från en citron i en mikrovågssäker skål. Koka i 5 minuter. Torka apparaten noga och torr med en mjuk trasa. 205 | LAURUS LMWE208... -
Page 206: Felsökning
Apparaten alstrar När apparaten används ångor och lukt när den första gången kan lätt smörjande oljan bränns rök alstras och en svag bort. lukt förnimmas. Detta är normalt. Detta fenomen kommer att upphöra efter en tids användning. 206 | LAURUS LMWE208... -
Page 207: Demontering Och Bortskaffning
Symbolen på ytteremballaget anger att det är tillverkat av PAP (papp). Produkten du har köpt gäller under EU RoHS-direktivet (2011/65/EU). Den innehåller inga av de farliga eller förbjudna material som anges i direktiven. 207 | LAURUS LMWE208... -
Page 208: Garanti
• Användning av extern kraft • Felaktigt underhåll • Underlåtenhet att efterleva handhavandeanvisningarna • Skada till följd av blixtnedslag Distribueras av: VESTEL Germany GmbH Parkring 6 (Business Campus) 85748 Garching b. München Tyskland www.vestel-germany.de 208 | LAURUS LMWE208... - Page 209 209 | LAURUS LMWE208...
- Page 210 210 | LAURUS LMWE208...
- Page 211 211 | LAURUS LMWE208...
- Page 212 VESTEL-GERMANY.DE...
Need help?
Do you have a question about the LMWE208 and is the answer not in the manual?
Questions and answers