Table of Contents
Advertisement
Available languages
Available languages
Quick Links
Safety Instructions
. . . . . . . . . . .2, 3
Operating Instructions
Control knob models . . . . . . . . .6, 7
Touch pad models . . . . . . . . . . . .4, 5
Care and Cleaning
Air Filter . . . . . . . . . . . . . . . . . . . . . .8
Front Grille and Case . . . . . . . . . . .8
Outdoor Coils . . . . . . . . . . . . . . . . .8
. . . . . .14, 15
Normal Operating Sounds . . . . . .15
Consumer Support
Consumer Support . . . . . . . . . . . .18
Warranty . . . . . . . . . . . . . . . . . . . . .17
Write the model and serial numbers here:
Model # __________________________
Serial # __________________________
Find these numbers on a label on the
side of the air conditioner.
ge.com
. . . . .9-13
Owner's Manual and
Installation Instructions
AGH06
3828A21031D
49-7520
11-05 JR
Advertisement
Chapters
Table of Contents

Related Manuals for GE AGH06LJ


Summary of Contents for GE AGH06LJ
-
Page 1: Table Of Contents
Safety Instructions ...2, 3 Owner’s Manual and Installation Instructions Operating Instructions Control knob models ..6, 7 AGH06 Touch pad models ... .4, 5 Care and Cleaning Air Filter . - Page 2 Turn the unit OFF and unplug your air purpose as described in this Owner’s conditioner before cleaning. Manual. GE does not support any servicing of the air This air conditioner must be properly conditioner. We strongly recommend that installed in accordance with the Installation you do not attempt to service the air Instructions before it is used.
- Page 3 WARNING! USE OF EXTENSION CORDS— 115-Volt models only Because of potential safety hazards under certain conditions, we strongly recommend against the use of an extension cord. However, if you must use an extension cord, it is absolutely necessary that it be a UL-listed,...
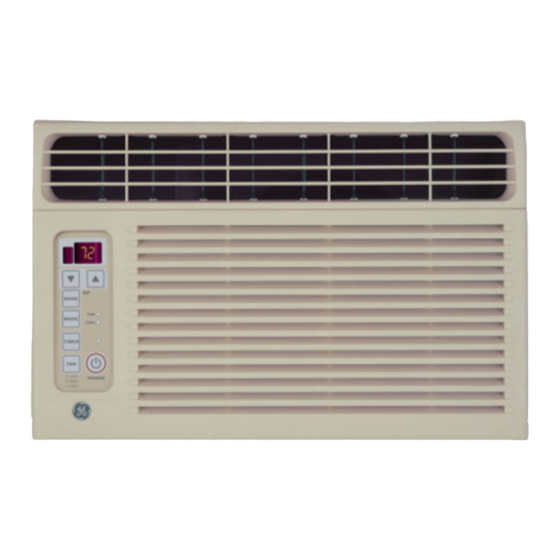
- Page 4 About the controls on the air conditioner—models with touch pads. Features and appearance will vary. Energy Saver on Fan on Cool on Timer on Air Conditioner Controls Remote Control Controls OFF—The fan runs all the time, while the ON/OFF Pad compressor cycles on and off.
- Page 5 Lights next to the touch pads on the air conditioner control panel indicate the selected settings. Power Outage Recovery Feature In the case of a power outage or interruption, the unit will automatically re-start in the settings last used after the power is restored. If the TIMER feature was set, it will resume its countdown.
- Page 6 About the controls on the air conditioner—models with control knobs. Features and appearance will vary. COOL COOL COOL COOL COOL COOL MODE Your model will have one of the above type controls. TEMP Your model will have one of the above type controls. Controls Mode Control Temp Control...
- Page 7 Additional controls and important information. Air Direction Fingertip pressure on the louvers lets you control the air direction left, right, straight ahead or any combination of these directions.
-
Page 8: Air Filter
Care and cleaning of the air conditioner. Air Filter The air filter behind the front grille should be To remove (on some models): checked and cleaned at least every 30 days or Open the inlet grille downward by pulling out more often if necessary. -
Page 9: Installation Instructions
Installation Air Conditioner Instructions Questions? Call 800.GE.CARES (800.432.2737) or Visit our Website at: ge.com BEFORE YOU BEGIN ELECTRICAL REQUIREMENTS Read these instructions completely and Some models require a 115/120-volt a.c., carefully. 60 Hz grounded outlet protected with a 15-amp time delay fuse or circuit breaker. - Page 10 Installation Instructions PARTS INCLUDED Foam top window gasket (Appearance may vary) Window sash seal Top mounting rail Air conditioner Side accordion panels Type A (5) Type B (11) Support brackets (3) Security bracket (1)
- Page 11 Installation Instructions WINDOW REQUIREMENTS PREPARE THE WINDOW • These instructions are for a standard Cut the window sash seal to the window double-hung window. You will need to width and stick the adhesive side to the modify them for other types of windows. bottom of the sash.
- Page 12 Installation Instructions INSTALL THE SIDE ACCORDION INSTALL THE AIR CONDITIONER PANELS IN THE WINDOW Slide the left and right accordion panels Center the air conditioner in the window into the top and bottom mounting rails. with the bottom mounting rail between the window stool and the support brackets.
- Page 13 Installation Instructions INSTALL THE SECURITY BRACKET INSTALL A SUPPORT BRACKET AND THE FOAM TOP WINDOW Remove the lower front right corner screw GASKET from the side of the case and replace through the security bracket. Attach a support bracket with a Type B Attach the security bracket to the stool screw.
-
Page 14: Troubleshooting Tips
Troubleshooting Tips. Problem Possible Causes What To Do Air conditioner • Make sure the air conditioner plug is pushed completely The air conditioner does not start is unplugged. into the outlet. • Check the house fuse/circuit breaker box and replace The fuse is blown/circuit breaker is tripped. -
Page 15: Normal Operating Sounds
Normal Operating Sounds You may hear a pinging noise caused by water Water will collect in the base pan during high being picked up and thrown against the humidity or on rainy days. The water may condenser on rainy days or when the humidity overflow and drip from the outdoor side of is high. - Page 16 Notes.
- Page 17 GE Air Conditioner Warranty—One Year Limited Warranty. Staple your receipt here. Proof of the original purchase date is needed to make a warranty claim. For The Period Of: We Will Replace: One Year Replacement unit for any product which fails due to a defect in materials or workmanship.
-
Page 18: Consumer Support
Contact Us ge.com If you are not satisfied with the service you receive from GE, contact us on our Website with all the details including your phone number, or write to: General Manager, Customer Relations GE Appliances, Appliance Park... - Page 19 Instrucciones de seguridad ..2, 3 Manual del propietario e Instrucciones de Instalación Instrucciones de operación Controles–botones de control ..6, 7 AGH06 Controles–teclas de toque ..4, 5 Cuidado y limpieza Bobinas para exteriores .
- Page 20 Manual del propietario. GE no está no apoya que se le proporcione Este acondicionador de aire debe instalarse ningún servicio al acondicionador de aire. correctamente de acuerdo con las Vehementemente recomendamos que Instrucciones de instalación antes de su uso.
- Page 21 ¡ADVERTENCIA! USO DE CABLES DE EXTENSIÓN—Modelos de 115 voltios solamente Debido al potencial de riesgos de seguridad bajo ciertas condiciones, enérgicamente recomendamos contra el uso de cables de extensión. Sin embargo, si usted se ve en la necesidad de usar un cable eléctrico de extensión, es absolutamente necesario que el mismo esté...
- Page 22 Acerca de los controles en el acondicionador de aire— modelos con teclas de toque. Las funciones y el aspecto pueden variar. Energy Saver Encendido Ventilador Encendido Cool (Frío) Encendido Sincronizador Encendido Controles del acondicionador Control remoto de aire Controles — OFF (APAGADO) El ventilador funciona todo el ON/OFF (ENCENDIDO/APAGADO)
- Page 23 Las luces al lado de las teclas de toque en el panel de control del acondicionador de aire indicarán los ajustes seleccionados. Función de recuperación de pérdida de energía En caso de la pérdida de la energía o interrupción, la unidad reiniciará...
- Page 24 Acerca de los controles en el acondicionador de aire— modelos con botones de control. Las funciones y el aspecto pueden variar. COOL COOL COOL COOL COOL COOL CONTROLES DE MODO Su modelo tendrá uno de los tipos de control mostrados arriba. CONTROLES DE TEMPERATURA Su modelo tendrá...
- Page 25 Controles adicionales e información importante. Dirección del aire Haga presión con las puntas de sus dedos sobre las persianitas para cambiar la dirección del aire de derecha a izquierda y en dirección recta o en combinaciones de estas direcciones.
-
Page 26: Cuidado Y Limpieza
Cuidado y limpieza del acondicionador de aire. Filtro de aire El filtro de aire detrás de la rejilla frontal debe Para retirarlo (en algunos modelos): inspeccionarse y limpiarse por lo menos cada Abra la parrilla de entrada hacia abajo tirando 30 días o más a menudo si fuese necesario. -
Page 27: Instrucciones De Instalación
Instrucciones Acondicionador de instalación de aire ¿Preguntas? Llame 800.GE.CARES (800.432.2737) o Visite nuestra página en la red en: ge.com ANTES DE COMENZAR REQUISTIOS ELÉCTRICOS Lea estas instrucciones completa y Algunos modelos requieren cuidadosamente. tomacorrientes de 115/120 voltios de corriente alterna y 60 Hz conectados IMPORTANTE •... - Page 28 Instrucciones de instalación HERRAMIENTAS QUE NECESITARÁ Un destornillador de estrella Tijeras o cuchilla Nivel Un destornillador Lápiz Una regla o cinta métrica con hoja plana PARTES INCLUIDAS Empaque superior de (aparencia puede variar) Sello del marco espuma de la ventana de la ventana Riel de montaje superior...
- Page 29 Instrucciones de instalación REQUISITOS PARA LA VENTANA PREPARE LA VENTANA • Estas instrucciones son para una ventana Corte el sello del marco de la ventana a lo estándar de dos pliegues. Usted necesitará ancho de ésta y pegue la cinta adhesiva en modificar el proceso para otros tipos de la parte inferior del marco.
- Page 30 Instrucciones de instalación INSTALE LOS PANELES INSTALE EL ACONDICIONADOR LATERALES DE ACORDEON DE AIRE EN LA VENTANA Deslice los paneles de acordeón izquierdo Centre el acondicionador de aire en la y derecho en los rieles de montaje superior ventana con el riel de montaje inferior y inferior.
- Page 31 Instrucciones de instalación INSTALE EL SOPORTE DE INSTALE UN SOPORTE DE APOYO SEGURIDAD Y EL EMPAQUE SUPERIOR DE ESPUMA DE LA VENTANA Remueva el tornillo de la esquina inferior derecha del lado de la caja y reemplacelo Pegue un soporte con un tornillo tipo B. a través del soporte de seguridad.
-
Page 32: Solucionar Problemas
Solucionar problemas. Problema Causas posibles Qué hacer El acondicionador de aire • Cerciórese de que el acondicionador de aire está El acondicionador de aire no enciende está desconectado. enchufado totalmente en el tomacorriente. • Inspeccione los fusibles / caja de interruptores de la casa El fusible se disparó... -
Page 33: Sonidos Normales De Operación
Problema Causas posibles Qué hacer Se acumula agua en • Esto es normal por un corto período en áreas con poca La humedad removida del aire la bandeja y se drena hasta la bandeja. humedad; normal por un período de tiempo más postergado en áreas más húmedas. - Page 34 Notas.
-
Page 35: Garantía
Garantía de su acondicionador de aire—garantía limitada de un año. Grape aquí su recibo. Se requiere facilitar prueba de la fecha de compra original para hacer un reclamo de garantía. Por el período de: Nosotros reemplazaremos: Un año Unidad de reemplazo para cualquier producto que falle debido a defectos en los materiales o en A partir de la fecha el proceso de fabricación. -
Page 36: Servicio Al Consumidor
Póngase en contacto con nosotros ge.com Si no está satisfecho con el servicio que recibe de GE, póngase en contacto con nosotros en nuestra página Web indicando todos los detalles así como su número de teléfono o escríbanos a: General Manager, Customer Relations...
Need help?
Do you have a question about the AGH06LJ and is the answer not in the manual?
Questions and answers