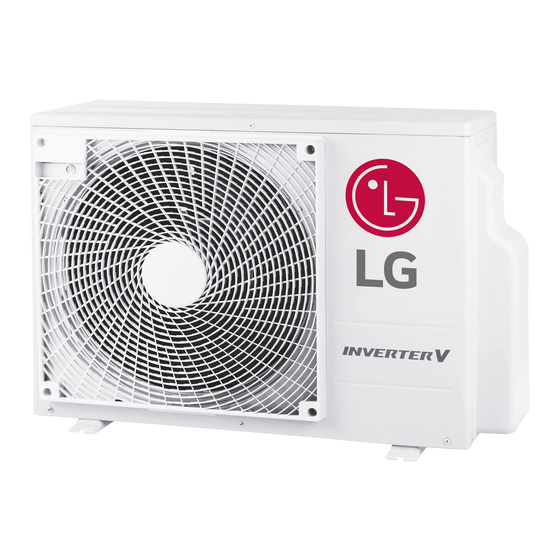
LG UUA1 Series Owner's Manual

LG UUA1 Series Owner's Manual

Single inverter outdoor unit

Advertisement

Quick Links

INSTALLATION MANUAL
AIR
CONDITIONER
Please read this installation manual completely before installing the product.
Installation work must be performed in accordance with the national wiring
standards by authorized personnel only.
Please retain this installation manual for future reference after reading it thoroughly.
Single Inverter Outdoor Unit
Original instruction (R32)
[Representative] LG Electronics Inc. EU Representative : LG Electronics European Shared Service Center B.V.
Krijgsman 1, 1186 DM Amstelveen, The Netherlands
[Manufacturer] LG Electronics Inc. Changwon 2nd factory 84, Wanam-ro, Seongsan-gu, Changwon-si,
Gyeongsangnam-do, KOREA
MFL71675701
Rev.00_101520
Copyright © 2019 - 2020 LG Electronics Inc. All Rights Reserved.
www.lg.com

Advertisement

Table of Contents
loading

Summary of Contents for LG UUA1 Series

  • Page 1 Please retain this installation manual for future reference after reading it thoroughly. Single Inverter Outdoor Unit Original instruction (R32) [Representative] LG Electronics Inc. EU Representative : LG Electronics European Shared Service Center B.V. Krijgsman 1, 1186 DM Amstelveen, The Netherlands [Manufacturer] LG Electronics Inc. Changwon 2nd factory 84, Wanam-ro, Seongsan-gu, Changwon-si, Gyeongsangnam-do, KOREA www.lg.com...
  • Page 2 MODEL DESIGNATION MODEL DESIGNATION Airborne Noise Emission The A-weighted sound pressure emitted by Product information this product is below 70 dB. ** The noise level can vary depending on the - Product Name : Air conditioner site. - Model Name : The figures quoted are emission level and are not necessarily safe working levels.
  • Page 3: Tips For Saving Energy

    TIPS FOR SAVING ENERGY TIPS FOR SAVING ENERGY Here are some tips that will help you minimize the power consumption when you use the air conditioner. You can use your air conditioner more efficiently by referring to the instructions below: •...
  • Page 4: Important Safety Instructions

    IMPORTANT SAFETY INSTRUCTIONS IMPORTANT SAFETY INSTRUCTIONS Read the precautions in this manual This appliance is filled with carefully before operating the unit. flammable refrigerant. (for R32) This symbol indicates that a service This symbol indicates that the person should be handling this Operation Manual should be read equipment with reference to the carefully.
  • Page 5 IMPORTANT SAFETY INSTRUCTIONS • Failure to carefully read and follow all instructions in this manual can result in equipment malfunction, property damage, personal injury and/or death. (for R32) • Compliance with national gas regulations shall be observed Installation • Do not use a defective or underrated circuit breaker. Use the correctly rated breaker and fuse.
  • Page 6 IMPORTANT SAFETY INSTRUCTIONS • Never install the outdoor unit on a moving base or a place from where it can fall down. The falling outdoor unit can cause damage or injury or even death of a person. • In outdoor unit the step-up capacitor supplies high voltage electricity to the electrical components.
  • Page 7 IMPORTANT SAFETY INSTRUCTIONS • The appliance shall be stored in a room without continuously operating ignition sources (for example: open flames, an operating gas appliance or an operating electric heater) • Do not use means to accelerate the defrosting process or to clean, other than those recommended by the manufacturer.
  • Page 8 IMPORTANT SAFETY INSTRUCTIONS • Do not place a heater or other heating appliances near the power cable. There is risk of fire and electric shock. • Do not allow water to run into electric parts. Install the unit away from water sources. There is risk of fire, failure of the product, or electric shock.
  • Page 9 IMPORTANT SAFETY INSTRUCTIONS • When flammable gas leaks, turn off the gas and open a window for ventilation before turning on the product. Do not use the telephone or turn switches on or off. There is risk of explosion or fire. •...
  • Page 10 IMPORTANT SAFETY INSTRUCTIONS • Any person who is involved with working on or breaking into a refrigerant circuit should hold a current valid certificate from an industry-accredited assessment authority, which authorizes their competence to handle refrigerants safely in accordance with an industry recognized assessment specification.
  • Page 11 IMPORTANT SAFETY INSTRUCTIONS • Always insert the filter securely after cleaning. Clean the filter every two weeks or more often if necessary. A dirty filter reduces the efficiency. • Do not insert hands or other objects through the air inlet or outlet while the product is operating.
  • Page 12 IMPORTANT SAFETY INSTRUCTIONS • If you eat the liquid from the batteries, brush your teeth and see doctor. Do not use the remote if the batteries have leaked. The chemicals in batteries could cause burns or other health hazards. • Do not let the air conditioner run for a long time when the humidity is very high and a door or a window is left open.
  • Page 13: Table Of Contents

    TABLE OF CONTENTS TABLE OF CONTENTS MODEL DESIGNATION TIPS FOR SAVING ENERGY IMPORTANT SAFETY INSTRUCTIONS INSTALLATION INSTALLATION OF OUTDOOR UNIT CONNECTING PIPES Preparation of Piping Connection of piping - Outdoor Forming the piping WIRING CONNECTION Electrical Wiring Connecting Cables between Indoor Unit and Outdoor Unit Connecting the cable to Outdoor Unit LEAKAGE TEST AND EVACUATION Preparation...
  • Page 14: Installation

    INSTALLATION INSTALLATION Installation Tools Figure Name Figure Name Screw driver Multi-meter Electric drill Hexagonal wrench Measuring tape, Knife Ammeter Hole core drill Gas-leak detector Thermometer, Spanner Level Torque wrench Flaring tool set more than 30cm more than 30cm...
  • Page 15: Installation Of Outdoor Unit

    INSTALLATION OF OUTDOOR UNIT INSTALLATION OF OUTDOOR UNIT CAUTION You need to select adequate installation location considering the following conditions, and make sure to acquire the consent of the Be very careful while carrying the user. product. • Do not have only one person carry Installation Places product if it is more than 20 kg.
  • Page 16 INSTALLATION OF OUTDOOR UNIT Piping length and the elevation • Single Operation 1) Standard Inverter / High Inverter Additona Pipe Size mm(inch) Length A(m) Elevation B(m) Capacity refrigerant (kBtu/h) Liquid Standard Max Standard Max (g/m) UUA1 9/12 Ø 9.52 (3/8) Ø...
  • Page 17 INSTALLATION OF OUTDOOR UNIT Minimum floor area(for R32) - The appliance shall be installed, operated and stored in a room with a floor area larger than the minimum area. - Use the graph of table to determine the minimum area. Amin (m Floor standing Wall mounted...
  • Page 18 INSTALLATION OF OUTDOOR UNIT • Synchro Operation Install the branch pipe so that pipe length and difference between high and low will not exceed below Spec. [Unit : m] Branch Pipe Length & Height Spec(MAX.) Total(L1+L2+L3+L4+L5) Main Pipe(L1) Branch Pipe (L2+L3+L4+L5) Each Indoor-Outdoor (H1) Remote...
  • Page 19 INSTALLATION OF OUTDOOR UNIT Synchro Combination table Possible combination of indoor units Synchro Trio Quartet IDU : INDOOR UNIT ODU : OUTDOOR UNIT BD : BRANACH DISTRIBUTOR UNIT REMO : WIRED REMOTE REMO REMO REMO CONTROLLER MODEL Cassette Duct Cassette Duct Cassette Duct...
  • Page 20 INSTALLATION OF OUTDOOR UNIT Outdoor Unit PCB Setting Procedure For Simultaneous Operation System DIP_SW Setting Set the DIP_SW as below Table (Ⓐ) Auto Addressing Method Addressing work assigns address to each indoor unit. When firstly installing product or replacing the indoor unit PCB. Auto Addressing work should be done for simultaneous operation.
  • Page 21: Connecting Pipes

    CONNECTING PIPES CONNECTING PIPES Preparation of Piping - Main cause of gas leakage is defect in flaring Copper Slanted Uneven Rough work. Carry out correct flaring work in the tube 90° following procedure. - Use the de-oxidised copper as piping materials to install.
  • Page 22: Connection Of Piping - Outdoor

    CONNECTING PIPES Connection of piping - Outdoor Preventing foreign objects from entering (Figure 2) - Align the center of the piping and sufficiently - Plug the pipe through-holes with putty or tighten the flare nut by hand. insulation material(procured locally)to stop up - Finally, tighten the flare nut with torque all gaps, as shown in the figure 2.
  • Page 23: Forming The Piping

    CONNECTING PIPES Forming the piping In cases where the Outdoor unit is installed above the Indoor unit perform the following. Form the piping by wrapping the connecting Tape the piping and connecting cable from portion of the indoor unit with insulation down to up.
  • Page 24: Wiring Connection

    WIRING CONNECTION WIRING CONNECTION Electrical Wiring ELCB Main Perform the electrical wiring work according power source Switch box to the electrical wiring connection. - All wiring must comply with local Outdoor requirements. Indoor - Select a power source that is capable of supplying the current required by the air conditioner.
  • Page 25 WIRING CONNECTION 1(L) 2(N) 3 1(L) 2(N) 3 CN-REMO Terminals on the indoor unit 4 Simultaneous Terminals on the indoor unit 3 1(L) 2(N) 3 1(L) 2(N) 3 CN-REMO Operation Unit 2,3,4 CN-REMO Terminals on the indoor unit 2 1(L) 2(N) 3 1(L) 2(N) 3...
  • Page 26 WIRING CONNECTION Precautions when laying power wiring Use round pressure terminals for connections to the power terminal block. Power wire Round pressure terminal When none are available, follow the instructions below. - Do not connect wiring of different thicknesses to the power terminal block. (Slack in the power wiring may cause abnormal heat.) - When connecting wiring which is the same thickness, do as shown in the figure below.
  • Page 27: Connecting The Cable To Outdoor Unit

    WIRING CONNECTION Connecting the cable to Outdoor Unit Remove the side panel for wiring connection. Use the cord clamp to fix the cord. Earthing work - Case 1 : Terminal block of Outdoor Unit have mark. Connect the cable of diameter 1.6 mm or more to the earthing terminal provided in the control box and do earthing.
  • Page 28: Leakage Test And Evacuation

    LEAKAGE TEST AND EVACUATION LEAKAGE TEST AND EVACUATION Air and moisture remaining in the refrigerant system have undesirable effects as indicated below. - Pressure in the system rises. - Operating current rises. - Cooling (or heating) efficiency drops. - Moisture in the refrigerant circuit may freeze and block capillary tubing. - Water may lead to corrosion of parts in the refrigeration system.
  • Page 29: Evacuation

    LEAKAGE TEST AND EVACUATION Indoor unit Do a leakage test of all joints of the tubing (both Indoor unit and outdoor unit) and Outdoor unit both gas and liquid side service valves. Bubbles indicate a leak. Be sure to wipe off the soap with a clean cloth.
  • Page 30: Test Running

    TEST RUNNING TEST RUNNING Precautions In Test Running - The initial power supply must provide at least 90 % of the rated voltage. Otherwise, the air conditioner should not be operated. CAUTION • For test run, carry out the cooling operation firstly even during heating season. If heating operation is carried out firstly, it leads to the trouble of compressor.
  • Page 31 TEST RUNNING CAUTION After the confirmation of the above conditions, prepare the wiring as follows: 1 Never fail to have an individual power specialized for the air conditioner. As for the method of wiring, be guided by the circuit diagram pasted on the inside of control box cover.
  • Page 32: Installation Pi485

    INSTALLATION PI485 INSTALLATION PI485 Fix the PI485 PCB as shown in below images. For detailed installation method refer to PI485 Installation Manual. UUA1 UUB1 UUC1 UUD1 / UUD3...
  • Page 33: Function

    FUNCTION FUNCTION DIP S/W Setting If you set the DIP Switch when power is on, the change in setting is not applicable. The changing setting is enabled only when Power is reset. DIP Switch Function Normal Operation (No Function) Pump Down Saving Power Consumption (Step 1) Saving Power Consumption (Step 2) Mode Lock (Cooling)
  • Page 34 FUNCTION DIP Switch Function 1 2 3 4 5 6 Synchro_Duo Synchro_Trio Synchro_Quartet WARNING When you set the DIP switch, you should turn off the circuit breaker or shut the power source of the product down. CAUTION • Unless the applicable DIP switch is set properly, the product may not work. •...
  • Page 35: Pump Down

    FUNCTION Pump Down Setting Procedure Set the DIP Switch as follow after shutting the power source down. UUB1 / UUC1 UUD1 / UUD3 Reset the power. Red LED and Green LED of PCB lights during work. (The indoor unit is operated by force.) If operation is done, Red LED will be turned off.
  • Page 36: Saving Power Consumption

    FUNCTION Saving Power Consumption Saving Power Consumption operation is the function which enables efficient operation by lowering the maximum power consumption value. Power consumption Normal and current Time Setting Procedure Set the DIP Switch as follow after shutting the power source down. UUB1 / UUC1 UUB1 / UUC1 UUD1 / UUD3...
  • Page 37: Night Quiet Mode

    FUNCTION UUB1 / UUC1 UUB1 / UUC1 UUD1 / UUD3 UUD1 / UUD3 Saving Power Consumption (step 2) Saving Power Consumption (step 2) + Mode Lock (Cooling) + Mode Lock (Heating) Night Quiet Mode Night Quiet Mode operation lowers the noise level of the outdoor unit by changing the Compressor’s frequency and fan speed.
  • Page 38: Mode Lock

    FUNCTION Night Quiet Mode with Mode Lock. UUB1 / UUC1 UUB1 / UUC1 UUD1 / UUD3 UUD1 / UUD3 Mode Lock (Cooling) Mode Lock (Cooling) + Night Quiet Mode (step 1) + Night Quiet Mode (step 2) CAUTION • If compressor’s frequency and fan speed are down, the cooling capacity may decrease accordingly.
  • Page 39 FUNCTION Mode Lock with Night Quiet Mode UUB1 / UUC1 UUB1 / UUC1 UUD1 / UUD3 UUD1 / UUD3 Mode Lock (Cooling) Mode Lock (Cooling) + Night Quiet Mode (step 1) + Night Quiet Mode (step 2) Saving Power Consumption with Mode Lock. UUB1 / UUC1 UUB1 / UUC1 UUD1 / UUD3...
  • Page 40: Installation Guide At The Seaside

    INSTALLATION GUIDE AT THE SEASIDE INSTALLATION GUIDE In case, to install the outdoor unit on the seaside, set up a windbreak not to be exposed to the sea wind AT THE SEASIDE CAUTION Windbreak • Air conditioners should not be installed Sea wind in areas where corrosive gases, such as acid or alkaline gas, are produced.
  • Page 41: Seasonal Wind And Cautions In Winter

    SEASONAL WIND AND CAUTIONS IN WINTER SEASONAL WIND AND CAUTIONS IN WINTER - Sufficient measures are required in a snow area or severe cold area in winter so that product can operate well. - Get ready for seasonal wind or snow in winter even in other areas.
  • Page 43 • The information for Eco design is available on the following free access website. https://www.lg.com/global/support/cedoc/cedoc...

This manual is also suitable for:

Uub1 seriesUuc1 seriesUud1 seriesUud3 series

Table of Contents