Table of Contents
Advertisement
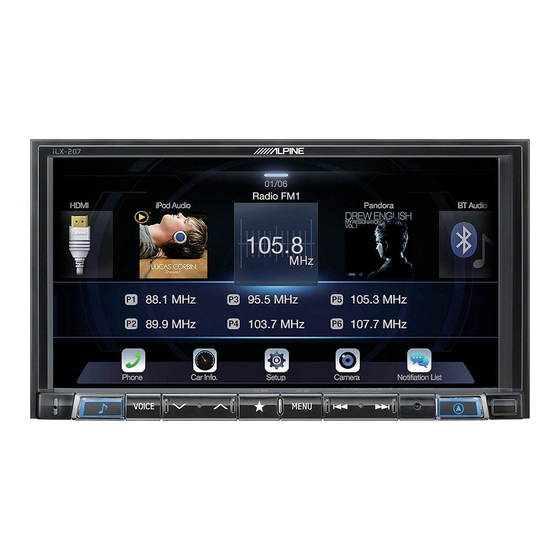
9-INCH AUDIO/VIDEO RECEIVER
7-INCH AUDIO/VIDEO RECEIVER
• OWNER'S MANUAL
Please read before using this equipment.
• MODE D'EMPLOI
Veuillez lire avant d'utiliser cet appareil.
Thank you for purchasing this Alpine product. Please take a moment to protect your purchase by
registering your product now at the following address: www.alpine-usa.com/registration.
You will be informed of product and software updates (if applicable), special promotions, news
about Alpine.
Merci d'avoir acheté ce produit Alpine. Nous vous invitons à consacrer un moment à la protection
de votre achat en enregistrant votre produit dès maintenant à l'adresse suivante :
www.alpine-usa.com/registration.
Vous serez tenu informé des mises à jour des produits et des logiciels (le cas échéant), des
promotions spéciales et de l'actualité d'Alpine.
Gracias por adquirir este producto Alpine. Con solo unos pocos pasos podrá proteger su producto,
registrándolo a través de la siguiente dirección: www.alpine-usa.com/registration.
Recibirá información sobre nuevos productos y software, promociones especiales y novedades
sobre Alpine.
ALPINE ELECTRONICS OF AMERICA, INC.
19145 Gramercy Place, Torrance,
California 90501, U.S.A.
Phone 1-800-ALPINE-1 (1-800-257-4631)
i209
iLX-207
• MANUAL DE OPERACIÓN
Léalo antes de utilizar este equipo.
EN
FR
ES
Designed by ALPINE Japan
68-34732Z13-C
Advertisement
Table of Contents

Related Manuals for Alpine iLX-207


Summary of Contents for Alpine iLX-207
- Page 1 • MODE D’EMPLOI Veuillez lire avant d’utiliser cet appareil. Thank you for purchasing this Alpine product. Please take a moment to protect your purchase by registering your product now at the following address: www.alpine-usa.com/registration. You will be informed of product and software updates (if applicable), special promotions, news about Alpine.
- Page 2 Resistant to Dust and Fresh Water (i209 Only) IP53 rating Resistant to Dust and Fresh Water. Rated IP53 under IEC standard 60529. This product has been tested in a controlled, laboratory environment with an IP (Ingress Protection) rating of IP53 under IEC standard 60529, which is an international standard for measuring the level of protection from dust and fresh water.
-
Page 3: Table Of Contents
Turning the System On ........15 Book ............... 31 Initial System Start-Up ........15 Selecting the Output Speaker ......31 Adjusting the Volume ......... 15 Setting the Microphone Select (iLX-207 only) ............... 31 Lowering Volume Quickly ......... 15 Touch Screen Operation ........16 General Setup Switching Sources .......... - Page 4 Screen/Lighting Customize ......39 Factory System Setup .......... 47 Switching the Display Color ......39 Setting the Source Category ......48 Switching the Illumination Color (iLX-207 Setting the Default Vehicle Screen ....48 only) ............... 39 Setting the Maestro Module ......48 Setting the Text Scroll ........
- Page 5 Selecting the Receivable Program Type (RBDS SiriusXM Satellite Radio Operation FM Radio mode only) ........53 (Optional) Forced Analog Mode .......... 53 Receiving Channels with the SiriusXM Displaying Radio Text (RBDS FM Radio mode Tuner ..............65 only) ..............53 Tuning Channels by Category ......
- Page 6 Stopping Playback ..........73 Bluetooth Audio Fast-forwarding/Fast-reversing ...... 73 Playback ..............82 Finding the Beginnings of Chapters/Tracks/ Repeat Play ............82 Files ..............73 Random Play ............82 Forward/Reverse frame-by-frame Search Function ........... 82 Playback ............74 Connecting a Bluetooth Device ......83 Repeat Playback ..........
- Page 7 In Case of Difficulty ..........95 If this Message Appears ........96 Specifications ............98 LIMITED WARRANTY...
-
Page 8: Operating Instructions
LISTENING AT LOUD manner which will hinder safe operation of your vehicle. VOLUME LEVELS IN A CAR MAY ALSO CAUSE HEARING • This product may be used in conjunction with the Alpine KAC-001 DAMAGE. External Accessory Control module, which works with various accessory products manufactured by third parties. - Page 9 MINIMIZE DISPLAY VIEWING WHILE DRIVING. DO NOT INSTALL IN LOCATIONS WHICH MIGHT HINDER VEHICLE Viewing the display may distract the driver from looking ahead of OPERATION, SUCH AS THE STEERING WHEEL OR GEARSHIFT. the vehicle and cause an accident. Doing so may obstruct forward vision or hamper movement etc. and results in serious accident.
-
Page 10: Caution
If you have problems, do not attempt to repair the unit yourself. The wiring and installation of this unit requires special technical Return it to your Alpine dealer or the nearest Alpine Service Station skill and experience. To ensure safety, always contact the dealer for servicing. - Page 11 Microsoft Corporation in the United States and/or other countries. Alpine accepts no responsibility for lost data, etc., even if data, etc., is • Apple, iPhone, iPod, iPod nano, iPod touch, and Siri are lost while using this product.
-
Page 12: Features
Features The screen design used in the Owner’s Manual may differ from the actual screen. Favorite Function Frequently used functions can be easily recalled. For details, see “Favorite Function” (page 23). Favorite screen example • Frequently used functions and useful functions can be customized for your convenience. •... -
Page 13: Switching The Audio Sources Screen To A Dedicated Screen
Switching the Audio Sources Screen to a Dedicated Screen You can switch the Audio Sources screen to a dedicated screen by touching the icon on one of the four edges of the screen, or by swiping vertically or horizontally. For details on how to swipe the screen, see “Touch Screen Operation” (page 16). •... -
Page 14: Getting Started
For iLX-207 Recalls the Camera screen. Controllable with Remote Control This unit can be controlled with an optional Alpine remote control. For details, consult your Alpine dealer. Point the optional remote control transmitter at the remote control sensor. About the button descriptions used in this Owner’s... -
Page 15: Turning Power On Or Off
• When turned on, the system displays the last screen that was displayed before the ignition key was turned off. For example, if For iLX-207 the unit is in radio mode when ignition is turned off, it will remain in radio mode when ignition is turned back on. -
Page 16: Touch Screen Operation
Touch Screen Operation Switching Sources You can operate the system by using the touch panel on the screen. Press the (AUDIO) button to change the source. • Be sure to touch the onscreen button lightly with the pad of your finger Switching sources using the (AUDIO) button to avoid scratching the display. -
Page 17: Operating The Function Button On The Audio/Video Main Screen
Operating the Function Button on the Audio/ About Basic Operation for List Screen Video Main Screen Basic operations on the Setup list screen and the Search list screen. How to display on the list screen differs depending on the selected item. Using the Function button on the Audio/Visual main screen. -
Page 18: About The Shortcut Setup Screen
Sound Setup Function About the Shortcut Setup Screen Tone Adjustment mode Displaying the Sound Setup screen, or the Shortcut Setup screen of the Rear Seat Entertainment System screen. Touch [ ] or swipe downward in the Audio source screen. The Sound Setup screen or the Rear Seat Entertainment System BASS ENGINE SQ mode Setup Screen is displayed. -
Page 19: Rear Seat Entertainment Function
Adjusting Bass Level/Treble Level Rear Seat Entertainment Function Bass Level and Treble Level can be set independently set for Front and Rear speakers by touching [Front] or [Rear]. The Rear Seat Entertainment function independently routes different sources to the front and the rear side of the car. For example, while Setting item: listening to the radio or other audio sources in the front, HDMI can be Bass / Treble... -
Page 20: About The Menu Screen
*3 Use to display the Facebook Notification List on the connected smartphone via this unit. (page 27) Displays when Alpine TuneIt App is set to “USB (iPhone)” or “Bluetooth (Android), ” and when a smartphone with Alpine TuneIt App installed is connected. (page 26) *4 Displays the Android Auto screen, displayed when an Android Smartphone installed Android Auto App is connected. -
Page 21: About The Indicator Display
About the Indicator Display Opening screen Customization The Indicator Bar at the bottom of the screen displays various types of You can set a BMP image that is stored on a USB flash drive as the information, like the current time. opening screen. -
Page 22: How To Input Characters And Numbers (Keypad)
How to Input Characters and Numbers (Keypad) The displayed screens and procedures may vary slightly depending on the function used, but the basic input method is the same. Input screen area. Cursor position alteration switch Cancel Keypad mode finishes. (Delete) Returns to the previous character and erases it. -
Page 23: Favorite Function
Favorite Function Editing the Favorite Screen You cannot edit the Favorites screen while driving. Using the Favorite Function Your vehicle must be parked with the ignition key in the ACC or ON position. For details, see “To display the Setup Menu screen” in “Setup Operation”... -
Page 24: Changing Item Names
Audio/Visual Changing Icons (only the Shortcut Dialing [Radio]* / [USB/iPod] / [Factory Media (USB/iPod)]* / [HDMI/DVD] / icons) 2, 3 [Pandora] / [Bluetooth Pandora] / [SiriusXM]* or [Factory SiriusXM]* [AUX]* / [Bluetooth Audio] / [Apple CarPlay]* / [Android Auto]* You can change the icons of Shortcut Dialing category. The following example explains how to change the Shortcut Dialing *1 You can choose the frequency from Preset 1 - 12, registered into each icon. -
Page 25: Deleting Items
Deleting Items When deleting a selected item Touch the checkbox at the left of the item you want to delete and place a check ( ) in it. Touch [ ] (Delete). The selected item will be deleted. When deleting all items Touch [ ] (Delete All). -
Page 26: Applying Alpine Tuneit App
Close button Smartphone is not in a service area or receives no signal. Close the notification screen. • Turn Apple CarPlay to Off before using Alpine TuneIt App. Refer to “Apple CarPlay Setup” (page 44). Touch the desired button to operate. - Page 27 Displaying Facebook Screen During Notification incoming or Notification List screen, you can switch to Facebook screen. Facebook screen example Message content Poster’s photo Close button: Close the Facebook screen. Touch the poster’s picture and name to switch to the Facebook screen. The detailed information of Notification is displayed.
-
Page 28: Setup
Touch the required setting icon on the upper part of the Setup Setup main screen or swipe the list area vertically, then touch the setting item. Setting items: Wireless: See “Wireless (Bluetooth) Setup” (page 29). Setup Operation General: See “General Setup” (page 31). Source: See “Source Setup”... -
Page 29: Wireless (Bluetooth) Setup
Default Phone Book Format Phone Speaker Displaying Bluetooth Information Microphone Select (iLX-207 only) Make sure the “Bluetooth” setting is “On” ( *1 This setting is only available when “Bluetooth” is set to “On” ( You can display the Bluetooth device name and device address of this *2 Cannot be adjusted when an iPhone 5 or later/Android smartphone unit. -
Page 30: Hands-Free Device Primary/Secondary Setting
Touch [ ] (Audio), [ ] (Hands-free) or [ ] (Both) Hands-free Device Primary/Secondary Setting of the device you want to connect from the list. Make sure the “Bluetooth” setting is “On” ( ). See “Bluetooth Setup” Audio: Device is used as an Audio device. (page 29). -
Page 31: Changing The Character Code Of The Phone Book
• This option is not available when “External Audio Processor” (page 49) is set to On. Default Sound Settings Picture Quality Setting the Microphone Select (iLX-207 only) Video* Camera* You can select the built-in microphone or the supplied microphone as a Display/Key Hands-Free Microphone. -
Page 32: Sound Setup
*1 You can make this setting in the Sound Setup screen of the Shortcut Fad./Bal. screen Setup. For details, see “Sound Setup Function” (page 18). *2 You can also make the setting in the Bal./Fad. screen. For details on how to adjust, see “Setting the Balance/Fader/Rear Speaker/Subwoofer”... -
Page 33: Setting The Media Xpander (Mx Hd)
Setting the Media Xpander (MX HD) Equalizer Presets Media Xpander (MX HD) makes vocals or instruments sound distinct 10 typical equalizer settings are preset at the factory for a variety of regardless of the music source. The HD-Radio Technology (FM)/ musical source material. -
Page 34: Adjusting The Crossover Settings (X-Over)
Adjusting the Frequency Adjusting the Crossover Settings (X-Over) Touch [ ] or [ ] of “Frequency” to adjust the frequency of the selected band. Before performing the following procedures, see “About the Crossover” (page 36). Adjustable frequency bands: 20 Hz to 20 kHz (in 1/3 octave steps) Setting item: Band1: 20 Hz~100 Hz (63 Hz) -
Page 35: Adjusting The Time Correction (Tcr)
Adjusting the Time Correction (TCR) Setting the Volume for Each Source Before performing the following procedures, see “About Time Setting item: Source Volume Setup Radio / SiriusXM / Compressed Media* Correction” (page 37). 2, 3 iPod Music / AUX* / HDMI* / Bluetooth Audio / Factory Audio* Setting item: Apple Carplay*... -
Page 36: Adjusting The Ring Tone Level
Adjusting to a frequency range initialized. outside that recommended may cause damage to the speakers. For the recommended crossover frequencies of Alpine speakers, refer to the respective Owner’s Manual. We are not responsible for damage or malfunction of speakers caused by... -
Page 37: About Time Correction
Example 2. Listening Position: All Seats About Time Correction Adjust the time correction level of each speaker to almost the same level. The distance between the listener and the speakers in a car vary widely due to the complex speaker placement. This difference in the distances Sit in the listening position (driver’s seat, etc.) and from the speakers to the listener creates a shift in the sounds image and measure the distance (in meters) between your head and... -
Page 38: Picture Quality Setup
Adjusting Tint of Picture Picture Quality Setup Setting item: [Picture Quality] is selected on the General Setup Menu screen in step Tint Setting content: 1. See “General Setup” (page 31). R15 to G15 (Initial setting: 0) You can set up items related to an image. Adjust the Color from R15 to G15. -
Page 39: Display/Key Setup
Glass Blue / Glass Green / Glass Light Blue / Glass Red / Steel White / Steel screen. Green / Steel Light Blue / Steel Red The Screen/Lighting setup screen appears. Switching the Illumination Color (iLX-207 Setting item: only) Dimmer / Key Illumination Level / Screen Dimmer Level Setting the Brightness of the Backlighting You can choose the color of the Front Panel button from one of 7 colors. -
Page 40: General Setup
Name, and to initialize various settings. Displaying the Product Information You can view the version information of this product. Make note of this information and refer to it whenever you contact Alpine Tech Support or an Alpine-authorized dealer. Setting contents: Format settings Serial No. -
Page 41: Vehicle Setup
Source Setup Vehicle Setup [Source] is selected on the Setup main screen in step 3. See “Setup [Vehicle] is selected on the General Setup Menu screen in step 1. See “General Setup” (page 31). Operation” (page 28). Source Setup Menu screen Steering wheel Setting Set this item when an iPhone 5 or later/Android smartphone with Android Auto App is connected. -
Page 42: Radio Setup
Setting the Alert individually for an Artist/ Radio Setup Song/Favorite Team [Radio] is selected on the Source Setup Menu screen in step 1. See This menu option allows you to enable the Artist/Song/Team alert for “Source Setup” (page 41). individual Artists/Songs/Teams (On or Off) or to delete individual stored Artist/Song/Team alerts (Delete). -
Page 43: Setting The Favorite Sports Team Alerts
Touch the numeric keypad to input a 4-digit passcode. Setting the Favorite Sports Team Alerts The initial default 4-digit passcode is set to 0000. After entering the digit, it is displayed as “*” (asterisk). This menu option allows you to select your favorite teams, organized by •... -
Page 44: Aux Setup
AUX Setup HDMI Setup [AUX] is selected on the Source Setup Menu screen in step 1. See [HDMI] is selected on the Source Setup Menu screen in step 1. See “Source Setup” (page 41). “Source Setup” (page 41). You can set up the items related to the Auxiliary device. You can set the name of an external device connected via HDMI. -
Page 45: System Setup
*4 You can select this item only when Camera Select is “Rear. ” When Camera Select is set to “Off ” or “Other, ” you cannot select this *5 Set this setting after closing the Alpine TuneIt App. item. The following steps 1 to 3 are common to each “Setting... -
Page 46: Adjusting The Rear/Front/Side Camera Guide
Multi View compatible Front Camera/Rear Camera Front Camera screen example Touch [Back], [Panorama], [Corner], or [Top]. The view will change to the selected view. • [Back] will not appear for the Front camera. • For an explanation of video patterns, see the camera Owner’s Manual. Adjusting the Rear/Front/Side Camera Guide You can adjust the camera guide position. -
Page 47: Camera Interrupt Setting (Power Off Mode) (Rear Camera Only)
When Hitch Guide is set to On Setting Multi Camera to On/Off When connecting the optional Multi Camera Interface module, you can connect up to 3 cameras as Front Camera/Rear Camera/Side Camera. • When using the optional Multi Camera Interface module, select “Camera Selector”... -
Page 48: Setting The Source Category
Setting the Source Category Rear Seat Entertainment Setup You can set whether the following source icon in the Menu screen is [Rear Seat Entertainment] is selected on the System Setup Menu screen available. in step 1. See “System Setup” (page 45). Setting item: USB/iPod (Initial setting: Both) / SiriusXM (Initial setting: Aftermarket) Setting contents:... -
Page 49: External Accessories Setup
1. See “System Setup” (page 45). 1. See “System Setup” (page 45). Set Alpine TuneIt App to USB (iPhone) when an iPhone is connected, or set to Bluetooth (Android) when an Android Smartphone is paired. Setting the External Audio Processor Setting item: When using an external audio processor, set to “On”... -
Page 50: Apple Carplay (Optional)
Apple CarPlay Android Auto (Optional) (Optional) Apple CarPlay is a smarter, safer way to use your iPhone in the car. Apple CarPlay takes the things you want to do with your iPhone while What is Android Auto driving and puts them right on the unit. You can get directions, make calls, send and receive messages, and listen to music, all in a way that Android Auto is designed to make it easier to use apps from your phone allows you to stay focused on the road. -
Page 51: Radio/Hd Radio™/Rbds
Info area Radio/HD Radio™/ RBDS Station Info. mode: Program Type /Frequency and PS Name/Artist Name/Song RBDS Name/Album Name Radio Text mode: Frequency/ Radio Text The unit can receive HD Radio broadcasting signals based on digital • For details on switching the display of the Radio text, see radio broadcast standards, in addition to analog radio broadcasts using “Displaying Radio Text (RBDS FM Radio mode only)”... -
Page 52: Radio Basic Operation
Radio Basic Operation Presetting Stations Manually Tune in a desired radio station you wish to store in the Listening to the Radio preset memory by manual or automatic seek tuning. Touch the Preset number you want to store, for at least Press the (AUDIO) button to select radio mode. -
Page 53: Inputting Frequency Directly And Receiving The Radio Station
Inputting Frequency Directly and Receiving the Selecting the Receivable Program Type (RBDS Radio Station FM Radio mode only) You can input a frequency of the same band directly and receive the You can select and receive the currently receivable stations in the radio station. -
Page 54: Using Ballgame Mode (Hd Radio™ Mode Only)
Using Ballgame Mode (HD Radio™ Mode only) In live broadcast, such as sportscasts, etc., a time lag occurs between digital sound and analog sound. Therefore, when live broadcasts are received, a time lag between the real broadcast may occur and the unit can change to analog broadcasting automatically. -
Page 55: Usb Flash Drive (Optional)
USB Video main screen example USB Flash drive (Optional) You can play back music files (MP3/WMA/AAC/FLAC) and video files (AVI/MKV/MP4) stored in a USB flash drive on the internal player of this system. WARNING It is dangerous for the driver to watch video while driving the vehicle. -
Page 56: Playback
Playback Stopping Playback (USB Video only) Touch [ ] during playback. Press the (AUDIO) button to select USB mode. “STOP” indicator is displayed, and playback stops. The display shows the USB mode screen. • Playback starts from the beginning when [ ] is touched while •... -
Page 57: Switching Display Modes (During Video File Play Back)
Full Search mode Touch [Audio] or [Video] to switch whether the search list displays music files or video files. Touch your desired Folder name* or File name. When you select a File name, the selected song is played. When you select a Folder name, repeat the same procedure to select another Folder name or File name. -
Page 58: Ipod/Iphone (Optional)
Function mode iPod/iPhone (Optional) Artwork display • You can change the artwork position. For details, see “Switching the Artwork Position” (page 39). A separately sold Lightning to USB cable (KCU-471i), etc., is required. Current song no./Total song no. When the unit is connected by the above cable, the controls on the iPod Artist title/Release Date* are disabled. -
Page 59: Playback
Quick Search Mode Playback In Quick Search mode, the list from the previous search mode is displayed. For example, if the last time you searched for songs was is in Press the (AUDIO) button to select iPod mode. Albums, the Album list is displayed. If you have not used the search The display shows the iPod mode screen. -
Page 60: Alphabet Search Function
Alphabet Search Function Repeat Play The unit is provided with an alphabet search function for effective Touch [ ] to repeatedly play back the currently track. searching. When you use this function in the search mode, you can The tracks (files) will be played repeatedly. Touch [ ] again to deactivate Repeat play. -
Page 61: Pandora® Internet Radio (Optional)
Listening to Pandora® USB port and change the Audio source from Bluetooth Audio, set “Alpine TuneIt App” to “USB (iPhone)” or “Off. ” For more details, see “Pairing a Bluetooth Device” (page 29) and “Smartphone Apps Setup” Launch the Pandora® on the smartphone. -
Page 62: Thumbs" Feedback
“Thumbs” Feedback Creating a New Station You can personalize your stations with “Thumbs Up” or “Thumbs Basing on the currently playing song or artist, a personalized Pandora Down” feedback, which the system takes into account for future music station can be created. The new station will play more music like it. selections. -
Page 63: Connecting A Bluetooth Device (Bluetooth Pandora® Only)
Connecting a Bluetooth Device (Bluetooth Pandora® Only) Registering a Bluetooth device in the unit enables automatic connection. If it does not connect automatically, run through the connection procedure again. Touch [ ] (Settings). The Device Setting select pop up screen is displayed. Touch [Reconnect]. -
Page 64: Siriusxm Satellite Radio Operation (Optional)
< During Replay mode > SiriusXM Satellite Radio Operation Signal Indicator Indicates the signal strength of SiriusXM. Info area (Optional) Channel Info. Mode*: Channel No/Long Channel Name/Category Name Song Info.Mode: SiriusXM Tuner operation: Artist Name/Song Name/Content Info When an optional SiriusXM Tuner is connected to this unit, the Album Art following operations may be performed. -
Page 65: Tuner
Select the desired channel. Receiving Channels with the SiriusXM Tuner Changing the Display About SiriusXM Satellite Radio Only SiriusXM® brings you more of what you love to listen to, all in one place. Get over 140 channels, including commercial-free music plus the Text information, such as the channel name, artist name/feature, and best sports, news, talk, comedy and entertainment. -
Page 66: Smartfavorites Functions
Touch [ ] (TuneScan). SmartFavorites Functions The [ ] (TuneScan) icon is highlighted during TuneScan mode. SmartFavorites allow you to rewind and replay any missed Touch [ ] (TuneScan) during scan playback, programming from your current Band of Preset channels. Miss a music, TuneScan mode will be canceled and the selected track news, talk or sports segment? No Problem, because you can rewind and will be played back normally. -
Page 67: Selecting The Channel Directly
Searching by My Music Touch the “Artist Saved” or “Song Saved” to choose to store the Artist or the Song. Touch [My Music]*. Total registrations and Remaining number of registration slots is The artist names and song titles that you have stored and are displayed for 2 seconds, then the Artist or Song is registered as currently playing will be displayed in a list. -
Page 68: Replay Function
Replay Function Using Jump Memory and Jump Recall function In SiriusXM mode, you can pause, rewind and replay live Satellite Radio. The Jump Channel is a special channel that you can jump to with the press of a dedicated button and then jump back to the previous channel. Replay mode screen example This channel is often used to select your favorite SiriusXM traffic and weather report channel. -
Page 69: Hdmi Device (Optional)
Touch [ ] or [ ] to select the setting item. HDMI Device Touch [Enter] , then touch [ ], [ ], [ ] or [ ] to change the setting item. (Optional) Touch [ ] to return to the main source screen. •... -
Page 70: Playback
Playback MIX (Random Play) Touch [ ] during playback. Press the (AUDIO) button to select DVD (CD) mode. The tracks (files) on the disc will be played back in a random The display shows the DVD (CD) mode screen. sequence. •... -
Page 71: Dvd
Info mode DVD Video main screen example Current track no. Playback control (PBC)/Current audio status Elapsed time Function mode Disc types that can be used for each heading are represented by the following marks. DVD Commercial Video discs (used for the distribution of movies, etc.) or a DVD-R/DVD- RW, DVD+R/DVD+RW recorded in a video mode can be used. -
Page 72: Playing A Disc
If a Menu Screen Appears Playing a Disc On DVD mode, menu screens may appear automatically. If this happens, perform the operation described below to start playback. WARNING Direct Menu Operations It is dangerous for the driver to watch the DVD while driving the vehicle. -
Page 73: Numeric Keypad Input Operations
Numeric Keypad Input Operations Stopping Playback Touch [Key] again in the menu operation mode. Touch [ ] during playback. The numeric keypad input mode screen appears. “ ” indicator is displayed, and playback stops. Touch a desired number. • Playback starts from the beginning when [ ] is touched while playback is stopped. -
Page 74: Forward/Reverse Frame-By-Frame Playback
Forward/Reverse frame-by-frame Playback Searching by Title Number Use this function to easily find positions on the DVD using the DVD’s titles. Perform operations while playback is stopped. In the pause mode, touch [ ] or [ Touch [ ] (Menu Control). The picture advances by one frame each time the button is The menu operation mode screen appears. -
Page 75: Switching The Audio Tracks
If the disc does not include • Use only the Alpine Special HDMI connection cable. that track, the disc’s default language is selected instead. • Not all discs will allow changing the alternate audio tracks during Press the (AUDIO) button to select HDMI mode. -
Page 76: Bluetooth Operation
Bluetooth compatible device to this unit. The device mobile device or personal computer over short distances. This enables a name of this unit is “i209” or “iLX-207” and the initial number of the hands-free call or data transmission between Bluetooth compatible passcode is “0000. -
Page 77: Answering A Call
Answering a Call Call Waiting Function Incoming calls are announced by the received call ring tone and a If a call comes in from another phone during a call, a notice is displayed displayed message (PHONE No., etc.). on the screen. This function can only be used if the connected mobile phone has a call waiting function service included. -
Page 78: Calling
Second incoming call during a conversation in the Phone Touch the Short Cut icon. A contact’s name, phone number, and a confirmation message Operation screen of the phone number are displayed. • The display or operation may differ depending on the connected mobile phone or the caller’s mobile phone. -
Page 79: Using Voice Recognition Function
Entering a Phone Number to Make a Call Speak into the microphone supplied with this unit. • If no speech is detected, the unit may pause depending on version Touch [ ] (Keypad). of the connected iPhone. In that case, touch the microphone icon The number input screen (Keypad) appears. -
Page 80: Operations During A Conversation
Adjusting the volume Phone Book Function Adjust the speaker/microphone volume in Voice Dial mode. Perform the same procedure to adjust the speaker/microphone volume of hands- free phone. Phone Book screen example Touch [ ] or [ ]. Adjust the speaker and microphone volumes. Stopping input to the microphone If the surrounding sound (road noise, etc.) is loud, you may wish to cut input to the microphone for 3 seconds. -
Page 81: Deleting The Phone Book Entries
Deleting the Phone Book Entries Bluetooth Audio Deleting One Entry from the Phone Book If a Bluetooth compatible mobile phone, portable player, etc. is connected by wireless, you can play back a song (operation is Touch [ ] (Edit). controllable from the unit). Touch the checkbox [ ] of the contact name (or phone •... -
Page 82: Playback
Playback Random Play Available for AVRCP Ver. 1.3, 1.4 and 1.5 only. Press the (AUDIO) button to select Bluetooth Audio mode. Touch [ The display shows the Bluetooth Audio mode screen. The Random Play mode select pop up screen is displayed. •... -
Page 83: Connecting A Bluetooth Device
Connecting a Bluetooth Device Registering a Bluetooth device in the unit enables automatic connection. If it does not connect automatically, run through the connection procedure again. Touch [ ] (Settings). The Device Setting select pop up screen is displayed. Touch [Reconnect]. Bluetooth connection will start. -
Page 84: Auxiliary Device (Optional)
Operating an AUX, AUX DVD or GAME Auxiliary Device Example for AUX, AUX DVD, GAME mode display (Optional) Operating Auxiliary Devices (Optional) To operate devices connected to the AUX terminals of the unit, follow the procedure described below. • Set AUX to “On. ” See “AUX Setup” (page 44). •... - Page 85 Touch the switch to advance to the beginning of the next chapter/track/file. Touch and hold to fast forward. ] (Menu) Calls up the Menu screen. ] (Menu Control)* Calls up the menu operation mode. ] (Folder Down) Switches the program/playlist/folder down. ] (Folder Up) Switches the program/playlist/folder up.
-
Page 86: Camera Operation (Optional)
Touch [Camera]. Camera Operation The Rear Camera view is displayed. • Touch the screen while the camera image is being displayed, and touch (Optional) ] or [ ] to return to the main source screen or previous screen. • You can perform a Guide Adjustment. For details, see “Adjusting the Rear/Front/Side Camera Guide”... -
Page 87: Adjusting The Caution Display Location
Touch [Guide Off] or [Hitch Guide Off] on the Rear • The camera has a limited range of vision. Objects at extreme angles to the camera (e.g. under the bumper or at opposite ends of the bumper) camera display screen. may not be in the its field-of-vision. -
Page 88: Front Camera Operation
<Situation of the car> Front Camera Operation Actual distances Displaying the Front Camera image from the Menu screen. Press the MENU button. The menu screen is displayed. Error Error The distance guidance mark represents the distance to a flat road surface. Therefore in the case of an upward slope behind the car, the distance guides are displayed closer to the rear bumper than the actual distance. -
Page 89: About The Adjustment Of Guide Display On/Off Setting And Adjustment Of Caution Display Location
About the adjustment of guide display ON/ Switching the Image Pattern for the Side OFF setting and adjustment of Caution Camera display location If the camera has a view switch function, the Direct Change switch is displayed. As with the rear camera, the front camera guide display ON/OFF setting and Caution display location can be adjusted. -
Page 90: Idatalink Operation
Adjust or confirm the item/information accordingly. iDataLink Operation • Operable functions and displays may differ depending on the vehicle. iDataLink Function Screen example When the unit is connected to the car’s iDataLink module, you can transfer and receive data between the car and the unit to check the car’s Climate screen example status, or to make various operations from the unit. -
Page 91: About Parking Sensor Screen
Vehicle Information screen example Parking Sensor Camera interlock screen example (Rear camera) You can check for open doors, check the tire pressure, the battery life, You can check for obstacles through an interlocked camera image by etc. for the vehicle. connecting a Front or Rear Camera. -
Page 92: External Accessory Control Operation
When changing the name: External Accessory Control Operation Touch the icon name, then input characters into Edit Name (Keypad). You can also select a basic name from the [Template] of the Keypad. For details on how to input characters using the You can set the headlights to ON/OFF or adjust the air suspension from keypad, see “How to Input Characters and Numbers (Keypad)”... -
Page 93: Information
About the software license of the product Supported playback sampling rates and bit rates The software installed in the product contains open-source software. See the following Alpine website for details on the open source software. MP3 (USB Flash drive/Disc) Sampling rates: 48 kHz, 44.1 kHz, 32 kHz, 24 kHz, 22.05 kHz, 16 kHz,... - Page 94 Corresponding File Systems Terminology This device supports FAT 16/32. Bit rate The maximum nested folder depth is 8 (including the root This is the “sound” compression rate specified for encoding. The higher directory). File names are limited to 256 characters (including the the bit rate, the higher the sound quality, but also the larger the files.
- Page 95 • If the area you are in is a primary signal area, the antenna may properly connected, or then consult your authorized not be grounded and connected properly. Alpine dealer. - Check your antenna connections; make sure the antenna is properly grounded at its mounting location.
- Page 96 Bluetooth If this Message Appears Please connect a Bluetooth audio device. • The Bluetooth audio device was not connected correctly. Various messages are displayed on the screen during operation. In - Check the settings for the unit and the Bluetooth audio device addition to the messages telling you the current status or providing and reconnect.
- Page 97 - When “External Audio Processor” (page 49) is set to “On, ” you or otherwise damaged. Replace the antenna if necessary. cannot perform Sound Tuning from the Alpine TuneIt App. Set - SiriusXM products are available at your local car audio retailer “External Audio Processor”...
- Page 98 • Power output: measured at 4 Ohms and ≤ 1% THD+N Alternate Channel Selectivity 80 dB • S/N: 80 dBA (reference: 1 W into 4 Ohms) Signal-to-Noise Ratio 65 dB Weight 1.4 kg (3 lbs. 1 oz) (iLX-207) Stereo Separation 35 dB Audio output level Capture Ratio 2.0 dB Preout (Front, Rear): 4V/10k ohms (max.)
- Page 99 NOSE/CHASSIS SIZE i209 is sized exclusively for a certain car model. iLX-207 171 mm (6-3/4”) 178 mm (7-1/8”) 18 mm (23/32”)
- Page 100 ALPINE ELECTRONICS OF AMERICA, INC. (“Alpine”), is dedicated to quality craftsmanship and is pleased to offer this Warranty. We suggest that you read it thoroughly. Should you have any questions, please contact your Dealer or contact Alpine at one of the telephone numbers listed below.
- Page 101 N’oubliez pas de consacrer un moment à la protection de votre achat en enregistrant votre produit dès maintenant à l’adresse suivante : www.alpine-usa.com/registration. Recuerde que con solo unos pocos pasos podrá proteger su producto, registrándolo a través de la siguiente...
Need help?
Do you have a question about the iLX-207 and is the answer not in the manual?
Questions and answers