Table of Contents
Advertisement
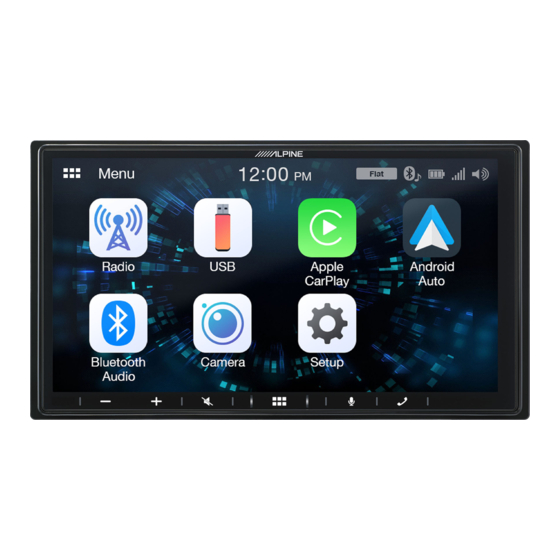
7-INCH AUDIO/VIDEO RECEIVER
1-7, Yukigaya-Otsukamachi, Ota-ku,
Tokyo 145-0067, JAPAN
Phone: 03-5499-4531
1500 Atlantic Blvd,
Auburn Hills, Michigan 48326 U.S.A.
Phone 1-800-ALPINE-1 (1-800-257-4631)
161-165 Princes Highway, Hallam
Victoria 3803, Australia
Phone 03-8787-1200
JEIL Moon Hwa Co.
18-6, 3Ga, Pil_dong, Jung_gu, Seoul, Korea
iLX-W650E
• OWNER'S MANUAL
Please read before using this equipment.
Ohmstraße 4
85716 Unterschleißheim, Germany
Phone: 089-32 42 640
Alpine House
Fletchamstead Highway, Coventry CV4 9TW, U.K.
www.alpine.co.uk
184 allée des Erables
CS 52016 – Villepinte
95 945 Roissy CDG cedex
FRANCE
Phone : + 33(0)1 48 63 89 89
Viale Cristoforo Colombo 8,
20090 Trezzano sul Naviglio MI, Italy
Phone +39 02 484781
Portal de Gamarra 36, Pabellón, 32
01013 Vitoria (Alava)-APDO 133, Spain
Phone 945-283588
Designed by ALPINE Japan
Printed in Korea
PART NO. M3514691010
Advertisement
Table of Contents

Related Manuals for Alpine iLX-W650E


Summary of Contents for Alpine iLX-W650E
- Page 1 CS 52016 – Villepinte Phone 03-8787-1200 95 945 Roissy CDG cedex FRANCE Phone : + 33(0)1 48 63 89 89 Designed by ALPINE Japan JEIL Moon Hwa Co. Printed in Korea 18-6, 3Ga, Pil_dong, Jung_gu, Seoul, Korea PART NO. M3514691010...
-
Page 2: Table Of Contents
Contents Volume Setup Phone Volume Setup .......... 15 Operating Instructions Adjusting the Ring Tone Level ...... 15 Adjusting the Caller Level ......15 Adjusting the Microphone Level ....15 WARNING Volume Setup except for Phones (Other) ..16 Volume Setting ..........16 Points to Observe for Safe Usage ...... - Page 3 Radio Synchronizing the Phone Book ..... 32 Searching in the Phone Book ......32 Radio Basic Operation Bluetooth Audio Listening to the Radio ......... 23 Playback ..............33 Presetting Stations Manually ......23 Repeat Play ............33 Presetting Stations Automatically ..... 23 Shuffle Play ............
-
Page 4: Operating Instructions
They contain instructions on how to use this product MINIMIZE DISPLAY VIEWING WHILE DRIVING. in a safe and effective manner. Alpine cannot be responsible for problems resulting from failure to observe the instructions in this Viewing the display may distract the driver from looking ahead of manual. -
Page 5: Caution
If you have problems, do not attempt to repair the unit yourself. OPERATION, SUCH AS THE STEERING WHEEL OR SHIFT LEVER. Return it to your Alpine dealer or the nearest Alpine Service Station Doing so may obstruct forward vision or hamper movement etc. - Page 6 Microsoft Corporation in the United States and/or other countries. Alpine accepts no responsibility for lost data, etc., even if data, etc., is • Apple, iPhone, and Siri are trademarks of Apple Inc., registered lost while using this product.
-
Page 7: Getting Started
Getting Started Turning Power On or Off Some of this unit’s functions cannot be performed while the vehicle is in motion. Be sure to stop your vehicle in a safe location and apply the Location of Controls parking brake, before attempting these operations. Turn the ignition key to the ACC or ON position. -
Page 8: Touch Screen Operation
Touch Screen Operation About the HOME Screen You can operate the system by using the touch panel on the screen. In the HOME screen, you can select the audio source and perform various setups or operations on the unit. • Be sure to touch the onscreen button lightly with the pad of your finger to avoid scratching the display. -
Page 9: About The Indicator Display
About the Indicator Display How to Input Characters and Numbers (Keypad) The Indicator Bar at the top of the screen displays various types of The displayed screens and procedures may vary slightly depending on information, like the current time. the function used, but the basic input method is the same. Indicates the current time. -
Page 10: Setup
Sound Setup Setup [Sound] is selected on the Setup menu screen. You can set up items related to the sound quality. Setup Operation Touch [Advanced] or [Simple] to change the setting screen. <Setting item> Simple Touch the (HOME) button. Fad./Bal. (page 10) The HOME screen is displayed. -
Page 11: Adjusting The Bass/Middle/Treble
Adjusting the Bass/Middle/Treble Setting the Subwoofer Touch [ ] or [ ] for each item to be adjusted. Turning Subwoofer ON/OFF Setting item: If an optional subwoofer is connected to the unit, make the following Bass, Middle, Treble setting. Setting contents: Setting item: -7 to 7 (Initial setting: 0) Sub.W... -
Page 12: Adjusting The Crossover Settings (X-Over)
Adjusting the Crossover Settings (X-Over) Adjusting the Parametric Equalizer Curve (P-EQ) Before performing the following procedures, see “About the Crossover” (page 14). Parametric Equalizer (P-EQ) can adjust the center frequency/Q Factor (bandwidth)/level for the front and rear speakers independently. Setting item: You can adjust only to the approximate frequency zone, but can then X-Over compensate by performing advanced correction of the sound. -
Page 13: Adjusting The Time Correction (Tcr)
• While adjusting the P-EQ, you should consider the frequency response Setting the Media Xpander (MX) of the connected speakers. • To reflect the P-EQ setting, set “EQ” to [Custom] (page 11). Media Xpander (MX) makes vocals or instruments sound distinct •... -
Page 14: About The Crossover
Adjusting to a frequency range speakers. outside that recommended may cause damage to the speakers. For the recommended crossover frequencies of Alpine speakers, refer to the respective Owner’s Manual. We are not responsible for damage or malfunction of speakers caused by... -
Page 15: Volume Setup
Example 2. Listening Position: All Seats Volume Setup Adjust the time correction level of each speaker to almost the same level. [Volume] is selected on the Setup menu screen. Sit in the listening position (driver’s seat, etc.) and measure the distance (in meters) between your head and Phone Volume Setup the various speakers. -
Page 16: Volume Setup Except For Phones (Other)
System Setup Volume Setup except for Phones (Other) [System] is selected on the Setup menu screen. [Other] is selected on the Volume Setup menu screen. Setting item: System Setting contents: Clock, Dimmer, Language, Reset Clock Setup [Clock] is selected on the System Setup Menu screen. Volume Setting You can change the volume of the sound heard when a button is touched. -
Page 17: Setting The Brightness Of The Backlighting
Setting the Brightness of the Backlighting Reset (Dimmer) [Reset] is selected on the System Setup Menu screen. You can initialize Backlighting is provided by LEDs light built into the liquid crystal panel. all data, to restore the factory settings. Remove the USB flash drive, etc. The illumination control adjusts the brightness of the backlighting based from the system before operation. -
Page 18: Connectivity Setup
Connectivity Setup Bluetooth Setup [Connectivity] is selected on the Setup menu screen. [Bluetooth] is selected on the Setup menu screen. Setting item: Bluetooth Setting contents: Devices, Info, Search Device Setup [Devices] is selected on the Bluetooth Setup Menu screen. You can register and set up Bluetooth compatible devices. Setting item: Connectivity Using Apple CarPlay mode... -
Page 19: Displaying Bluetooth Information
Displaying Bluetooth Information Camera Setup [Info] is selected on the Bluetooth Setup Menu screen. [Camera] is selected on the Setup Menu screen. You can display the Bluetooth device name and device address of this You can set up items related to the Camera. unit. -
Page 20: Setting The Camera Signal Input
Adjusting Color of Display Adjusting the Rear Camera Guide Setting item: You can adjust the camera guide position. Colors Setting contents: Setting item: -5 to 5 (Initial setting: 0) Rear Camera Guide (Page 3) • You can adjust the color between MIN (-5) and MAX (5). Further setting item: Adjustment Adjusting Display Contrast... -
Page 21: Information
Information [Information] is selected on the Setup menu screen. Information about this system is shown. • To update the software of this system, refer to “Product Software Update” (page 36). -
Page 22: Apple Carplay (Optional)
Apple CarPlay Android Auto (Optional) (Optional) Apple CarPlay is a smarter, safer way to use your iPhone in the car. Apple CarPlay takes the things you want to do with your iPhone while What is Android Auto driving and puts them right on the unit. You can get directions, make calls, send and receive messages, and listen to music, all in a way that Android Auto is designed to make it easier to use apps from your phone allows you to stay focused on the road. -
Page 23: Radio Basic Operation
Radio Presetting Stations Manually Tune in a desired radio station you wish to store in the Radio main screen example preset memory by manual or automatic seek tuning. Touch and hold the Preset number you want to store for at least 1 second. The selected station is stored. -
Page 24: Usb Flash Drive (Optional)
USB Photo mode screen USB Flash drive (Optional) You can play back music files (MP3/WMA/AAC/FLAC/WAV), video files (MP4/AVI/WMV/MOV) and photo files (JPG/PNG/BMP) stored in a USB flash drive on the internal player of this system. WARNING It is dangerous for the driver to watch video while driving the vehicle. -
Page 25: Playback
Playback Shuffle Play (USB Audio or USB Video) Touch the (HOME) button and select USB mode. Touch and hold [ The display shows the USB mode screen. • The [ ] button displays the currently selected mode. Select your desired Shuffle mode. Touch [ Mode]. -
Page 26: Ipod Mode On Iphone (Optional)
iPod mode on Playback iPhone (Optional) Touch the (HOME) button and select iPod mode. The display shows the iPod mode screen. A separately sold Lightning to USB cable (KCU-471i), etc., is required. Touch [ ] or [ ] or to select the desired track (file). •... -
Page 27: Searching For A Music File
Searching for a Music File Shuffle Play An iPhone can contain thousands of songs. For this reason, this unit Touch [ can make various searches using the search function as shown below. • The [ ] button displays the currently selected mode. Using the Playlist/Artist/Album/Podcast/Audiobook/Genre/ Composer/Song/iTunes Radio search mode’s individual hierarchy, you Select your desired Shuffle mode. -
Page 28: Bluetooth Operation
Phone Book. When 60 Alpine reserves the right to change or modify any information or items exist in the list, the oldest item is deleted when a further specifications without notice or obligation. -
Page 29: Answering A Call
Answering a Call Calling An incoming call triggers the ringtone and an incoming Making a phone call using the Phone Menu call display. Entering a Phone Number to Make a Call Touch [Keypad]. The number input screen (Keypad) appears. Touch [Answer]. The call starts. -
Page 30: Using Voice Recognition Function
Touch the phone number. Using Voice Recognition function The Phone Operation screen is displayed. You can use Siri function of your iPhone or make a telephone call by using voice operation of your smartphone. • When using Apple CarPlay or Android Auto, the operation screen may differ from the screen design in the Owner’s Manual. -
Page 31: Voice Dial Function
Voice Dial Function Phone Operation Screen You can make a telephone call by using voice operation. • Connect your smartphone to the unit via Bluetooth, then set to “Hands- free” or “Both” (page 18). Touch [ ] button. Adjusting the Speech Volume You can adjust Caller Level and Mic. -
Page 32: Phone Book Function
Bluetooth Audio Phone Book Function If a Bluetooth compatible mobile phone, portable player, etc. is Phone Book screen example connected by wireless, you can play back a song (operation is controllable from the unit). • Operation may vary, depending on the Bluetooth compatible device. Bluetooth Audio main screen example Use to search by directly inputting a name or phone number with the Keypad. -
Page 33: Playback
Playback Touch the (HOME) button and select Bluetooth Audio mode. The display shows the Bluetooth Audio mode screen. Touch [ ] or [ ] to select the desired track (file). Returning to the beginning of the current file: Touch [ Fast backward the current file: Touch and hold [ Advance to the beginning of the next file:... -
Page 34: Camera Operation (Optional)
If you shift the gear lever to a position other than reverse Camera Operation (R), the monitor returns to the previous screen. • Touch the screen when the camera image is displayed, and touch the (Optional) secondary camera button to switch to the secondary camera view image. - Page 35 Distance guidance mark <Situation of the car> Actual distances The distance guides represent the ground level distance from the rear bumper. It is difficult to accurately estimate the distance to objects above ground level. In the following example, the distance to A is 0.5 m and the distance to B is 1 m.
-
Page 36: Information
This product use software that can be updated through a USB flash AAC/FLAC/WAV (USB Flash drive) files, refer to the user’s manual for drive. Download the software from the Alpine website and update the that software. product using the USB flash drive. - Page 37 Terminology Media supported The media that this device can play back a USB flash drive. Bit rate Corresponding File Systems This is the “sound” compression rate specified for encoding. The higher the bit rate, the higher the sound quality, but also the larger the files. This device supports FAT 16/32.
-
Page 38: In Case Of Difficulty
• If the area you are in is a primary signal area, the antenna may properly connected, or then consult your authorized not be grounded and connected properly. Alpine dealer. - Check your antenna connections; make sure the antenna is properly grounded at its mounting location. -
Page 39: If This Message Appears
Bluetooth If this Message Appears No Bluetooth device connected • The Bluetooth audio device was not connected correctly. Various messages are displayed on the screen during operation. In - Check the settings for the unit and the Bluetooth audio device addition to the messages telling you the current status or providing and reconnect. -
Page 40: Specifications
Bluetooth SECTION Specifications Bluetooth Specification Bluetooth V4.2 Output Power +4 dBm Ave. (Power class 2) MONITOR SECTION Profile HFP (Hands-Free Profile) PBAP (Phone Book Access Profile) Screen Size 7” A2DP (Advanced Audio LCD Type Transparent type TN LCD Distribution Profile) Operation System TFT active matrix AVRCP (Audio/Video Remote... -
Page 41: Installation And Connections
When in doubt, consult your Alpine dealer. electrical wiring. Failure to take such precautions may result in fire. -
Page 42: Accessory List
Accessory List Main unit......................1 Microphone Power cable......................1 USB extension cable ..................1 PRE OUT cable....................1 Cable clamp (sold separately) Microphone ....................... 1 Owner’s Manual ..................1set Installation Installation example using the Original Caution Mounting Bracket • Do not block the unit’s fan, thus preventing air circulation. -
Page 43: Connections
Connections Vehicle Antenna Microphone (included) USB extension cable (included) To USB flash drive, iPhone or Android smartphone. REMO To amplifier or equalizer (Blue/White) REVERSE To plus side of the back lamp signal (Orange/White) lead of the car P. ANT To power antenna (Blue) PARKING BRAKE To the parking brake signal lead... - Page 44 Steering Remote Control Interface Connector Connect this lead to the remote turn-on lead of your amplifier or signal processor. To steering remote control interface. For details about connections, consult your nearest Alpine dealer. Reverse Lead (Orange/White) USB Connector Power Antenna Lead (Blue) To USB flash drive, iPhone or Android smartphone.
-
Page 45: If An Acc Power Supply Is Not Available
• Connect the ground lead securely to a bare metal spot (remove any paint, dirt or grease if necessary) of the car chassis. • If you add an optional noise suppressor, connect it as far away from the unit as possible. Your Alpine dealer carries various noise suppressors, contact them for further information. -
Page 46: System Example
System Example Connection of an iPhone When connecting to an iPhone with a Lightning connector USB connector iPhone with a Lightning connector (sold separately) USB extension cable (included) Lightning to USB Cable KCU-471i (sold separately) • Do not leave an iPhone in a vehicle for a long time. Heat and humidity may damage the iPhone, and you may not be able to play it again. Connection of a USB Flash Drive USB connector USB extension cable (included) - Page 47 Connection of an External Amplifier REMOTE ON Power Supply Connector CAMERA/ (Blue/White) PRE OUT REMO REMOTE ON Connector (Blue/White) (Blue/White) Power cable SUBW PRE OUT cable Amplifier for subwoofer Subwoofer (sold separately) To subwoofer input terminal To front input terminal (Red) Front speaker FRONT OUT...
- Page 48 Connection of a Rearview camera CAMERA/PRE OUT Power Supply Connector Connector Power cable Reverse Connect to the plus side of the car’s reverse lamp. (Orange/White) PRE OUT cable To Video Output terminal Camera with RCA video output (sold separately) REAR VIEW CAMERA To Video Output terminal Camera with RCA video output (sold separately)
- Page 49 Open source licenses lw IP This library is free for commercial and non-commercial use as long as the following conditions are aheared to. The following conditions apply to all code found in this Copyright (c) 2001, 2002 Swedish Institute of Computer Science. distribution, be it the RC4, RSA, lhash, DES, etc., code;...
Need help?
Do you have a question about the iLX-W650E and is the answer not in the manual?
Questions and answers