
Related Manuals for Teac LEV40A121


Summary of Contents for Teac LEV40A121
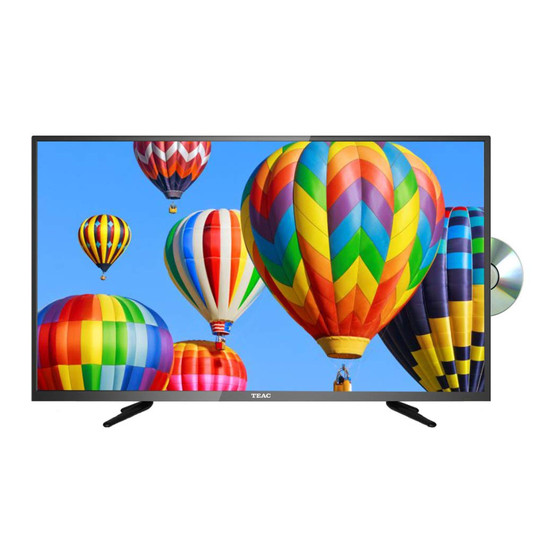
- Page 1 LEV40A121 LED TV USER MANUAL IMPORTANT ! WARRANTY INFORMATION INSIDE. PLEASE READ www.teac.com.au Trademark of TEAC Corporation JAPAN...
- Page 3 Dealer’s Name Dealer’s Address P ostc ode Thank you for selecting a TEAC product If your TE AC product malfunctions, please call us directly for warranty support between Monday to Friday at 8.30AM – 5PM AE S T at the...
- Page 4 TE AC and/or its Authorised S ervic e C entres reserve the right to inspect and verify whether the product is exhibiting a major failure as claimed by c ustomers/retailers. LC D dead pixel polic y, please c ontact TE AC at support@ teac.c om. au for assistanc e.
-
Page 5: Table Of Contents
Contents IMPORTANT SAFETY INSTRUCTIONS ........2 SAFETY INFORMATION . -
Page 6: Important Safety Instructions
Important Safety Instructions • Read these instructions – All the safety and operating instructions should be read before this product is operated. • Keep these instructions – The safety and operating instructions should be retained for future reference. • Heed all warnings – All warnings on the appliance and in the operating instructions should be adhered to. -
Page 7: Safety Information
Safety Information To ensure reliable and safe operation of this equipment, please read carefully all the instructions in this user guide, especially the safety information below. Electrical safety • The TV set should only be connected to a main power supply with voltage that matches the label at the rear of the product. -
Page 8: What Is Included/Tv Placement Setup
Stand Support LEV40A121 LED TV Base Stand 4 Screws USER MANUAL IMPORTANT ! WARRANTY INFORMATION INSIDE. PLEASE READ Remote Control Trademark of TEAC Corporation JAPAN www.teac.com.au TV Set with Batteries User’s Manual TV Stand Installation/Removal 200mm 200mm Four mounting holes... -
Page 9: Getting Started
Getting Started Front/Back View Disc Tray Slot Insert the DVD with the label side facing the back. Button Functions STANDBY: Turn on TV SOURCE: Audio/Video input source selection MENU: Open settings menu CH+: Next channel CH-: Previous channel VOL+: Increase volume VOL-: Decrease volume : Play/Pause toggle in DVD/media player modes : Eject disc... - Page 10 COAXIAL RF: Antenna connection AUDIO IN R/L: Stereo audio input HEADPHONES YPbPr: Connect to the YPbPr video VIDEO: Video input output terminal of the DVD PC AUDIO: Connect it to the audio output terminal of the PC HDMI VGA: PC video input NOTE: Before making or changing cable connections, please make sure that power to the unit is completely disconnected by switching off the power supply and unplugging the power...
-
Page 11: Connecting To External Devices
Connecting to External Devices Connecting external devices to your LED TV Headphones Coaxial cable Audio cable cable Composite Component cable cable VHF/UHF antenna RF Coaxial cable cable TV company HDMI cable cable receiver/satellite box... -
Page 12: Remote Control
Remote Control Basic Operations POWER: Turn on the TV/Standby. AUDIO: Switch the audio channel when DVD or multimedia playing. PMODE : Cycle through the different picture modes. INPUT: Press to change signal source. SMODE : Cycle through the different sound modes. NUMBER KEYS: Change the channel directly. -
Page 13: Install The Batteries
29. D.MENU: Display the menu of the DVD. 30. GOTO: Play from the desired location. ASPECT: Selects the screen size. 32. D.TITLE: Go to the title page of DVD disk. 33. SLEEP: Auto Power Off Timer. 34. MUTE: Mute or restore the sound. NOTE: Availability of teletext services depends on your local service provider. -
Page 14: First Installation
First installation 1.Press the menu button 2.Press button,enter “SETUP” page,choose First Time Installation by pressing button. Press OK for Auto Tuning. Tune Type :Select Tune Type as DTV+ATV or DTV, you can choose Air(DVB-T), Cable(DVB-C), in “Digital Type”. Air(DVB-T) Auto Tune: Select DTV+ATV in “Tune Type”, and DVB-T in Digital Type, then press OK to start tuning. - Page 15 Cable (DVB-C) Auto Tune: Select DVB-C in “Digital Type”: There are 2 options for DVB-C “Scan Type”: 1.Full: Select “FULL”in “Scan Type”and choose “OK” to start Auto Search for the channels. 2.Network:Select “Network” in “Scan Type” Input the number of the Network ID of the channel and choose the frequency and press “OK”...
-
Page 16: Select Input Source
Select input source... -
Page 17: The Main Menu
The Main Menu Refer to P. 10 and P.11. - Page 18 Press MENU,then choose ATV Manual Tuning. Start searching channel by presing button. Once a channel is found,it will automatically stored. Repeat the step by changing the channel number. DTV Manual Tuning DVB-T Manual Tuning: Enter the DTV Manual Tuning. Press button to adjust the channel and press OK button to manual tune.
- Page 19 button to add or remove the channnel to/from your favorite list.
-
Page 23: Time Menu
press "OK" button to confirm selection and enter the sub-menu. press "OK" button to confirm selection and enter the sub-menu. (Available options are:Off, 15min,30min,45min,60min,90min,120min, 240min). - Page 24 press "OK" button to confirm selection and enter the sub-menu. press "OK" button to confirm selection and enter the sub-menu.
- Page 26 Green...
-
Page 31: Screen Menu(Under Pc Mode Only)
Screen Menu(Under PC mode only) Press INPUT,choose PC. -
Page 32: Dvd Operation
DVD operation General Setup... - Page 34 AUDIO Setup...
- Page 35 Dolby Digital Setup Preference Setup...
-
Page 38: Multimedia Operation
Multimedia operation... -
Page 43: Troubleshooting
Troubleshooting If the device performance fails, check whether the detected problem is in the following table. If your device still fails, contact customer service. SYMPTOM POSSIBLE CAUSE REMEDY TV – No signal input Signal cable is loose or not Ensure signal cable is not loose connected. -
Page 44: Specifications
Specifications Specifications TV System DVB-T/PAL/SECAM Maximum 1920x1080 Brightness 200 cd/m2 Static Contrast 5000:1 Response Time 9.5ms Consumption Power Supply AC 100-240V- 50/60Hz Connectivity Composite Video Input Component Video Input PC Video Input (VGA) PC Audio Input HDMl input RF Antenna Input Headphones Output Coaxial Output Data Interface... - Page 48 In the event of a product failure within the warranty period, please call the TEAC Warranty Service Hotline 1300 553 315 Between Monday to Friday - 8.30AM to 5PM AEST *Please have your purchase receipt and the product’s serial number ready For other enquiries and support please visit www.teac.com.au...
Need help?
Do you have a question about the LEV40A121 and is the answer not in the manual?
Questions and answers