Table of Contents
Advertisement
Quick Links
All about the
Use
of your
WELCOME & CONGRATULATION ............................2
IMPORTANT SAFETY INSTRUCTIONS ......................2
PART NAMES ........................................................8
CONTROL PANEL .................................................. 9
BEFORE OPERATING ........................................... 10
MANUAL COOKING .............................................. 11
AUTO COOKING ..................................................
www.frigidaire.com USA 1-800-
&
Microwave Oven
TA B L E O F C O N T E N T S
4
1
374 4432
-
www.frigidaire.ca Canada 1-800-265-8352
Care
SENSOR COOKING .............................................
CONVENIENT FEATURES......................................2
CLEANING AND CARE ..........................................
SERVICE CALL CHECK .........................................
SPECIFICATIONS.................................................
WARRANTY .........................................................
9
1
1
24
27
27
28
Advertisement
Table of Contents

Related Manuals for Electrolux FRIGIDAIRE UMV1422UW


Summary of Contents for Electrolux FRIGIDAIRE UMV1422UW
-
Page 1: Table Of Contents
All about the & Care Microwave Oven of your TA B L E O F C O N T E N T S SENSOR COOKING ..........WELCOME & CONGRATULATION ......2 CONVENIENT FEATURES........2 IMPORTANT SAFETY INSTRUCTIONS ......2 CLEANING AND CARE .......... PART NAMES ............8 SERVICE CALL CHECK ......... -
Page 2: Welcome & Congratulation
WELCOME & CONGRATULATIONS Congratulations on your purchase of a new microwave oven! At Electrolux Home Products, we are very proud of our product and are completely committed to providing you with the best Questions? service possible. Your satisfaction is our number one priority. - Page 3 20 seconds before • This appliance should be serviced only by qualifi ed removing the container. service personnel. Contact nearest Electrolux Authorized - Use extreme care when inserting a spoon or other Servicer for examination, repair or adjustment.
- Page 4 IMPORTANT SAFETY INSTRUCTIONS • Thermometer— Do not use regular cooking or oven • Do not clean with metal scouring pads. Pieces can burn thermometers when cooking by microwave or off the pad and touch electrical parts involving risk of combination. The metal and mercur y in these electric shock.
- Page 5 1. If you have any questions about the grounding or electrical instructions, consult a qualifi ed electrician or service person. 2. Neither Electrolux nor the dealer can accept any liability for damage to the microwave oven or personal injury resulting from failure to observe the correct electrical connection procedures.
- Page 6 IMPORTANT SAFETY INSTRUCTIONS ABOUT YOUR MICROWAVE OVEN ABOUT MICROWAVE COOKING This Use and Care Manual is valuable: read it carefully and • Arrange food carefully. Place thickest areas towards outside of dish. always save it for reference. • Watch cooking time. Cook for the shortest amount of A good microwave cookbook is a valuable asset.
- Page 7 Electrolux is not responsible safety door latches. for any damage to the microwave oven when accessories are used.
-
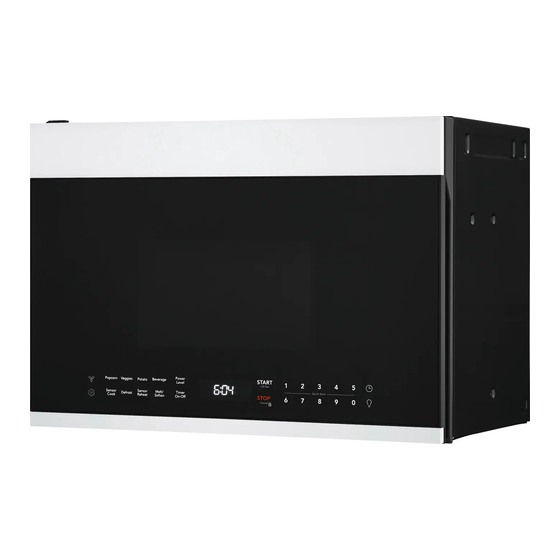
Page 8: Part Names
PART NAMES BOTTOM VIEW (Front of microwave oven) (Rear of microwave oven) Grease filter 11 Ventilation openings 1 Microwave oven door with see-through window 12 Removable turntable glass 2 Door hinges Position glass tray on turntable motor shaft 3 Waveguide cover: coupling. -
Page 9: Control Panel
CONTROL PANEL Number next to the control panel illustration indicates pages on which there are feature descriptions and usage information. 17 11 2 -2 14-17 Words in the lower portion of the display will light to indicate what function is in progress. -
Page 10: Before Operating
BEFORE OPERATING 1.Before operating your new oven make sure you read TO SET THE TIMER and understand this Use and Care Guide completely. • Set the timer for 3 minutes. 2.Before the Over the Range Microwave Oven can be used, follow these procedures: Touch Display Shows: •... -
Page 11: Manual Cooking
MANUAL COOKING USING ONE TOUCH START SETTING TIMED COOKING WITH This is a time saving pad that will automatically start POWER LEVEL cooking 2 seconds after selected. Numeric key 1 to 9 This feature lets you program a specific cook time can be touched for a 1 minute to 9 minutes automatic and power. - Page 12 MANUAL COOKING SETTING TWO-STAGE COOKING For best results, some recipes call for different power levels during a cook cycle. You can program your oven for two power level stages during the cooking cycle. • To set a 2-stage cook cycle. The first stage is a 2 minutes cook time at 30% cook power then a 4 minutes cook time at 70% cook power.
- Page 13 MANUAL COOKING MICROWAVE POWER LEVELS For best results, some recipes call for different cook The table also tells you when to use each cook power. powers. The lower the cook power, the slower the Follow recipe or food package instructions if available. cooking.
-
Page 14: Auto Cooking
AUTO COOKING USING AUTO DEFROST OPERATING TIPS Three defrost sequences are preset in the oven. • For best results, remove fish, shellfish,meat, The auto defrost feature provides you with the and poultry from its original closed paper or plastic best defrosting method for frozen foods. package (wrapper). - Page 15 AUTO COOKING AUTO DEFROST TABLE NOTE: Meat of irregular shape and large, fatty cuts of meat should have the narrow or fatty areas shielded with foil at the beginning of the defrost sequence. MEAT SETTINGS FOOD SETTING AT BEEP SPECIAL INSTRUCTIONS BEEF Ground Beef, MEAT...
- Page 16 AUTO COOKING AUTO DEFROST TABLE (CONTINUED) POULTRY SETTINGS FOOD SETTING AT BEEP CHICKEN POULTRY Turn over breast side down. Cover warm areas with aluminum foil. Whole (up to 6 lbs) Separate pieces and rearrange. Cut-up Turn over. Cover warm areas with aluminum foil. CORNISH POULTRY Turn over.
- Page 17 AUTO COOKING DEFROSTING TIPS The shape of the package affects how quickly food will When using Auto Defrost, the weight to be entered is the net weight (the weight of the food minus the container). defrost. Shallow packages will defrost more quickly than Before starting, make sure to remove any and all metal a deep block.
- Page 18 AUTO COOKING Amount 1 sti Melt / Soften x1 Melt Butter 2 sticks 2 oz. 4 oz. Melt / Soften x2 Melt Chocolate 8 oz. 1 Pint Melt / Soften x3 Soften Ice Cream 1.5 Quart Then time will count down 3 oz.
-
Page 19: Sensor Cooking
SENSOR COOKING SENSOR OPERATING INSTRUCTIONS 4. Be sure the outside of the cooking container and the Sensor Cook allows you to cook most of your favorite inside of the microwave oven are dry before placing foods without selecting cooking times and power levels. food in the oven. - Page 20 SENSOR COOKING SENSOR COOK TABLE AMOUNT DIRECTION CATEGORY Place bacon strips on a microwave bacon rack for best Bacon results. (Use dinner plate lined with paper towels if rack 1-3 slices is not available). Place in an appropriately sized microwave container. 10 oz./ 20 oz.
-
Page 21: Convenient Features
CONVENIENT FEATURES SETTING WEIGHT LB/KG USER REFERENCE • Suppose you want to toggle weight between This section gives instructions for operating each pounds & kilograms. function. Please read this section carefully. USER PREF Touch Display Shows: The microwave oven has settings that allow you to customize the operation for your convience. - Page 22 CONVENIENT FEATURES SETTING POWER SAVE SETTING TURNTABLE ON/OFF • Suppose you want t o enter Power Save • Suppose you want to turn on the Turntable. The turntable cannot be turned off in Touch Display Shows: Convection modes. Touch Display Shows: Display for 2 seconds then clear.
- Page 23 CONVENIENT FEATURES SETTING DEMO MODE USING VENT FAN • Suppose you want t o enter Demo ode. • Suppose you want to set the vent fan speed to HIGH from the OFF position. Touch Display Shows: Touch: Display Shows: Turn off fan when desired NOTE If the temperature from the range or cooktop...
-
Page 24: Cleaning And Care
CLEANING AND CARE Disconnect the power cord or leave the door open to deactivate the oven during cleaning. Disconnect the power cord before replacing filters and lights. EXTERIOR ODOR REMOVAL The outside surface is precoated steel and plastic. Occasionally, a cooking odor may remain in the Clean the outside with mild soap and water;... - Page 25 CLEANING AND CARE Disconnect the power cord or leave the door open to deactivate the oven during cleaning. Disconnect the power cord before replacing filters and lights. Cleaning the exhaust filters Surface light replacement The oven ventilation exhaust filters should be removed and cleaned often;...
- Page 26 CLEANING AND CARE Disconnect the power cord or leave the door open to deactivate the oven during cleaning. Disconnect the power cord before replacing filters and lights. CHARCOAL FILTER REPLACEMENT OVEN LIGHT REPLACEMENT charcoal filter replacement instructions. 1. Remove the light cover mounting screw, open light light cover by carefully pulling up on the front edge.
-
Page 27: Service Call Check
If “NO” is the answer to any of the above questions, NOTES please check electrical outlet, fuse and/or circuit breaker. If they are functioning properly, CONTACT YOUR NEAREST ELECTROLUX AUTHORIZED SER- VICER. A microwave oven should never be serviced by a “do-it-yourself” repair person. - Page 28 This warranty only applies in the USA and Canada. In the USA, your appliance is warranted by Electrolux Major Appliances North America, a division of Electrolux Home Products, Inc. In Canada, your appliance is warranted by Electrolux Canada Corp.
Need help?
Do you have a question about the FRIGIDAIRE UMV1422UW and is the answer not in the manual?
Questions and answers