
Related Manuals for LG WF-1208C4W


Summary of Contents for LG WF-1208C4W
- Page 1 使用者手冊 洗衣機 開始安裝前, 請仔細閱讀這些操作指引。 這將簡化安裝過程, 保證產品正確並 且安全安裝。 將這些操作指引放置在產品旁, 以便以後參考。 CANTONESE WF-1208C4W www.lg.com MFL69655821 Rev.00_121316...
-
Page 2: Table Of Contents
目錄 此手冊可能包含與您購買的型號不同的 圖像或內容。 此手冊以製造商的修訂版本爲準。 安全說明 ................ 3 重要安全說明....................3 舊裝置的處理....................8 安裝 ................9 零件......................9 附件......................9 規格......................10 安裝地點要求..................... 11 打開包裝並拆除運輸螺栓................12 使用防滑板 (可選) ..................13 木地板 (懸浮地板) ..................13 校平電器....................14 連接供水管....................14 安裝排水管. -
Page 3: 安全說明
安全說明 ZH-HK 下列安全指引是為防止無法預見的危險或由於不安全或不正確的電器 操作方式造成的損失。 如下所述, 指引分為 「警告」 和 「注意」 兩部份。 顯示此標誌指示可能造成危險的事物和操作。 仔細閱讀帶有此 標誌的部份, 遵循操作指引以避免危險。 警告 這表示不遵循操作指引會造成重傷或死亡。 注意 這表示不遵循操作指引會造成輕傷或產品損壞。 重要安全說明 警告 在使用產品時, 為減少給人體帶來爆炸、 火災、 死亡、 觸電、 傷害或燙 傷的風險, 應遵循基本的安全預防措施, 包括以下內容: 家中的兒童 身體、 感知或心理能力較弱者或缺乏經驗及知識的人群 (包括兒童) 不 宜使用該電器, 除非有負責其安全的人員給予有關使用該電器的監督 或指引。 .應監督兒童, 避免其把玩該電器。... - Page 4 ZH-HK 對於在歐洲地區使用的產品: 如果監護人監督使用者使用或指導其以安全的方式使用本裝置, 並讓 其瞭解到相關危險, 本裝置才可由.8.歲和以上兒童, 以及生理、 感觀、 心 智能力不足的人員使用。 .兒童不得玩耍本裝置。 .不得讓兒童在沒有監督 的情況下進行清潔或用戶保養。 除非由監護人一直監督, 否則年齡低於.3.歲的兒童應當遠離本裝置。 安裝 . •若電器損壞、 故障、 部份散開, 或有遺失或破損部份, 包括損壞的電源 線或插頭, 不要開啟電器。 . •此電器必須由至少兩人負責運輸, 以保證電器安全。 . •請勿在潮濕和灰塵多的地方安裝電器。 .請勿在室外或陽光直射、 風或 雨或冰點以下溫度等風化條件下安裝或儲存電器。 . •擰緊排水管, 防止分離。 . •若電源線損壞或電氣插座口鬆開, 請勿使用電源線, 並聯絡授權維修 中心。 .
- Page 5 ZH-HK . •此電器不能在可鎖門、 推拉門或在電器相對面帶有門鉸的門後安裝, 因為在這種情況下, 電器門不能完全打開。 . •此設備必須接地。 .如果出現故障或停機, 接地將透過提供適用於電流 的最小電阻路徑減少電擊風險。 . •此電器擁有電器接地導線和接地插頭的電源線。 .插頭必須插入根據所 有本地規範和法令正確安裝和接地的適用電氣插座。 . •錯誤連接電器接地導線可能會導致電擊風險。 .如果您懷疑電器是否正 確接地, 請聯絡有資格的電工或維修人員。 . •請勿改動電器隨附的電氣插座。 .如果插頭不適合插座, 請合格電工安 裝正確的插座。 操作 . •請勿試圖分離任何面板或拆卸電器。 .為操作電器, 請勿讓鋒利物體接 觸控制面板。 . •請勿修理或更換電器的任一部份。 .除此使用者手冊中特別提出的, 所 有修理和維修必須由合格的維修人員執行。 .只使用授權工廠的零件。...
- Page 6 如蜂蠟、 脫蠟劑、 燃油、 油漆、 汽油、 去油劑、 乾洗溶劑、 煤油、 石油、 除斑 劑、 松脂、 植物油、 食用油、 丙酮、 酒精等) 的衣物。 .不適當的使用會造成 火災或爆炸。 . •電器運轉時, 請勿伸入電器中。 .請等候至滾筒完全停止。 . •為防止溢水, 請斷開電氣插座, 聯絡.LG.電子客戶服務中心。 . •當電器門打開的時候, 不要將門過度下按。 . •在進行高溫程式時, 請勿接觸門。 . •請勿在電器周圍使用可燃氣體和易燃物質 (苯、 汽油、 稀釋劑、 石油、 酒...
- Page 7 ZH-HK . •請勿用濕手觸摸電氣插座或電器控制器。 . •請勿過度彎曲電源線或在電源線上放置重物。 . •請勿在本機器中清洗地毯、 墊子、 鞋或寵物毯或任何除衣物或床單外 的其他物品。 . •本機器僅用於家用目的, 不得在行動應用裝置中使用。 . •若有漏氣 (異丁烷、 丙烷與天然氣等) 現象, 請勿接觸機器或電源插頭 並立即讓該區域通風。 維護 . •去除所有濕氣和灰塵後, 將電氣插頭安全插入電氣插座中。 . •清潔電器前, 斷開電器的電源連接。 .將控制器設定為關閉或所在位置 已斷開電器的電源連接。 . •請勿在電器內部或外部噴水來進行清潔。 . •若要中斷電源連接, 切勿拉扯電源線, 應緊握插頭將其從插座拔出。 處理 . •丟棄舊電器前, 請拔掉插頭。 .直接斷開電器後面的電線, 防止使用不 當。...
-
Page 8: 舊裝置的處理
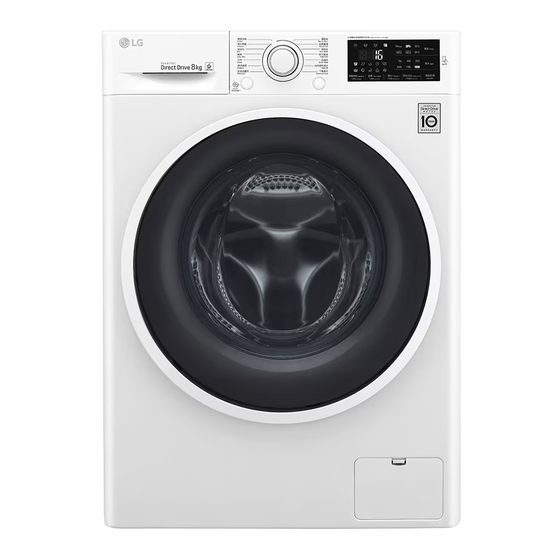
ZH-HK 舊裝置的處理 . • 此帶輪式垃圾標誌表示電子電器廢棄物.(WEEE).應與城市垃圾流分開處理。 . • 舊電子產品包含有害物質, 因此正確處理舊裝置將有助於防止對環境及人類健康產生潛 在負面影響。 .舊機器可能包含可用於修理其他產品的可再用零件, 以及其他循環用於節 約有限資源的有用材料。 . • 您既可以將機器攜帶至您購買本產品的商店, 也可聯絡當地政府廢物處理辦公處以瞭 解您最近授權.WEEE.收集點的詳情。 .有關您所在國家/地區的最新資訊, 請參閱.www. lg.com/global/recycling。... - Page 9 安裝 ZH-HK 零件 運輸螺栓 電源插頭 抽屜盒 控制面板 滾筒 機門 排水管 排水塞 排水泵過濾器 罩蓋 (位置主要取決於產品) 可調機腳 附件 冷水管.(1.根) 扳手 覆蓋運輸螺栓孔的蓋子 防滑板.(2.EA) (選配) (選配) 固定排水管的彎管支架 索帶 (選配) (選配)...
- Page 10 ZH-HK 規格 型號 WF-1208C4W 洗滌容量 8.kg 電源 220.-.240.V~,.50.Hz 大小 600.mm.(W).x.560.mm.(D).x.850.mm.(H) 產品重量 62.kg 允許的水壓 0.1.-.1.0.MPa.(1.0.-.10.0.kgf./.cm²) . • 外部特徵和技術參數可能因提升產品質素而有所改變, 恕不另行通知。 . • 無需對進水管接頭進行迴流保護。...
-
Page 11: 安裝地點要求
ZH-HK 安裝地點要求 . • 如果無法避免將機器放置在煤氣爐或煤爐附近, 則必須在朝向炊具或爐子一側的兩個設備之間 位置 覆蓋鋁箔的耐煤爐熱型絕緣材料.(85x60.cm)。 . • 室內出現冰點溫度時, 不要安裝電器。 .凍住的水 管在壓力下可能裂開。 .在冰點溫度以下時, 電控 單元的信度係數可能受損。 . • 請確認機器安裝好後, 即使發生故障亦便於工程 師檢查機器。 . • 安裝機器後, 使用提供的運輸螺栓扳手調節四個 機腳, 確保機器平穩, 並在機器頂部和任何工作 台下方之間留出約.20.mm.的間隙 . • 若電器在冬季交付, 並且溫度低於冰點, 在電器 運轉前, 將電器放置於室溫下幾小時。 10 cm 2 cm 2 cm 警告... -
Page 12: 打開包裝並拆除運輸螺栓
ZH-HK 打開包裝並拆除運輸螺栓 安裝孔帽。 . • 找到配件包中包含或安裝在背部的孔帽。 拿掉機器的發泡膠底座。 . • 拆除紙箱和裝運材料之後, 取出機器的發泡 膠底座。 .確保洗衣桶支架與底座脫離, 且未卡 蓋子 在機器底部。 . • 如果您必須放倒機器以拆除紙箱底板, 務必 保護好機器側面並小心地將其一側放倒。 .請 勿從正面或背面放倒機器。 注意 . • 儲存螺栓組件, 以供將來使用。 .為防止損壞內部 零件, 請勿在未重新安裝運輸螺栓的情況下運輸 機器。 . • 若不拆除運輸螺栓和固定夾, 可能導致劇烈振動 洗衣桶支架 (可選) 紙箱底板 和噪音, 從而對洗衣機造成永久性損壞。 .用運輸 螺栓將電線固定到洗衣機背面,... -
Page 13: 使用防滑板 (可選
衣機長久、 規律且可靠地運作。 . • 洗衣機必須達到.100%.水平並保持平穩。 此面朝上 . • 負荷情況下, 機器對角不得 「蕩鞦韆」 。 膠面 . • 安裝平面必須乾淨, 沒有塗抹地板蠟或其他潤滑 塗層。 . • 切勿讓洗衣機的機腳受潮。 .未按此操作可能會產 生振動或噪音。 . • 您可從.LG.服務中心獲取橡膠套. (零件號.4620ER4002B) 。 確保機器處於調平狀態。 . • 輕輕推動或搖動機器邊緣, 確保機器不搖 晃。 .如果機器搖晃, 請再次調平機器。 注意 . • 您可從.LG.服務中心獲取防滑板。... -
Page 14: 校平電器
ZH-HK 校平電器 連接供水管 如果地板不平坦, 視需要轉動可調機腳 (請勿在機 . • 水壓必須在.0.1.MPa.和.1.0.MPa.(1.0‒10.0.kgf/ 腳下插入木片等物品) 。 .確保四隻機腳全部穩定地 ).之間。 放在地板上, 然後檢查電器是否達到完全水平 (使 . • 將進水管連接至閥時, 請勿拆除或亂扣螺紋。 用水準儀) 。 . • 如果水壓超過.1.0.MPa, 應安裝減壓裝置。 . • 機器調平後, 將機器底座上的的鎖緊螺母向上緊 . • 定期檢查水管的狀況, 視需要更換水管。 固。 .必須緊固所有鎖緊螺母。 檢查進水管上的橡膠密封件 兩個橡膠密封件與進水管一同提供。 .其用於防止 漏水。 .確保水龍頭的接頭已充分緊固。 昇高... - Page 15 ZH-HK 連接水管至水龍頭 將接頭推到水龍頭的末端, 以便使橡膠密封件 形成不透水的連接。 .擰緊四顆固定螺絲。 連接螺紋式水管至帶螺紋的水龍頭 將水管連接器擰到供水水龍頭上。 向上垂直按壓進水管, 使水管內的橡膠密封件 能夠完全貼合水龍頭, 然後透過向右側擰緊進 行緊固。 面板 連接螺紋式水管至不帶螺紋的水龍頭 進水. 鬆開四顆固定螺絲。 管 上部. 橡膠. 連接器 密封件 將一個觸控型水管連接至不帶螺紋的水龍頭 固定螺絲 卸下接頭環板, 鬆開四顆固定螺絲。 如果水龍頭過大而無法安裝接頭, 則取下導 板。 導板 環板 如果水龍頭過大而無法安裝接頭, 則取下導 板。 導板...
- Page 16 ZH-HK 將水管連接至機器 將接頭推到水龍頭的末端, 以便使橡膠密封件 形成不透水的連接。 .擰緊四個固定螺絲與接頭 將冷水管連接至洗衣機背部上的冷水管。 環板。 熱水供應 (可 冷水供應 選) 注意 向下按壓接頭插銷板, 將進水管推入接頭, 並鬆 開接頭插銷板。 .確保接頭鎖定到位。 . • 完成連接之後, 如果水管漏水, 則請重複相同的 步驟。 .使用最常見的水龍頭類型進行供水。 .如果 水龍頭為方形或過大, 請先取下導板, 然後再將 水龍頭插入接頭。 插銷板 使用橫式水龍頭 橫式水龍頭 延長型水龍頭 注意 . • 將進水管連接到水龍頭上前, 打開水龍頭沖刷水 管上的異物 (灰塵、 沙子、 木屑等) 。 .讓水排入桶 方形水龍頭...
-
Page 17: 安裝排水管
ZH-HK 安裝排水管 . • 排水管放置時不得高於地板.100.cm。 .機器中的 水可能無法排放或排放緩慢。 . • 正確固定排水管可防止地板因漏水而受損。 . • 如果排水管過長, 不要用力將其塞進機器中。 .這 將會產生不正常的噪音。 ~ 100 cm ~ 145 cm ~ 105 cm max. 100 cm . • 將排水管安裝到水池上時, 使用繩子將其牢牢固 定住。 . • 正確固定排水管可防止地板因漏水而受損。 洗衣桶槽 水管固定夾 max. 100 cm 係帶... -
Page 18: 使用洗衣機
操作 ZH-HK 使用洗衣機 選擇所需的洗滌程序。 . • 重複按下程序按鈕或將程序轉換開關轉動到 首次清洗前, 選取洗滌程序並允許洗衣機在無衣物 所需程序。 的情況下清洗。 .此操作將會從滾筒中移除製造期 間可能留下的殘留物與水。 分類洗滌並將放入衣物。 . • 根據織物類型、 髒污程度、 顏色和所需負荷 大小分類洗滌。 .打開門並將衣物放入洗衣機 內。 開始程序。 . • 按下啟動/暫停按鈕開始程序。 .洗衣機將在無 水狀態下短暫搖動以測量負荷重量。 .如果在. 5.分鐘內未按下啟動/暫停按鈕, 洗衣機將關 閉, 且所有設定將丟失。 添加清潔用品和/或清潔劑和柔順劑。 . • 在洗滌劑抽屜盒中添加適量洗滌劑。 .如有需 要, 在分配器的適當區域添加漂白劑或衣物 柔順劑。... -
Page 19: 分類要洗衣物
ZH-HK 分類要洗衣物 放入前進行保養。 . • 將大衣物和小衣物一起洗滌。 .先放入大衣 物。 找到您衣物上的保養標籤。 . • 大衣物不得超過洗滌總量的一半。 .請勿洗滌 . • 這會使您瞭解服裝的面料成份以及洗滌方 單件衣物。 .這會導致負荷不平衡。 .放入一兩件 式。 相似的衣物。 . • 保養標籤上的符號。 . • 檢查所有口袋, 確保口袋是空的。 .釘子、 髮 夾、 火柴、 鋼筆、 硬幣和鑰匙等物品會損壞您 水溫 的洗衣機和衣物。 普通機洗 免燙處理 柔軟衣物 . • 拉上拉練、 合上鉤子並繫好帶子以確保這些 物品不會勾到其他衣物。... -
Page 20: 添加清潔用品
ZH-HK 添加清潔用品 注意 . • 不要使洗滌劑硬化。 .這樣做可能會引起阻塞、 清 洗滌劑用量 洗性能變差或產生異味。 . • 滿載: 按照製造商的建議。 . • 應按照洗滌劑製造商的說明使用洗滌劑, 並根 據類型、 顏色、 織物髒污程度和水洗溫度進行選 . • 部分負荷: 3/4.標準量 取。 . • 最小負荷: 滿載的一半 . • 如果使用的洗滌劑過多, 會出現大量泡沫, 使得 洗滌效果減弱或加重發動機負荷。 添加洗滌劑和衣物柔順劑 . • 如果您想使用液體洗滌劑, 請遵循洗滌劑製造商 的指導。... - Page 21 ZH-HK 使用片劑 . • 切勿將衣物柔順劑放在洗滌劑抽屜盒中超過.2. 天 (衣物柔順劑可能硬化) 。 打開門並將片劑放入滾筒內。 . • 將在進行最後一次清洗程序時自動添加柔順 劑。 . • 供水後請勿打開抽屜盒。 . • 不得使用溶劑 (苯等) 。 注意 . • 請勿直接將衣物柔順劑倒在衣物上。 將衣物放入滾筒中然後關門。 添加軟水劑 . • 軟水劑, 如除垢劑 (例如: 加爾貢) 可以用於減少 在極硬水區域中洗滌劑的使用量。 .根據包裝上所 指定的用量進行分配。 .首先添加洗滌劑, 然後再 添加軟水劑。 .
-
Page 22: 控制面板
ZH-HK 控制面板 預約完成 電源按鈕 程序旋鈕 . • 按下電源按鈕, 啟動洗衣機。 . • 按衣物類型選擇洗衣程序。 . • 所選程序的指示燈將會亮起。 開始/暫停按鈕 . • 啟動/暫停按鈕按鈕用於啟動洗滌程序或暫 停洗滌程序。 . • 如果需要暫停洗滌程序, 按下啟動/暫停按 選項 鈕按鈕。 . • 可讓您選取附加程序, 所選功能的指示燈將 會亮起。 . • 使用這些按鈕為選定的洗衣程序添加額外 洗衣功能。 顯示 . • 顯示螢幕顯示設定、 預計的賸餘時間、 選項以 及狀態訊息。... -
Page 23: 程序表
ZH-HK 程式表 洗滌程序 最大衣 程式 描述 面料種類 合適的溫度 物量 40.°C. 透過將各種滾筒運動結 棉質衣物 (冷水至.95.°C. 合起來改善性能。 有色速乾服裝 (襯衫、 女士 水溫) 洗衣機額定 睡衣、 睡衣等) 和髒污程度 重量 60.°C. 一般的棉質衣物 (內衣) 。 為大量衣物提供最佳的 特大棉質 (冷水至.60.°C. 洗滌性能, 且能耗較少。 水溫) 40.°C. 適合在洗滌後不需要熨 簡易 尼龍、 腈綸、 滌綸。 (冷水至.60.°C. 燙的休閒襯衫。... - Page 24 ZH-HK 最大衣 程式 描述 面料種類 合適的溫度 物量 20.°C. 有助於防止脫色 (使用有 棉質或混合纖維織物製成 深色洗 (冷水至.40.°C. 色纖維織物的洗滌劑) 。 的深色衣物。 水溫) 2.kg 為小型衣物和輕微髒 20.°C. 30分鐘快速洗 污衣物提供快速洗滌 輕微髒污的有顏色衣物。 (冷水至.40.°C. 時間。 水溫) 適合手洗與機洗的精緻 20.°C. 衣物, 諸如可洗的羊毛、 羊毛、 可手洗衣服、 精緻衣 柔軟護理 (冷水至.30.°C. 1.5.kg 女士內衣及裙子等 (使用 物、 易損壞的衣物。 水溫)...
- Page 25 ZH-HK 額外選項 程式 省時 深層清潔 過水+ 預約完成 防皺 預洗 棉質衣物 ● ● ● ● ● ● 特大棉質 ● ● ● ● ● 簡易 ● ● ● ● ● ● 混合洗 ● ● ● ● ● ● 潔淨處理 ● ● ● ●...
- Page 26 ZH-HK 操作數據 程式 最大 轉速 棉質衣物 1200 特大棉質 1200 簡易 1000 混合洗 1200 潔淨處理 1200 超柔呵護洗 1000 夜間洗 1000 大件 1000 運動裝 深色洗 1200 30分鐘快速洗 1200 柔軟護理 除污護理 1200 注意 . • 半負荷時主洗滌程序的資訊。 時間 (分鐘) 賸馀含水量 水 (公升) 能量 (kWh) 程式...
-
Page 27: 附加功能
ZH-HK 附加功能 深層清潔 ( 預約完成 ( 如果衣物的髒污程度為標準和重度,深層清潔選 項很有效。 您可以設定時間延遲, 以便洗衣機將在一段指定的 按下電源按鈕。 時間間隔之後自動啟動並且完成操作。 按下電源按鈕。 選取洗滌程序。 選取洗滌程序。 按下深層清潔按鈕。 按下預約完成按鈕以設定所需時間。 按下開始/暫停按鈕。 按下開始/暫停按鈕。 防皺 ( 注意 如果您要預防衣物起皺, 請選取防皺選項。 . • 延遲時間是指到程序結束的時間, 而非開始。 .實 按下電源按鈕。 際運轉時間可能因水溫、 洗滌量及其他因素而產 生變化。 . • 如要取消功能, 則應按下電源按鈕。 選取洗滌程序。 . • 避免在該選項使用洗滌液。 按下防皺按鈕三秒。... - Page 28 ZH-HK 省時 ( 過水 ( 該選項用於縮短洗滌程序時間。 .最好用輕度髒污 過水+ ( 的衣物。 新增一次漂洗。 按下電源按鈕。 添加衣物 ( 選取洗滌程序。 可在洗滌程序啟動後添加或移除衣物。 按下省時按鈕。 在.LED.燈亮起時按下添加衣物按鈕。 按下開始/暫停按鈕。 添加或移除衣物。 關閉機門並按下啟動/暫停按鈕。 水溫 水溫按鈕為所選程序選取洗衣和洗清綜合溫度。. 注意 按下此按鈕直至所需的設定點亮。 .所有清洗均使 用冷水自來水。 . • 出於安全原因, 門在水位或溫度較高時應保持鎖 定。 .不可在此期間添加衣物。 . • 選取適合您所清洗衣物類型的水溫。 .若要獲得最 佳效果, 請遵循服裝面料保養標籤上的說明。 . • 如果滾筒中的水溫過高, 請等待直至水冷卻。 脫水...
- Page 29 ZH-HK 蜂鳴聲開/關 兒童鎖 ( ) 使用此選項, 禁用控制器。 .此功能可防止兒童更改 按下電源按鈕。 程序或運行此機器 按下開始/暫停按鈕。 鎖定控制面板 按下並一直按壓兒童鎖選項按鈕三秒鐘。 同時按住水溫和延時結束按鈕.3.秒以設定蜂鳴 聲開/關功能。 響起蜂鳴聲, 且顯示屏上將出現. 。 注意 設定兒童安全鎖後, 除電源按鈕外, 所有按鈕都 將鎖住。 . • 一旦設定蜂鳴聲開/關功能, 設定即使在關閉電源 後後仍被儲存。 . • 如果您想關閉蜂鳴器, 僅重複此過程即可。 注意 . • 關閉電源將不會重設兒童鎖功能。 .您在使用其他 功能前必須停用兒童鎖。 解鎖控制面板 按下並一直按壓兒童鎖選項按鈕三秒鐘。 .
-
Page 30: 智慧功能
啟動過程可能會不同。 .有關更多資訊, 請參閱智 統) 為基礎。 慧手機手冊。 . • 鑒於.NFC.的特性, 如果傳輸距離過長, 或者有金 應用程式安裝 屬貼標或手機殼, 可能會令傳輸效果不佳。 .在有 些情況下, 即使配備.NFC.的手機亦可能無法成 功傳輸。 . • 從您的智慧手機上的.Google.電子商店中搜尋. LG.Smart.Laundry.Global。 . • 本手冊中的內容可能因 「LG.Smart.Laundry. Global」 應用程式版本而有所不同, 如有修改, 恕 不另行通知客戶。 LG.Smart 歐盟符合性通知 使用應用程式 LG.Smart.Laundry.Global.應用程式讓您可以方 便使用多種功能。 茲.LG.Electronics.歐洲共享服務中心.B.V..宣佈本 . • 下載洗滌程序... -
Page 31: 使用.Smart.diagnosis™.功能
ZH-HK 使用 Smart Diagnosis™ 功能 在倒計時結束且鈴音停止後, 請繼續與客戶中 心服務人員對談, 之後便可以使用傳輸的分析 資訊來協助您解決問題。 當本產品失靈或發生故障時, 如要透過.LG. Electronics.客戶服務中心進行精確的診斷, 則可 使用該功能。 .僅可在非正常運行期間使用該功能 聯絡服務代表。 按下電源按鈕打開洗衣機。 .請勿按下任何其他 按鈕或旋轉程式選取旋鈕。 注意 . • Smart.Diagnosis™.功能取決於通話質量。 . • 使用固網電話有助提升通話質素, 確保數據正確 當按照聯絡中心指示操作時, 將手機的話筒移 傳輸。 至電源按鈕附近。 . • 若由於不良的通話質量造成.Smart.Diagnosis™. 資料傳輸不良, 您可能不能獲得最佳.Smart. Diagnosis™.服務。 按住水溫鈕三秒鐘, 同時將電話聽筒放置在圖... -
Page 32: 清潔洗衣機
維護 ZH-HK 清潔內側 警告 . • 清潔洗衣機之前, 拔掉插頭, 避免電擊危險。 .如 . • 使用毛巾或軟布在洗衣機機門開口與機門玻璃 果未遵循此警告, 可能導致嚴重傷害、 火災、 電擊 附近擦拭。 或死亡。 . • 始終在程序完成之後將物品從洗衣機中取出。. . • 切勿使用刺激性化學物質、 研磨型清潔劑或溶劑 將潮濕的物品放在洗衣機中會造成起皺、 染色以 清潔洗衣機。 .它們可能損壞拋光面。 及產生異味。 . • 每月運行一次 (依據需要增加次數) 筒槽殺菌程 清潔洗衣機 序, 以清除積聚的洗滌劑和其他殘渣。 洗後保養 清潔濾水入口... -
Page 33: 清潔排水泵過濾器
ZH-HK 清潔排水泵過濾器 清潔之後, 擰上水泵過濾器並塞上排水塞。 . • 排水過濾器收起衣物留下的線頭或小物體。 .定 期檢查過濾器是否清潔以確保洗衣機能夠順利 地運轉。 . • 清潔排水泵前須使水冷卻, 執行緊急排水, 或在 緊急情況下打開機門。 打開帽蓋並拉出水管。 蓋上帽蓋。 拔下排水塞, 將過濾器向左旋轉以將其打開。 用容器收集排出 的水。 注意 . • 首先使用排水管排水, 然後打開水泵過濾器以清 除任何線頭或物體。 . • 排水時要當心, 因為水可能太燙。 清除水泵過濾器中的任何異物。... -
Page 34: 清潔抽屜盒
ZH-HK 清潔抽屜盒 潔 筒( ) ( 選用) 洗滌劑和衣物柔順劑可能堆積在抽屜盒中。 .取下 滾筒清潔是清潔洗衣機內部的特殊程序。 抽屜盒與嵌件, 檢查是否有堆積, 每月執行一到兩 使用本程序要求水位更高, 脫水速度更快。 .定期執 次。 行此程序。 將抽屜盒向外直拉出, 直到拉不動為止, 以拆除 取出洗衣機內的任何衣物或物品, 然後關門。 洗滌劑抽屜盒。 . • 用力向下按脫離按鈕並取下抽屜盒。 打開洗滌劑抽屜盒, 在主洗滌劑格中加入除垢 劑 (例如: 加爾貢) 。 . • 對於滾筒中的片劑。 慢慢關閉抽屜盒。 從抽屜盒上取下嵌件。 開啟電源, 按住潔筒按鈕.3.秒鐘。 .然後. .將... -
Page 35: 冬季注意防止結冰
ZH-HK 冬季注意防止結冰 . • 關閉水龍頭後, 從水龍頭斷開冷水進水管, 將水 管開口朝下清除水。 . • 結冰後, 產品無法正常運作。 .確保將產品安裝在 冬季期間不會結冰的地點。 . • 如果必須將產品安裝在室外的門廊上或處其他 室外條件下, 確保檢查以下項目。 進水管 如何防止產品結冰 . • 洗滌之後, 打開用於排除殘留水的水管塞將水泵 中剩餘的水完全排空。 .澈底將水排空之後, 蓋上 用於排除殘留水的水管塞和帽蓋。 檢查是否結冰 . • 當打開用於排除殘留水的水管塞時無法排水, 則 檢查排水裝置。 排水塞 帽蓋 排水塞 . • 將排水管自然垂下, 將管內的水完全排出。 帽蓋... - Page 36 ZH-HK 結冰處理 . • 從滾筒中完全清除水後, 關閉用於排出殘留水的 水管塞, 選擇洗滌程序並按下啟動/暫停按鈕。 . • 確保排空滾筒的水, 倒入.50‒60.°C.的溫水, 直至 直至水面沒過滾筒內的橡膠件, 關上門, 等待.1-2. 個小時。 排水管 洗滌劑抽屜盒 50-60.°C 注意 . • 檢查漂洗時水是否進入洗滌劑抽屜盒, 以及脫水 時水是否從排水管排出。 注意 . • 如果以彎曲的形狀安裝排水管, 水管內部可能會 . • 出現供水問題後, 請採取以下措施。 結冰。 . − 關上水龍頭, 使用浸過熱水的步為水龍頭和產 品進水管的兩個連接區域解凍。...
-
Page 37: 疑難排解
疑難排解 ZH-HK . • 您的洗衣機配有自動故障監測系統, 以在早期階段檢測和診斷故障問題。 .如果您的洗衣機無法正常工作 或不工作, 聯絡維修服務之前檢查以下部分: 診斷問題 癥狀 原因 解決方案 . • 檢查所有口袋, 確保口袋是空的。 .夾子、 火柴、 鋼筆、 硬幣和鑰匙等物品會損壞您 滾筒或水泵中有異物, 例如硬幣或 咔嗒聲和叮噹聲噪音 的洗衣機和衣物。 安全別針等。 . • 拉上拉練、 合上鉤子並繫好拉繩以防這些 物品勾在或纏在其他衣物上。 洗滌量過大可能會產生重擊聲。 這 . • 如果持續發出聲音, 則洗衣機可能失去平 重擊聲 衡。 .停止洗衣機, 重新分配洗滌量。 通常是正常情況。... - Page 38 ZH-HK 癥狀 原因 解決方案 此位置的供水不足。 . • 檢查家中的另一個水龍頭。 供水水龍頭沒有完全打開。 . • 完全打開水龍頭。 水無法進入洗衣機或 流入的速度較慢 進水管扭折。 . • 拉直水管。 進水管過濾器堵塞。 . • 檢查進水管過濾器。 排水管扭結或堵塞。 . • 清潔並拉直排水管。 洗衣機中的水無法排 放或排放緩慢 拍書過濾器堵塞。 . • 清潔排水管過濾器。 可能沒有插上電源線或者接頭可 . • 確保插頭牢牢地插在壁式插座上。 能鬆動。 . • 重設電路斷路器或更換保險絲。 .請勿增 洗衣機無法啟動...
- Page 39 ZH-HK 癥狀 原因 解決方案 洗衣機啟動之後, 為安全起見, 不得 . • 檢查 「門上鎖」 圖示是否亮起。 .您可在 「門 機門無法打開 上鎖」 圖示不亮時安全打開機門。 打開機門。 如果檢測到不平衡或者如果已打 . • 這是正常情況。 .顯示螢幕上顯示的剩餘 洗滌週期時間延遲 開去除泡沫程序, 則會增加洗滌 時間僅是預計的時間。 .實際時間可能會 有所不同。 時間。 . • 遵循柔順劑使用指南以確保使用合適的 衣物柔順劑溢出 柔順劑過多可能會溢出。 量。 .切勿超出最大加注線。 . • 遵循洗滌劑製造商提供的指引。 柔順劑過早分配...
-
Page 40: 錯誤訊息
ZH-HK 錯誤訊息 癥狀 原因 解決方案 . • 檢查家中的另一個水龍頭。 本區域的供水不足。 供水水龍頭沒有完全打開。 . • 完全打開水龍頭。 進水管扭折。 . • 拉直水管。 進水管過濾器堵塞。 . • 檢查進水管過濾器。 如果水止進水管漏水, 指示燈 將變成 紅色。 . • 使用水止進水管。 可能因型號而異。 . • 加入.1.到.2.件類似的衣物以幫助平衡 衣物量太少。 負載。 . • 加入.1.到.2.件類似的衣物以幫助平衡 衣物量不平衡。 負載。 本電器具有不平衡檢測與校正系統。 如果 放入單件較重的物品... - Page 41 ZH-HK 癥狀 原因 解決方案 排水管扭結或堵塞。 . • 清潔並拉直排水管。 拍書過濾器堵塞。 . • 清潔排水管過濾器。 . • 完全關閉門。 .如果. 、 、 .未釋 確保門沒有打開。 放, 則聯絡維修服務。 控制錯誤。 . • 拔掉電源插頭, 聯絡服務。 . • 關閉水龍頭。 因水閥故障造成注水過量。 . • 拔下電源插頭。 . • 聯絡維修服務。 . • 關閉水龍頭。 水位感測器故障。...
- Page 42 . • 由滲漏或破損水管、 冷凍水管、 排水管道小、 供水不足或中斷或供氣不足造成的損失。 . • 由於在腐蝕性氣體環境下或與產品使用者手冊所述相反操作產品造成的損失。 . • 由於事故、 害蟲、 雷電、 風、 火、 水災或天災造成的產品損失。 . • 由未授權修改或改正造成的損失或故障, 或被用於其它用途, 或組件未合適安裝造成的滲水。 . • 由於不正確的電氣線路、 電壓或管道工程規程、 商業或工業使用、 或使用附件、 部件或未被.LG.認可的消 耗清潔產品造成的損失或故障。 . • 由於運輸和搬運造成的損傷, 包括刮痕、 凹痕、 缺損和/或完成產品的其他損傷, 除非損傷是由於材料缺陷 或工匠技藝造成的。 . • 顯示的損壞或丟失衣物、 已打開的箱子、 打折產品或整修品。...
- Page 43 ZH-HK 因沒有拆下運輸螺栓或洗衣 拆下運輸螺栓和洗衣筒 筒支架而產生奇怪的振動或 支架。 噪音。 運輸. 洗衣桶. 紙箱. 螺栓 支架 底板 因墊圈和機門玻璃上的污垢 ( 清潔墊圈和機門玻璃。 頭髮、 纖維屑) 引起的洩漏。 因水泵過濾器堵塞引起的無 清潔泵過濾器。 法排水。 由於進水閥過濾器堵塞或進水 清潔進水閥過濾器或重新 管扭折導致不進水。 安裝進水管。 濾水入口 因使用過多洗滌劑而無法進 清潔洗滌劑抽屜盒。 分配器 水。 冷水 熱水 冷水供應 熱水供應 由於進水管安裝反了, 洗衣結 重新安裝進水管。 束後, 衣物較熱或較溫。 因沒有打開水龍頭而無法供 打開水龍頭。...
- Page 44 ZH-HK 因排水管安裝不當或排水管堵 重新安裝排水管。 塞而造成的洩漏。 彎管支架 係帶 由於進水管安裝不當或使用其 重新安裝進水管。 他品牌進水管導致洩漏。 因電源線連接鬆動或電氣插座 重新連接電源線或更換電 問題引起的無法供電問題。 氣插座。 調平 提供交付、 裝運或安裝產品或 保固僅涵蓋製造缺陷。 .因 說明產品用途的服務。 .產品的 安裝不當而造成的服務不 拆除和重新安裝。 在保固範圍內。 如果所有的螺絲均未正確安 在每個角安裝.4.顆螺絲 ( 裝, 就有可能引起過度的振動 ( 共.16顆) 。 僅基座型號) 。 高壓水 自然水流 洗衣機注水時會發出水擊聲音 調小家中水閥或水龍頭的 (咚咚響) 。 水流量來調節水壓。 突然停止的...
- Page 45 備註...
- Page 46 備註...
- Page 47 MACHINE Before beginning installation, read these instructions carefully. This will simplify installation and ensure that the product is installed correctly and safely. Leave these instructions near the product after installation for future reference. ENGLISH WF-1206C5W WF-1207C4W WF-1206C4W www.lg.com MFL69655820 Rev.00_011117...
- Page 48 TABLE OF CONTENTS This manual may contain images or content different from the model you purchased. This manual is subject to revision by the manufacturer. SAFETY INSTRUCTIONS ............3 IMPORTANT SAFETY INSTRUCTIONS ............ 3 Disposal of Your Old Appliance ..............8 INSTALLATION ................9 Parts ......................
-
Page 49: Safety Instructions
SAFETY INSTRUCTIONS The following safety guidelines are intended to prevent unforeseen risks or damage from unsafe or incorrect operation of the appliance. The guidelines are separated into ‘WARNING’ and ‘CAUTION’ as described below. This symbol is displayed to indicate matters and operations that can cause risk. - Page 50 For use in Europe: This appliance can be used by children aged from 8 years and above and persons with reduced physical, sensory or mental capabilities or lack of experience and knowledge if they have been given supervision or instruction concerning use of the appliance in a safe way and understand the hazards involved.
- Page 51 •This appliance must not be installed behind a lockable door, a sliding door or a door with a hinge on the opposite side to that of the appliance, in such a way that a full opening of the appliance door is restricted. •This appliance must be grounded.
- Page 52 •Never reach into the appliance while it is operating. Wait until the drum has completely stopped. •In case of flood, disconnect the power plug and contact the LG Electronics customer information centre. •Do not push down the door excessively, when the appliance door is open.
- Page 53 •Do not touch the power plug or the appliance controls with wet hands. •Do not bend the power cable excessively or place a heavy object on it. •Do not wash rugs, mats, shoes or pet blankets, or any other items other than clothes or sheets, in this machine.
-
Page 54: Disposal Of Your Old Appliance
• You can take your appliance either to the shop where you purchased the product, or contact your local government waste office for details of your nearest authorised WEEE collection point. For the most up to date information for your country please see www.lg.com/global/recycling. -
Page 55: Installation
INSTALLATION Parts Transit bolts Power plug Drawer Control panel Drum Door Drain hose Drain plug Drain pump filter Cover cap (Location may vary depending on products) Adjustable feet Accessories Cold supply hose (1 EA) Spanner Caps for covering Anti–slip sheets (2 EA) (Option: Hot (1 EA)) transit bolt holes (Optional) -
Page 56: Specifications
Specifications Model WF-1206C5W/ WF-1206C4W WF-1207C4W Wash Capacity 6 kg 7 kg Power Supply 220 - 240 V~, 50 Hz Size 600 mm (W) x 450 mm (D) x 850 mm (H) Product Weight 62 kg Permissible Water pressure 0.1 - 1.0 MPa (1.0 - 10.0 kgf / cm²) •... -
Page 57: Installation Place Requirements
Installation Place • If it is impossible to avoid positioning the appliance next to a gas cooker or coal burning Requirements stove, an insulation (85x60 cm) covered with aluminum foil on the side facing the cooker Location or stove must be inserted between the two appliances. -
Page 58: Unpacking And Removing Transit Bolts
Unpacking and Removing Install the hole caps. Transit Bolts • Locate the hole caps included in the accessory pack or attached on the back. Lift the appliance off the foam base. • After removing the carton and shipping material, lift the appliance off the foam base. -
Page 59: Using Anti-Slip Sheets (Optional)
• Push or rock the top edges of the appliance gently to make sure that the appliance does not rock. If the appliance rocks, level the appliance again. NOTE • You can obtain anti-slip sheets from the LG Service Centre. -
Page 60: Leveling The Appliance
Leveling the Appliance Connecting the Water Supply Hose If the floor is uneven, turn the adjustable feet as required (Do not insert pieces of wood etc. under • Water pressure must be between 0.1 MPa and the feet). Make sure that all four feet are stable 1.0 MPa (1.0‒10.0 kgf/cm and resting on the floor and then check that the •... - Page 61 Connecting Hose to Water Tap Push the adapter onto the end of the tap so that the rubber seal forms a watertight connection. Tighten the four fixing screws. Connecting Screw-Type Hose to Tap with Thread Screw the hose connector onto the water supply tap.
- Page 62 Connecting Hose to Appliance Push the adapter onto the end of the tap so that the rubber seal forms a watertight Attach the hot water line to the hot water supply connection. Tighten the four fixing screws on the back of the washer. Attach the cold water and the adapter ring plate.
-
Page 63: Installing The Drain Hose
Installing the Drain Hose • The drain hose should not be placed higher than 100 cm above the floor. Water in the appliance may not drain or may drain slowly. • Securing the drain hose correctly will protect the floor from damage due to water leakage. •... -
Page 64: Operation
OPERATION Using the Washing Machine Choose the desired washing cycle. • Press the cycle button repeatedly or turn Before the first wash, select a washing the cycle selector knob until the desired programme, allow the washing machine to wash cycle is selected. without clothing. -
Page 65: Sorting Laundry
Sorting Laundry Caring before loading. • Combine large and small items in a load. Load large items first. Look for a care label on your clothes. • Large items should not be more than half • This will tell you about the fabric content of the total wash load. -
Page 66: Adding Cleaning Products
Adding Cleaning Products NOTE • Do not let the detergent harden. Doing so may Detergent Dosage lead to blockages, poor rinse performance or odour. • Detergent should be used according to the • Full load : According to manufacturer’s instruction of the detergent manufacturer and recommendation. - Page 67 Using Tablet • Do not leave the fabric softener in the detergent drawer for more than 2 days (Fabric Open the door and put tablets into the drum. softener may harden). • Softener will automatically be added during the last rinse cycle. •...
-
Page 68: Control Panel
Control Panel 預約完成 Power Button Programme Knob • Press the Power button to turn the • Programmes are available according to washing machine on. laundry type. • Lamp will light up to indicate the selected programme. Start/Pause Button • This Start/Pause button is used to start the wash cycle or pause the wash cycle. -
Page 69: Programme Table
Programme Table Washing Programme Maximum Programme Description Fabric Type Proper Temp. Load Provides better performance by 40 °C Cotton combining various drum (Cold to 95 °C) Coloured fast garments motions. (shirts, nightdresses, pajamas, etc.) and Rating Provides optimised normally soiled cotton washing performance 60 °C load (underwear). - Page 70 Maximum Programme Description Fabric Type Proper Temp. Load Helps to prevent Dark garments made decolorization (Use 20 °C Dark Wash from cotton or mixed detergent for colored (Cold to 40 °C) fabrics. fabrics). 2 kg Provides fast washing Lightly soiled colour 20 °C Quick 30 time for small loads and...
- Page 71 Extra Options Time Delay Crease Programme Intensive Rinse+ Pre Wash Save Care Cotton ● ● ● ● ● ● Cotton+ ● ● ● ● ● Easy Care ● ● ● ● ● ● ● ● ● ● ● ● Hygiene ●...
- Page 72 Operating Data Programme Max RPM Cotton 1200 Cotton+ 1200 Easy Care 1000 1200 Hygiene 1200 Baby Care 1000 Silent Wash 1000 Duvet 1000 Sports Wear Dark Wash 1200 Quick 30 1200 Gentle Care Stain Care 1200 NOTE • Information of main washing programmes at half load. Remaining Time in moisture...
-
Page 73: Option Programme
Option Programme Intensive ( Delay End ( If the laundry is normal and heavily soiled, Intensive option is effective. You can set a time delay so that the washing Press the Power button. machine will start automatically and finish after a specified time interval. - Page 74 Time Save ( Rinse ( This option can be used to reduce the time of Rinse+ ( a wash programme. It is best used on lightly s oiled loads. Add rinse once. Press the Power button. Add Item ( Select a washing programme. Laundry can be added or removed after the washing programme is started.
- Page 75 Beep On / Off Child Lock ( Use this option to disable the controls. This Press the Power button. feature can prevent children from changing cycles or operating the appliance Press the Start/Pause button. Locking the Control Panel Press and hold the Temp. and Delay End Press and hold the Child Lock button for button simultaneously for 3 seconds to set three seconds.
-
Page 76: Smart Functions
Installation of the Application phone, transmission will not be good. In some cases, NFC-equipped phones may be unable • Search LG Smart Laundry Global on the to transmit successfully. Google Play Store from your smart phone. • The content found in this manual may differ... -
Page 77: Using The Smart Diagnosis™ Function
Use this function if you need an accurate for analysis. diagnosis by an LG Electronics service centre when the product malfunctions or fails. Use this function only to contact the service representative, not during normal operation. -
Page 78: Maintenance
MAINTENANCE Cleaning the Interior WARNING • Unplug the washing machine before cleaning • Use a towel or soft cloth to wipe around the to avoid the risk of electric shock. Failure to washing machine door opening and door glass. follow this warning may result in serious injury, •... -
Page 79: Cleaning The Drain Pump Filter
Cleaning the Drain Pump After cleaning, turn the pump filter and insert the drain plug. Filter • The drain filter collects threads and small objects left in the laundry. Check regularly that the filter is clean to ensure smooth running of your washing machine. -
Page 80: Cleaning The Dispenser Drawer
Cleaning the Dispenser Tub Clean ( ) (Optional) Drawer Tub Clean is a special programme to clean the inside of the washing machine. Detergent and fabric softener may build up in the dispenser drawer. Remove the drawer and A higher water level is used in this programme inserts and check for buildup once or twice a at higher spin speed. -
Page 81: Caution On Freezing During Winter
Caution on Freezing During • After closing the tap, disconnect the cold supply hose from the tap, and remove water Winter while keeping the hose facing downwards. • When frozen, the product does not operate normally. Make sure to install the product where it will not freeze during winter. - Page 82 How to Handle Freezing • When water is removed completely from the drum, close the hose plug used for removal of • Make sure to empty the drum, pour warm residual water, choose a washing programme, water of 50–60 °C up to the rubber part inside and press the Start/Pause button.
-
Page 83: Troubleshooting
TROUBLESHOOTING • Your washing machine is equipped with an automatic error-monitoring system to detect and diagnose problems at an early stage. If your washing machine does not function properly or does not function at all, check the following before you call for service: Diagnosing Problems Symptoms Reason... - Page 84 Symptoms Reason Solution Water supply is not adequate in • Check another tap in the house. that location. Water supply tap is not Water does not • Fully open tap. completely open. enter washing machine or it enters Water supply hose(s) are •...
- Page 85 Symptoms Reason Solution Once washing machine has • Check if the ‘Door Lock’ icon is Door does not open started, the door cannot be illuminated. You can safely open the door after the ‘Door Lock’ icon turns off. opened for safety reasons. If an imbalance is detected or if •...
-
Page 86: Error Messages
Error Messages Symptoms Reason Solution Water supply is not adequate in area. • Check another tap in the house. Water supply taps are not completely • Fully open tap. open. Water supply hose(s) are kinked. • Straighten hose(s). The filter of the supply hose(s) are •... - Page 87 Symptoms Reason Solution Drain hose is kinked or clogged. • Clean and straighten the drain hose. The drain filter is clogged. • Clean the drain filter. • Close the door completely. If Ensure door is not open. is not released, call for service. •...
-
Page 88: Warranty
• Costs associated with removal of your Product from your home for repairs. • The removal and reinstallation of the Product if it is installed in an inaccessible location or is not installed in accordance with published installation instructions, including LG’s owner’s and installation manuals. - Page 89 Strange vibration or noise Remove the transit bolts caused by not removing & tub support. transit bolts or tub support. Transit Carton bolt support base Leakage caused by dirt (hair, Clean the gasket & door lint) on gasket and door glass.
- Page 90 Leakage caused by improper installation of drain hose or Reinstall the drain hose. Elbow Bracket clogged drain hose. Tie Strap Leakage caused by improper installation of water supply Reinstall the supply hose or using other brand hose. supply hoses. No power problem caused Reconnect the power by loose connection of power cord or change the...
- Page 91 Memo...
Need help?
Do you have a question about the WF-1208C4W and is the answer not in the manual?
Questions and answers