Table of Contents
Advertisement
Quick Links
OWNER'S MANUAL
DVD MINI Hi-Fi System
Please read this manual carefully before operating
your set and retain it for future reference.
MODELS
MDT355 (MDT355, MDS355V/W)
MDD65 (MDD65, MDS65V)
MDD105 (MDD105, MDS105V)
MDD265 (MDD265, MDS265V)
P/NO : MFL63266280
MDD105-A0U-AARELLK-ENG.indd 1
MDD105-A0U-AARELLK-ENG.indd 1
10. 05. 24
10. 05. 24
5:21
5:21
Advertisement
Table of Contents

Related Manuals for LG MDT355


Summary of Contents for LG MDT355
- Page 1 OWNER’S MANUAL DVD MINI Hi-Fi System Please read this manual carefully before operating your set and retain it for future reference. MODELS MDT355 (MDT355, MDS355V/W) MDD65 (MDD65, MDS65V) MDD105 (MDD105, MDS105V) MDD265 (MDD265, MDS265V) P/NO : MFL63266280 MDD105-A0U-AARELLK-ENG.indd 1 MDD105-A0U-AARELLK-ENG.indd 1 10.
-
Page 2: Safety Information
Safety Information Safety Information such as vases, shall be placed on the apparatus. CAUTION CAUTION concerning the Power Cord RISK OF ELECTRIC SHOCK DO NOT OPEN Most appliances recommend they be placed upon a dedicated circuit; CAUTION: TO REDUCE THE RISK OF ELECTRIC SHOCK DO That is, a single outlet circuit which powers only that NOT REMOVE COVER (OR BACK) NO USER-SERVICEABLE appliance and has no additional outlets or branch circuits. - Page 3 Directive 2004/108/ players when formatting rewritable discs. When setting EC, 2006/95/EC, and 2009/125/EC. the option to Live File System, you cannot use it on LG European representative : players. (Mastered/ Live File System : Disc format system LG Electronics Service Europe B.V.
-
Page 4: Table Of Contents
To display the DVD Menu To display the DVD title Installation Selecting a subtitle language 1.5 times speed playback Attaching the speakers to the unit Starting play from selected MDT355 (2.1 channel) time MDD65/ MDD105/MDD265 Last Scene Memory (2 channel) Antenna Connection MDD105-A0U-AARELLK-ENG.indd 4 MDD105-A0U-AARELLK-ENG.indd 4... - Page 5 Contents Changing the character set to Synchronized Recording from display DivX® subtitle correctly CD to Tape - optional Recording to USB Creating your own program Viewing a PHOTO fi le Maintenance Viewing a PHOTO fi le as a slide show Notes on Discs Setting the Clock Handling the Unit...
-
Page 6: Preparation
Preparation Preparation Unique Features Accessories Please check and identify the supplied accessories. AUTO DJ Auto DJ blends the end of one song into the beginning of another for seamless playback. USB Direct Recording Video cable (1) FM antenna (1) Records music to your USB device. Remote control (1) Battery (1) AM antenna (1) -
Page 7: Introduction
Preparation Introduction Symbol Used in this Manual All discs and fi le listed below MP3 fi les Playable Discs DVD and fi nalized DVD±R/RW This unit plays DVD±R/RW and CD-R/RW that WMA fi les contains audio titles, DivX, MP3, WMA and/or JPEG fi les. -
Page 8: Playable Fi Le Requirement
Preparation Playable fi le Requirement DivX fi le requirement DivX fi le compatibility with this unit is limited as follows : MP3/ WMA music fi le requirement • Available resolution: MP3/ WMA fi le compatibility with this unit is up to 800 x 600 (W x H) pixels. limited as follows : •... -
Page 9: Remote Control
Preparation (Dimmer : The display window will be darkened Remote control by half.) 1 POWER : Switches the unit ON or OFF. Z OPEN/CLOSE : Opens and closes the disc Remote control tray. TITLE : If the current DVD title has a menu, the title menu appears on the screen. - Page 10 (LG TV only) Controlling the TV. You can control the sound level, input source, and power switching of LG TVs as well. Hold POWER (TV) and press PR/CH (+/–) button repeatedly until the TV turns on or off . PROG./MEMO. : Accesses Program menu.
-
Page 11: Rear Panel
Preparation Rear panel a VIDEO OUT connector e SPEAKERS terminal b ANTENNA (FM, AM (optional) ) MDT 355 Speaker terminal c AUX IN connector d OUT PUT (COMPONENT VIDEO OUT (PROGRESSIVE SCAN)) connector MDD65/ MDD105/MDD265 Speaker terminal f Cooling fan MDD105-A0U-AARELLK-ENG.indd 11 MDD105-A0U-AARELLK-ENG.indd 11 10. -
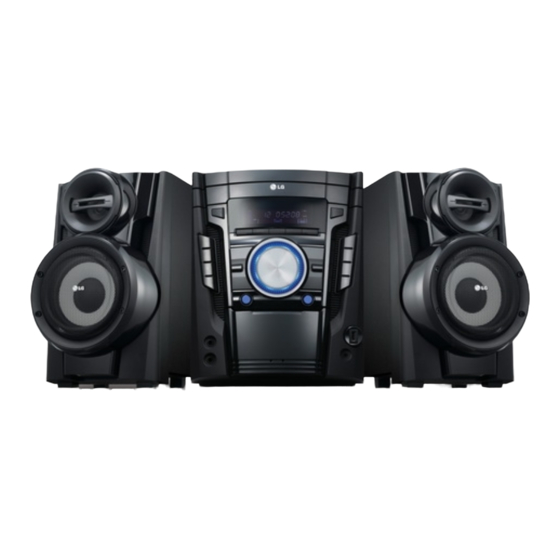
Page 12: Front Panel
Preparation Front panel MDD105-A0U-AARELLK-ENG.indd 12 MDD105-A0U-AARELLK-ENG.indd 12 10. 05. 24 10. 05. 24 5:21 5:21... - Page 13 Selects the TAPE function. u Cassette door Selects the AUX function. v PRESET -/ < e f EQ/ LG EQ - TAPE reverse play You can choose sound impressions. - Selects preset numbers g USER EQ w PRESET + / >...
-
Page 14: Installation
TV screen or PC monitor screen. Please use the speakers far away from either TV screen or PC monitor. Connect the other end of each wire to the correct speaker according to the color coding MDT355 (2.1 channel) Color Speaker Position Orange... -
Page 15: Antenna Connection
Installation Antenna Connection Connect the supplied FM (F) /AM (optional) (A) antenna for listening to the radio. Antenna Connection NOTE • To prevent noise pickup, keep the (optional) Loop antenna away from the unit and other components. • Be sure to fully extend the FM wire antenna. After connecting the FM wire antenna, keep it as horizontal as possible. -
Page 16: Connections To Your Tv
Installation Connections to Your Component Video Connection Make one of the following connections, depending on the capabilities of your existing equipment. NOTE • Depending on your TV and other equipment you wish to connect, there are various ways you could connect the unit. Use only one of the connections described in this manual. -
Page 17: Video Connection
Installation Video Connection Optional Equipment Connect the VIDEO OUT jack on the unit to the Connection video in jack on the TV using a video cable. You can hear the sound through the system’s speakers. AUX In Connection Video Connection Connect an Output of auxiliary device to the AUX (L/R) INPUT Connector. -
Page 18: Usb Connection
Installation USB Connection USB device requirement • Devices which require additional program Connect the USB port of USB Memory (or MP3 installation connected to a computer, are player, etc.) to the USB port on the front of the not supported. unit. -
Page 19: Adjust The Setup Settings
Installation Adjust the Setup To display and exit the Setup Menu settings 1. Select the DVD/CD or USB function by pressing FUNCTION. 2. Press SETUP. By using the Setup menu, you can make Displays the [SETUP] Menu. various adjustments to items such as picture 3. -
Page 20: Language
Installation LANGUAGE DISPLAY Menu Language TV Aspect Select a language for the Setup menu and Select which screen aspect to use based on then on screen display. the shape of your TV screen. [4:3] Disc Audio / Disc Subtitle / Disc Select when a standard 4:3 TV is connected. -
Page 21: Audio
AUDIO of the selected speaker. Test – Press I i to test the signals of each 2.1 Speaker Setup (MDT355) speaker. Adjust the volume to match the Make the following settings for the built-in 2.1 volume of test signals memorized in the channel surrounds decoder. -
Page 22: Lock (Parental Control)
Installation LOCK (Parental Control) Password You can enter or change password. Initial Setting of the Area Code 1. Sel ect [Password] on the [Lock] menu and then press When you use this unit for the fi rst time, you have to set the Area Code as shown below. Input a password and press ENTER. -
Page 23: Others
Installation OTHERS NOTE • DVD, DVD Karaoke discs with more than 2 DivX(R) Registration tracks are available discs for this function. ABOUT DIVX VIDEO: DivX® is a digital video • When you watch movies, “off ” the Semi format created by DivX,Inc. This is an offi cial Karaoke at the SETUP menu or enjoy it without DivX Certifi ed device that plays DivX video. -
Page 24: Operation
Operation Operation Basic Operations During playback, press . or > to go to the Skipping to next chapter track/fi le or to the next/ return to the beginning of previous Disc/ USB Operations the current chapter track/ chapter/ track/ fi le. 1. -
Page 25: Tape Operation
Operation TAPE Operation Listening to cassette tapes Cassette tapes can be played back in this unit. 1. Open the tape door by pressing Z PUSH EJECT. 2. Insert the tape. 3. Close the tape door. 4. Select the TAPE funtion by pressing TAPE on the unit or FUNCTION on the remote control. -
Page 26: Other Operations
Operation Other Operations To display the DVD Menu When you play a DVD which contains several menu, you can select the menu you want using the Menu. Displaying Disc Information 1. Press MENU. on-screen The disc’s menu appears. You can display various information about the 2. -
Page 27: Starting Play From Selected
Operation Starting play from selected Creating your own program time MP3 WMA DivX You can play the contents of a disc in the order To start playing at any chosen time on the fi le you want by arranging the order of the songs or title. -
Page 28: Viewing A Photo Fi Le As A Slide Show
Operation Viewing a PHOTO fi le Viewing a PHOTO fi le as a slide show This unit can play discs with photo fi les. 1. Highlight the fi le (not folder) which you like 1. Select the DVD/CD or USB function by beginning slide show. -
Page 29: Setting The Clock
Operation Setting the Clock Using your player as an alarm clock 1. Turn the power on. 1. Turn the power on. 2. Press CLOCK for at least 2 seconds. 2. Press TIMER. Each functions fl ashes. 3. Choose from either, by using |<<... -
Page 30: Sleep Timer Setting
Operation Sleep Timer Setting System Select - Optional Press SLEEP one or more times to select delay You must select the appropriate system mode time between 10 and 180 minutes, after which for your TV system. If “NO DISC” appears in the the unit turn off . -
Page 31: Auto Dj Playback
Operation AUTO DJ playback NOTE MP3 WMA Auto DJ blends the end of one song into • Searching for a section within a track or playing the beginning of another for seamless repeatedly or randomly is not supported on the AUTO DJ mode. playback. -
Page 32: Radio Operations
Operation Radio Operations Presetting the Radio Stations You can preset 50 stations for FM and AM (optional) (MW). Before tuning, make sure that you have turned Be sure that both FM and AM (optional) aerials down the volume. are connected. (Refer to the page 15) 1. -
Page 33: Improving Poor Fm Reception
Operation Improving poor FM reception Press PLAY (B) (MO./ST.) on the remote control. This will change the tuner from stereo to mono and usually improve the reception Deleting all the saved station 1. Press and hold PROG./MEMO. for two seconds. “ERASE ALL”... -
Page 34: Sound Adjustment
You can select a desired sound mode by using LG EQ/EQ NOTE You can change the LG EQ/EQ using I i • In some of surround modes, some speakers, arrow key while the sound eff ect information is there's no sound or low sound. -
Page 35: Advanced Operations
Operation Advanced Operations Pausing recording During TAPE recording, press R on the unit REC on the remote control to pause recording. Press it again to restart recording. Listening to music from your external device Synchronized Recording from The unit can be used to play the music from CD to Tape many types of external devices. -
Page 36: Recording To Usb
Operation Recording to USB NOTE You can record a various sound source to USB. • You can check the recording percentage rate 1. Connect the USB device to the unit. for the USB record on the screen during the recording. (Audio CD or MP3/ WMA CD only) 2. -
Page 37: Maintenance
Maintenance Maintenance Notes on Discs Handling the Unit Handling Discs When shipping the unit Please save the original shipping carton and packing materials. If you need to ship the unit, for maximum protection, re-pack the unit as it was originally packed at the factory. Keeping the exterior surfaces clean Never stick paper or tape on the disc. -
Page 38: Troubleshooting
Troubleshooting Troubleshooting Troublushoothing PROBLEM CAUSE CORRECTION Plug the power cord into the wall outlet No power The power cord is disconnected. securely. Select the appropriate video input mode The TV is not set to receive the DVD signal. on the TV so the picture from the unit appears on the TV screen. -
Page 39: Appendix
Appendix Appendix Language Codes Use this list to input your desired language for the following initial settings: Disc Audio, Disc Subtitle, Disc Menu. Language Code Language Code Language Code Language Code Afar 6565 French 7082 Lithuanian 7684 Singhalese 8373 Afrikaans 6570 Frisian 7089... -
Page 40: Area Codes
Appendix Area Codes Choose a area code from this list. Area Code Area Code Area Code Afghanistan Greenland Paraguay Argentina Hong Kong Philippines Australia Hungary Poland Austria India Portugal Belgium Indonesia Romania Bhutan Israel Russian Federation Bolivia Italy Saudi Arabia Brazil Jamaica Senegal... -
Page 41: Trademarks And Licenses
• Dimensions (W x H x D): registered trademarks of Dolby Laboratories. (272 X 336 X 352) mm • Net Weight (Approx.): MDT355: 5.5 Kg MDD65 : 5.2 kg “DVD Logo” is a trademark of DVD Format/Logo MDD105 : 5.3 kg Licensing Corporation. - Page 42 3.4 kg Amplifi er • Passive Subwoofer (MDS355W) • OUTPUT POWER: Type: 1 Way 1 speaker Front (MDT355) : 100 W x 2 (4 Ω) Impedance: 3 Ω Subwoofer (MDT355) : 150 W (3 Ω) Rated Input Power: 150 W Max.
- Page 43 MDD105-A0U-AARELLK-ENG.indd 43 MDD105-A0U-AARELLK-ENG.indd 43 10. 05. 24 10. 05. 24 5:21 5:21...
- Page 44 MDD105-A0U-AARELLK-ENG.indd 44 MDD105-A0U-AARELLK-ENG.indd 44 10. 05. 24 10. 05. 24 5:21 5:21...
Need help?
Do you have a question about the MDT355 and is the answer not in the manual?
Questions and answers