Table of Contents
Advertisement
OWNER'S MANUAL
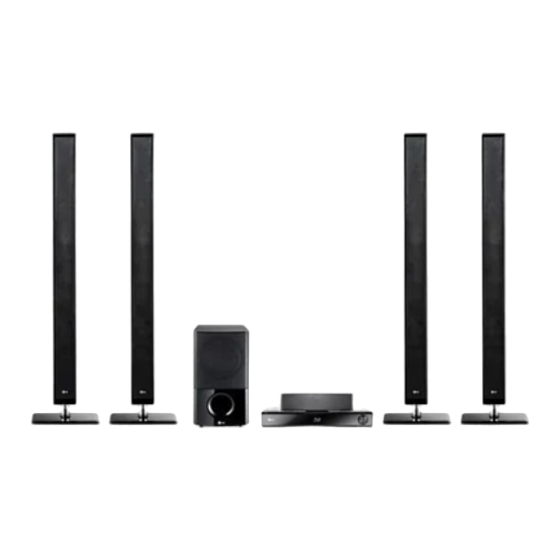
Network Blu-ray Disc™ / DVD
Wireless Home Theater System
Please read this manual carefully before operating
your set and retain it for future reference.
MODEL
HB965TXW (HB965TXW, SB95TX-S/C/W / W95)
P/NO : MFL65220860
HB965TXW-AD.BDZALLK_ENG_0860.ind1 1
HB965TXW-AD.BDZALLK_ENG_0860.ind1 1
2010.6.9 2:3:10 PM
2010.6.9 2:3:10 PM
Advertisement
Table of Contents

Related Manuals for LG SB95TX-SW95


Summary of Contents for LG SB95TX-SW95
- Page 1 OWNER’S MANUAL Network Blu-ray Disc™ / DVD Wireless Home Theater System Please read this manual carefully before operating your set and retain it for future reference. MODEL HB965TXW (HB965TXW, SB95TX-S/C/W / W95) P/NO : MFL65220860 HB965TXW-AD.BDZALLK_ENG_0860.ind1 1 HB965TXW-AD.BDZALLK_ENG_0860.ind1 1 2010.6.9 2:3:10 PM 2010.6.9 2:3:10 PM...
-
Page 2: Safety Information
Safety Information Safety Information Cautions and Warnings CAUTION WARNING: TO PREVENT FIRE OR ELECTRIC SHOCK RISK OF ELECTRIC SHOCK DO NOT OPEN HAZARD, DO NOT EXPOSE THIS PRODUCT TO RAIN OR MOISTURE. CAUTION: TO REDUCE THE RISK OF ELECTRIC WARNING: Do not install this equipment in a SHOCK DO NOT REMOVE COVER (OR BACK) NO confi ned space such as a book case or similar unit. - Page 3 Safety Information CAUTION concerning the Power Cord CAUTION: The apparatus shall not be exposed to water (dripping or splashing) and no objects fi lled Most appliances recommend they be placed upon a with liquids, such as vases, shall be placed on the dedicated circuit;...
- Page 4 Italy. The use of these equipments is regulated by: 1. D.L.gs 1.8.2003, n. 259, article 104 (activity subject LG Electronics hereby declares that this product is to general authorization) for outdoor use and in compliance with the essential requirements and...
- Page 5 Safety Information Notes on Copyrights Important Notice for TV colour system • Because AACS (Advanced Access Content System) The colour system of this player diff ers according to is approved as content protection system for BD currently playing discs. format, similar to use of CSS (Content Scramble For example, when the player plays the disc recorded System) for DVD format, certain restrictions are in the NTSC colour system, the image is outputted as...
-
Page 6: Table Of Contents
Contents Installation Assemble the speaker Speaker Connection Attaching the speakers to the player Safety Information Wireless speakers connection Cautions and Warnings Positioning the system Connecting to Your TV HDMI Connection What is SIMPLINK? Preparation Component Video Introduction Connection About the “ ” Symbol Video Connection Display Resolution Setting... - Page 7 Sound Effect Appendix Controlling a TV with the Supplied Operation Remote Control Area Code List General Playback Language code List Advanced Playback Network Software Update On-Screen display Network update notifi cation Enjoying BD-LIVE Software Update Playing a movie fi le and VR disc Video output resolution Viewing a photo Trademarks and Licences...
-
Page 8: Preparation
Preparation Preparation A section whose title has one of the following Introduction symbols are applicable only to the disc represented by the symbol. BD-ROM disc About the “ ” Symbol Display DVD-Video, DVD±R/RW in “ ” may appear on your TV display during Video mode or VR mode operation and indicates that the function and fi nalized... -
Page 9: Supplied Accessories
Preparation Supplied Accessories Playable Discs Blu-ray Disc Discs such as movies that can be purchased or rented. BD-R/RE discs that contain Movie, Music or Photo fi les. Video cable (1) Color-coded Speaker Cables (6) DVD-VIDEO 8 / 12 cm disc Discs such as movies that can be purchased or rented. - Page 10 [Mastered] in order to make the discs compatible with the LG players when formatting rewritable discs. When setting the option to Live System, you cannot use it on LG player. (Mastered/Live File System : Disc format system for windows Vista) HB965TXW-AD.BDZALLK_ENG_0860.ind10 10...
-
Page 11: File Compatibility
Preparation File compatibility NOTE Overall • HD movie fi les contained on the CD or USB 1.0/1.1 may not played properly. BD, DVD or USB Available File extensions: 2.0 are recommended to play back HD movie “.jpg”, “.jpeg”, “.png”, “.avi”, “.divx”, “.mpg”, “.mpeg”, “ fi les. -
Page 12: Regional Code
Preparation Regional Code Certain System Requirements This unit has a regional code printed on the For high defi nition video playback: rear of the unit. This unit can play only BD-ROM • High defi nition display that has or DVD discs labeled same as the rear of the COMPONENT or HDMI input jacks. -
Page 13: Remote Control
Preparation Remote control 1 (POWER): Switches the player HOME: Displays or exits the ON or OFF. [Home Menu]. Z OPEN/CLOSE: Opens and closes MUSIC ID: When connected to the the disc tray. network, can provide information about the current song while RADIO&INPUT: Changes input movie playback. -
Page 14: Front Panel
Preparation Front panel 10 10 i USB Port (POWER) Button b Disc Tray j Operation buttons (PLAY / PAUSE) c iPod Dock (STOP) (SKIP) d Remote sensor > F (Function) e Display window Changes the input source or function. f Volume control (OPEN/CLOSE) h PORT. -
Page 15: Rear Panel
Preparation Rear panel 10 10 11 11 a AC Power cord g COMPONENT VIDEO (Y P Plug into the power source. OUTPUT (PROGRESSIVE SCAN) b Speakers connectors h OPTICAL IN 1(TV) / 2 c Cooling Fan i HDMI IN (type A, Version 1.3) 1/2 d Antenna Connector j HDMI OUT (type A, Version 1.3) Connect to TV with HDMI inputs. -
Page 16: Installation
Installation Installation 1. Attach the pole to the base, then secure the Assemble the speaker connection with a supplied screw. Step 1 Preparation Screw Screw Base Base Cable Cable Speaker Speaker Pole Pole HB965TXW-AD.BDZALLK_ENG_0860.ind16 16 HB965TXW-AD.BDZALLK_ENG_0860.ind16 16 2010.6.9 2:3:29 PM 2010.6.9 2:3:29 PM... - Page 17 Installation 2. Insert a speaker wire from the bottom of 3. Connect the speaker wire to the terminal the base. on the speaker. Make sure the wire marked black goes in Step 2 to the terminal marked “–” (minus) and the other wire goes in to the terminal marked “+”...
-
Page 18: Speaker Connection
Installation Speaker Connection CAUTION • Be careful to make sure children not to put their hands or any objects into the *speaker duct. Attaching the speakers to the *Speaker duct: A hole for plentiful bass sound player on speaker cabinet (enclosure). •... - Page 19 Installation Setting an ID of wireless receiver About Ferrite Core (for EMI only) When the unit is manufactured, the ID is Be sure to attach the ferrite core to the speaker already set. If an interference occurs or you cable (for connecting to this unit and wireless use a new wireless receiver, an ID should be set receiver).
-
Page 20: Positioning The System
Installation Front left speaker (L)/ Positioning the system Front right speaker (R): The following illustration shows an example Place the front speakers to the sides of the of positioning the system. Note that the monitor or screen and as fl ush with the screen illustrations in these instructions diff er from the surface as possible. -
Page 21: Connecting To Your Tv
Installation Connecting to Your TV HDMI Connection If you have a HDMI TV or monitor, you can connect it to this player using a HDMI cable(Type A, Version 1.3). Connect the HDMI Make one of the following connections, OUT jack on the player to the HDMI IN jack on depending on the capabilities of your existing a HDMI compatible TV or monitor. -
Page 22: What Is Simplink
Some functions of this unit are controlled by malfunctions. To solve the problem, turn off the the TV’s remote control when this unit and LG player and then turn it on again. TV’s with SIMPLINK are connected through •... -
Page 23: Component Video Connection
Installation Component Video Connection Video Connection Connect the COMPONENT VIDEO OUT jacks on Connect the VIDEO OUT jack on the player to the player to the corresponding input jacks on the video in jack on the TV using a video cable. the TV using Y Pb Pr cables. -
Page 24: Resolution Setting
Installation Resolution Setting NOTE The player provides several output resolutions • If your TV does not accept the resolution you for HDMI OUT and COMPONENT VIDEO OUT have set on the player, you can set resolution to jacks. You can change the resolution using 576p as follows: [Setup] menu. -
Page 25: Antenna Connection
Installation Antenna connection Connections with external device Connect the supplied antenna for listening to the radio. AUX Connection Antenna Connection You can enjoy the sound of your component with the analogue audio output jacks from the speakers of the system. Connect the analogue audio output jacks of your component into the AUX L/R (INPUT) on this unit. -
Page 26: Port. In Connection
Installation PORT. IN connection OPTICAL IN 1/2 connection You can enjoy the sound of your portable audio player from the speakers of the system. You can enjoy the sound of your component with the digital optical connection from the Connect the headphones (or line out ) jack of speakers of the system. -
Page 27: Hdmi In 1/2 Connection
Installation HDMI IN 1/2 connection NOTE You can enjoy the pictures and sound of your • You cannot change the video resolution at the HDMI IN 1/2 mode. Change the video resolution component with this connection. of the connected component. Connect the HDMI OUT jack of your •... -
Page 28: Connecting To Your Home Network
Installation Connecting to your Wired Network Connection Home Network Router Router Broadband Broadband This player can be connected to a local area Service Service network (LAN) via the LAN port on the rear panel or the internal wireless module. By connecting the unit to a broadband home network, you have access to services such LAN 1 as software updates, Home Link, BD-LIVE... -
Page 29: Wired Network Setup
Installation Wired Network Setup 4. Use U / u / I / i to select the IP mode between [Dynamic] and [Static]. Before setting the wired network, you need to Normally, select [Dynamic] to allocate an IP connect the broadband internet to your home address automatically. -
Page 30: Wireless Network Connection
Installation 7. If you select [Test] and press ENTER Wireless Network Connection ( ) at step 5 above, the network connection status is displayed on the Wireless screen. Communication You can also test it on the [Connection Status] in the [Setup] menu. Player Access Point or Wireless Router... -
Page 31: Wireless Network Setup
Installation 3. Selects [Yes] and press ENTER ( ) to Wireless Network Setup continue. The new connection setting Before setting the wireless network, you need resets the current network settings. – connect the broadband internet to the wireless home network. –... - Page 32 Installation [Manual] – Your access point may not be Notes on Network Connection: broadcasting its access point name(SSID). • Many network connection problems during Check your router settings through your set up can often be fi xed by re-setting the computer and either set your router to router or modem.
- Page 33 Installation • Some internet connection operations may • For the purpose of the better transmission, not be possible due to certain restrictions placing the player from the access point as set by the Internet service provider (ISP) close as possible. supplying your broadband Internet •...
-
Page 34: Usb Device Connection
Installation 2. Select [Movie], [Photo] or [Music] using USB device I / i , and press ENTER ( ). connection 3. Select a fi le using U / u / I / i , and press PLAY or ENTER ( ) to play the fi le. You can check the space of the USB device on the screen. - Page 35 Installation NOTE • This player supports USB fl ash memory/external HDD formatted in FAT16, FAT32 and NTFS when accessing fi les (music, photo, movie). However, for BD-LIVE and Audio CD recording, only FAT16 and FAT32 formats are supported. Use the USB fl ash memory/external HDD formatted in either FAT16 or FAT32 when using BD-LIVE and Audio CD recording.
-
Page 36: Settings
Installation 4. Use U / u to select a second setup option, Settings and press ENTER ( ) to move to the third level. Adjust the Setup Settings You can change the settings of the player in the [Setup] menu. 1. - Page 37 Installation 1080p Display Mode NOTE When the resolution is set to 1080p, select [24 Hz] for smooth presentation of fi lm material You cannot select [4:3 Letter Box] and [4:3 Pan (1080p/ 24 Hz) with a HDMI-equipped display Scan] option when the resolution is set to higher than 720p.
-
Page 38: Language] Menu
Installation [LANGUAGE] Menu [AUDIO] Menu Display Menu Speaker Setup Select a language for the [Setup] menu and To obtain the best possible sound, use the on-screen display. speaker setup display to specify the volume of the speakers you have connected and their distance from your listening position. -
Page 39: Lock] Menu
Installation HD AV Sync [LOCK] Menu Sometimes Digital TV encounters a delay between picture and sound. If this happens you can compensate by setting a delay on the To access the any features in [LOCK] settings, sound so that it eff ectively ‘waits’ for the picture you must enter the 4-digit security code you to arrive: this is called HD AV Sync. -
Page 40: Network] Menu
Installation DVD Rating [NETWORK] Menu Blocks playback of rated DVD based on their content. (Not all discs are rated.) The [NETWORK] settings are needed to use the software update, BD Live, Home Link and [Rating 1-8] NetCast features. Rating one (1) has the most restrictions and rating eight (8) is the least restrictive. -
Page 41: Others] Menu
Installation Auto Power Off [OTHERS] Menu The screen saver appears when you leave the player in Stop mode for about fi ve minutes. If you set this option to [On], the unit DivX VOD automatically turns itself off after the Screen ABOUT DIVX VIDEO: DivX®... -
Page 42: Sound Effect
Installation Software Sound Effect Information Displays the current software version. Update You can select a suitable sound mode. Press You can update the software by connecting SOUND EFFECT repeatedly until the desired the unit directly to the software update mode appears on the front panel display or the server (see page 86). - Page 43 Installation [Clear Voice]: This mode makes voice sound clear, improving the quality of voice sound. [Virtual]: You can enjoy more dynamic sound with improved Center channel. [Game]: You can enjoy more virtual sound while playing video games. [Night]: This may be useful when you want to watch movies at low volumes late at night.
-
Page 44: General Playback
Operation Operation 4. Select [Movie], [Photo] or [Music] using General Playback I / i , and press ENTER ( ). 5. Select the Disc option using I / i , and press ENTER ( ). Playing Discs 1. Press OPEN/CLOSE (Z), and place a disc on the disc tray. - Page 45 Operation To stop playback Using the disc menu Press x (STOP) while playback. AVCHD To pause playback To display the disc menu Press X (PAUSE) while playback. The menu screen may be displayed fi rst after Press B (PLAY) to resume playback. loading a disc which contains a menu.
-
Page 46: Advanced Playback
Operation Resume playback Advanced Playback AVCHD MOVIE ACD MUSIC The unit records the point where you pressed Repeat Playback the x (STOP) depending on the disc. AVCHD ACD MUSIC If “Xx (Resume Stop)” appears on the screen briefl y, press B (PLAY) to resume playback During playback, press REPEAT repeatedly to (from the scene point). - Page 47 Operation Repeating a specifi c portion To delete a Marker 1. Press SEARCH and the search menu appears AVCHD on the screen. This player can repeat a portion you have selected. 1. While playback, press REPEAT to select [A-] at the beginning of the portion you wish to repeat.
- Page 48 Operation Using the search menu Changing content list view AVCHD MOVIE MOVIE MUSIC PHOTO Using search menu, you can easy to fi nd the On the [Movie], [Music], [Photo] or [Home Link] point where you want to start playback. menu, you can change the content list view. To search a point Method 1 1.
- Page 49 Operation Method 2 Last Scene Memory 1. On the content list, press INFO/DISPLAY ( ) to display the option menu. This unit memorizes the last scene from the 2. Use U / u to select the [View Change] last disc that is viewed. The last scene remains option.
-
Page 50: On-Screen Display
Gracenote® media database is either not correct or not exist, please contact Gracenote® at http://www.gracenote.com for support. • LG is a licence of Gracenote® technology and is not responsible or reliable for information from a Title – Current title number/total number the Gracenote® media database. - Page 51 Operation Playing from selected time NOTE AVCHD MOVIE • Some discs allow you to change audio selections 1. Press INFO/DISPLAY ( ) during playback. only via the disc menu. If this is the case, press The time search box shows the elapsed TITLE/POPUP or DISC MENU button and choose playing time.
- Page 52 Operation Watching from a different Changing the Picture Mode angle AVCHD MOVIE You can change the [Picture mode] option while playback. If the disc contains scenes recorded at diff erent camera angles, you can change to a diff erent 1. During playback, press INFO/DISPLAY ( ) to camera angle during playback.
-
Page 53: Enjoying Bd-Live
Operation 3 . Press Home ( ), and set the [BD-LIVE Enjoying BD-LIVE connection] option on the [Setup] menu (page 40). Depending on a disc, the BD-LIVE function may not be operated if [BD- This unit allows you to enjoy functions such as LIVE connection] option is set to [Partially picture-in-picture, secondary audio and Virtual Permitted]. -
Page 54: Playing A Movie Fi Le And Vr Disc
Operation Playing a movie fi le NOTE and VR disc • The fi le requirements are described on page 11. • You can use various playback functions. Refer to pages 44-52. • Unfi nalized DVD VR format discs may not be You can play DVD-RW discs that are recorded played in this player. - Page 55 Operation Selecting a subtitle fi le Changing subtitle code page MOVIE MOVIE If a movie fi le name and the subtitle fi le If the subtitle is not displayed properly, You name are the same, subtitle fi le is played can change the subtitle code page to view the automatically when playing the movie fi le.
-
Page 56: Viewing A Photo
Operation Viewing a photo To play a slide show Press B (PLAY) to start slide show. To stop a slide show You can view photo fi les using this player. Press x (STOP) while slide show. 1. Press HOME ( To pause a slide show Press X (PAUSE) while slide show. - Page 57 Operation Options while viewing a photo Listening to music while slide show You can use various options during viewing a photo in full screen. You can display photo fi les while listening to music fi les. 1. While viewing a photo in full screen, press INFO/DISPLAY ( ) to display the option 1.
-
Page 58: Listening To Music
Operation 7. Use U / u to select a device, and press ENTER Listening to music ( ). Device that you can select are diff er depending on the location of the photo fi le you are displaying in full screen. The player can play Audio CDs and music fi les Photo location Available Device... - Page 59 Operation Audio CD Recording You can record one desired track or all of the tracks in Audio CD to a USB storage device. 1. Insert a USB storage device to the USB port on the front panel. 2. Press Z (OPEN/CLOSE), and place an Audio If you want to create a new folder, use U / u / CD on the disc tray.
- Page 60 Operation Viewing information from NOTE Gracenote Media Database • The table below shows the average recording The player can access to the Gracenote Media time from an audio track with 4 minutes of Database and loads the music information so playback time to a music fi le with 192 kbps as an that Track name, Artist Name, Genre and other example.
- Page 61 • This function is not available for NetCast on-line content and content in DLNA servers. • LG is a license of Gracenote® technology and is not responsible or reliable for information from the Gracenote® media database. • Audio CDs that users made for their only private...
-
Page 62: Playing The Ipod
Operation When you connect the iPod on the HOME Playing the iPod menu, the player plays a music automatically. Or a menu for the fi le type selection will appear. You can enjoy the sound with your iPod. For details about iPod, refer to the iPod’s User Guide. - Page 63 Operation NOTE NOTE If the iPod’s OSD language is selected to simple • An error message “CHECK IPOD” or “Connected chinese, the power scroll function is not operated iPod model is not supported. ” appears when: correctly. - your iPod is not available for the function to be operated.
-
Page 64: Radio Operations
Operation Radio Operations Deleting all the saved stations Press and hold CLEAR for two seconds. “ERASE ALL” will fl ash up. Press CLEAR again. Then all the saved stations are deleted. Be sure that the antenna are connected. (Refer to the page 25) Improving poor FM reception Press B (blue) (MONO/STEREO) colored button Listening to the radio... -
Page 65: Playing Content Via Your Home Network
Operation Playing content via Accessing a DLNA media server your home network 1. Check the network connection and settings (page 28). 2. Press HOME ( The play can browse and play content on 3. Select [Home Link] using I / i , and press your PC and DLNA certifi ed media servers ENTER ( ). - Page 66 Operation About Nero MediaHome 4 NOTE Essentials • The fi le requirements are described on page 11. Nero MediaHome 4 Essentials is a software for • You can use various playback functions. Refer to sharing movie, music and photo fi les stored pages 44-52.
- Page 67 Operation • Graphics card with at least 32 MB video Sharing fi les and folders memory, minimum resolution of 800 x 600 On your computer, you must share the folder pixels, and 16-bit color settings contained movie, music and/or photo content •...
- Page 68 Operation Accessing a share folder from NOTE your PC • The fi le requirements are described on page 11. 1. Start your PC that connected on your local • You can use various playback functions. Refer to area network. pages 44-52. 2.
- Page 69 Operation 3. When you fi nish entering the network user Entering a network user ID and the ID and password, select [OK] using U / u / I / password i and press ENTER ( ) to access the folder. Depending on your PC’s environment, you The network user ID and password will may need to enter a network user ID and the...
-
Page 70: Using Netcast™ Entertainment Access
Using NetCast™ YouTube You can browse, search and watch YouTube Entertainment Access videos over the internet to your TV via your LG Blu-ray disc player. Watch YouTube videos on your TV You can use various content services via Internet with NetCast Entertainment Access 1. - Page 71 Operation About the YouTube menu NOTE There are various options on the YouTube menu. Use U / u / I / i to select an option • The YouTube menu can display 5 videos in the and press ENTER ( ) to select the options as videos list.
- Page 72 Operation Keypad Mode Using the virtual keyboard On the virtual keyboard, there are two input This mode allows you to enter letters by mode for the entering a character. Press the pressing the buttons on the remote control. yellow (Y) colored button to toggle display Press the buttons with the required letter once, between keyboard mode and keypad mode.
- Page 73 Operation 3. When you fi nish entering the user name Searching videos and the password, select [OK] and press You can search for videos by entering search ENTER ( ) to sign in. words of up to 128 characters. 4. If you want to sign out, select the [Sign Out] 1.
-
Page 74: Picasa Web Albums
Operation Picasa Web Albums Options while viewing a photo You can use various options during viewing a Enjoy photo albums from friends and family on photo in full screen. the Picasa Web Albums on-line service. 1. While viewing a photo in full screen, press INFO/DISPLAY ( ) to display the option View Picasa Web Albums on your TV menu. - Page 75 Operation About the Picasa Web Albums menu Adding friends There are various options on the Picasa Web If you add your friends on the [NetCast Friends] Albums menu. Use U / u / I / i to select an menu, you can see the photos of your friend’s menu option and press ENTER ( ) to select public photos directly.
- Page 76 Operation 3. Enter the password using the virtual Searching photos keyboard, and press ENTER ( ) while [OK] is You can enter a search word to fi nd related selected. photos. Your web album is appeared on the screen. 1. Select the [Search] on the Picasa Web Albums menu using U / u / I / i , and press 4.
-
Page 77: Using The Accuweather
Operation 5. Select a city using U / u / I / i , and press Using the AccuWeather ENTER ( ). 6. Use U / u / I / i to select [Home] and press ENTER ( ) to display weather information of the selected city. - Page 78 Operation Adding more cities 1. Use I / i to select [Favorite City List] on the AccuWeather menu, and press ENTER ( ). 2. Press ENTER ( ) while [Add City to Favorite City List] is selected. 3. Select a region, country and city using U / u / I / i and ENTER ( ).
-
Page 79: Maintenance
Maintenance Maintenance Notes on Discs Handling the Unit Handling Discs When shipping the unit Please save the original shipping carton and packing materials. If you need to ship the unit, for maximum protection, re-pack the unit as it was originally packed at the factory. Keeping the exterior surfaces clean Never stick paper or tape on the disc. -
Page 80: Troubleshooting
Troubleshooting Troubleshooting General The Power does not turned • Plug the power cord into the wall outlet securely. The unit does not start • Insert a playable disc. (Check the disc type, color system, and playback. regional code.) • Place the disc with the playback side down. •... -
Page 81: Picture
Troubleshooting Picture There is no picture. • Select the appropriate video input mode on the TV so the picture from the unit appears on the TV screen. • Connect the video connection securely. • Check the [HDMI Color Setting] in the [Setup] menu is set to the appropriate item that conforms to your video connection. -
Page 82: Network
You can update the Player using the latest software to enhance the products operation and/or add new features. To obtain the latest software for this player (if updates have been made), please visit http://lgservice.com or contact LG Electronics customer care Center. HB965TXW-AD.BDZALLK_ENG_0860.ind82 82 HB965TXW-AD.BDZALLK_ENG_0860.ind82 82... -
Page 83: Appendix
Setting up the remote to Controlling a TV with control your TV the Supplied Remote You can operate your LG/GoldStar TV with the Control supplied remote control. While holding down TV POWER button, press PR/CH U/u . Release the TV POWER button to complete setting. -
Page 84: Area Code List
Appendix Area Code List Choose an area code from this list. Area Code Area Code Area Code Area Code Afghanistan Fiji Monaco Singapore Argentina Finland Mongolia Slovak Republic Australia France Morocco Slovenia Austria Germany Nepal South Africa Belgium Great Britain Netherlands South Korea Bhutan... -
Page 85: Language Code List
Appendix Language code List Use this list to input your desired language for the following initial settings: [Disc Audio], [Disc Subtitle] and [Disc Menu]. Language Code Language Code Language Code Language Code Afar 6565 French 7082 Lithuanian 7684 Sindhi 8368 Afrikaans 6570 Frisian... -
Page 86: Network Software Update
Appendix Network Software Option 2: If the software update is available from the Update update server, the “Update” icon appears at the bottom of the Home menu. Press blue (B) colored button to start the update procedure. Network update notifi cation Software Update From time to time, performance improvements You can update the player using the latest... - Page 87 (Downloading will In this case, you can obtain the latest software from the authorized LG Electronics Service Center then takes several minutes depending on your update your player. Refer to “Customer Support” on home network condition) page 82.
-
Page 88: Video Output Resolution
Appendix Video output resolution When the non-copy protected media is playing back Video Out COMPONENT VIDEO OUT HDMI OUT HDMI connected HDMI disconnected Resolution 576i 576p 576i 576p 576p 576p 720p 720p 576p 1080i 1080i 1080i 1080p / 24 Hz 1080p / 24 Hz 576i 1080i... -
Page 89: Trademarks And Licences
Appendix Trademarks and Licences HDMI, the HDMI logo and High-Defi nition Multimedia Interface are trademarks or registered “Blu-ray Disc” is a trademark. trademarks of HDMI licensing LLC. “BD-LIVE” logo is a trademark of Blu-ray Disc Association. “DVD Logo” is a trademark of DVD Format/Logo “BONUSVIEW”... - Page 90 Additional information may be obtained from MPEG LA, LLC. See http://www.mpegla.com. On the LG products, an innovative power consumption system in stand-by mode is built. iPod is a trademark of Apple Inc., registered in the It consumes less than 0.09 watts in that mode.
-
Page 91: Specifi Cations
Appendix Specifi cations Tuner • FM Tuning Range: 87.5 to 108.0 MHz or 87.50 to 108.00 MHz • AM Tuning Range: 520 to 1710 kHz or 522 to 1620 kHz General • Power requirements: AC 200- 240 V, 50/ 60 Hz Amplifi... - Page 92 Appendix Speakers Wireless receiver • Front speaker (Left/ Right) • Power requirements: Type: 2 Way 3 speaker AC 200-240 V, 50/60 Hz Impedance Rated: 4 Ω • Power consumption: Input Power: 180 W Refer to main label on the bottom of the receiver. Max.
-
Page 93: Important Information Relating To Network Services
The Network Services belong to third parties and facilities over which LG has no control. LG EXPRESSLY may be protected by copyright, patent, trademark DISCLAIMS ANY RESPONSIBILITY OR LIABILITY and/or other intellectual property laws. The Network... -
Page 94: Open Source Software Notice
© 1991, 1992 Paul Kranenburg gSOAP Public License 1.3 LIBRARY: gsoap copyright © 1993 Branko Lankester LG El ectronics off ers to provide source code to copyright © 1993 Ulrich Pegelow you on CD-ROM for a charge covering the cost of copyright ©... -
Page 95: Gracenote® End User Licence Agreement
Appendix The Gracenote Software and each item of Gracenote Gracenote® End User Data are licenced to you “AS IS. ” Gracenote makes no representations or warranties, express or implied, Licence Agreement regarding the accuracy of any Gracenote Data from in the Gracenote Servers. Gracenote reserves the right to delete data from the Gracenote Servers or to change data categories for any cause that Gracenote deems suffi cient. - Page 96 HB965TXW-AD.BDZALLK_ENG_0860.ind96 96 HB965TXW-AD.BDZALLK_ENG_0860.ind96 96 2010.6.9 2:4:24 PM 2010.6.9 2:4:24 PM...
Need help?
Do you have a question about the SB95TX-SW95 and is the answer not in the manual?
Questions and answers
Esse receiver é modelo w95 é o mesmo controle do o home theater
The provided context does not explicitly state whether the LG SB95TX-SW95 receiver remote control is the same as the home theater remote control. However, it does mention that the supplied remote can control an LG/GoldStar TV and includes TV control buttons. Without more specific details, it cannot be determined if the remote controls for the two devices are the same.
This answer is automatically generated