
Related Manuals for Lenoxx PR4423


Summary of Contents for Lenoxx PR4423
- Page 1 Model Number: EC06 / Batch number: PR4423 User Manual Please read and keep manual to ensure safe and effective use. HOUSEHOLD USE ONLY...
-
Page 2: Table Of Contents
Table of Contents Important Safety and General Instructions ..................3-4 Parts List Diagram ..........................5 Operating Instructions ........................6-8 Cleaning, Care and Maintenance ....................... 9 Warranty Details and Customer Support Hotline ................10... -
Page 3: Important Safety And General Instructions
1. Read all instructions before using the Lenoxx EC06 Evaporative Cooler. 2. Remove and safely disregard any packaging material and labels before using this product for the first time. - Page 4 33. Do not operate any appliance with a damaged cord or plug or after the appliance malfunctions or is dropped or damaged in any manner, take it to the store where the unit was purchased or call Lenoxx customer service for further assistance on 1300 666 848...
-
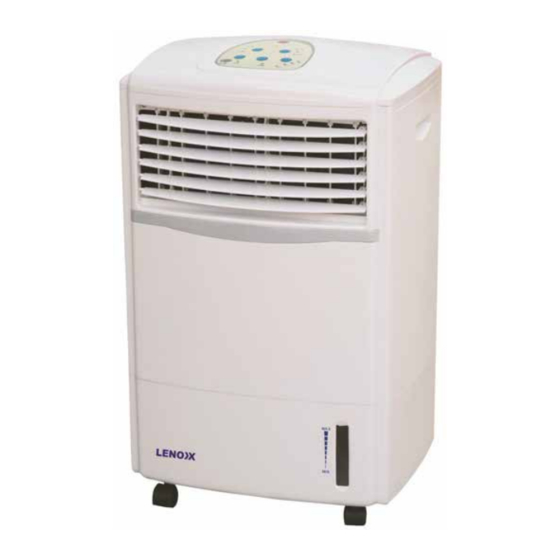
Page 5: Parts List Diagram
Parts List 1. Control Panel 2. Vertical Grill 3. Horizontal Grill 4. Main Body 5. Water Level Indicator 6. Water Tank Opening 7. Castor Wheels 8. Handle 9. Cold PAK 10. Remote Control (not pictured, requires 2 x AAA batteries. -
Page 6: Operating Instructions
Operating Instructions Control Panel (on Unit) 1. ON/OFF To switch evaporative cooler on, press the ON/OFF (1) button. Press again to turn off. 2. Speed Selector – You can choose from 3 speeds by pressing the SPEED selector button (2) repeatedly to choose between LOW, MEDIUM and HIGH. - Page 7 4. Timer - The timer options are for 0.5, 1.5, 3.5 or 7.5 hours. Press the TIMER button (4) once to select 0.5 hours. The 0.5 will illuminate on the control panel. Press again to select 1.5 hours (both 0.5 and 1 will illuminate). Pressing 3 times will set the timer for 3.5 hours (0.5, 1 and 2 will illuminate).
- Page 8 Operation 1. Place the Evaporative Cooler on a level, dry surface. 2. Open the water tank cover and pour in clean water or ice. If you use ice, you will actually get a cooler air temperature. Do NOT fill the water tank above MAX level indicator in the water tank.
-
Page 9: Cleaning, Care And Maintenance
Cleaning, Care and Maintenance NOTE: Always unplug the Evaporative Cooler from the electrical outlet and allow it to cool before servicing, relocating, cleaning, or storing it. Remove the rubber plug from the back of the unit and drain the water (place a bucket beneath the plug for the water to drain into). -
Page 10: Warranty Details And Customer Support Hotline
UNDER THE AGE OF 3. IMPORTANT MESSAGE: BEFORE SENDING YOUR UNIT TO LENOXX FOR REPAIR, YOU MUST SUPPLY PROOF OF PURCHASE (ORIGINAL RECEIPT) TO VALIDATE YOUR WARRANTY THIS WARRANTY IS IN ADDITION TO OTHER RIGHTS AND REMEDIES OF THE CONSUMER UNDER A LAW IN RELATION TO THE GOODS OR SERVICES TO WHICH THE WARRANTY RELATES.
Need help?
Do you have a question about the PR4423 and is the answer not in the manual?
Questions and answers