Table of Contents
Advertisement
Advertisement
Table of Contents

Related Manuals for AEG LAVAMAT LN 79680A3


Summary of Contents for AEG LAVAMAT LN 79680A3
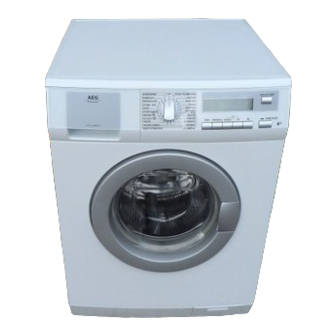
- Page 1 LAVAMAT LN 79680A3 LAVAMAT LN 79689A3 User manual Washing Machine...
-
Page 2: Table Of Contents
Contents Thank you for choosing one of our high-quality products. To ensure optimal and regular performance of your appliance please read this instruction manual carefully. It will enable you to navigate all processes perfectly and most efficiently. To refer to this manual any time you need to, we recommend you to keep it in a safe place. -
Page 3: Operating Instructions
Water drainage ELECTRICAL CONNECTION ENVIRONMENT CONCERNS OPERATING INSTRUCTIONS SAFETY INFORMATION Read carefully & keep for future reference. • The safety of Your appliance complies with the industry standards and with legal re- quirements on the safety of appliances. However, as manufacturers, we feel it is our duty to provide the following safety notes. -
Page 4: Installation
Safety information Installation • This appliance is heavy. Care should be taken when moving it. • When unpacking the appliance, check that it is not damaged. If in doubt, do not use it and contact the Service Centre. • All packing and transit bolts must be removed before use. Serious damage can occur to the product and to property if this is not adhered to. -
Page 5: Product Description
• Make sure that children or pets do not climb inside the drum. To prevent children or pets becoming trapped inside the drum the ma- chine incorporates a special feature. To acti- vate this device, rotate the button (without pressing it) inside the door clockwise until the groove is horizontal. -
Page 6: Detergent Dispenser Drawer
Control panel Detergent dispenser drawer Compartment for detergent used for prewash. The prewash detergent is added at the beginning of the wash programme. Compartment for powder or liquid detergent used for main wash. Compartment for liquid additives (fabric softener, starch). Compartment for stain remover used for main wash with STAIN-option. -
Page 7: Symbols
SPIN reduction button OPTIONS button OK button TIME SAVING button START/PAUSE button DELAY START button Display Symbols: Handwash; Child Lock. DISPLAY 9.1 - Temperature indicator and COLD 9.2 - Spin Speed indicator, RINSE HOLD 9.3 - Programme progress display: PREWASH DRAIN , OVERDOSAGE •... -
Page 8: First Use
First use – After selecting a programme, the duration is displayed in hours and minutes (for ex- ample . The duration is calculated automatically on the basis of the maximum recommended load for each type of fabric. – After the programme has started, the time remaining is updated every minute. •... -
Page 9: Daily Use
This function remains able also when the washing machine is not working. To enable (or disable) this option press simultaneously for about 6 seconds buttons 4 and 5 until the Child Lock symbol appears on (or disappears from) the display. There are two different ways to set this option: •... -
Page 10: Turn The Programme Dial (1) To Set The Required Programme
Daily use If required, pour fabric softener into the compartment marked used must not exceed the MAX mark in the drawer). Close the drawer gently. Turn the programme dial (1) to set the required programme You can choose the right programme for any type of laundry following the descriptions on the washing programme tables (see «Washing Programmes»... -
Page 11: Select The Spin Speed, Night Cycle Or Rinse Hold Option (Button 3)
Select the spin speed, NIGHT CYCLE or RINSE HOLD option (button 3) When the required programme has been selected, your appliance automatically proposes the maximum spin speed provided for that programme. Press this button repeatedly to change the spin speed, if you want your laundry to be spun at a speed different from the one proposed by the washing machine. -
Page 12: Stain Option
Daily use This option is recommended for heavily soiled laundry. STAIN option Select this option to treat heavily soiled or stained laundry with stain remover (extended main wash with time optimized stain action phase). The relevant symbol will appear on the display. -
Page 13: Select The Delay Start (Button 8)
Select the DELAY START (button 8) Before you start the programme, if you wish to delay the start, press the button repeat- edly, to select the desired delay. The corresponding symbol will appear on the display. The wash programme can be delayed from 30 min - 60 min - 90 min, 2 hours and then by 1 hour up to a maximum of 20 hours by means of this button. -
Page 14: Opening The Door After The Programme Has Started
Opening the door after the programme has started When the machine is working and throughout the delay time the door is locked. If, for any reason, you wish to open the door, set firstly the machine to pause by pressing the button •... -
Page 15: Washing Programmes
WASHING PROGRAMMES Programme Maximum and Minimum Temperature Cycle Description Maximum Fabrics Load Type of Laundry COTTON 95°- Cold Main wash - Rinses - Long spin at maximum spin speed Max. load 8 kg - Reduced load 4 kg For white and coloured cotton (normally soiled items). - Page 16 Washing programmes Programme Maximum and Minimum Temperature Cycle Description Maximum Fabrics Load Type of Laundry SYNTHETICS 60°- Cold Main wash - Rinses - Short spin at 1200 rpm Max. load 4 kg - Reduced load 2 kg Synthetic or mixed fabrics: underwear, coloured garments, non-shrink shirts, blouses.
- Page 17 Programme Maximum and Minimum Temperature Cycle Description Maximum Fabrics Load Type of Laundry DRAIN Draining of water Max. load 8 kg For emptying out the water of the last rinse in pro- grammes with the Rinse Hold or Night Cycle option selected.
- Page 18 Washing programmes Programme Maximum and Minimum Temperature Cycle Description Maximum Fabrics Load Type of Laundry SPORT JACKETS 40° - Cold Main wash - Rinses - Short spin at 800 rpm Max. load 2 kg Special program for sport clothes. By selecting this program, do not add any additives.
-
Page 19: Helpful Hints And Tips
Programme Maximum and Minimum Temperature Cycle Description Maximum Fabrics Load Type of Laundry COTTON ECONOMY 60° Main wash - Rinses - Long spin at maximum spin speed Max. load 8 kg White and fast coloured cotton. This programme can be selected for slightly or nor- mally soiled cotton items. -
Page 20: Detergents And Additives
Helpful hints and tips Dried grease stains: moisten with turpentine, lay the garment on a soft surface and dab the stain with the fingertips and a cotton cloth. Rust: oxalic acid dissolved in hot water or a rust removing product used cold. Be careful with rust stains which are not recent since the cellulose structure will already have been damaged and the fabric tends to hole. -
Page 21: Degrees Of Water Hardness
Degrees of water hardness Water hardness is classified in so-called “degrees” of hardness. Information on hardness of the water in your area can be obtained from the relevant water supply company, or from your local authority. If the water hardness degree is medium or high we suggest you to add a water softener following always the manufacturer’s instructions. -
Page 22: Washing Drum
Care and cleaning Remove the conditioner insert from the middle compartment. Clean all parts with water. Put the conditioner insert in as far as it will go, so that it is firmly in place. Clean all parts of the washing machine, especially the nozzles in the top of the washing-in chamber, with a brush. - Page 23 • the appliance makes an unusual noise during draining due to objects such as safety pins, coins etc. blocking the pump; • a problem with water draining is detected (see chapter “What to do if...” for more de- tails). WARNING! Before opening the pump door, switch the appliance off remove the mains plug from the socket.
-
Page 24: Cleaning The Water Inlet Filters
Care and cleaning Remove foreign bodies and fluff from the filter seat and from the pump im- peller. Check carefully whether the pump im- peller rotates (it rotates jerkily). If it doesn’t rotate, please contact your Serv- ice Centre. 10. Put the cap back on the emergency emptying hose and place the latter back in its seat. -
Page 25: Frost Precautions
Unscrew the hose from the machine. Keep a towel nearby because some wa- ter may flow. Clean the filter in the valve with a stiff brush or with the piece of cloth. Screw the hose back to the machine and make sure the connection is tight. -
Page 26: What To Do If
What to do if… place a bowl on the floor and place the end of the emergency emptying hose into the bowl. Remove its cap. The water should drain by gravity into the bowl. When the bowl is full, put the cap back on the hose. Empty the bowl. Repeat the procedure until water stops flowing out;... - Page 27 Problem The machine does not fill: The machine fills then empties immediately: The machine does not empty and/or does not spin: There is water on the floor: What to do if… Possible cause/Solution The water tap is closed. • Open the water tap. The inlet hose is squashed or kinked.
- Page 28 What to do if… Problem Unsatisfactory washing results: The door will not open: The machine vibrates or is noisy: Spinning starts late or the machine does not spin: Possible cause/Solution Too little detergent or unsuitable detergent has been used. • Increase the detergent quantity or use an- other one.
-
Page 29: Technical Data
Problem The machine makes an unusual noise: No water is visible in the drum: The display shows the alarm code If you are unable to identify or solve the problem, contact our service centre. Before telephoning, make a note of the model, serial number and pur- chase date of your machine: the Service Centre will require this information. -
Page 30: Consumption Values
Consumption values CONSUMPTION VALUES Programme White Cottons 95 °C Cottons 60 °C Cottons 40 °C Synthetics 40 °C Delicates 40 °C Wool/ Handwash 30 °C 1) Refer to the display for the programme time. 2) The consumption information shown in this chart is indicative. It can vary depending on the quantity and the type of laundry, on the temperature of the water supply and on the ambient temperature. - Page 31 After removing all the packaging, care- fully lay machine on it’s back to remove the polystyrene base from the bottom. Remove the power supply cable and the draining hose from the hose holders on the rear of the appliance. Unscrew the three bolts using the key supplied with the machine.
- Page 32 Installation Slide out the relevant plastic spacers. Open the porthole, take out the inlet hose from the drum and remove the polystyrene block fitted on the door seal. Fill the smaller upper hole and the two large ones with the corresponding plas- tic plug caps supplied in the bag con- taining the instruction booklet.
-
Page 33: Positioning And Levelling
Positioning and levelling Install the machine on a flat hard floor. Make sure that air circulation around the machine is not impeded by carpets, rugs etc. Before placing it on small tiles, apply a rubber coating. Never try to correct any unevenness in the floor by putting pieces of wood, cardboard or similar materials under the machine. -
Page 34: Water-Stop Device
Installation Set the hose correctly by loosening the ring nut. After positioning the inlet hose, be sure to tighten the ring nut again to prevent leaks. Connect the hose to a tap with a 3/4” thread. Always use the hose supplied with the appliance. -
Page 35: Electrical Connection
This could be done by tying it to the tap with a piece of string or attaching it to the wall. In a sink drain pipe branch. This branch must be above the trap so that the bend is at least 60 cm above the ground. -
Page 36: Environment Concerns
Environment concerns WARNING! Should the appliance power supply cable need to be replaced, this must be carried out by a Service Centre. ENVIRONMENT CONCERNS The symbol on the product or on its packaging indicates that this product may not be treated as household waste. - Page 40 www.aeg.com/shop...
Need help?
Do you have a question about the LAVAMAT LN 79680A3 and is the answer not in the manual?
Questions and answers