Table of Contents
Advertisement
Available languages
Available languages
Quick Links
OWNER'S MANUAL
WASHING MACHINE
Before beginning installation, read these instructions carefully.
This will simplify installation and ensure that the washer is installed
correctly and safely. Leave these instructions near the washer
after installation for future reference.
WD-P1481D6S
P/No.: MFL67473466
www.lg.com
Advertisement
Chapters
Table of Contents

Related Manuals for LG WD-P1481D6S


Summary of Contents for LG WD-P1481D6S
- Page 1 OWNER’S MANUAL WASHING MACHINE Before beginning installation, read these instructions carefully. This will simplify installation and ensure that the washer is installed correctly and safely. Leave these instructions near the washer after installation for future reference. WD-P1481D6S www.lg.com P/No.: MFL67473466...
-
Page 2: Table Of Contents
Contents Contents........2 Thank you for buying a LG Fully Product Features......3 Automatic Washing Machine. Important safety instructions Important safety instructions ....4 Please read your owner’s manual Basic safety precautions .......5 carefully, it provides instruction on safe Save these instructions......6 installation, use and maintenance. -
Page 3: Product Features
Product Features Inverter Direct Drive system The advanced Brushless DC motor directly drives the drum without belt and pulley. 6 Motion Washer is able to perform various drum actions or a combination of different actions depending on the wash program selected. Combined with a controlled spin speed and the ability of the drum to rotate both left and right, the wash performance of the machine is greatly improved, giving you perfect results every time. -
Page 4: Important Safety Instructions
Important safety instructions READ ALL INSTRUCTIONS AND EXPLANATION OF THE INSTALLATION BEFORE USE. WARNING For your safety, the information in this manual must be followed to minimize the risk of fire or explosion, electric shock, or to prevent property damage, injury to persons, or death. Your Safety and the safety of others are very important. -
Page 5: Basic Safety Precautions
Important safety instructions ■ Basic safety precautions WARNING To reduce the risk of fire, electric shock, or injury to persons when using the washer, follow basic precautions, including the following: • Before installation, check exterior • Do not wash or dry articles that have damages. -
Page 6: Save These Instructions
Important safety instructions ■ Basic safety precautions WARNING To reduce the risk of fire, electric shock, or injury to persons when using the washer, follow basic precautions, including the following: • Before discarding an old machine • To reduce the risk of personal injury, unplug it. -
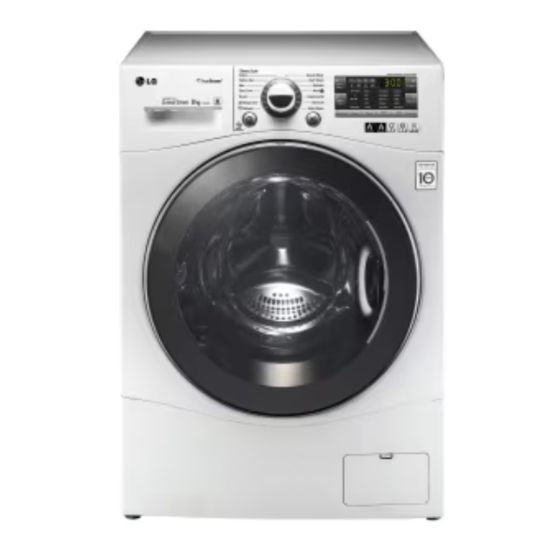
Page 7: Specifications
Specifications Power plug Transit bolts • If the supply cord is damaged, Drawer it must be replaced by the manufacturer or its service agents (For detergent and or a similarly qualified person in fabric softener) order to avoid a hazard. Control panel Drain hose Drum... -
Page 8: Installation
Installation ■ Removing packing 1. Remove the cardboard box and styrofoam packing. 2. Lift the washing machine and remove the base packing. Washer 3. Remove the tape securing the power supply cord and drain hose. Base Packing 4. Remove the inlet hose from the drum. NOTE •... -
Page 9: Installation Place Requirements
Installation ■ Installation place requirements ‹ Location • Level floor : Washer Allowable slope under entire washer is 1˚. • Power outlet : Must be within 1.5 meters of either side of location of washer. Do not overload the outlet with more than one appliance. approx. - Page 10 Installation CAUTION CAUTION concerning the Power cord • Most appliances recommend they be placed upon a dedicated circuit; that is, a single outlet circuit which powers only that appliance and has no additional outlets or branch circuits. Check the specification page of this owner's manual to be certain. •...
-
Page 11: Connecting Water Supply Hose
Installation ■ Connecting water supply hose • Water supply pressure must be between 100 kPa and 1000 kPa (1.0 - 10.0 kgf / cm • Do not strip or crossthread when connecting inlet hose to the valve. • If the water supply pressure is more than 1000 kPa, a decompression device should be installed. •... - Page 12 Installation Type-C : Connecting one touch type hose to tap without thread 1. Unscrew the adapter ring plate and the 4 adapter retaining screws. 2. Remove the guide plate if the tap is Ring plate too large to fit the adapter. Guide plate 3.
-
Page 13: Installation Of Drain Hose
Installation Installation of drain hose • The drain hose should not be placed higher than 100 cm above the floor. Water in the washer does not drain or drains slowly. about 100 cm • Securing the drain hose correctly will about 145 cm protect the floor from damage due to water leakage. -
Page 14: Leveling
Installation ■ Leveling 1. Leveling the washing machine properly prevents excessive noise and vibration. Install the appliance on a solid and level floor surface, preferably in a corner of the room. NOTE • Timber or suspended type flooring may contribute to excessive vibration and unbalance. - Page 15 • If possible install the washer in one of the corners of the room, where the floor is more stable. • Fit the rubber cups to reduce vibration. • You can obtain the rubber cups (p/no.4620ER4002B) from the LG spares dept. NOTE •...
-
Page 16: How To Use Washer
How to use washer Operating washing machine 1. Sort Laundry. (Refer to 17 page) 2. Open the door and load laundry. 3. Press the Power button. 4. Select a Program. (Refer to 18~20 page) Select options at this time (Refer to 22~25 page) ■... -
Page 17: Care Before Washing
How to use washer ■ Care before washing 1. Care Labels Wash temperature Look for a care label on your clothes. Normal machine wash This will tell you about the fabric content of your garment and how it should be washed. Permanent press Delicate Hand wash... -
Page 18: Washing Program Table
How to use washer Washing program table • Recommended courses according to the laundry type. Proper Maximum Description Fabric type Program Temp. Load Provides better performance by 40°C Cotton combining various drum motions. Color fast garments (shirts, (Cold to 95°C) nightdresses, pajamas, etc) and Rating Provides optimized washing... -
Page 19: Extra Options
How to use washer • Water Temperature: Select water temperature to suit wash cycles. Always follow garment manufacture’s care label or instructions when washing. The wool wash cycle of this machine has been approved by Woolmark for the washing of machine washable Woolmark products provided that the products are washed according to the instructions on the garment label and those issued by the manufacturer of this washing machine M1009. -
Page 20: Operating Data
How to use washer Operating data Program Max RPM Cotton 1400 Cotton Eco 1400 Easy Care 1000 1400 Allergy Care 1400 Silent Wash 1000 Refresh – Duvet 1000 Sports Wear Dark Wash 1400 Delicate Wool Quick 30 1400 Intensive 60 1400... -
Page 21: Control Panel
How to use washer ■ Control panel Additional SMARTDIAGNOSIS™ function is program available only for the products with buttons display a SMARTDIAGNOSIS™ mark. Power Program Start/Pause Beep Option On/Off button dial button buttons Power Additional program • Press the Power button to turn power on •... -
Page 22: Additional Program
How to use washer ■ Additional program Time Delay Favorite You can set a time delay so that the washing Favorite program allows you to store machine will start automatically and finish a customized wash cycle for future use. after a specified time interval. 1. -
Page 23: Options
How to use washer ■ Options Medic Rinse Rinse+Spin For best results or for cleaner rinsing. This can be helpful in preventing fresh stains This allows the final rinse to be heated to 40 from setting in fabrics. degrees. This is a separate cycle. 1. -
Page 24: Child Lock
How to use washer ■ Child Lock Select this function to lock the buttons on the control assembly to prevent tampering. "Child Lock" can be set only during the washing cycle. Locking the control panel 1. Touch and hold the Child Lock button for 3 seconds. -
Page 25: Tub Clean
How to use washer ■ Tub Clean Tub Clean is a special cycle to clean the inside of the washing machine. A higher water level is used in this cycle at higher spin speed. Perform this cycle regularly. 1. Remove any clothing or items from the washer and close the door. -
Page 26: Adding Detergent
Adding detergent ■ Adding detergent and fabric softener ‹¤The dispenser drawer • Main wash only ➔ • Pre Wash + Main Wash ➔ WARNING Fabric softener • Keep all washing detergents away from children as there is danger of poisoning. •... - Page 27 Adding detergent ‹¤Detergent dosage • Detergent should be used according to the instruction of the detergent manufacture. • If too much detergent is used, too many suds can occur and this will decrease the washing result or cause heavy load to the motor. •...
-
Page 28: Maintenance
Maintenance • Before cleaning the washer interior, unplug the electrical power cord to avoid electrical shock hazards. • Turn off the stopcock if the machine is to be left for any length of time (e.g. holiday), especially if there is no floor drain(gully) in the immediate vicinity. The water inlet filter •... -
Page 29: The Drain Pump Filter
Maintenance The drain pump filter • The drain filter collects threads and small objects left in the laundry. Check regularly that the filter is clean to ensure smooth running of your machine. CAUTION • First drain using the drain hose and then open the pump filter to remove any threads or objects. Be careful when draining if the water is hot. -
Page 30: Dispenser Drawer
Maintenance Dispenser drawer • After a while, detergents and fabric softeners leave a deposit in the drawer. • It should be cleaned from time to time with a jet of running water. • If necessary it can be removed completely from the machine by pressing the catch downwards and by pulling it out. -
Page 31: The Washing Drum
Maintenance The washing drum • If you live in a hard water area, limescale may build up continuously in places where it cannot be seen and thus not easily removed. Over time the build up of scale clogs appliances, and if it is not kept in check these may have to be replaced. -
Page 32: Troubleshooting Guide
Troubleshooting guide • This washing machine is equipped with automatic safety functions which detect and diagnose faults at an early stage and react appropriately. When the machine does not function properly or does not function at all, check the following points before you contact your service provider. Diagnosing Problem Symptom Possible Cause... - Page 33 Troubleshooting guide Symptom Possible Cause Solution Washer does not • Electrical power cord may not be Make sure plug fits tightly in wall start plugged in or connection may be outlet. loose. • House fuse blown, circuit breaker Reset circuit breaker or replace tripped,or a power outage has fuse.
-
Page 34: Error Messages
Troubleshooting guide Error Messages Symptom Possible Cause Solution • Water supply is not adequate in area. Check another tap in the house. • Water supply taps are not completely open. Fully open tap. • Water inlet hose(s) are kinked. Straighten hose(s). •... -
Page 35: Using Smartdiagnosis
Accordingly, LG does not guarantee that Smart Diagnosis would accurately troubleshoot any given issue. -
Page 36: Terms Of Warranty
Terms of Warranty What Is Not Covered: • Service trips to your home to teach you how to use the product. • If the product is connected to any voltage other than that shown on the rating plate. • If the fault is caused by accident, neglect, misuse or Act of God. •... - Page 39 MESIN CUCI Sebelum mulai memasang, baca dahulu petunjuknya dengan hati-hati. Ini akan menyederhanakan pemasangan dan memastikan bahwa mesin cuci telah dipasang dengan benar dan aman. Letakkan petunjuk ini di dekat mesin cuci setelah memasang untuk referensi di masa mendatang. WD-P1481D6S www.lg.com...
-
Page 40: Daftar Isi
Daftar Isi Daftar isi ........2 Terima kasih, Anda telah membeli Fitur Produk ......3 Mesin Cuci Otomatis LG. Petunjuk keselamatan penting Silakan baca buku petunjuk Anda Petunjuk keselamatan penting ....4 dengan seksama, buku ini menyajikan Petunjuk keselamatan dasar....5 petunjuk tentang pemasangan, Simpanlah petunjuk ini. -
Page 41: Fitur Produk
Fitur Produk Sistem Inverter Direct Drive Motor Brushless DC yang canggih langsung menggerakkan drum tanpa sabuk dan kerekan. 6 Gerakan Mesin cuci mampu melakukan berbagai tindakan drum atau kombinasi tindakan yang berbeda-beda, tergantung program pencucian yang dipilih. Dikombinasikan dengan kecepatan perputaran terkontrol dan kemampuan drum untuk berotasi ke kiri maupun ke kanan, kinerja pencucian mesin meningkat pesat, yang memberi Anda hasil sempurna setiap kali mencuci. -
Page 42: Petunjuk Keselamatan Penting
Petunjuk keselamatan penting BACALAH SEMUA PETUNJUK DAN PENJELASAN PEMASANGAN SEBELUM ANDA MENGGUNAKAN. PERINGATAN Untuk keselamatan Anda, informasi di buku petunjuk ini harus diikuti untuk meminimalkan risiko kebakaran atau ledakan, kejutan listrik, atau mencegah kerugian harta, cedera diri, atau ancaman keselamatan jiwa. Keselamatan Anda dan orang lain sangatlah penting. -
Page 43: Petunjuk Keselamatan Dasar
Petunjuk keselamatan penting ■ Petunjuk keselamatan dasar PERINGATAN Untuk mengurangi risiko kebakaran, kejutan listrik, atau cedera pada seseorang ketika menggunakan mesin cuci, ikutilah upaya pencegahan dasar, yang meliputi hal berikut: • Sebelum pemasangan, periksalah • Jangan cuci atau keringkan kain yang apakah ada kerusakan di luar mesin. -
Page 44: Simpanlah Petunjuk Ini
Petunjuk keselamatan penting ■ Basic safety precautions PERINGATAN Untuk mengurangi risiko kebakaran, kejutan listrik, atau cedera pada seseorang ketika menggunakan mesin cuci, ikutilah upaya pencegahan dasar, yang meliputi hal berikut: • Sebelum membuang mesin lama, • Untuk mengurangi risiko cedera diri, lepaskan kabel dan stekernya. -
Page 45: Spesifikasi
Spesifikasi Steker daya Baut transit • Jika kabel daya rusak, kabel Laci harus diganti oleh produsen atau agen servisnya atau orang (Untuk deterjen dan dengan kualifikasi yang sama, pelembut pakaian) untuk menghindari bahaya. Panel kontrol Selang penguras Drum Filter pompa penguras Pintu Steker penguras Dudukan yang dapat... -
Page 46: Pemasangan
Pemasangan ■ Membuka kemasan 1. Bukalah boks karton dan kemasan stirofom. 2. Angkat mesin cuci dan lepaskan kemasan dasar. Pencuci 3. Lepaskan plester yang menutup kabel catu daya dan selang penguras. Kemasan 4. Lepaskan selang inlet dari drum. Dasar CATATAN •... -
Page 47: Persyaratan Tempat Pemasangan
Pemasangan ■ Persyaratan tempat pemasangan ‹ Lokasi • Lantai yang datar : Pencuci Kemiringan yang diizinkan di bawah keseluruhan mesin cuci adalah 1˚. • Stopkontak daya : Harus dalam jarak 1,5 meter dari setiap sisi lokasi mesin cuci. Jangan colokkan steker lebih dari satu peralatan ke kira-kira stopkontak. - Page 48 Pemasangan PERHATIAN PERHATIAN menyangkut kabel daya • Sebagian besar peralatan dianjurkan diletakkan di sirkuit yang diperuntukkan khusus; yaitu, satu sirkuit stopkontak yang memberi daya ke peralatan itu saja dan tidak ada stopkontak tambahan atau sirkuit cabang. Periksa halaman spesifikasi buku petunjuk pengguna ini untuk memastikan.
-
Page 49: Menghubungkan Selang Pasokan Air
Pemasangan ■ Menghubungkan selang pasokan air • Tekanan pasokan air haruslah antara 100 kPa dan 1.000 kPa (1,0 - 10,0 kgf / cm • Jangan patahkan atau salah menyambung selang ketika menyambungkan selang masukan ke katup. • Jika tekanan pasokan air lebih dari 1.000 kPa, Anda harus memasang perangkat penghilang tekanan. - Page 50 Pemasangan Tipe-C : Menyambungkan selang tipe satu sentuhan ke keran tanpa galur 1. Lepaskan pelat ring adaptor dan 4 sekrup pengunci adaptor. 2. Lepaskan pelat pedoman jika keran Pelat ring terlalu besar untuk menempelkan Pelat pedoman adaptor. 3. Dorong adaptor ke ujung keran sehingga segel karet membentuk sambungan kedap air.
-
Page 51: Pemasangan Selang Penguras
Pemasangan Pemasangan selang penguras • Selang penguras harus ditempatkan lebih tinggi dari 100 cm di atas lantai. Air di dalam mesin cuci tidak terkuras atau terkuras perlahan. sekitar 100 cm • Mengencangkan selang penguras sekitar 145 cm dengan benar akan melindungi lantai dari kerusakan karena kebocoran air. -
Page 52: Meratakan
Pemasangan ■ Meratakan 1. Meratakan mesin cuci dengan baik dapat mencegah kebisingan dan getaran berlebihan. Pasanglah peralatan di permukaan lantai yang rata dan padat, lebih baik bila berada di sudut ruangan. CATATAN • Lantai kayu atau tipe suspensi dapat menimbulkan ketidakseimbangan dan getaran berlebihan. - Page 53 • Jika mungkin pasanglah mesin cuci di salah satu sudut ruang yang lantainya lebih stabil. • Pasang cawan tempel karet untuk mengurangi getaran. • Anda bisa memperoleh cawan tempel karet (p/no.4620ER4002B) dari departemen suku cadang LG. CATATAN • Penempatan dan perataan mesin cuci yang baik akan memastikan pengoperasian yang tahan lama, teratur, dan andal.
-
Page 54: Cara Menggunakan Pencuci
Cara menggunakan mesin cuci Mengoperasikan mesin cuci 1. Pisahkan cucian Anda. (Lihat halaman 17) 2. Bukalah pintu dan muat cucian. 3. Tekan tombol Power. 4. Pilih Program. (Lihat halaman 18~20) Pilih pilihan pada saat ini (Lihat halaman 22~25) ■ Additional Program (Program Tambahan) ■... -
Page 55: Yang Perlu Diperhatikan Sebelum Mencuci
Cara menggunakan mesin cuci ■ Yang perlu diperhatikan sebelum mencuci 1. Label Perawatan Temperatur pencucian Carilah label perawatan di pakaian Anda. Label ini memberi Pencucian mesin Normal tahu Anda kandungan kain garmen Anda dan cara mencucinya. Permanent press Lembut 2. Memisahkan Cuci tangan Jangan cuci Untuk mendapatkan hasil terbaik, pisahkan pakaian ke dalam... -
Page 56: Tabel Program Pencucian
Cara menggunakan mesin cuci Tabel program pencucian • Prosedur yang dianjurkan menurut tipe cucian. Muatan Uraian Tipe kain Anjuran Program maksimum 40°C Memberikan performa lebih baik dengan Cotton Garmen tidak luntur (baju, gaun (Dingin hingga 95°C) menggabungkan berbagai gerakan drum. malam, piyama, dll) dan katun Peringkat 60°C... -
Page 57: Pilihan Ekstra
Cara menggunakan mesin cuci • Temperatur Air: Pilihlah temperatur air agar cocok dengan siklus pencucian. Ikuti selalu petunjuk atau label perawatan produsen saat mencuci. Putaran pencucian wol mesin ini telah disetujui oleh Woolmark untuk pencucian produk Woolmark yang bisa dicuci asalkan produk dicuci menurut petunjuk di label garmen dan yang dikeluarkan oleh produsen mesin cuci M1009 ini. -
Page 58: Data Operasi
Cara menggunakan mesin cuci Data operasi Program Maks RPM Cotton 1400 Cotton Eco 1400 Easy Care 1000 1400 Allergy Care 1400 Silent Wash 1000 Refresh – Duvet 1000 Sports Wear Dark Wash 1400 Delicate Wool Quick 30 1400 Intensive 60 1400... -
Page 59: Panel Kontrol
Cara menggunakan mesin cuci ■ Panel kontrol Fungsi SMARTDIAGNOSIS™ Tombol program hanya tersedia untuk produk yang tambahan Layar LED bertanda SMARTDIAGNOSIS™. Tombol Tombol Tombol Tombol Power. Program Start/Pause Hidup/Mati Option Power (Daya) Program tambahan • Tekan tombol Power untuk mematikan •... -
Page 60: Program Tambahan
Cara menggunakan mesin cuci ■ Program tambahan Time Delay (Waktu Tunggu) Favorite (Favorit) Anda bisa mengatur waktu tunggu sehingga Program Favorite memungkinkan Anda mesin cuci akan otomatis dimulai dan selesai menyimpan putaran pencucian kesukaan setelah interval waktu yang ditentukan. Anda untuk digunakan di waktu mendatang. 1. -
Page 61: Pilihan
Cara menggunakan mesin cuci ■ Pilihan Medic Rinse Rinse+Spin For best results or for cleaner rinsing. This can be helpful in preventing fresh stains This allows the final rinse to be heated to 40 from setting in fabrics. degrees. This is a separate cycle. 1. -
Page 62: Pengaman Anak
Cara menggunakan mesin cuci ■ Pengaman Anak Pilihlah fungsi ini untuk mengunci tombol di panel kontrol guna mencegahnya dari pengrusakan. “Child Lock (Pengaman Anak)” hanya bisa disetel selama putaran pencucian. Mengunci panel kontrol 1. Tekan tombol-tombol Pengaman Anak secara serentak selama 3 detik. 2. -
Page 63: Tabung Bersih
Cara menggunakan mesin cuci ■ Tabung Bersih Tub Clean (Tabung Bersih) adalah putaran khusus untuk membersihkan bagian dalam mesin cuci. Dalam putaran ini, level air yang lebih tinggi digunakan dengan kecepatan putaran yang lebih tinggi. Lakukan putaran seperti ini secara teratur. 1. -
Page 64: Menambahkan Detergen
Menambahkan detergen ■ Menambahkan detergen dan pelembut kain ‹¤Laci dispenser • Hanya untuk cucian utama ➔ • Pra Pencucian + Cucian Utama ➔ PERINGATAN Pelembut • Jauhkan semua deterjen dari anak-anak kain karena dapat menimbulkan bahaya keracunan. • Terlalu banyak detergen, pemutih, atau pelembut dapat membuat air meluap. - Page 65 Menambahkan detergen ‹¤Dosis detergen • Harap gunakan deterjen menurut pedoman produsen deterjen. • Jika Anda menggunakan terlalu banyak deterjen, busa yang banyak bisa timbul dan dapat menurunkan performa pencucian • Jike busa terlalu banyak, harap kurangi jumlah deterjen • Gunakan deterjen yang direkomendasikan untuk mesin cuci muatan depan. •...
-
Page 66: Pemeliharaan
Pemeliharaan • Sebelum membersihkan bagian dalam mesin cuci, lepaskan kabel daya listrik untuk menghindari bahaya kejutan listrik. • Tutup katup air jika mesin akan ditinggalkan dalam waktu lama (misalnya liburan), khususnya jika tidak ada lobang kuras air di lantai (selokan) langsung di dekat mesin. Filter masukan air •... -
Page 67: Filter Pompa Penguras
Pemeliharaan Filter pompa penguras • Filter penguras mengumpulkan benang dan benda-benda kecil yang tertinggal di cucian. Periksalah secara teratur apakah filter sudah bersih untuk memastikan kerja mesin yang lancar. PERHATIAN • Mula-mula kuraslah dengan menggunakan selang penguras, lalu buka filter pompa untuk membersihkan segala benang atau benda. -
Page 68: Laci Dispenser
Pemeliharaan Laci dispenser • Setelah beberapa saat, detergen dan pelembut kain akan meninggalkan endapan di laci. • Ini harus dibersihkan secara teratur dengan semprotan air mengalir. • Jika perlu, endapan bisa dibersihkan sepenuhnya dari mesin dengan menekan pegangan ke bawah dan dengan menariknya keluar. •... -
Page 69: Drum Pencucian
Pemeliharaan Drum pencucian • Jika Anda tinggal di area air keras, endapan kapur bisa terbentuk terus-menerus di tempat-tempat yang tidak dapat dilihat sehingga tidak mudah dibersihkan. Dari waktu ke waktu, pembentukan endapan ini menyumbat peralatan, dan jika tidak terus diperiksa, mesin harus diganti. •... -
Page 70: Pedoman Penyelesaian Masalah
Pedoman penyelesaian masalah • Mesin cuci ini dilengkapi dengan fungsi keselamatan otomatis yang mendeteksi dan mendiagnosis kesalahan di tahap dini dan bereaksi dengan tepat. Ketika mesin tidak berfungsi baik atau tidak berfungsi sama sekali, periksalah poin-poin berikut sebelum Anda menghubungi penyedia jasa servis. Mendiagnosis masalah Gejala Kemungkinan Penyebab... - Page 71 Pedoman penyelesaian masalah Gejala Kemungkinan Penyebab Solusi Mesin cuci • Kabel daya mungkin belum Pastikan steker cocok dengan stopkontak tidak berputar dihubungkan atau dinding. Resetlah pemutus sirkuit atau sambungannya mungkin longgar. gantilah sekring. • Sekring rumah putus, pemutus Jangan naikkan kapasitas sekring. Jika sirkuit macet, atau telah terjadi masalahnya adalah kelebihan beban sirkuit, kebocoran daya.
-
Page 72: Pesan Kesalahan
Pedoman penyelesaian masalah Pesan kesalahan Gejala Kemungkinan Penyebab Solusi • Pasokan air tidak memadai di area. Periksa keran lain di rumah. • Keran pasokan air tidak terbuka sempurna. Buka keran dengan sempurna. • Selang masukan air bengkok. Eratkan selang. • Filter selang masukan tersumbat. Periksa filter selang masukan. -
Page 73: Menggunakan Smartdiagnosis
Maka dari itu, LG tidak menjamin Smart Diagnosis dapat secara akurat menyelesaikan segala masalah. -
Page 74: Ketentuan Garansi
Ketentuan garansi Hal yang Tidak Tercakup dalam Garansi: • Perjalanan servis ke rumah Anda untuk mengajari Anda cara menggunakan produk ini. • Jika produk disambungkan ke voltase apa pun selain yang ditunjukkan di pelat peringkat. • Jika kesalahan ditimbulkan oleh kecelakaan, kelalaian, kesalahan penggunaan, dan Takdir Ilahi. •... - Page 76 LG Electronics Indonesia Kawasan Industri MM2100 Blok G Cikarang Barat, Bekasi, Jawa Barat 17520 Indonesia LAYANAN KONSUMEN/CUSTOMER INFORMATION CENTER: 14010 TANDA PENDAFTARAN PETUNJUK PENGGUNAAN MANUAL DAN KARTU JAMINAN/GARANSI DALAM BAHASA INDONESIA BAGI PRODUK ELEKTRONIK Nomor I.14.LG3.01002.03013...
Need help?
Do you have a question about the WD-P1481D6S and is the answer not in the manual?
Questions and answers